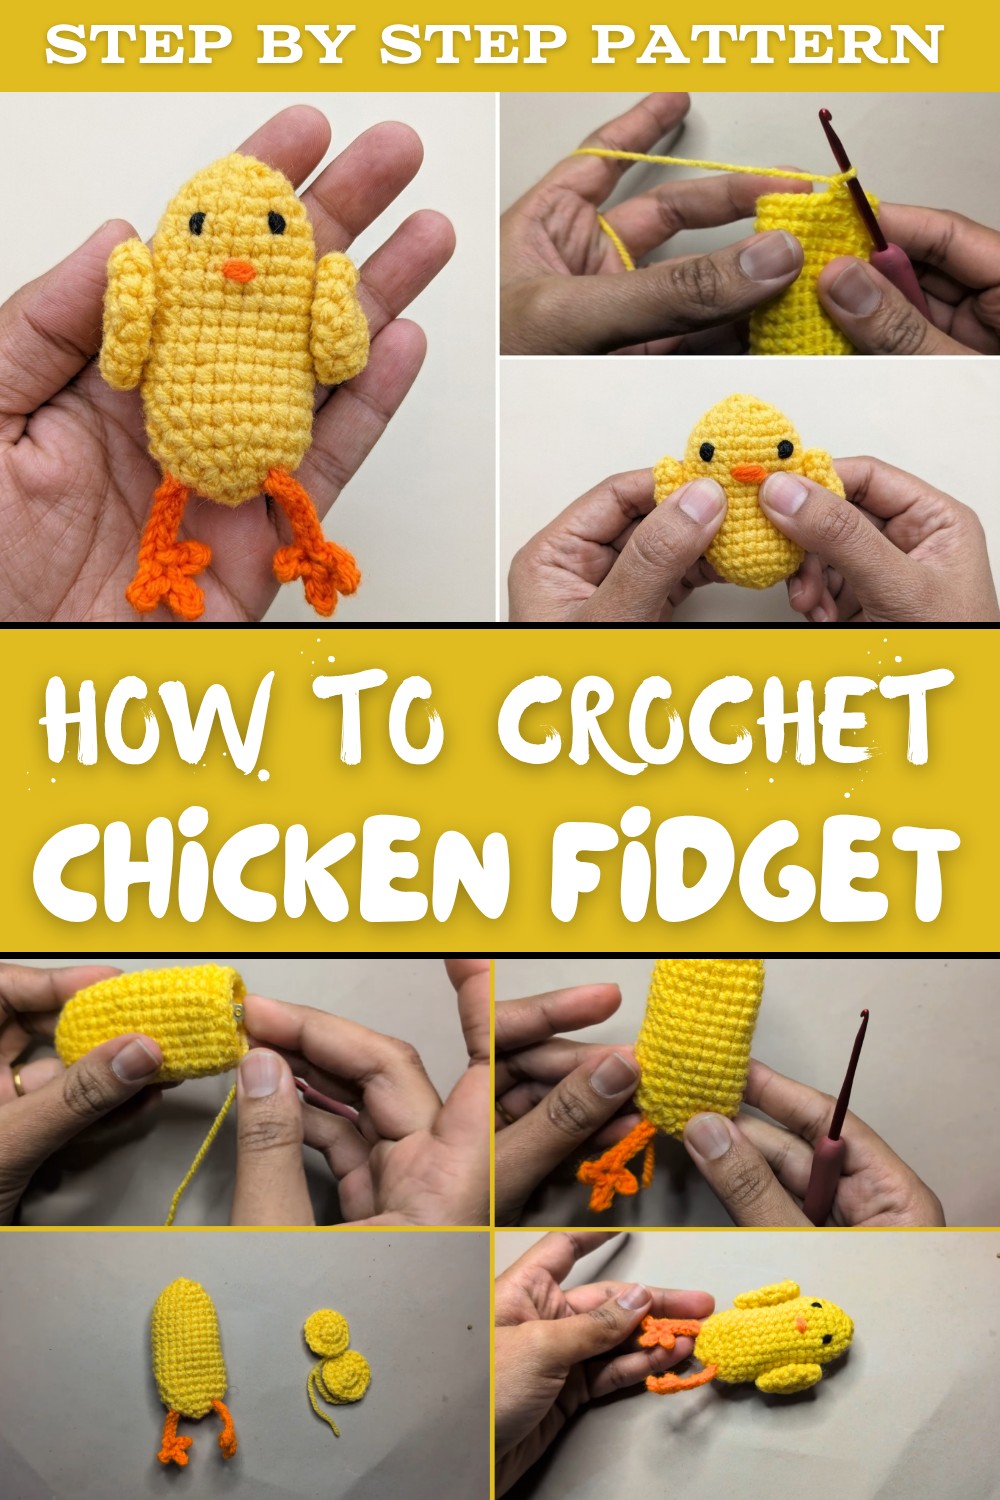
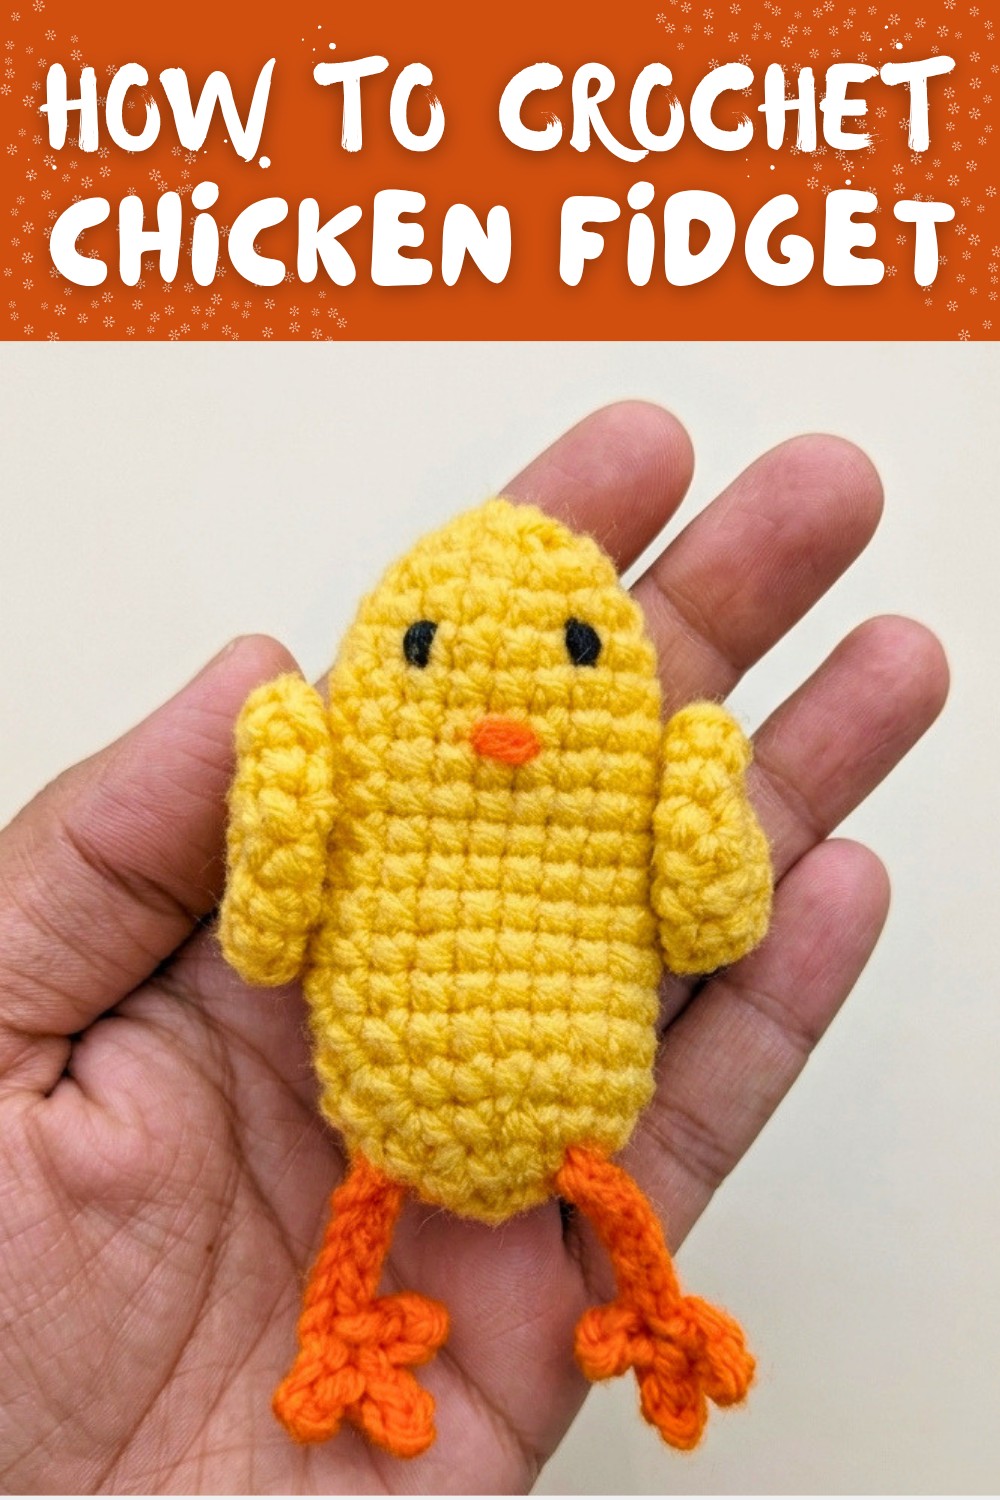
Easy Crochet Chicken Fidget Free Pattern for Stress-Relieving
Find a calming and creative solution to stress with this Free Crochet Chicken Fidget Pattern, perfect for beginners and fun to make.
Searching for a playful project to brighten your day? This delightful chicken fidget toy is the perfect combination of practicality and charm. Designed to keep your hands engaged while calming your mind, it's a fantastic crochet creation that adds personality wherever it's placed. With easy-to-follow steps and vibrant design possibilities, this pattern is great for both beginners and experienced crocheters looking to whip up something fun.
Handmade Free Crochet Chicken Fidget Pattern: Fun Project for Beginners
The compact size makes it a perfect stress-relieving gadget for work desks, pockets, or bags, providing comfort and relaxation on the go. Its interactive pattern is not only therapeutic but also a thoughtful gift idea for loved ones of all ages. This pattern is soft, lightweight, and makes for a wonderful handmade addition to your everyday life.
Whether you want to reduce stress, keep your hands busy, or add a touch of cuteness to your space, this pattern is sure to deliver joy and functionality in equal parts. The cheerful look and creative process make this pattern a fun and rewarding experience. With endless color options and personal touches, the finished chicken fidget toy is bound to be as unique as you are.
Materials You'll Need:
- Yarn: Acrylic yarn in yellow, orange, black, and white
- Hook Size: 3.5mm crochet hook
- Stuffing: Cotton or polyester fiberfill
- Hot Glue Gun: For securing the wings
- Hair Clip: For added functionality
- Scissors: To trim thread
- Tapestry Needle: For weaving ends
Special Features:
- Compact fidget toy design suitable to reduce stress.
- Creative use of color and textures to bring the chicken to life.
- Customizable for personalization.
Step-by-Step Crochet Chicken Fidget Toy Pattern
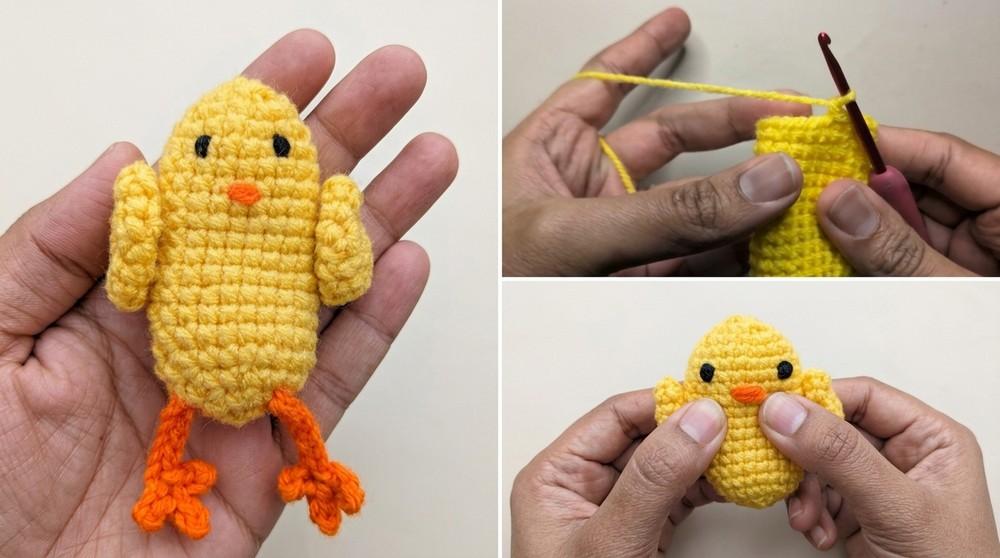
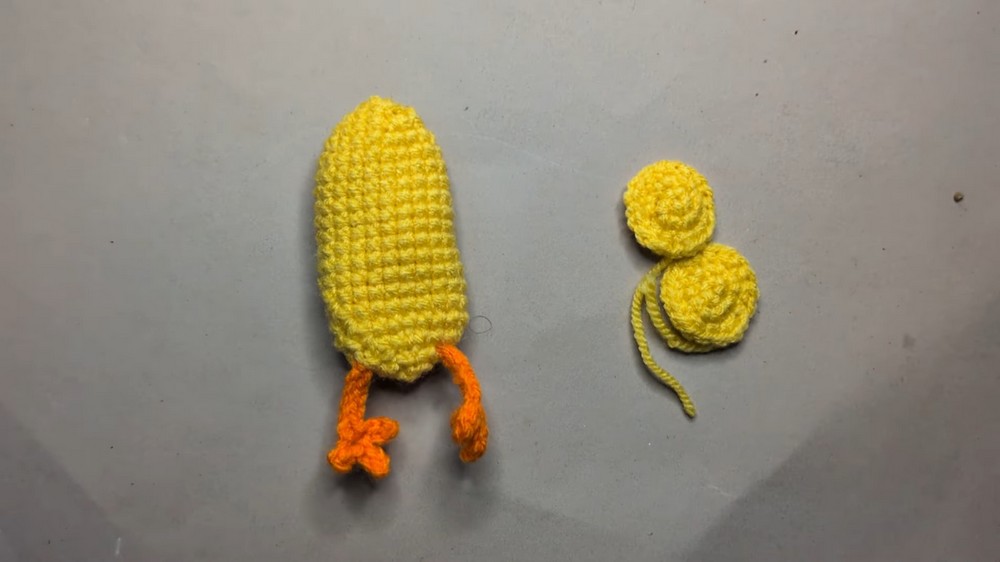
Part 1: Start the Body
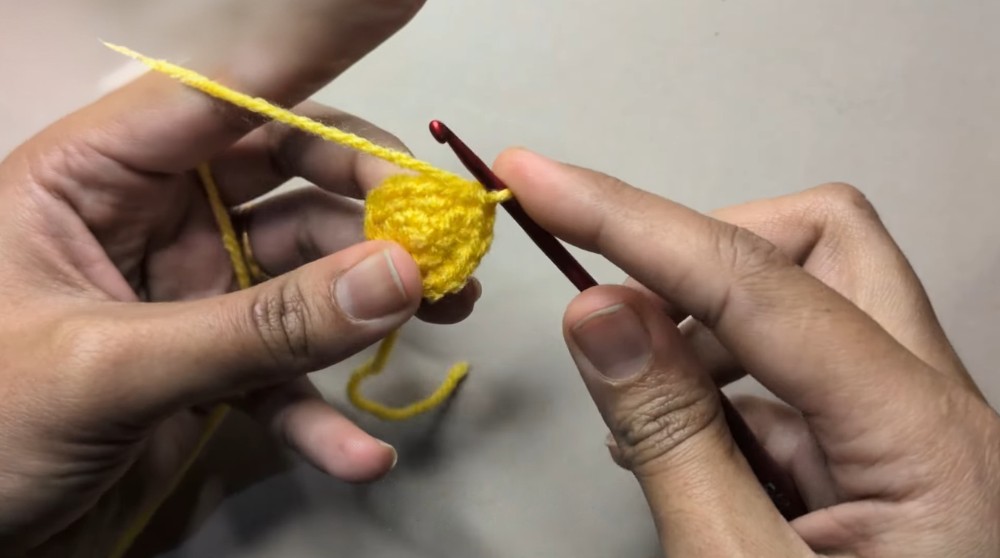
Round 1:
- Begin with a magic ring.
- Work 5 single crochet (SC) stitches into the ring.
- Pull the yarn through the loop and close the circle.
Round 2:
- In the first stitch, work 1 single crochet and chain 2.
- In the same stitch, make 2 SC stitches.
- Work 2 SC stitches into each stitch around.
- Close the round with a slip stitch (SS).
Round 3:
- Begin with chain 1.
- In the same stitch, work 1 SC.
- Alternate between 1 SC and 2 SC increases across the round.
- Complete the round with an SS.
Round 4:
- Start with chain 1.
- Work a sequence of single crochet, single crochet, and SC increase repeated five times.
- Finish this round with a slip stitch.
Round 5:
- Begin with chain 1.
- Work 1 SC in every stitch around without increases.
- Use three slip stitches to close the round.

Rounds 6-11:
- Work 1 SC in every stitch around for six rounds. This creates a cylinder shape for the chicken's body.
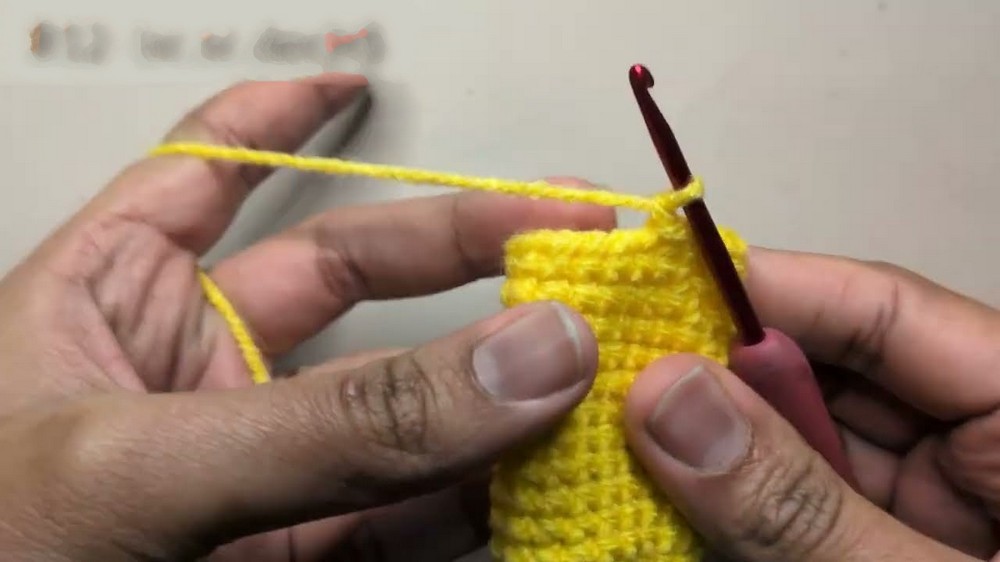
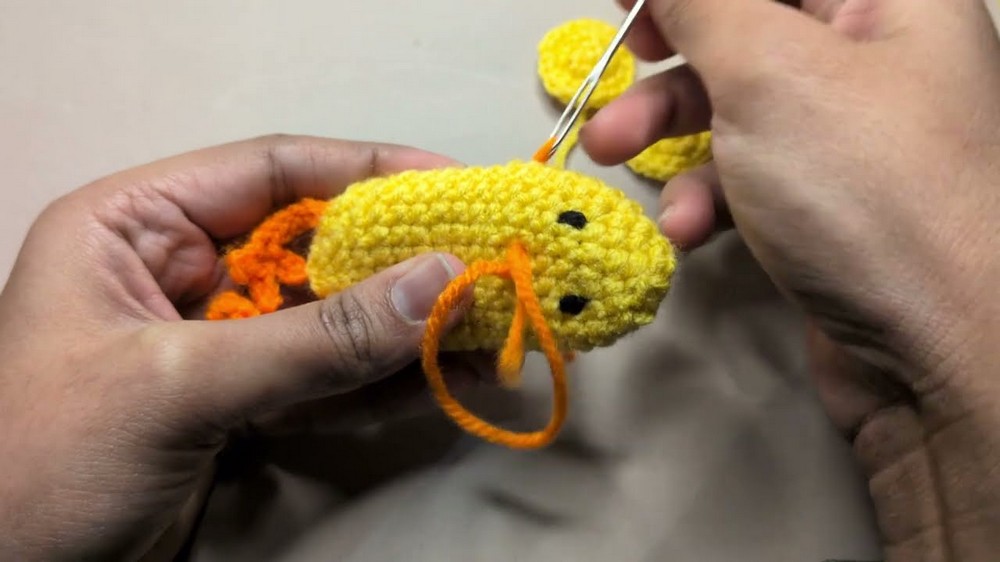
Part 2: Shaping the Head
Round 12:
- Alternate between single crochet and single crochet decreases by working through the front loops of two stitches together.
- Repeat this five times and finish the round with a slip stitch.
Round 13:
- Insert the hair clip and begin stuffing with cotton or fiberfill.
- Continue alternating single crochet and front loop decreases.
Part 3: Create the Legs
- Use orange yarn and make 8 chains.
- From the second chain, work slip stitches into the next two chains.
- Chain 3, then work slip stitches into the next two chains.
- Repeat the process to form the toes of each leg.
- Work slip stitches into the remaining chains.
- Cut the yarn, secure the end, and make a second leg.
Part 4: Create the Wings
- Using yellow yarn, start with a magic ring.
- Work 6 SC stitches into the ring.
- Pull the yarn tight and finish with a slip stitch into the first stitch.
- Round 2: Work 1 SC into each stitch around.
- Round 3: Alternate single crochet increases and single crochet in each stitch.
- Make two wings total. Fold them in half and glue them to the sides of the chicken.
Part 5: Add the Eyes and Details
- Use black yarn to sew two small eyes between the fourth and fifth rows of the cylinder. Leave three stitches between the eyes.
- Cut off the excess yarn and secure the ends.
Part 6: Add the Beak
- With orange yarn, stitch a small triangle between the eyes as the beak. Trim and secure the thread.
Tutor's Suggestions:
- Work in a quiet space to avoid losing track of your stitch counts.
- Carefully fold and glue the wings to achieve a clean and tidy finish.
- Opt for bright and contrasting yarns to enhance the chicken's playful design.
Uses:
This crochet chicken fidget toy is perfect for:
- Stress relief through tactile engagement.
- Gifting for birthdays, holidays, or special occasions.
- Fun décor for work desks or kids' rooms.
Tip:
When making the wings or legs, always make slip stitches tight for a cleaner look. If you struggle with sewing parts together, consider pinning them in place first.
Conclusion:
This fun, interactive chicken fidget toy is a thoughtful and enjoyable project for crochet lovers of all skill levels. The clear instructions and adaptable pattern let you add your own personal touches while creating a cute, functional item. Whether for yourself or someone you care about, this handmade chicken promises both relaxation and smiles.