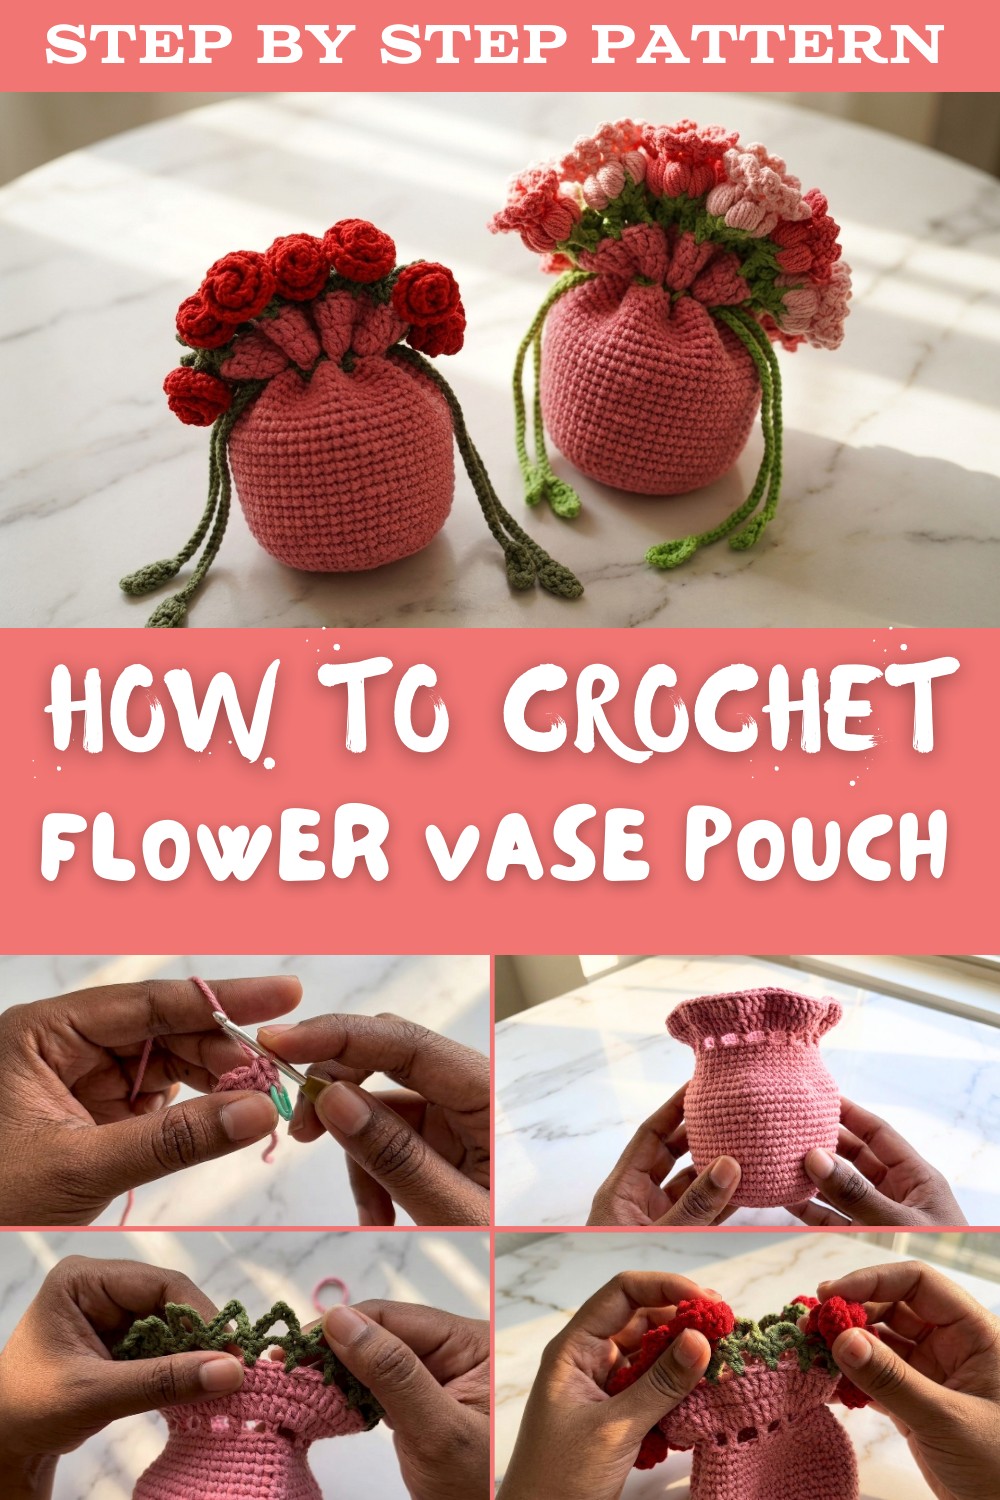
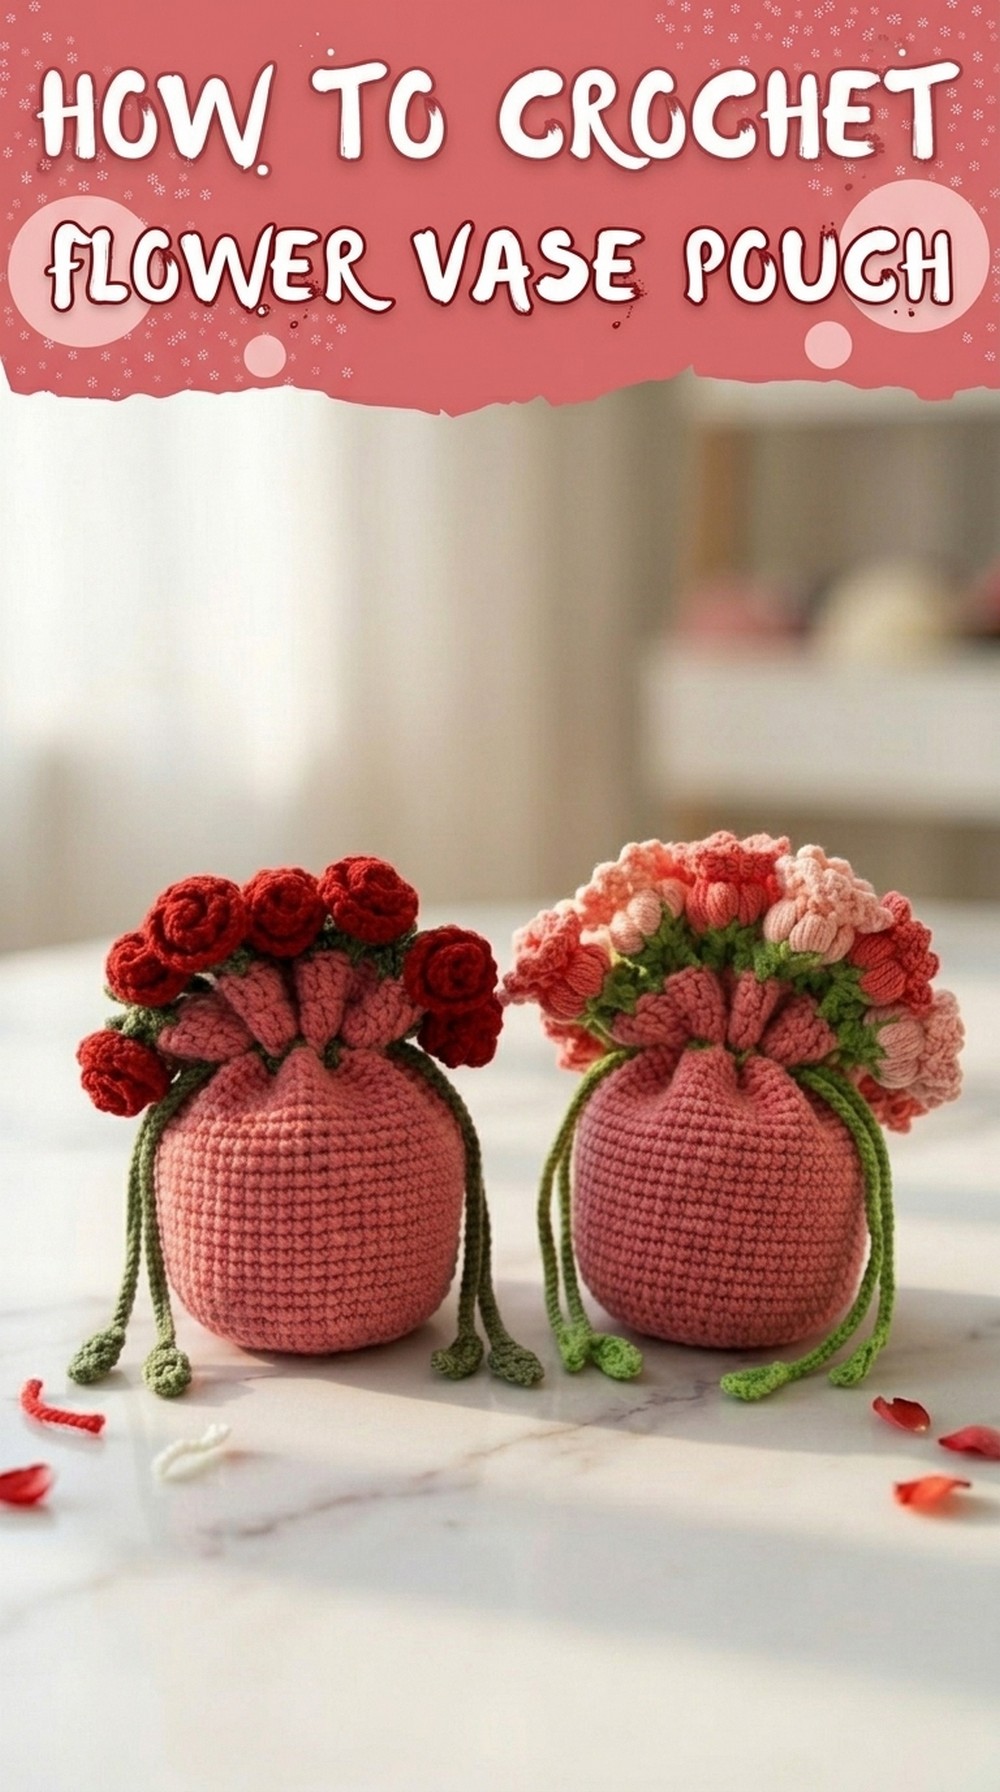
Amazing Crochet Flower Vase Pouch Pattern That Beautifies Any Vase
Learn how to make a simple and beautiful crochet pouch to dress up your flower vase with this easy and fun pattern that anyone can create and enjoy.
Do you love adding a little extra charm to your home? Here's a fun project that's as easy as it is creative! Picture this: a cute, colorful pouch to dress up your flower vase, making it look like it's wearing its own cozy outfit. This crochet pouch is soft, lightweight, and covered in pretty patterns that you can make yourself.
Crochet Flower Vase Pouch for Home Décor and More - Free Pattern
You get to choose your favorite colors, so it can match your style perfectly! Put it on your table, shelf, or any corner that could use a little pop of happiness. Not only does it protect your vase, but it also makes your flowers look extra special. Whether you're new to crochet or just love making something unique, this project is simple, fun, and guaranteed to bring smiles.

Crochet Pattern for Flower Vase Pouch
Finished Size
The finished pouch size will vary based on your tension and yarn but should stand approximately 8-12 cm tall and around 8 cm in diameter.

Materials Required
- Yarn:
- Milk Cotton or similar weight yarn (Color A for the pouch body, Color B for Lily of the Valley green accents, and Colors C & D for flowers).
- Recommended colors: Green, Pink, Red (customizable).
- Hook Size:
- 3 mm crochet hook (or a size suitable for your yarn weight).
- Stake Tools:
- Stitch markers.
- Yarn needle for hiding ends.
- Gauge:
- 10 sc x 10 rows = 4 cm x 4 cm in single crochet (adjust hook size if necessary).
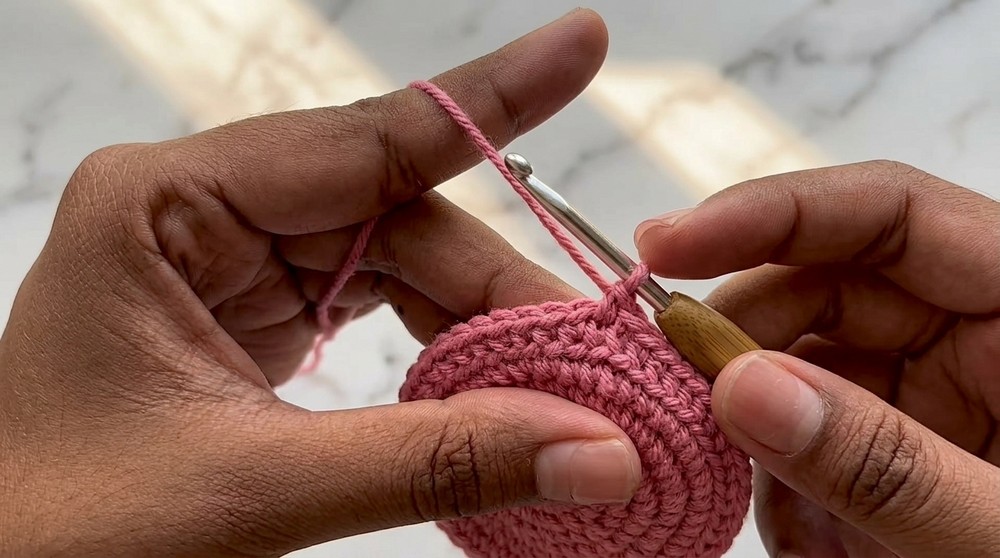
Special Techniques
Magic Ring
The pattern starts with the magic ring technique. Wrap yarn around your fingers and crochet into the ring to create a seamless circular start.
Back Loop Only Crochet
For textures, certain rounds only use the back loop of stitches. Insert the hook into the back loop instead of the full stitch to create distinct ridged edges.
Increase & Decrease
- Increase: Make two stitches in one.
- Decrease: Create two stitches into one by working in front loops only.
Pattern Instructions
Pouch Body
- Round 1: Create the magic ring. Crochet 8 single crochet (sc) into the ring. Pull yarn tail to close the ring and slip stitch (sl st) into the first stitch. Chain 1 (ch 1). [Total: 8 sts]
- Round 2: Make 8 increases (2 sc in each stitch). Mark the first stitch of the round with a stitch marker for accurate counting. Sl st into the first stitch, ch 1. [Total: 16 sts]
- Round 3: Repeat the sequence 1 sc, 1 increase for a total of 8 sets. Sl st into the first stitch, ch 1. [Total: 24 sts]
- Round 4: Repeat the sequence 1 sc, 1 increase, 1 sc for 8 sets. Sl st into the first stitch, ch 1. [Total: 32 sts]
- Round 5: Work 3 sc, 1 increase for 8 repeats. Sl st into the first stitch, ch 1. [Total: 40 sts]
- Round 6: Repeat 2 sc, 1 increase, 2 sc for 8 times. Sl st into the first stitch, ch 1. [Total: 48 sts]
- Round 7 (back loop only): Work 1 sc into the back loop of each stitch around. Sl st, ch 1. [Total: 48 sts]
- Rounds 8-13: Alternate rounds of increases with plain rounds:
- Round 8: 5 single crochets, 1 increase across.
- Rounds 9-13: Work straight 1 sc in each stitch.
- Round 14: Work 13 sc, 1 increase for four repeats. [Total: 72 sts]
- Round 15-17: Work straight with 1 sc in each stitch.
- Round 18: Repeat 14 sc, 1 increase for four counts. [Total: 76 sts]
- Rounds 19-21: Work straight rounds of 1 sc in each stitch.
- Round 22: Alternate 6 sc, 1 decrease, using front loops only for decreases. [Total: 64 sts]
- Rounds 23-27: Smooth out the shape with 1 sc in each stitch for every round.
- Round 28: Begin lace edging. Chain 4, skip 2 stitches, and create double crochet (dc) at the 3rd stitch. Repeat around.
- Round 29: Fill chain spaces with four double crochets and grounded stitches before continuing regular chains.
- Final Round (30): Expand into patterns with 7 double crochet, 1 increase at regular intervals.


Green Part for Lily of the Valley Vase
- Start with the green yarn at the last stitch of the pouch. Attach yarn, ch 1, and work loops via ch-5 groups.
- Enhance loops further through chain work, slip stitches, and decorative chaining.

Flower Steps
Lily of the Valley Flowers:
- Work flowers between double crochets with four chains to simulate petals.
- Add slip stitches mid-round to secure designs.
Roses:
- Start roses at triangular green sections. Work 12 chains as the petal base.
- Crochet clusters of 3 double crochets per chain space, curling the base into rose form.

Drawstrings
- Create two strings using chains and leaf-like designs at both ends.
- Attach strings securely on opposite pouch sides.

Customization Ideas
- Color Variations: Use vibrant or pastel yarns for seasonal themes.
- Size Adjustments: Add or reduce rounds to resize.
- Decorative Edges: Incorporate scalloped finishes instead of chains.
- Extra Flowers: Add embroidery for additional patterns.
Tips for Success
- Use stitch markers for counting and maintaining stitch order.
- Maintain consistent tension for uniformity.
- Weave in tails neatly to secure stitches.
Conclusion
After finishing, you'll have a beautifully detailed flower vase pouch that doubles as practical storage! Use it as a decoration piece or gift it to crochet enthusiasts-it's both functional and aesthetic. Remember to finish by weaving ends and gently shaping the pouch with hands.