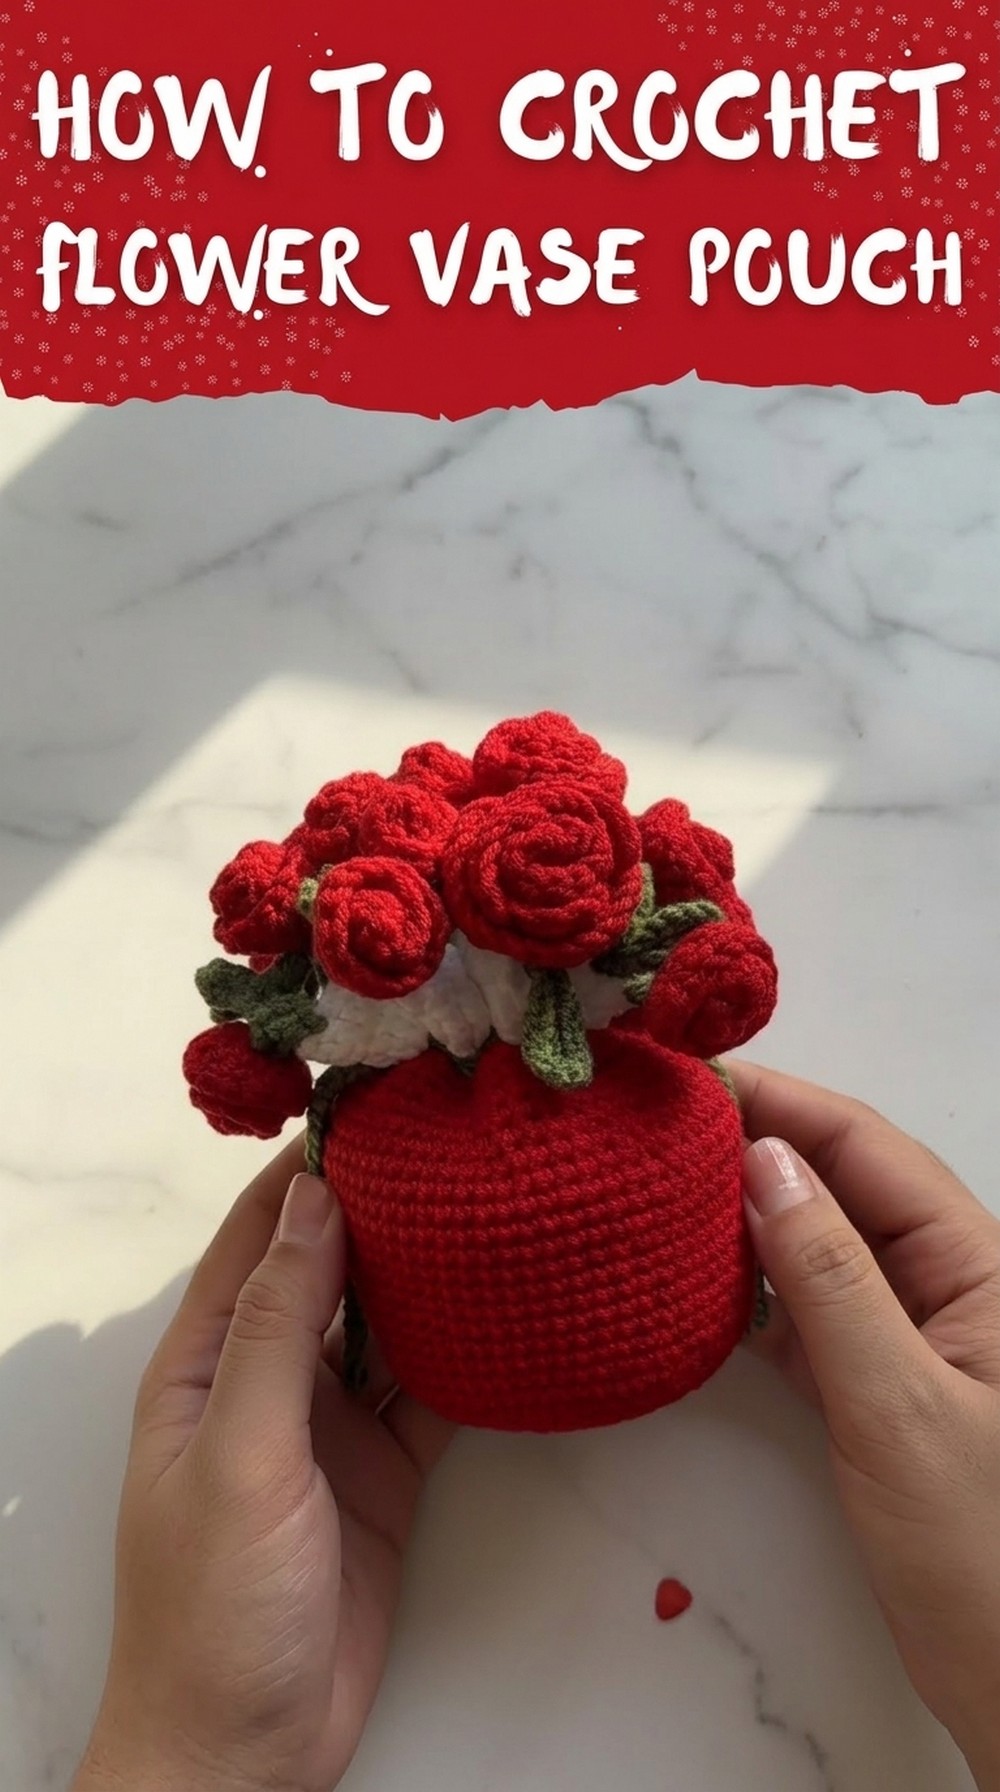
Adorable Free Crochet Flower Vase Pouch Pattern to Decorate Space
Add instant charm with this Free Crochet Flower Vase Pouch Pattern, turning simple yarn into a colorful, cheerful accent that lights up any room beautifully.
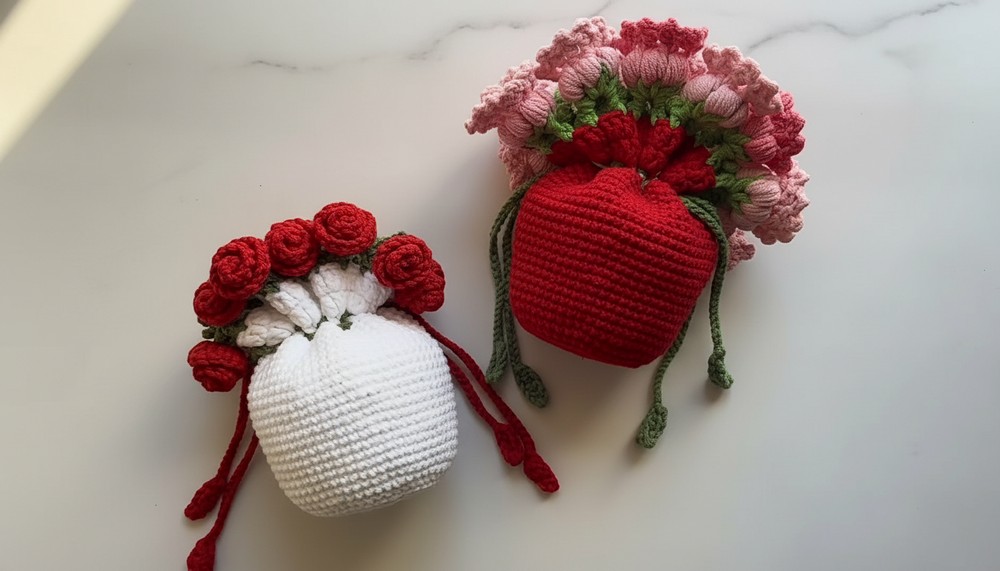
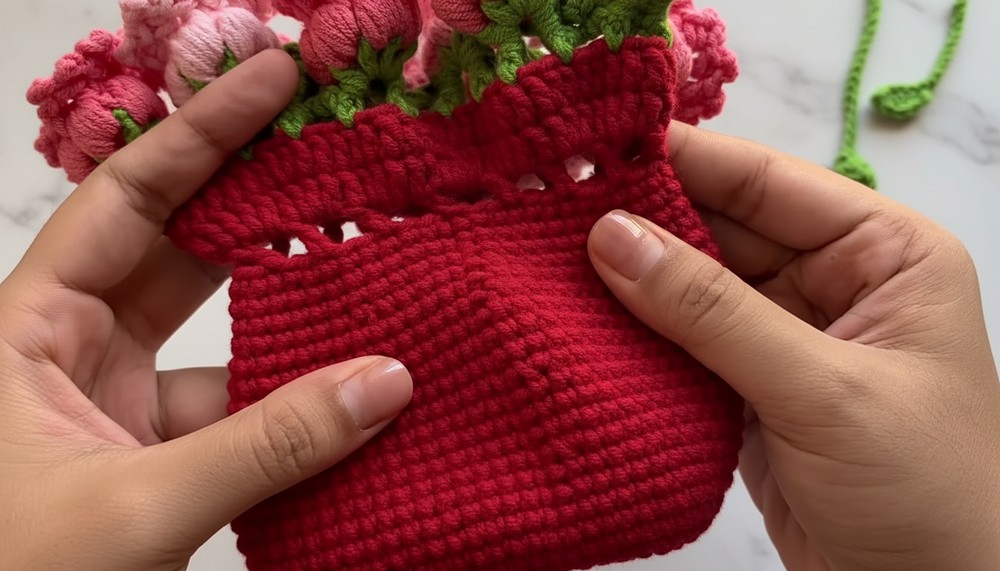
A simple yet elegant pouch that doubles as both a decorative piece and a practical storage solution. This crochet flower vase pouch is a charming design crafted to bring beauty and functionality into any space. With its unique shape, it resembles a delicate flower vase when the drawstrings are pulled, making it an eye-catching feature whether sitting on a desk, table, or shelf.
Sweet Free Crochet Flower Vase Pouch Pattern for Floral Displays

Its graceful design, adorned with small decorative flowers and subtle leafy details, adds a touch of nature-inspired beauty to your home. More than just decoration, it serves as a perfect mini organizer for storing small essentials like crochet tools, jewelry, or daily trinkets. The soft texture of the crochet work, combined with vibrant colors, makes it an attractive addition to any decor style. Whether as a gift or a personal treat, this flower vase pouch blends practicality with artistic flair effortlessly.
Crochet Flower Vase Pouch Pattern
Materials Needed
- Yarn:
- Milk Cotton Yarn (or similar DK weight yarn). For the pouch:
- Any color for the body of the pouch.
- Green yarn for the leafy part of the flower vase.
- Red yarn (or colors of your preference) for the flower appliqués.
- Milk Cotton Yarn (or similar DK weight yarn). For the pouch:
- Hook:
- 3mm crochet hook.
- Additional Items:
- Stitch markers.
- Scissors.
- Tapestry needle for weaving in ends.
Gauge (Optional)
Gauge is not critical for this project. However, using the specified yarn and hook, the finished pouch should measure approximately:
- Diameter of base: 4–5 inches.
- Height of pouch (excluding flower details): 7–8 inches.
Abbreviations and Stitches Used
- ch: Chain.
- sc: Single crochet.
- sl st: Slip stitch.
- inc: Increase (2 sc in the same stitch).
- dec: Decrease (crocheting two stitches together).
- dc: Double crochet.
- blo: Back loop only.
Special Techniques
Magic Ring
- Create an adjustable loop to start crocheting in the round.
Back Loop Only (BLO)
- Work into only the back loop of the stitch, leaving the front loop unworked.
Shaping
- Use increases/decreases to shape the pouch and define its design.
Pattern Instructions
Step 1: Pouch Body
-
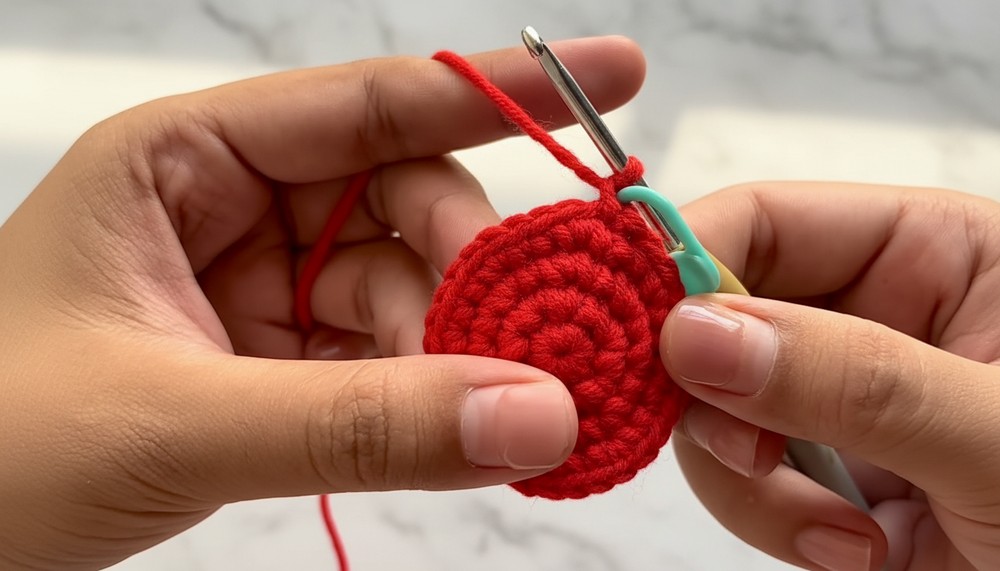
Base of the Pouch:
- Round 1: Start with a magic ring, crochet 8 sc into the ring. Pull the yarn tail to close the ring. Mark the first stitch with a stitch marker. Join with a sl st to the first stitch. Ch 1. (8 stitches)
- Round 2: Work 8 inc (2 sc in each stitch). Join with sl st and ch 1. (16 stitches)
- Round 3: (1 sc, 1 inc) x 8. Join with sl st and ch 1. (24 stitches)
- Round 4: (1 sc, 1 inc, 1 sc) x 8. Join with sl st and ch 1. (32 stitches)
- Round 5: (3 sc, 1 inc) x 8. Join with sl st and ch 1. (40 stitches)
- Round 6: (2 sc, 1 inc, 2 sc) x 8. Join with sl st and ch 1. (48 stitches)
-
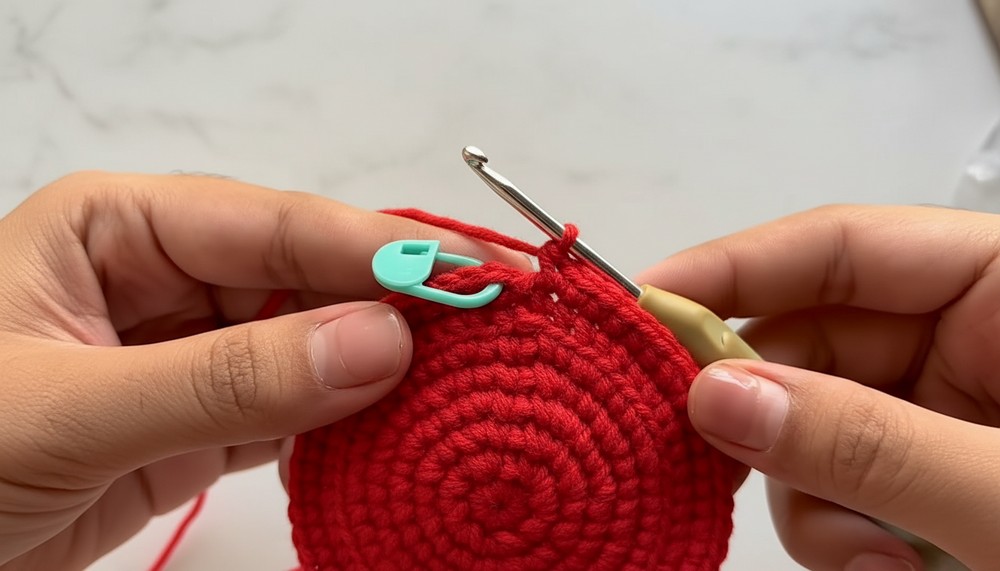
Building the Walls of the Pouch:
- Round 7: Work in blo only. 1 sc in each stitch. Join with sl st and ch 1. (48 stitches)
- Round 8: (5 sc, 1 inc) x 8. Join with sl st and ch 1. (56 stitches)
-
Continue the Walls:
- Rounds 9–13: 1 sc in each stitch. Join with sl st and ch 1.
-
Increase the Width of the Pouch:
- Round 14: (13 sc, 1 inc) x 4. Join with sl st and ch 1. (60 stitches)
- Rounds 15–17: 1 sc in each stitch.
-
Round Opening:
- Round 18: (14 sc, 1 inc) x 4. Join with sl st and ch 1. (64 stitches)
- Rounds 19–21: 1 sc in each stitch.
-
Start Decreasing:
- Round 22: (6 sc, 1 dec) x 8. Join with sl st and ch 1. (56 stitches)
-
Finalize Wall Dimensions:
- Round 23: 1 sc in each stitch.
- Round 24: (5 sc, 1 dec) x 8. Join with sl st and ch 1.
-
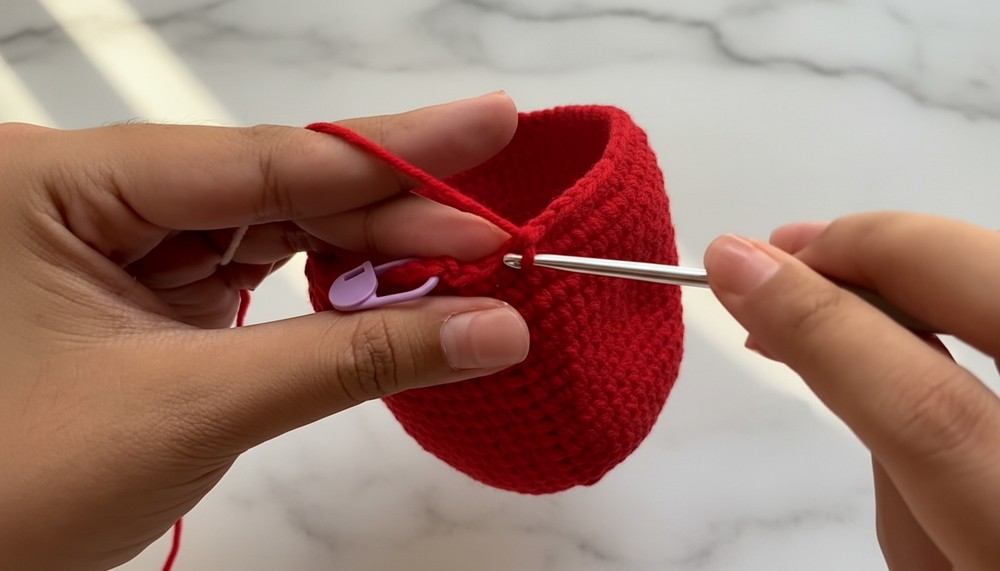
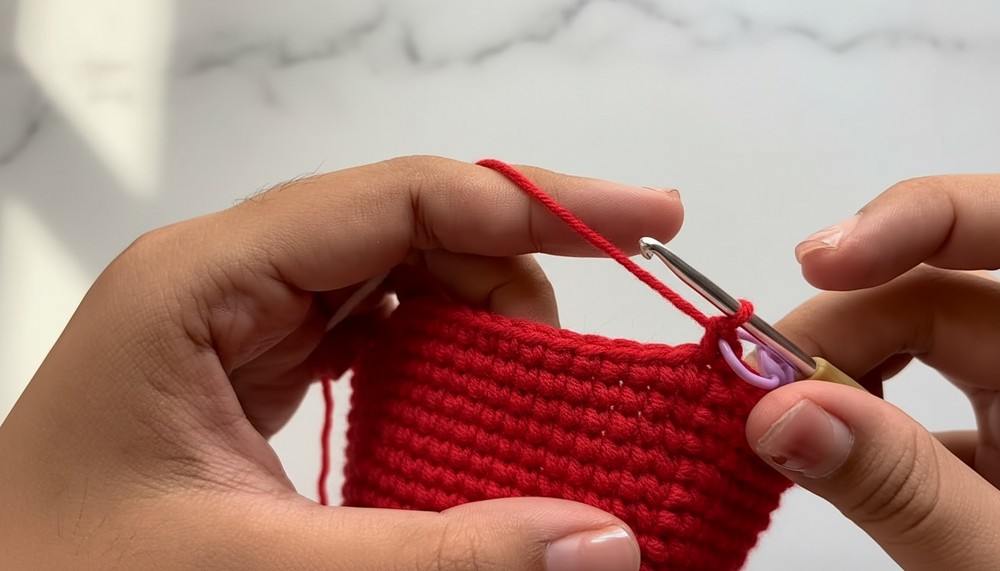
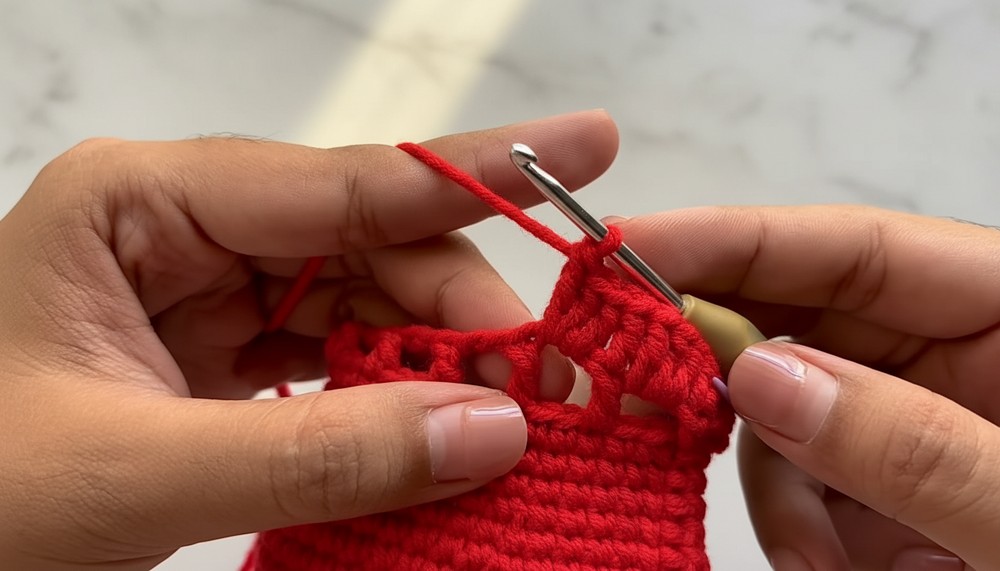
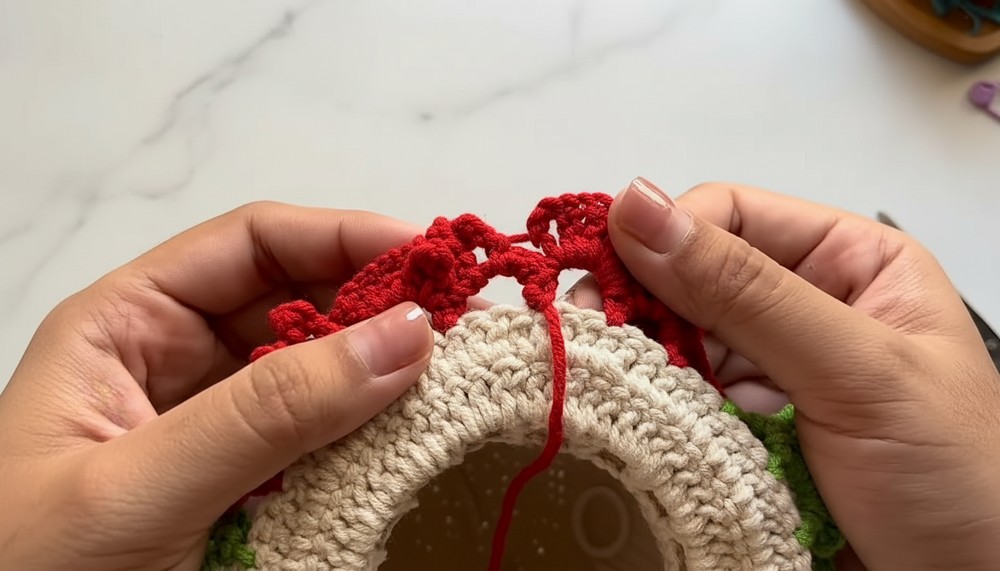
Edging with Chains:
- Round 25: Work loops by making 4 ch, skipping 2 stitches, and joining with a dc in the third stitch. Repeat to the end of the round.

Step 2: Flower Vase Green Accent
- Attach Green Yarn:
Use green yarn to create the leafy decoration on top of the vase as follows:- Round 1: Insert hook into the first stitch from Round 25, pull through green yarn, and ch 1. Work 1 sc, followed by 4 ch, skip 2 stitches, and repeat around. There will be 24 loops.
- Leafy Ridges:
- Into each loop: Work 1 sc, 4 ch, and a sl st into the second chain from the hook. Add 3 more ch and another sc into the same loop.
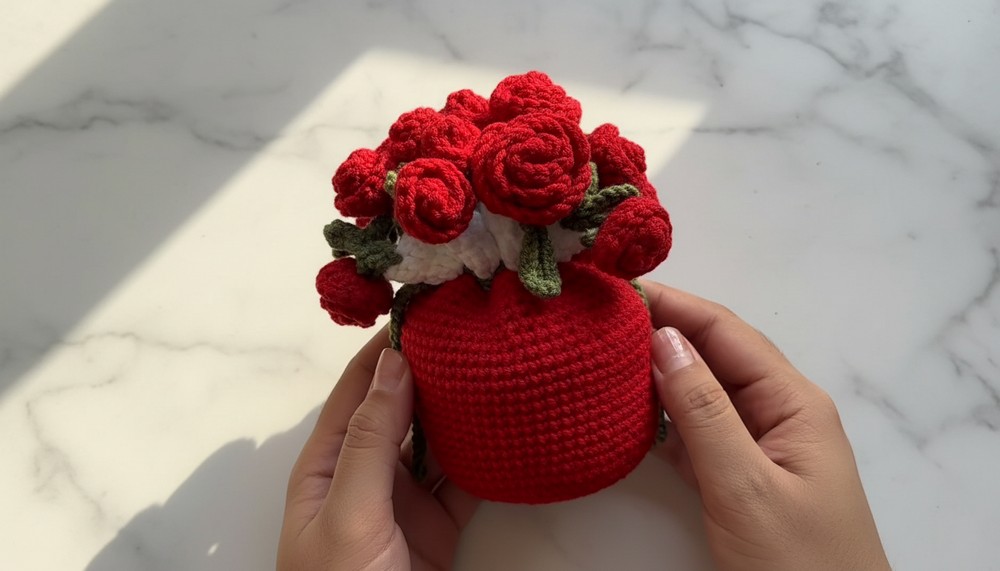
Step 3: Flowers (Rose or Lily Design)
- Lily Flower (Small Loops):
- Attach pink or red yarn to the first double crochet space of the leafy green accent.
- Make 3 ch, followed by 6 loops into the same space. Pull through all loops. Secure with a chain.
- Repeat Flowers:
- Work the same flower pattern into the next double crochet space, leaving a gap between each flower. Continue until all loops have flowers.
Step 4: Drawstring
- Make the String:
- Using green yarn, ch 75, then add decorative leaf tips at either end by working into the last 6 chains:
- Row 1: Sc, hdc, dc, hdc, sc. Fasten off.
- Using green yarn, ch 75, then add decorative leaf tips at either end by working into the last 6 chains:
- Thread the String:
- Weave the drawstring through the loop openings of Round 25.
Customization and Tips
Color Variations
- Experiment with different vibrant colors for seasonal themes.
- Use multiple yarn strands for ombré effects.
Functionality Enhancements
- Add lining inside the pouch for added durability.
- Attach a shoulder strap to convert it into a small handbag.
Final Touches
- Lightly steam block the flowers and vase to refine their shapes.
Finished Look and Dimensions
- Height: Approximately 7–8 inches.
- Base Diameter: Approximately 4–5 inches.
Conclusion
This crochet flower vase pouch combines functionality and aesthetics beautifully. Its uses as a decorative vase or a small pouch are sure to impress! Customize with different flowers and colors to make it your own.