Beginner-Friendly Crochet Baby Hat Pattern You’ll Adore
Learn how to crochet a cozy and adorable baby hat with this easy free pattern, perfect for beginners and a thoughtful gift idea.
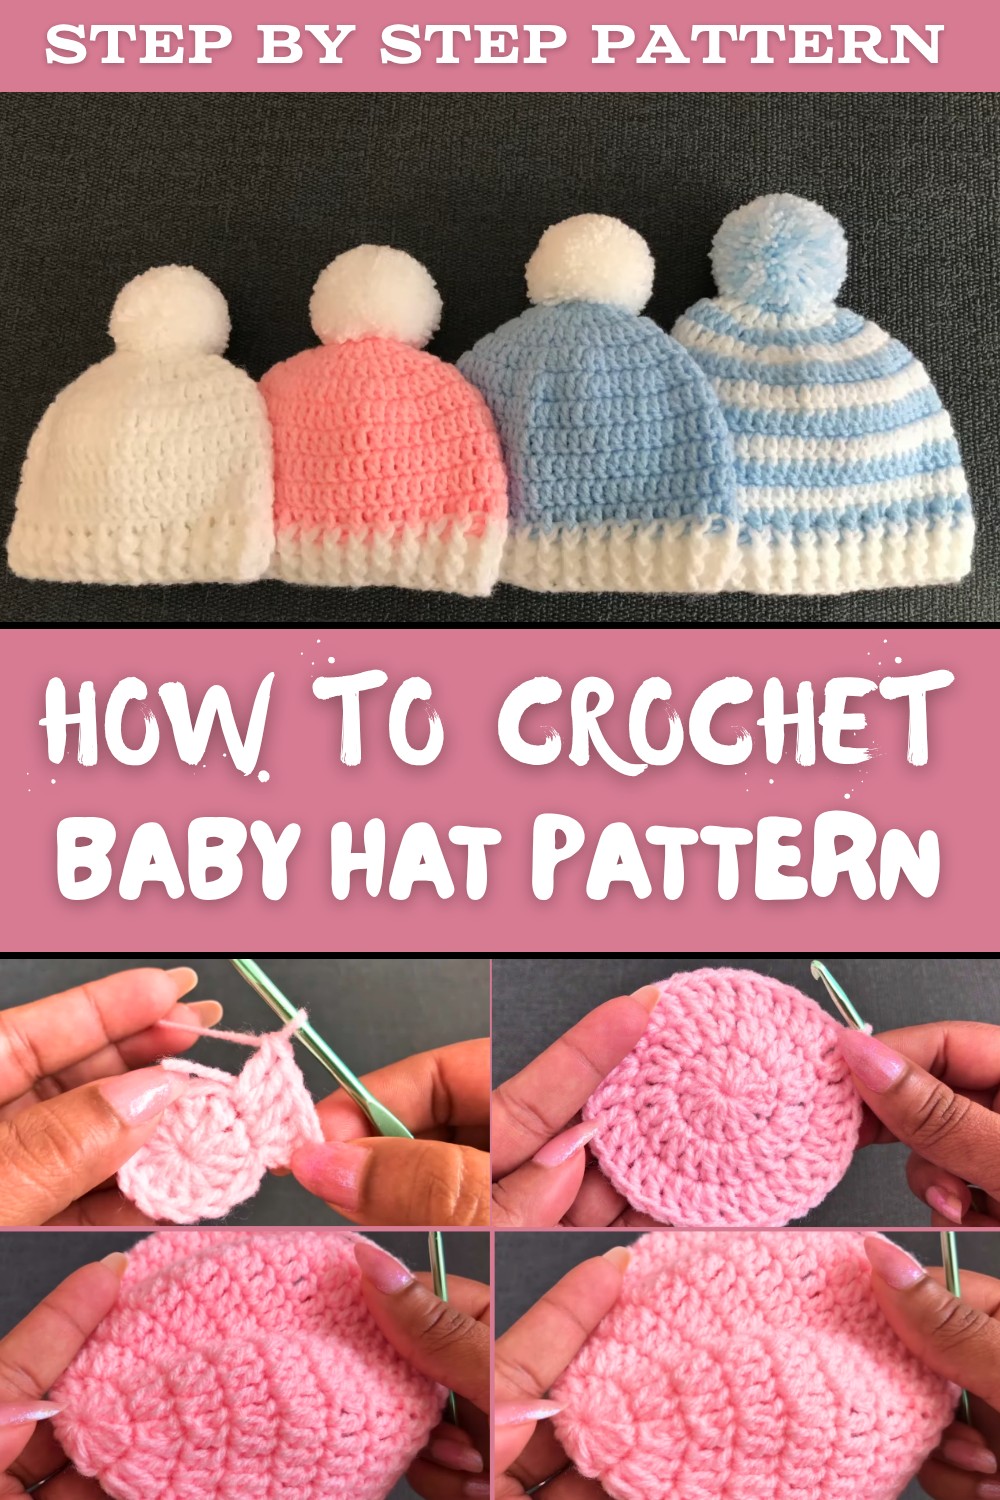
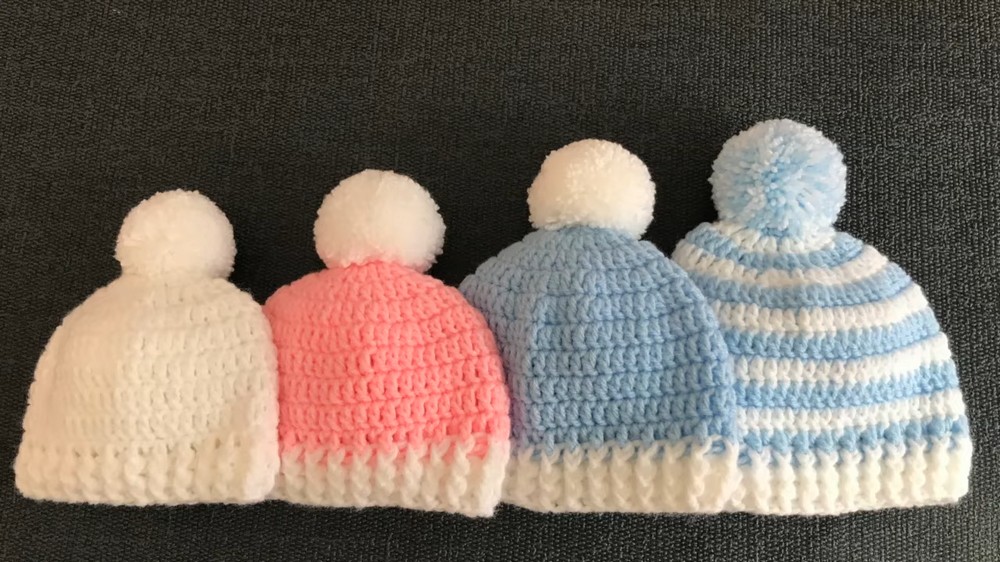
Crocheting a baby hat is a simple and rewarding project for any skill level. These tiny hats are not only adorable but also practical and customizable for different age groups. This free pattern is perfect for creating cozy hats in four sizes: newborn, 0 to 3 months, 3 to 6 months, and 6 to 12 months. You can add fun elements like pom-poms or small flowers to give them a personal touch. The pattern highlights the front post double crochet and back post double crochet stitches to create a textured border, adding elegance to the hat. These stitches also make it easy to explore other crochet ideas like blankets, scarves, or decorative edges.
Creative & Cozy Crochet Baby Hat Pattern Perfect for Gifts
The pattern starts with an easy magic ring, guiding you to create a seamless and neat base for the hat. The steps are simple to follow, using only double crochet stitches for most of the rounds. Beginners will find this project enjoyable because it doesn't require advanced techniques, and the hat can be completed in just 20 minutes using basic materials like soft double-knit yarn and a 4mm hook.
This pattern teaches you how to use essential crochet techniques like the magic ring, increases, and textured stitches. Once mastered, you can use the same approach to make matching baby booties, headbands, or a small blanket. Projects like this are a great way to build confidence with crochet while creating meaningful handmade gifts. Above all, this pattern proves that simple stitches can create beautiful results filled with love and care.

Crochet Baby Hat Pattern - Step-by-Step Guide
Creating an adorable crochet baby hat is fun, beginner-friendly, and incredibly rewarding. This detailed pattern is designed to help anyone, even those new to crochet, confidently create hats for newborns up to 12 months in four different sizes. This pattern uses basic stitches, making it perfect for both first-time crocheters and those looking for a quick, heartfelt gift idea for babies. You'll also learn to add a pom-pom or customize with flowers for baby girls, making it a versatile and special project suitable for every occasion.
Table of Contents
- Introduction to the Pattern
- Materials Needed
- Abbreviations Used
- Step-by-Step Pattern Instructions
- Magic Ring and Starting Round
- Increasing Rounds (Rounds 1 to 5)
- Shaping and Height (Rounds 6 to 9/11)
- Front and Back Post Ribbing (Rounds 10 to 12)
- Adding Pom-Poms or Custom Decorations
- Size Guide
- Tips for Beginners
- Special Features
- Conclusion and Final Thoughts
Introduction to the Pattern
This pattern is a foundational project that teaches you how to crochet a simple yet elegant baby hat in four sizes:
- Newborn/Early Born
- 0 to 3 Months
- 3 to 6 Months
- 6 to 12 Months
The main techniques include working with a magic ring, creating double crochets, and finishing with a front post and back post ribbing for a polished look. Each size shares the same first four rounds, making it easy to adjust as you move between sizes. Whether as a cozy winter essential or a thoughtful handmade gift, this hat will surely be a cherished item.
Materials Needed
- Yarn: Double-knit (DK) yarn in two colors (approximately 20-40 grams)
- Hook: 4 mm crochet hook (recommended for DK yarn)
- Scissors and Yarn Needle
- Optional: Pom-pom maker
Abbreviations Used
- CH: Chain
- DC: Double Crochet
- FPDC: Front Post Double Crochet
- BPDC: Back Post Double Crochet
- SS: Slip Stitch
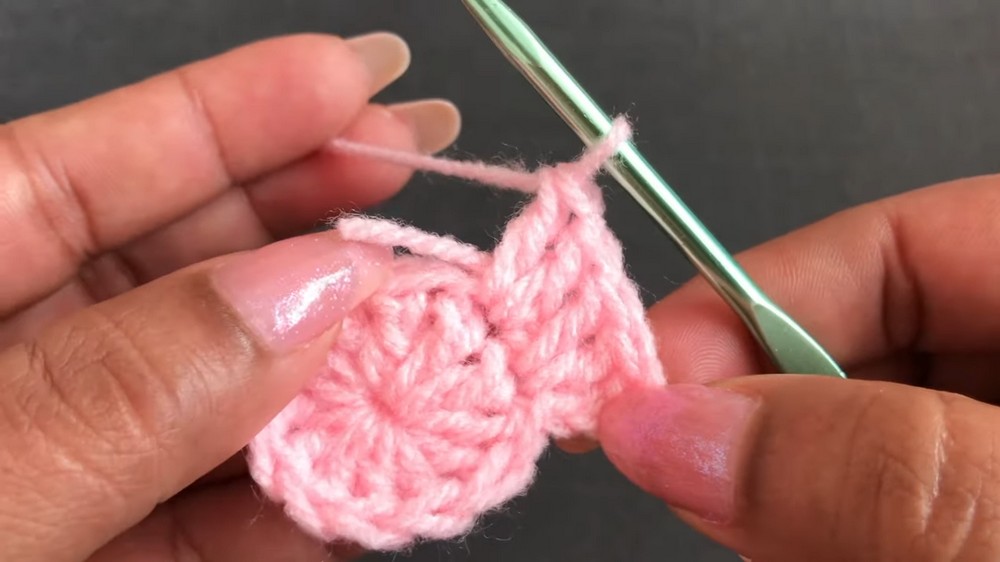
Step-by-Step Pattern Instructions
Round 1: Magic Ring
- Wrap the yarn around two fingers to create a loop. Insert the hook through the loop, pull a strand of yarn through, and make CH 1 to secure the ring.
- Chain 3 (CH 3) - counts as your first DC.
- Crochet 11 more DC into the magic ring (total: 12 DC, including the first CH 3).
- Pull the yarn tail to close the ring tightly. Join the round with a SS into the 3rd CH.
Round 2: Increase
- CH 3 (counts as first DC).
- 2 DC into each stitch around the circle, totaling 24 DC at the end of the round.
- Join with a SS in the 3rd CH.
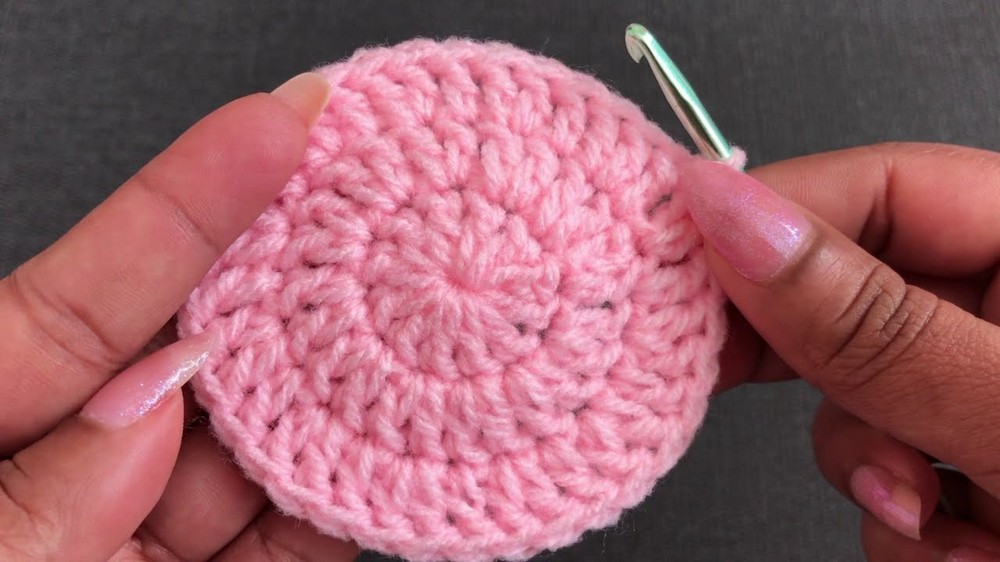
Round 3: Alternating Increase
- CH 3.
- Work the following repeat pattern: 1 DC in the next stitch, 2 DC in the next stitch. Repeat this pattern until the end of the round, yielding 36 DC.
- Join with a SS in the 3rd CH.
Round 4: Alternating Increase
- CH 3.
- Repeat the following sequence: 1 DC in the next two stitches, 2 DC in the next stitch. Continue this pattern till the end to reach 48* DC.
- Join with a SS to the 3rd CH.
Round 5 & Beyond: Size Adjustment
The first four rounds are the same for all sizes. For Rounds 5+, adjust as follows:
- Newborn/Early Born:
- Pattern: Alternate 1 DC in each of the next 3 stitches, 2 DC in the next stitch.
- Total Stitches: 52 DC. Continue for 9 rounds.
- 0 to 3 Months:
- Pattern: Alternate 1 DC in each of the next 4 stitches, 2 DC in the next stitch.
- Total Stitches: 56 DC. Continue for 9 rounds total.
- 3 to 6 Months:
- Pattern: Alternate 1 DC in each of the next 5 stitches, 2 DC in the next stitch.
- Total Stitches: 60 DC. Continue for 10 rounds total.
- 6 to 12 Months:
- Pattern: Alternate 1 DC in each of the next 6 stitches, 2 DC in the next stitch.
- Total Stitches: 64 DC. Continue for 11 rounds total.
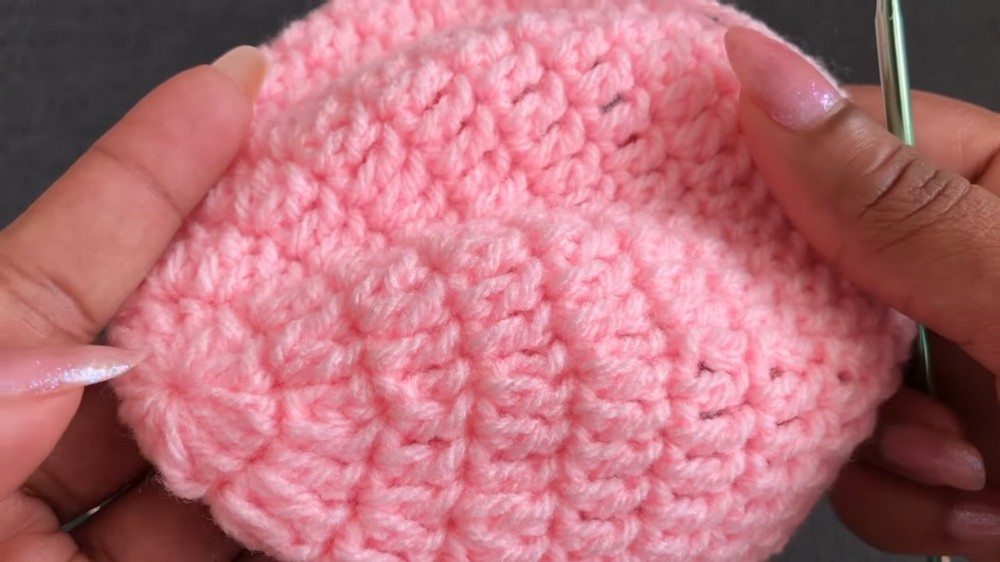
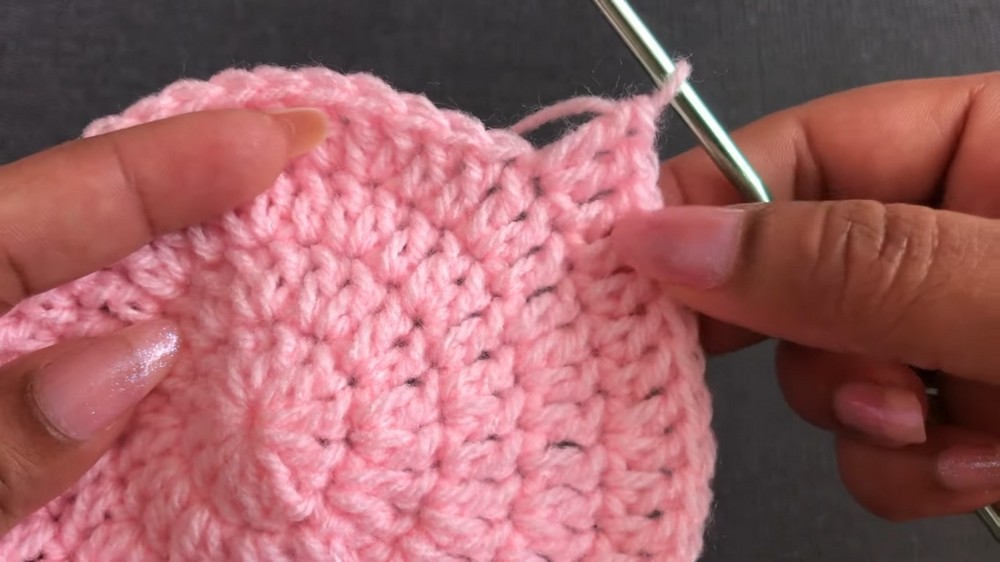
Rounds 10-12: Ribbing
- Switch to your second color or continue with the same.
- For ribbing: CH 3 for the first stitch. Work in alternating patterns of FPDC and BPDC around.
- Continue for 2-3 more rounds to create the ribbed border.
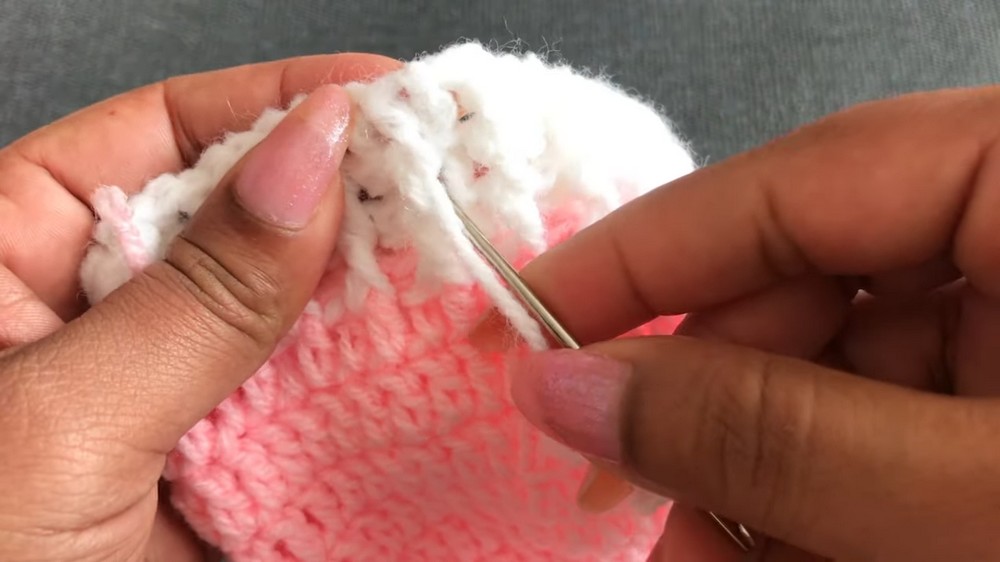
Adding Pom-Poms or Custom Decorations
- Attach a pom-pom to the top of the hat using the yarn needle and secure tightly.
- Alternatively, decorate with a crochet flower or appliqué for a baby girl.

Size Guide
| Size | Diameter (cm) | Height (cm) | Rounds | Total Stitches (Last Round) |
|---|---|---|---|---|
| Newborn/Early Born | 12 cm | 12 cm | 9 | 52 |
| 0 to 3 Months | 15 cm | 13 cm | 9 | 56 |
| 3 to 6 Months | 17 cm | 14 cm | 10 | 60 |
| 6 to 12 Months | 18 cm | 15 cm | 11 | 64 |
Tips for Beginners
- Keep your tension consistent for even stitches.
- Practice the magic ring technique a few times before starting.
- Count your stitches at the end of each round to avoid mistakes.
Special Features
- Easy-to-follow, beginner-friendly instructions.
- Adjustable sizing for multiple age groups.
- Ribbed border for a polished look.
- Optional customizations like pom-poms and flowers for added charm.
Level of Difficulty
- Beginner-Friendly: Perfect for new crocheters to learn magic rings, increasing rounds, and ribbing.
Conclusion and Final Thoughts
This crochet baby hat pattern is a wonderful introduction to the world of crochet. It teaches essential techniques like magic ring, increasing rounds, and creating a ribbed border, while offering a creative outlet for seasoned crocheters looking for quick, personalized gifts. With its customizable sizes and finishing options, this pattern is a keepsake waiting to happen!
What I Learned from This Pattern
By working on this project, I learned the importance of careful stitch counting to ensure accuracy, how to master the magic ring technique, and gained confidence in switching colors seamlessly. It's amazing how such a simple design can look so polished and professional with just a small effort. If you're just starting out in crochet, this pattern will boost your skills and ignite your creativity! Whether as a gift or for your little one, this hat is sure to warm your heart.