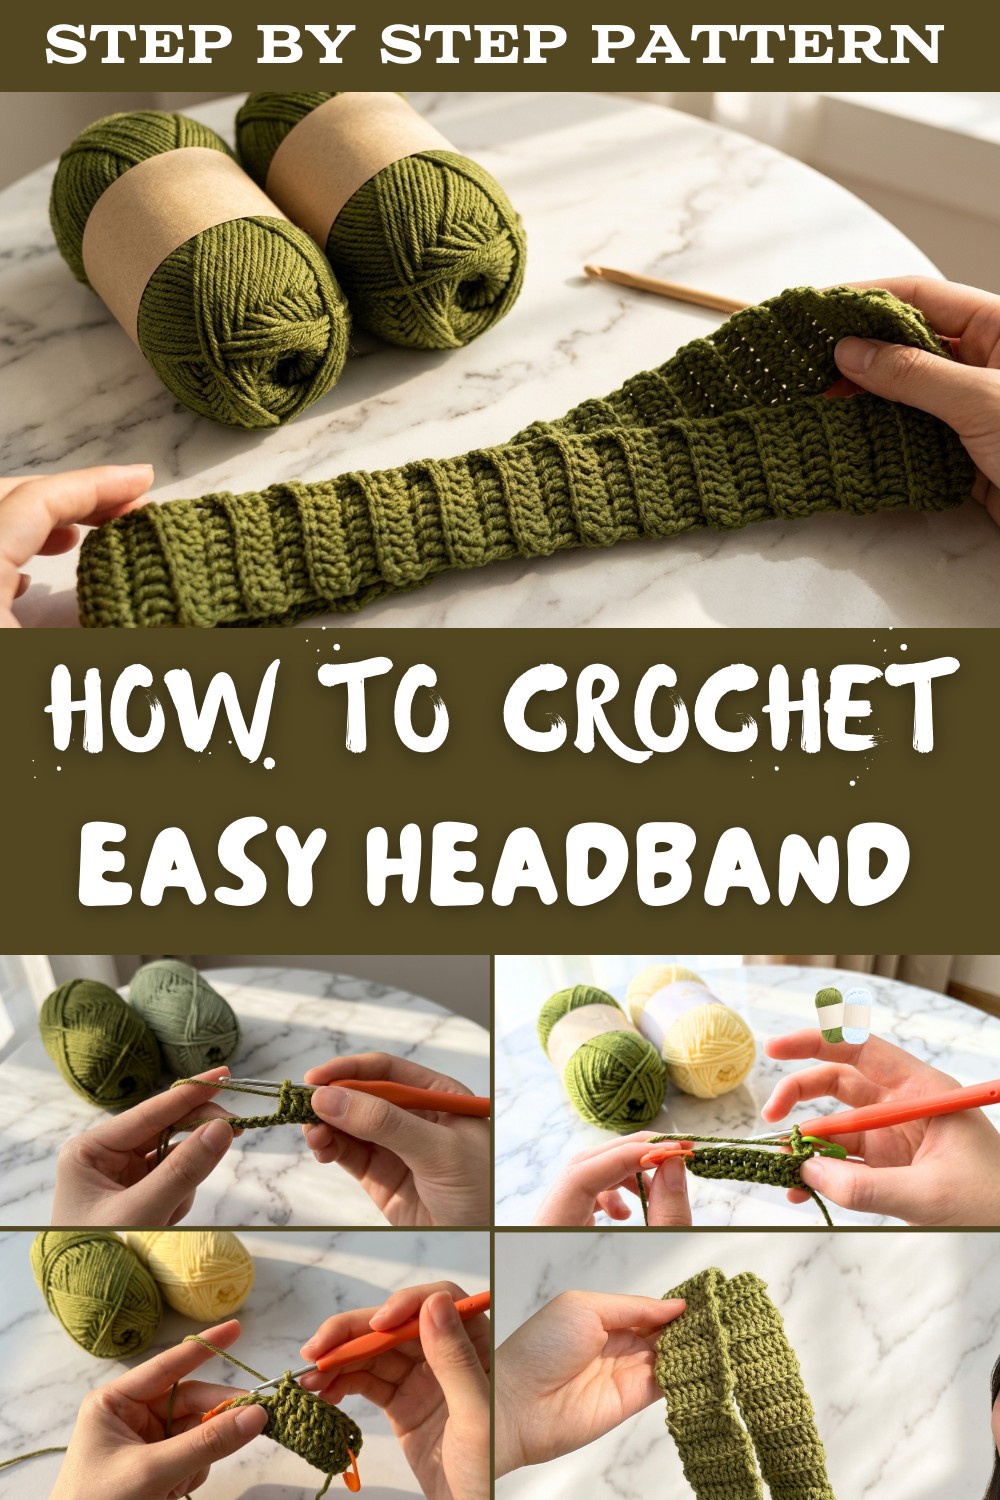
Beginner-Friendly Free Crochet Headband Pattern with Easy Steps
Get creative and make fun, stylish crochet headband with easy pattern that is perfect for beginners and bring color and charm to your outfits.
This handmade accessory is both beautiful and practical, adding a touch of style to any outfit. It is soft, colorful, and designed for comfort, making it perfect for everyday use or dressing up for special occasions. The pattern allows for endless creativity, offering a variety of designs and colors to match your unique taste.
How to Crochet Headband: Free Pattern for Beginners
It is lightweight and cozy, making it suitable for people of all ages. This simple creation can be personalized with flowers, bows, or beads, making it even more fun and stylish. Whether used to keep hair in place, enhance an outfit, or given as a thoughtful gift, it stands out as a charming and versatile piece. Its beauty lies in its simplicity and the love and creativity that go into crocheting it.

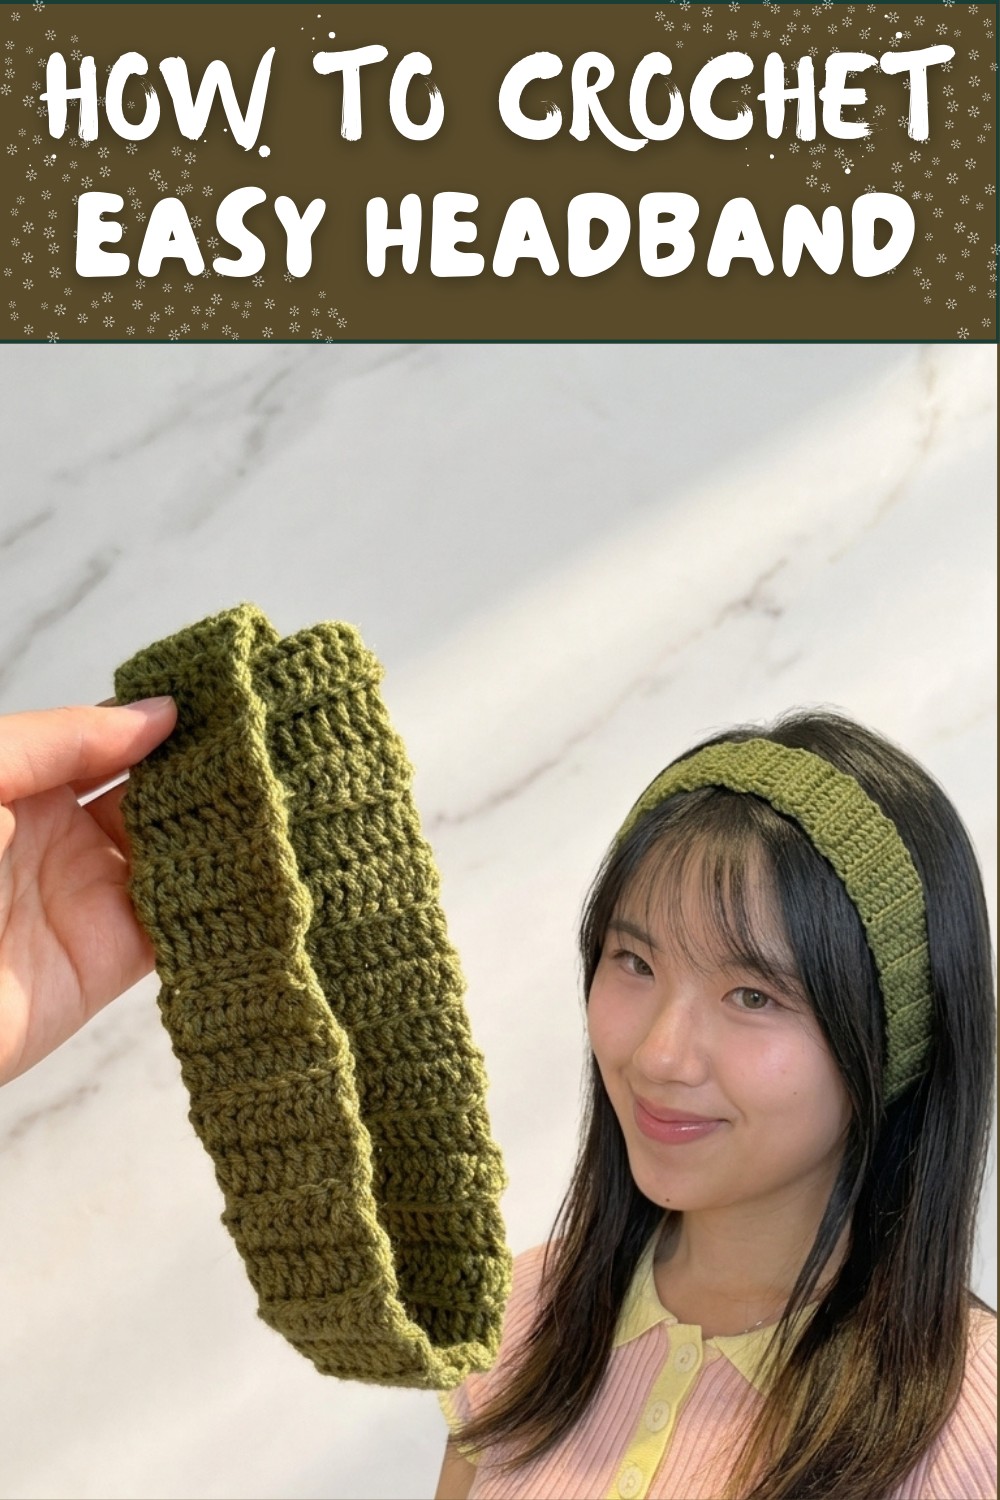
Crochet Easy Headband Pattern
Materials Required
- Yarn: Medium weight yarn (category 4). Featured yarn in the video: Sugar Swirl yarn from Lil Things World. You can substitute it with any soft, medium-weight yarn for similar results.
- Hook: 5.5 mm crochet hook (or size suitable for the yarn).
- Scissors: For cutting yarn at the end.
- Darning Needle: For weaving in yarn tails and sewing edges together.
- Stitch Markers: Optional but recommended for beginners.
Gauge
Gauge is not strictly necessary for this pattern but, if you'd like to check, you can make a test swatch:
- 4 inches (10 cm) of fabric = 14 double crochets worked over 8 rows using the recommended hook.
Finished Size
- Width of Headband: Approximately 3 inches (7.5 cm).
- Circumference of Headband: Customizable. Measure the tape comfortably around your head and subtract 1-2 inches for stretch. (Typically around 18-21 inches depending on head size).
Special Techniques Used
- Foundation Chains: Creates the starting chain for the width of the headband.
- Double Crochet (DC): Primary stitch to create the texture.
- Crocheting in the Back Loop Only: Adds the ribbed texture by skipping the front part of the "V" on each stitch.
- Seaming the Ends: Joining two ends of the band with a darning needle to create a seamless loop.
- Weaving in Loose Ends: Hides the yarn ends for a clean finish.
Step-by-Step Instructions
Step 1: Make a Slip Knot
- Grab the yarn tail with your right hand. With your left hand, hold up your index and middle fingers.
- Wrap the yarn around these two fingers to form a loop.
- Slide your thumb into the loop, grab the yarn tail, pull it through, and tighten.

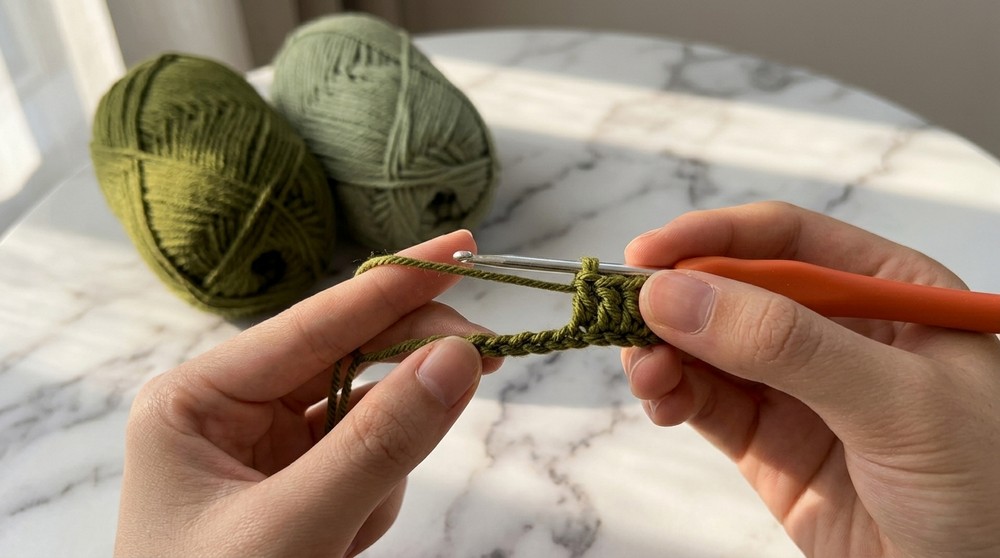
Step 2: Foundation Chain
- Insert the crochet hook into the slip knot loop.
- Using the working yarn (connected to the ball), make chains:
- Yarn over the hook and pull through the loop on the hook. This is one chain.
- Continue until the chain measures the desired width of your headband (approximately 3 inches for reference).
- Example: The tutorial uses 9 chains for 3 inches.
- Add 2 additional chains (these give height for the double crochet stitches).

Step 3: First Row (Double Crochet Base Row)
- Work your first double crochet into the third chain from the hook:
- Yarn over, insert your hook into the chain, yarn over, pull up a loop (3 loops on your hook), yarn over, pull through 2 loops, yarn over, pull through the last 2 loops.
- Mark this first stitch with a stitch marker to recognize it easily later.
- Continue working 1 double crochet in each remaining chain across the row.
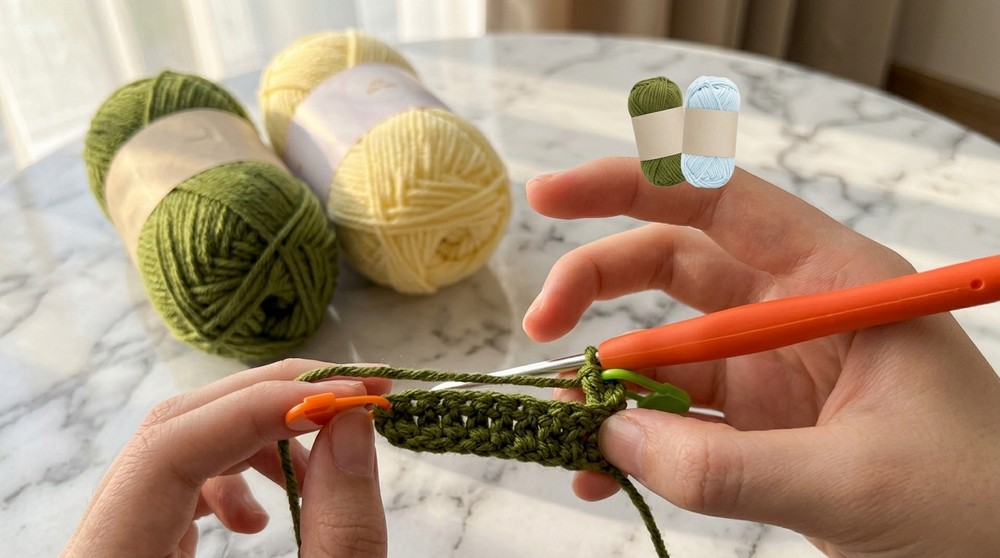
Step 4: Repeat Rows with Texture
- At the end of the row, chain 2 (to add height) and turn your work.
- Now, you will work into the back loop only (BLO) of each stitch to create a ribbed effect:
- Yarn over, insert your hook under the back loop of the first stitch (skip the front loop), pull up a loop, yarn over, pull through 2 loops, yarn over, pull through the final 2 loops.
- Place one double crochet in every stitch working into the back loops only until the end.
- Use the stitch marker to mark the first stitch of every row to avoid missing stitches.
- Repeat this row pattern (BLO double crochet) for the length of your headband.
- Stop when the band measures the desired circumference (around your head).


Step 5: Finish the Band
- When you reach your desired length and are ready to finish, cut your yarn, leaving a long tail (about 12-15 inches) for sewing the edges together.
- Pull the final loop large to secure the end.

Step 6: Sew the Edges Together
- Thread the yarn tail through the darning needle.
- Match the starting edge of the band with the ending edge. Align the stitches evenly.
- Sew the edges together:
- Use a whip stitch or back-and-forth weaving stitch, making sure to securely join both ends.
- Double knot the tail securely.
Step 7: Weave in Loose Ends
- If both tails are on one side, tie a double knot.
- Thread the loose ends onto the darning needle. Insert the needle into the stitches, hiding the ends neatly inside the band. Trim off excess yarn.
Tips and Customization Ideas
- Adjust Width: For a thinner or wider headband, increase or reduce the number of foundation chains accordingly.
- Add Color: Add stripes by changing yarn colors between rows. Simply attach the new color while finishing a stitch.
- Embellishments: Use buttons, bows, or appliqués (flowers) for extra decoration.
- Custom Stretch: Always subtract 1-2 inches from your head measurement to create a snug fit since crochet fabric will stretch.
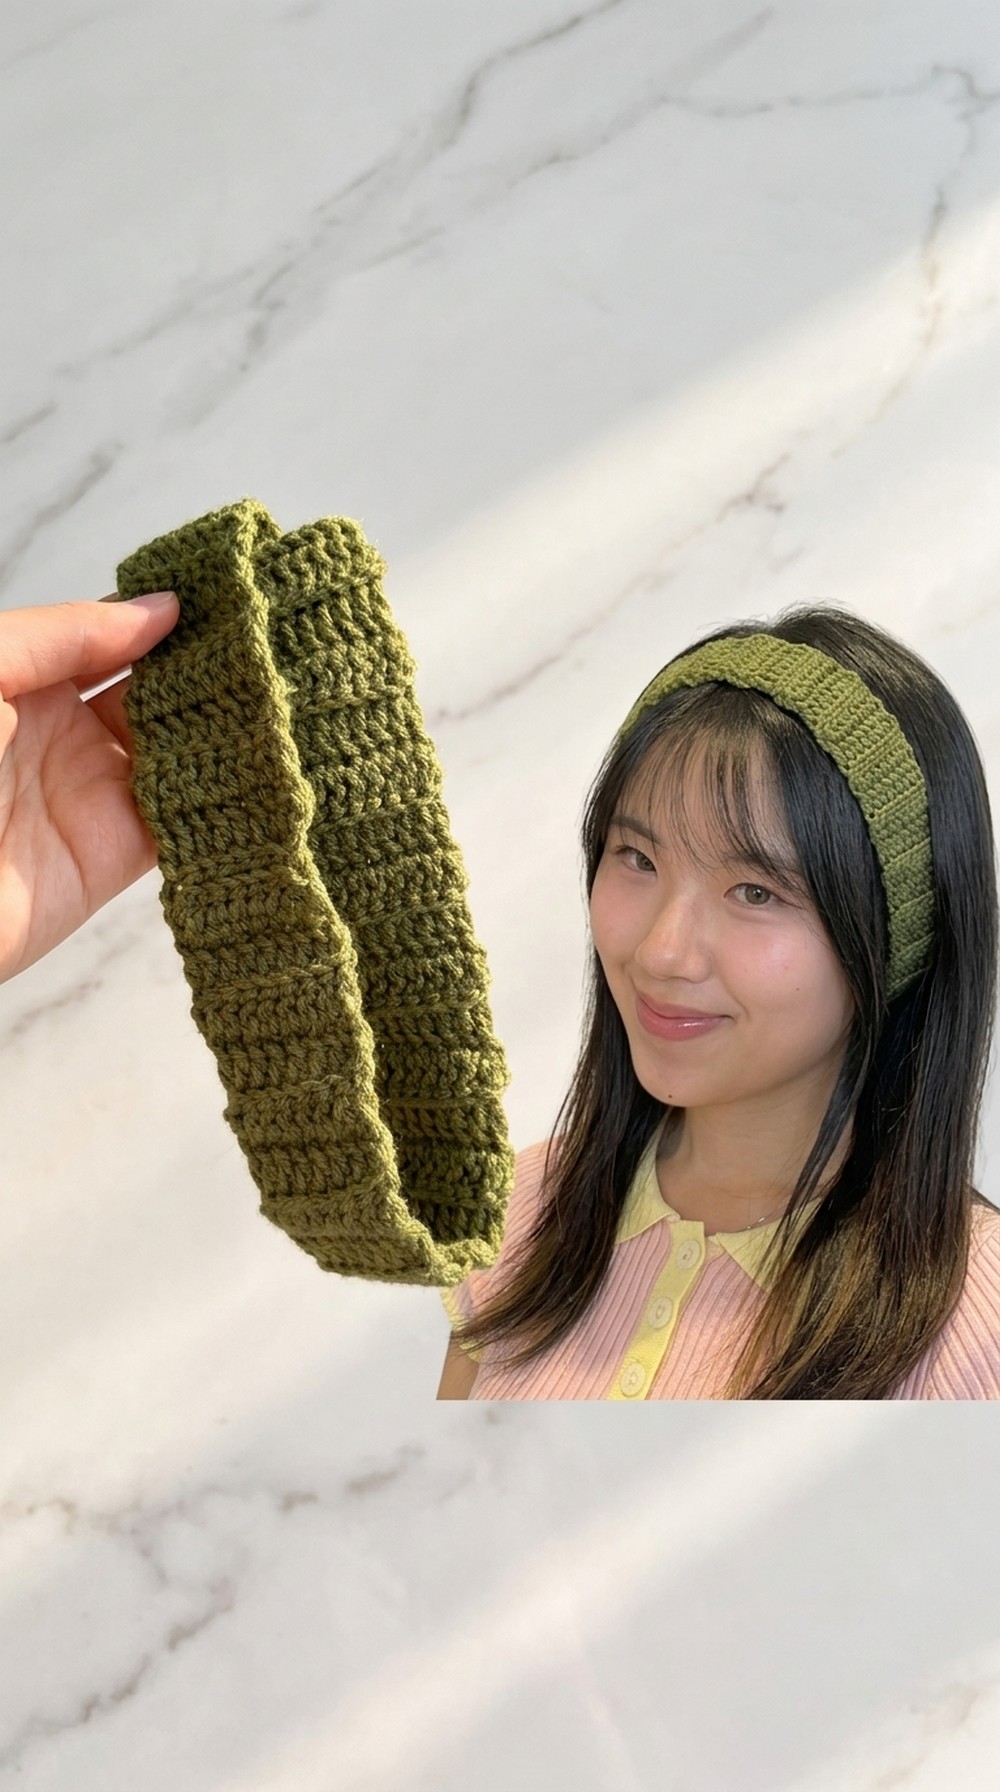
Conclusion and Final Remarks
Your textured crochet headband is complete! The ribbed pattern created by working into the back loops provides a lovely texture and flexibility, making the headband stylish yet functional. Thanks to its lightweight and stretchy nature, this headband is perfect for any season. Crafted with just a few simple techniques, this project is ideal for beginners or seasoned crafters alike.
For an even more satisfying result:
- Choose soft, comfortable yarns with a good stretch, like acrylic or cotton blends.
- Be creative with colors and customize for gifting.