Comfortable Free Crochet Top Pattern with Adjustable Straps
Bring life to your wardrobe by crocheting a chic open-back top with neat edges, breathable stitches, and a flattering fit that's ideal for any season or style.
This project is perfect for those looking for a beautiful and elegant addition to their wardrobe. The free crochet open-back top pattern uses mercerized cotton yarn and simple techniques to create an open-back top with stunning detail. It's easy to adjust for small, medium, or large sizes, ensuring a comfortable and flattering fit. The texture of this piece stands out due to its delicate stitches, neat edges, and well-arranged straps that add charm and style.
Simple & Stunning Free Crochet Top Pattern to Try Now

Its appearance is lightweight and classy, making it ideal for casual outings or dressing up for special occasions. The design features breathable stitching patterns, which keep you cool and stylish during warm weather. Pair it effortlessly with denim, skirts, or shorts for a timeless look.

open-back top Crochet Pattern
This top offers a practical way to work with chains and double crochets while adding artistic elements, like crisscross straps and refined detailing around the edges. It's simple yet eye-catching, providing a rewarding experience for those trying their hand at crochet projects. With some basic tools and a little time, this piece can shine as an essential fashion item in any wardrobe.
Skill Level
Intermediate to Advanced
Sizes Available
- Small (S): 24 rows for the base.
- Medium (M): 28 rows for the base.
- Large (L): 32 rows for the base.
Materials Needed
- Yarn:
- 100% Mercerized Cotton (Category #4), such as 24/7 Cotton from Lion Brand.
- Approximately 350 yards for the top; use corresponding colors for straps.
- Crochet Hook: 4 mm (or as recommended for your yarn).
- Stitch Marker: Optional, for tracking progress and decreases.
- Yarn Needle: For weaving in ends and hiding loose strands.
- Scissors: To trim yarn.
Gauge
Gauge is not critical for this pattern, as sizing is based on measurement. However, recommended gauge is:
- 16 stitches × 10 rows in double crochet = 4 in × 4 in (10 cm × 10 cm).
Key Abbreviations
- ch: Chain stitch
- sc: Single crochet
- sl st: Slip stitch
- dc: Double crochet
- dec: Decrease
- st(s): Stitch(es)
- rep: Repeat
Special Notes
- Pattern is written in US crochet terminology.
- Make adjustments to strap placement and tension based on personal preference.
- Count stitches carefully during decreases to ensure symmetrical shaping.
Pattern Instructions
1. Base of Top
Step 1: Chain Foundation
- For Small (S) size, crochet 81 chains.
- For Medium (M) size, crochet 101 chains.
- For Large (L) size, crochet 121 chains.
Step 2: Round 1 (Foundation Row)
- Begin with a false double crochet:
- Skip the first chain, insert hook into the second chain, yarn over and pull through, close as if it were sc.
- Insert into remaining loop, yarn over, pull through, and close (forming the false double crochet).
- Crochet dc in each chain across.

Step 3: Rounds 2-End
- Turn your work without chaining.
- Work a false double crochet into the first stitch, then dc across each st.
- Continue until you complete:
- 24 rows for Small (S).
- 28 rows for Medium (M).
- 32 rows for Large (L).

2. Working Decreases
Step 1: Start Decreases (Beginning of Rows)
- Turn without chaining.
- Skip the first stitch.
- Crochet a false dc into the second stitch; mark this stitch for easy identification.
Step 2: End-of-Row Decreases
- Stop two stitches before the end of the row.
- Work a dc decrease:
- Yarn over and insert hook into the second-to-last stitch, yarn over and pull through.
- Move onto the last stitch, yarn over and pull through.
- Yarn over and pull through the first three loops, yarn over again, and pull through remaining two loops.
Step 3: Repeat Decrease Rows
- Continue decreasing one stitch at the beginning and end until desired tapered width is achieved.
- Rows 3-5 establish the decrease pattern; repeat this technique for the entire base of the top.
3. Bottom Border
Step 1: Attaching Yarn
- Join yarn at the bottom edge of the top.
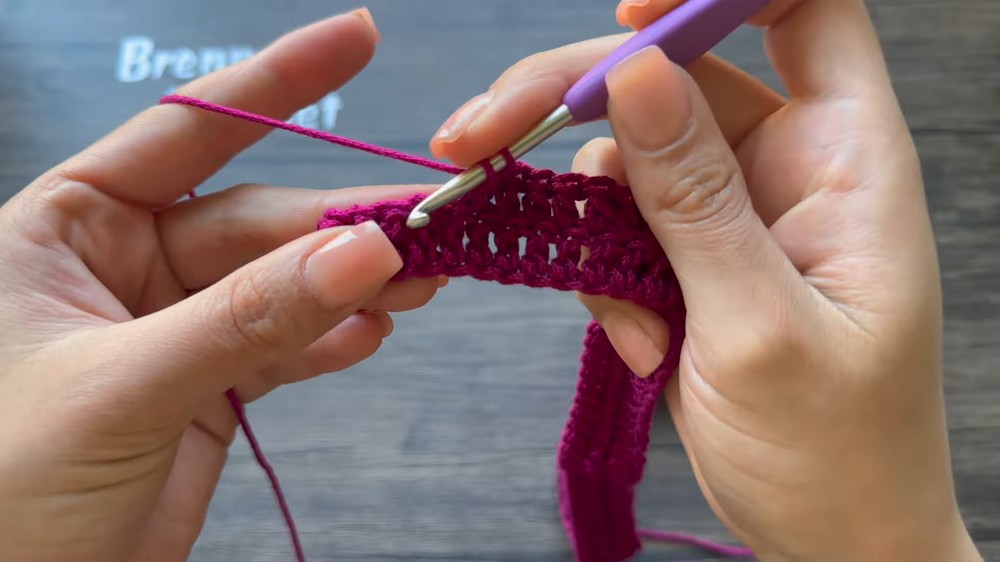
Step 2: Crochet Pattern
- In the joining space, crochet 5 chains, then 2 dc in the same space.
- Chain 3, skip 3 stitches, and crochet sc into the 4th chain.
- Chain 5, skip 3 chains, and crochet sc into the 4th chain.
- Repeat this sequence: [5 ch, skip 3, sc, 5 ch, skip 3, sc, 3 ch], until the edge is decorated.
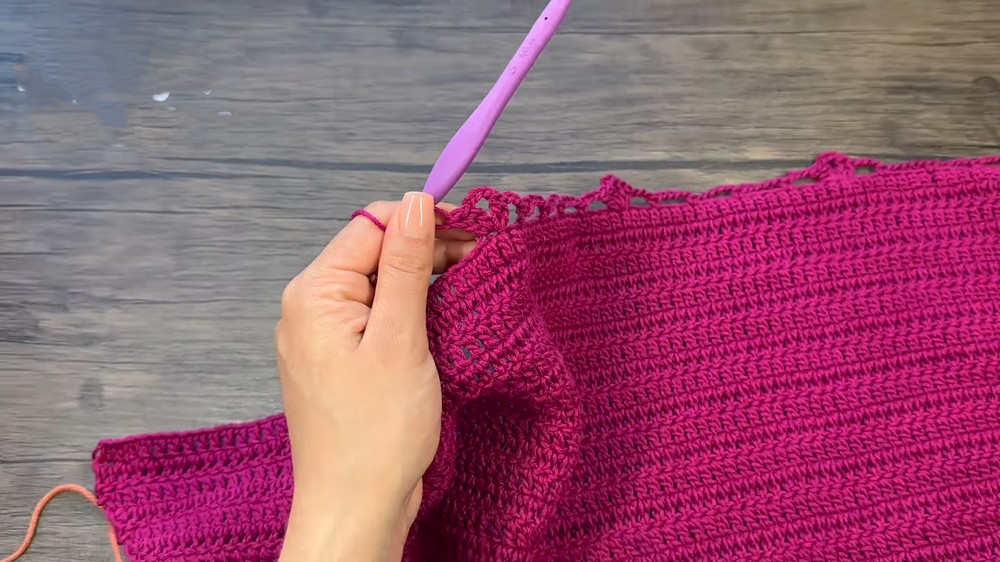

Step 3: Final Rows
- Work 2 dc, then ch 3, into each space to create small peaks.
- Trim excess yarn and weave in ends with a yarn needle.

4. Straps
Step 1: Foundation Chains
- Crochet a base chain of 400 chains.
- Starting in the second chain from the hook, work sl st into each chain across.
Step 2: Finishing Straps
- Cut yarn and fasten off with a tight knot.
- Hide loose ends with a yarn needle.
- Attach straps in desired placement on the top using the crisscross style or straight alignment.
5. Assembly
Step 1: Attaching Straps
- Fold the top in half horizontally (to identify front and back).
- Begin threading the strap through spaces along the backless center, skipping two stitches between each entry and exit point.
Step 2: Tightening Straps
- Adjust strap positioning and tension to ensure a secure fit.
- Optionally mark strap placement before weaving for balanced symmetry.

Conclusion
Congratulations on completing your open-back top! This design is stylish, breathable, and suitable for various occasions. Whether you stick to a single color or experiment with vibrant combinations, the pattern ensures a custom fit and polished result.

Pattern Corrections
- Double-check decrease rows for consistent tapering; skipped stitches should align symmetrically.
- Adjust strap length for comfort and secure placement.
Tips for Success
- Select durable, mercerized cotton for its strength and sleek finish.
- Use stitch markers for decrease rows and strap threading.
- For beginners, practice false double crochet and decreases before starting the project.
- Consult video tutorials for visual guidance.