
Crochet Amigurumi Stitch Free Pattern for Cute Toy Projects
Learn to make a cute and simple crochet Amigurumi Stitch Doll with this free pattern, perfect for beginners and fun for all ages to create and enjoy.
Amigurumi dolls are soft, colorful, and full of personality, making them a delightful gift or a fun decoration for your room. This free pattern allows you to create a stuffed doll that is as cute as a cartoon character and perfect for showcasing your crochet skills. The body of this Amigurumi Stitch doll is crocheted in a unique combination of blue and light blue yarn, while the ears and tummy patch add pops of color with soft pink and light blue shades. You can also create expressive eyes using black and light blue yarn, giving the doll an animated and playful look. The cute round head, big floppy ears, and the cheerful smile make it perfect for kids or anyone who loves handmade crochet projects.
Crochet Amigurumi Stitch Free Pattern for Amigurumi Lovers

This pattern features important techniques like magic ring, increasing and decreasing stitches, and creating a continuous round design. You'll also learn how to stuff and shape the doll, attach arms, legs, and ears, and finish everything with clean stitches. Because the instructions use basic stitches like single crochet, it's beginner friendly, yet detailed enough for intermediate crocheters who enjoy precision.
You can experiment with different yarn colors, add accessories like a bow or scarf, or personalize it for someone special. The materials required are simple: cotton or acrylic yarn, a crochet hook, stuffing, safety pins, and scissors. Creating this Amigurumi Stitch is more than just a fun activity-it's a chance to turn yarn into a lively and lovable character that brings joy. Whether for yourself or as a thoughtful handmade gift, this doll is sure to be a heartwarming treasure.
Amigurumi Stitch Pattern - Step by Step Instructions
Materials Needed
- Yarn:
- Dark blue (for the nose).
- Light pink (for the ears).
- Blue (for the body).
- Light blue (for the mouth and tummy patch).
- Black and white (for the eyes).
- Yarn Type: Cotton yarn is recommended (Drops brand was used in the pattern), but acrylic yarn works as well.
- Crocheting pipe cleaner or wire (for structure/stuffing in legs and arms if preferred).
- Toy stuffing.
- Crochet hook: Size 2.20 mm.
- Scissors.
- Needles: For sewing details and weaving ends.
- Safety pin: Used as a stitch marker (or use a dedicated stitch marker).
Special Techniques Used
- Magic Ring: A technique to create a tight and adjustable center for circular designs.
- Invisible Decrease: A neater way to decrease stitches without leaving bumps.
- Continuous Rounds: Rounds are worked without slip stitching or chaining between rounds. Use a stitch marker to track rounds.
Body Pattern
Step 1: Begin the Base
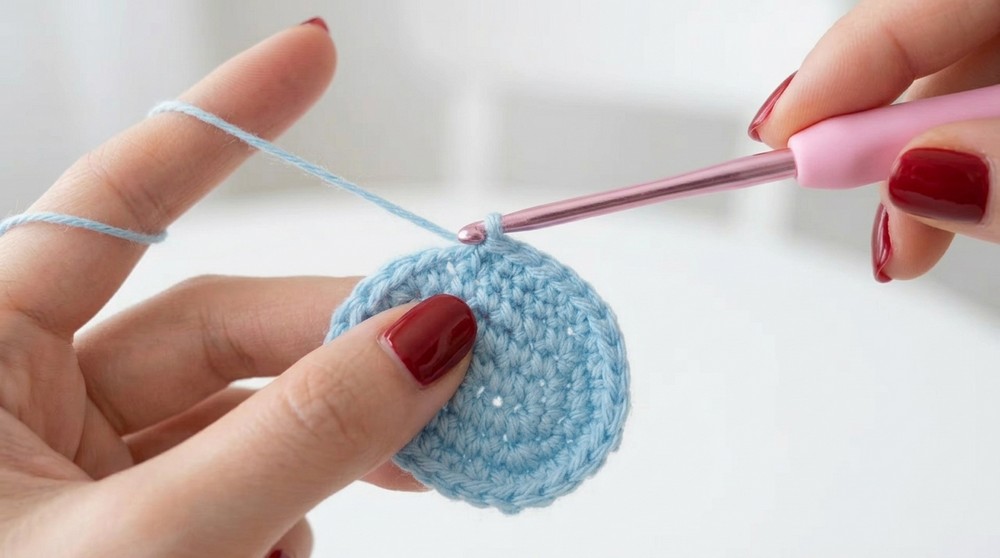
- With Blue Yarn: Create a magic ring and chain 1.
- Round 1: Make 6 single crochets (sc) into the magic ring. Pull the tail to close the ring. Place a stitch marker in the last stitch.
- Stitch count: 6 sc.
- Round 2: Increase in every stitch (2 sc in each).
- Stitch count: 12 sc.
- Round 3: 1 sc, 1 increase all the way around.
- Stitch count: 18 sc.
- Round 4: 2 sc, 1 increase all the way around.
- Stitch count: 24 sc.
- Round 5: 3 sc, 1 increase all the way around.
- Stitch count: 30 sc.
- Round 6: 4 sc, 1 increase all the way around.
- Stitch count: 36 sc.
- Round 7: 5 sc, 1 increase all the way around.
- Stitch count: 42 sc.


Step 2: Build the Main Body
- Rounds 8 to 12: Work single crochets all the way around for 5 rounds.
- Stitch count per round: 42 sc.
- Switch to Light Blue Yarn: On the last stitch of Round 12, change to light blue yarn.
- Remove the stitch, attach the light blue yarn, and start the next round. Cut off the blue yarn to keep it neat.
- Rounds 13 to 14: Work single crochets around for 2 rounds using light blue yarn.
- Stitch count per round: 42 sc.
Step 3: Shaping the Neck
- Round 15: 5 sc, 1 decrease all the way around.
- Stitch count: 36 sc.
- Round 16: 4 sc, 1 decrease all the way around.
- Stitch count: 30 sc.
- Round 17: 3 sc, 1 decrease all the way around.
- Stitch count: 24 sc.
- Add Toy Stuffing: Begin stuffing the doll as you work through the rounds, ensuring the shape is even.
- Round 18: 2 sc, 1 decrease all the way around.
- Stitch count: 18 sc.
- Round 19: Work single crochet around.
- Stitch count: 18 sc.
Head Pattern
To increase for the head:
- Switch Back to Blue Yarn:
- On the last stitch of Round 19, reattach the blue yarn (do not cut light blue yarn).
- Round 20: Work single crochet around.
- Stitch count: 18 sc.
- Round 21: 2 sc, 1 increase.
- Stitch count: 24 sc.
- Round 22: 3 sc, 1 increase.
- Stitch count: 30 sc.
- Round 23: 4 sc, 1 increase.
- Stitch count: 36 sc.
- Round 24: 5 sc, 1 increase.
- Stitch count: 42 sc.
- Round 25: 6 sc, 1 increase.
- Stitch count: 48 sc.

Arms (Make 2)
- Insert the hook into the body where the arm partition will go.
- Round 1: Create 10 stitches around for the arm (use stitch markers for alignment).
- Rounds 2 to 7: Work single crochet for 6 rounds.
- Finish Off: Chain 1 and fasten off, adding pipe cleaner or stuffing for stability. Sew the ends and hide them.

Legs (Make 2)
- Count the bottom body stitches and divide them into two groups with stitch markers for partitions.
- Round 1: Create 14 sc around for the first leg.
- Rounds 2 to 5: Work single crochet for 4 more rounds.
- Finish Off: Add toy stuffing and/or pipe cleaner for structure, then sew and hide seams. Repeat for the second leg.
Ears
- Base Pattern:
- Use the same increase pattern as the tummy patch, but work more to create a larger, ear shape piece.
- Pink Inner Ear Layer: Repeat the process with light pink yarn for a smaller oval. Sew the pink inner ear onto the blue outer ear.
- Attach ears to the head, aligned evenly on both sides.

Eyes and Facial Features
- Eyes:
- Black Yarn: Create a magic ring with 6 sc for the pupil.
- Light Blue Yarn: Attach and make increases to form the iris area of the eye.
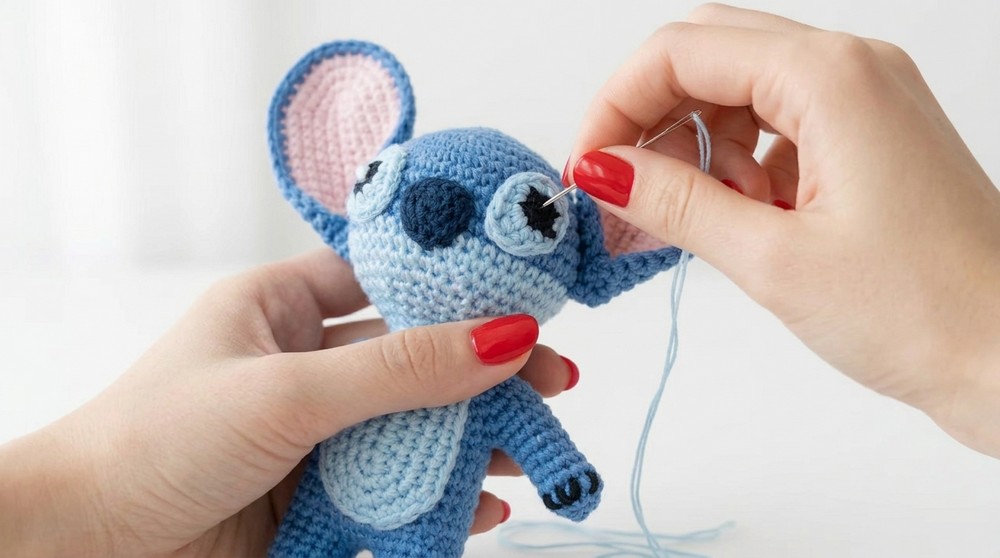
- Sew the completed eye pieces to the head with proper alignment.
- Mouth, Nose, and Smile:
- Use dark blue yarn for the nose and light blue for the mouth.
- Embroider a smile using black yarn.
Tummy Patch
- With Light Blue Yarn:
- Follow the increase instructions for a rounded oval shape.
- Attach it to the body with a needle, centered on the doll.
Finishing the Tail
- Use blue yarn to create a simple tail. Follow instructions similar to the legs until a small spherical shape forms. Stuff slightly and sew it to the lower back of the doll.
Final Touches
- Check for any loose threads or uneven stuffing. Adjust as needed.
- Ensure all attachments (arms, legs, ears, eyes) are secure.
Final Words
Congratulations on completing your Amigurumi Stitch Doll. Your hard work has brought this adorable piece to life. This project is perfect as a gift for children or as a charming addition to your handmade collection.

Tips for Maintaining the Pattern
- Storage: Keep your doll in a cool, dry place to ensure the yarn doesn't deteriorate.
- Washing: Hand wash gently with cold water and mild detergent if needed. Let it air dry completely.
- Display: If you plan to display your amigurumi, placing it on a shelf away from direct sunlight will protect its colors.
Enjoy crocheting and happy hooking, Feel free to adjust yarn colors or add embellishments to make it uniquely yours.