
Quick Crochet Hair Bow Pattern for Last-Minute Projects
Brighten any outfit with this free crochet hair bow pattern that brings a simple elegant touch to your look while being easy to complete.
Want to add a charming touch to your hairstyle without much effort? A crochet hair bow pattern is a wonderful way to make a stylish accessory that feels light and comfortable all day. This bow has a special texture that makes it stand out compared to an ordinary fabric bow. It is soft on the hair and does not pull or cause discomfort when worn for a long time. Because the bow can be attached to different fasteners like a clip, headband, or elastic band, it fits well with many hair types and styles. The choice of colors and sizes is wide, so it's easy to find the perfect match for any outfit. Whether worn on a casual day, during a celebration, or at a holiday event, this little bow adds a fresh and fun detail. Beginners appreciate this pattern
Cute Crochet Hair Bow Pattern for All Ages
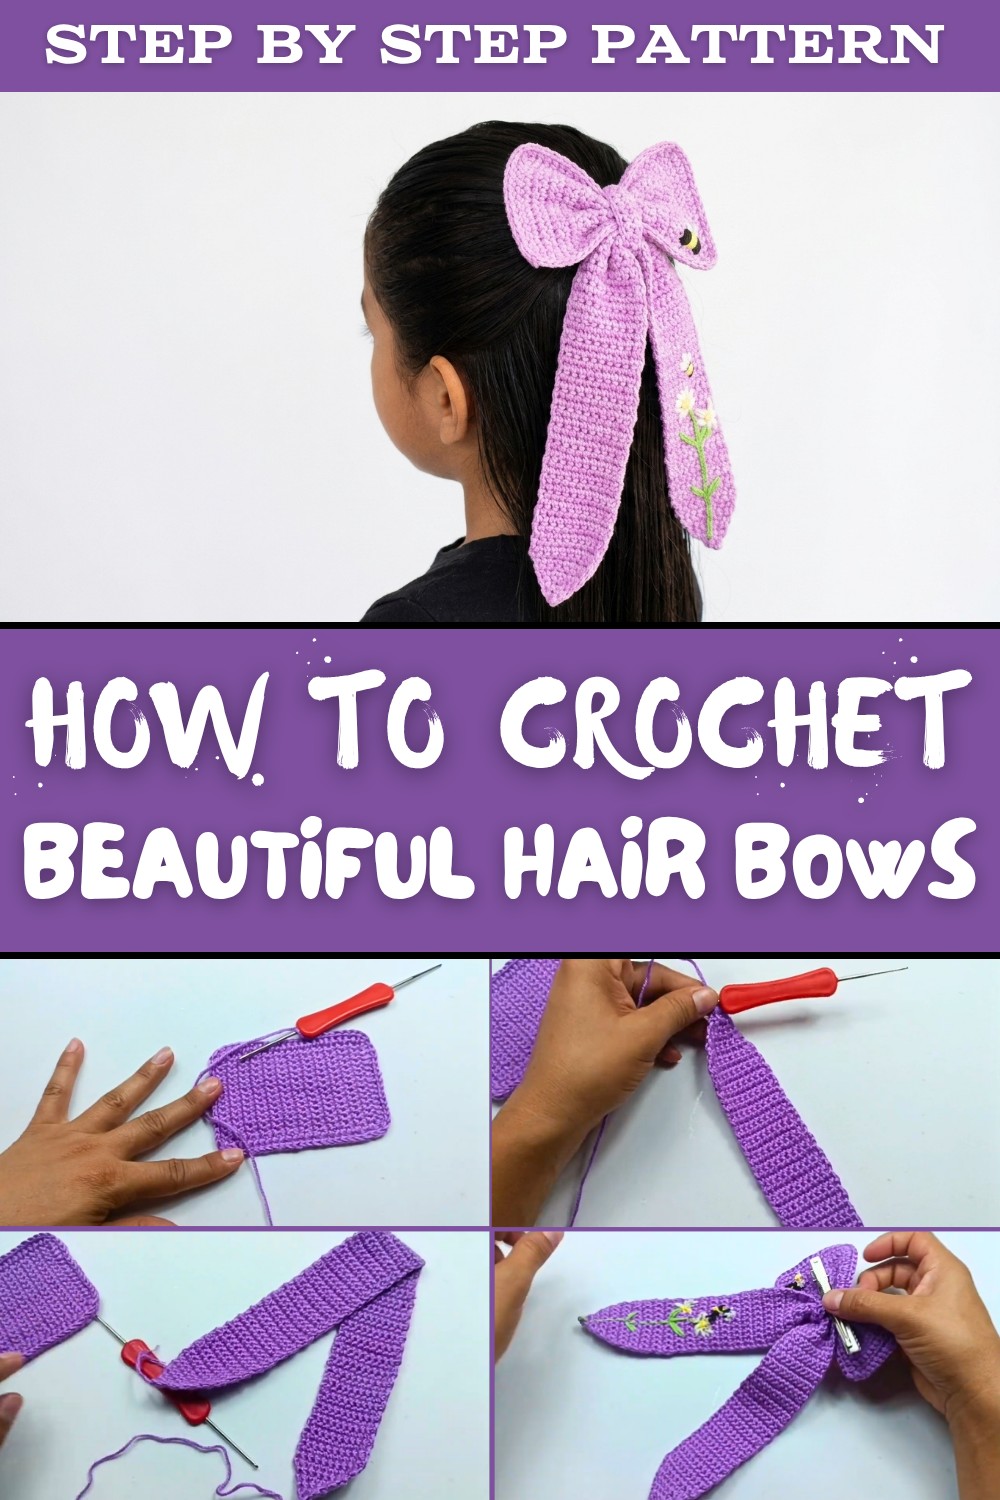
because it uses simple stitches and clear steps, making the process enjoyable and stress-free. Having this easy project allows anyone to make a personalized accessory in a short time. The result is a bow that looks delicate but holds its shape well. It also provides a neat way to keep hair tidy while giving a sweet pop of style. A crochet hair bow pattern invites creativity without the need for complicated skills or tools.

It offers a chance to bring a handmade element into everyday fashion. Wearing one can brighten your look and boost your confidence with a touch of handmade charm. Overall, investing time in this project is rewarding and can inspire more accessories that combine comfort, style, and individuality.
Elegant Crochet Bow with Embroidered Detail Pattern
Discover how to make a beautiful, versatile crochet bow enhanced with delicate embroidery. This elegant project uses simple stitches and basic embroidery techniques to create an eye-catching accessory, perfect for hair clips, wristbands, or decorative accents. The pattern is beginner-friendly, clear, and easy to follow with every step explained.
Preparation & Important Notes Before Crocheting
- Basic crochet skills needed: slip knot, chain (ch), single crochet (sc), half double crochet (hdc), slip stitch (sl st), and basic increases/decreases.
- Embroidery techniques are used with yarn needle to add refined detail; no advanced stitching required.
- Use 100% acrylic yarn with 2.0 mm thickness recommended for crisp stitches and durability.
- Crochet hook size recommended: 2.0 mm (US size).
- Keep stitch tension consistent for an even fabric.
- You may adjust chain length and number of rows to customize bow size.
- Embroidery uses multiple yarn colors and requires patience for neat results.
- Prepare scissors, tapestry needle, stitch markers (optional), embroidery yarns, and an embroidery needle.
Pattern Details & Special Considerations
- The bow base is a flat rectangular piece worked in single crochet.
- Edges are shaped gradually via increases and decreases shaping the bow "tip" and body.
- Crochet fabric is worked row by row with stitch counts carefully maintained.
- The embroidery is stitched afterward onto the completed bow in freeform floral and bee motifs.
- US crochet terms throughout.
- Pay attention to stitch counts for shaping, and count rows to maintain proportion.
- Ends must be secured with care; burning synthetic yarn tails helps prevent fraying.
- The bow can be sewn onto hair clips, brooches, or wrapped onto wristbands.
Construction Overview
- Begin with a chain foundation and single crochet 15 stitches across.
- Work 25 rows to form the base rectangle.
- Transition to working increases shaping one side steadily until 75 stitches wide.
- Reverse process with decreases to bring the shape back down.
- Work a small band for wrapping around the center of the bow.
- Embroider delicate floral patterns and a bee with fine yarn and needle.
- Finish by assembling, securing embroidery, and attaching any closures as desired.

Difficulty Level
Perfect for confident beginners and beyond who are comfortable with basic stitches and ready to explore shaping and simple embroidery.
Finished Bow Dimensions
- Width varies as increases shape bow, maximum about 75 stitches wide.
- Length around 25 rows plus additional for center wrap.
- Size adaptable by altering stitch or row counts.
Materials List
- 100% Acrylic yarn (approx. 2.0 mm thickness), main yarn color.
- Crochet hook 2.0 mm (US size).
- Assorted colored yarns for embroidery.
- Embroidery needle and tapestry needle for assembly.
- Scissors, stitch markers (optional).
- Hair clip, wristband, or desired accessory base (optional).
Measurements & Size Notes
- Initial chain: 16 chains (15 working stitches after chain skipped).
- Base rows: 25 rows worked for foundation.
- Increase rows: from 15 stitches up to 75 stitches at widest.
- Decrease rows reverse increments to taper shape.
- Small band for center wrap made separately.
- Adjust chain or rows proportionally to resize.
Gauge Information
- Single crochet stitch gauge will vary slightly based on yarn and tension.
- Gauge is approximate; consistent tension ensures the shape holds.
Stitch Glossary (US Terms)
- ch = chain
- sc = single crochet
- hdc = half double crochet
- sl st = slip stitch
- inc = increase (2 sc in one stitch)
- dec = decrease (sc2tog: single crochet two stitches together)
Key Stitches & Techniques Explained
- Single Crochet (sc): Insert hook in stitch, yarn over, pull through, yarn over, pull through two loops.
- Increase (inc): Work two single crochet stitches in same stitch.
- Decrease (dec): Crochet two stitches together by inserting hook through two stitches, yarn over, pull through, yarn over, pull through two loops twice (sc2tog).
- Chain (ch): Yarn over, pull through loop on hook to create foundation stitches.
- Slip Stitch (sl st): Insert hook, yarn over, pull through stitch and loop on hook.
Step-by-Step Crochet Instructions
Part 1: The Rectangular Base
Foundation Chain:
- Make a slip knot.
- Chain 16.
Row 1:
- Skip the first chain from hook.
- Sc in each remaining chain across. (15 sc)
- Turn.
Rows 2-25:
- Ch 1, sc in each stitch across (15 stitches).
- Turn at end of each row.
Maintain exactly 15 stitches per row to ensure a rectangular fabric.

Part 2: Increasing Section (The Bow Tip)
Row 1 (Increase start):
- Ch 1, turn.
- Sc increase at first stitch (2 sc in first stitch).
- Sc in each stitch across.
- Sc increase at last stitch (2 sc in last stitch).
- Total stitches: 17.
Continue Increasing:
- Repeat the following:
- Ch 1, turn.
- Inc at first stitch, sc across all stitches, inc at last stitch.
- Continue increasing by 2 stitches per row until you reach 75 stitches width.
- This will take multiple rows (approximately 30-35 increases; count carefully).
Part 3: Maintaining Width at Maximum
- Once 75 stitches width is reached, work a few rows without increases (sc across).
Part 4: Decreasing Section (Tapering Bow Tip)
- Begin decreasing stitches symmetrically by working a decrease at first and last stitch of each row (sc2tog).
- Continue decreasing 2 stitches per row until you return to 15 stitches across.
- Maintain stitch count each row and turn your work at the end.

Part 5: Small Centre Band
- Chain 17.
- Work 2 to 3 rows of single crochet.
- Fasten off leaving a long tail for assembly.

Part 6: Assembly of the Bow
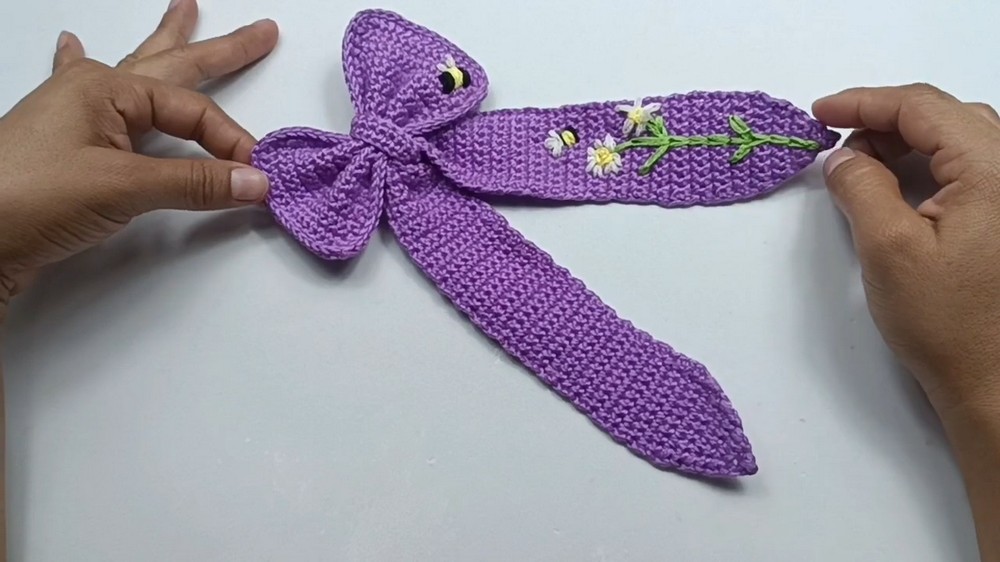
- Fold the rectangular piece in half, bringing the tapered ends together to form bow shape.
- Use the yarn needle and tail to sew the middle snugly, creating a gathered centre.
- Wrap the small center band around the bow's middle and sew ends securely.
- Weave in all yarn tails carefully.
Part 7: Embroidery Decoration
- Using embroidery yarns of your choice, stitch florals and bees onto the bow's surface.
- Embroidery includes small branches, flower petals formed by looping stitches, and tiny bees made with circular stitch clusters.
- Use simple embroidery techniques such as straight stitches and circular loops to mimic petals and wings.
- Position the embroidery as desired, focusing on symmetry and coverage.

Helpful Explanation for Beginners
This pattern builds a rectangular fabric with increasing and decreasing rows shaping it into a bow. The center is gathered by sewing, then wrapped with a small band. Embroidery adds pretty detail for visual interest. Work carefully, counting stitches as you go to maintain the shape. The embroidery uses basic hand-stitching techniques you can practice on scrap.
Assembly and Finishing Steps
- Securely weave in all loose yarn ends.
- Use tapestry needle to join bow center and sew center band.
- Lightly block the bow if desired to smooth edges.
- Attach to hair clip, wrist cuff, or pin backing with fabric/glue or stitching.
- Trim yarn tails tidily and burn synthetic yarn ends to prevent fraying.

Troubleshooting Tips
- Bow edges uneven or lopsided: Count stitches every row; use stitch markers if needed.
- Inconsistent tension: Work slowly and consistently to maintain even stitch size.
- Embroidery puckering: Don't pull yarn too tight; keep stitches a bit loose for smooth fabric surface.
- Center gathering too loose or tight: Adjust sewing tension and ensure bow is folded evenly.
Creative Project Ideas Using This Technique
- Crochet matching flower hair clips or headbands with embroidered accents.
- Make decorative brooches or pins inspired by the bow shape.
- Create wrist warmers or cuffs using similar stitch and embroidery techniques.
- Design crochet embellishments for bags or scarves.
- Use the embroidery methods to embellish blankets or cushion covers.