
Crochet Bow Design for Cute Decoration Projects Free Pattern
Grow up with fun using Free Crochet Bow Pattern to make cute soft bows for hair clips gifts and decorations in a simple and joyful beginner friendly way.
Have you ever seen a small handmade crochet bow that looks soft, neat, and full of charm? This simple yet pretty piece is made with yarn and a few easy stitches, but it gives a clean and lovely finish that anyone can enjoy. It can be used in many ways such as on hair clips, headbands, dresses, gift wrapping, or even to decorate bags and small items.
Crochet Bow Free Pattern for Stylish Accessories

Its smooth shape and gentle feel make it safe and comfortable, especially for young girls. The Free Crochet Bow Pattern is easy to follow, which makes it a good choice for beginners who want to try something fun and useful. It does not need much time or materials, so it is perfect for quick and simple projects. The beauty of this bow comes from its clean look and the happiness of making something by hand that feels both cute and special.

Crochet Bow Pattern
Materials Needed
- Yarn: Anti-pilling 100% acrylic, or any soft yarn in your choice of color. (You may use cotton or regular acrylic as well.)
- Recommended Hook Size: 4.5 mm (use size recommended on your yarn label for best results)
- Yarn Needle (tapestry needle) for sewing/weaving in ends
- Scissors
- Optional: Decorative elements (buttons, beads, stones, or mini crocheted flowers), extra yarn for tying center.
Abbreviations (US Terms)
- ch: chain
- st(s): stitch(es)
- sl st: slip stitch
- hdc: half double crochet
- BL: back loop (the loop furthest from you at the top of the stitch)
- Row/round: Each time you go back and forth or around with your crochet
Special Techniques
- Slip Knot: Make a loop, pull working yarn through to secure and tighten on hook.
- Half Double Crochet (hdc): Yarn over, insert hook into stitch, yarn over, pull up a loop (3 loops on hook), yarn over and pull through all 3 loops.
- Back Loop Only (BLO): Work into the back loop of each stitch only (not both loops at the top).

Step-by-Step Instructions
BOW BASE
- Foundation Chain:
- Make a slip knot and place it on your hook.
- Chain 65 (Make 65 chain stitches.)
- Row 1:
- Skip the first chain from the hook.
- Into the second chain, begin working as follows:
- 7 hdc: Yarn over, insert hook, and work 1 hdc in each of next 7 chains.
- 6 sl st: Work 1 slip stitch in each of the next 6 chains.
- 16 hdc: Work 1 hdc in each of the next 16 chains.
- 6 sl st: Work 1 slip stitch in each of the next 6 chains.
- 16 hdc: Work 1 hdc in each of the next 16 chains.
- 6 sl st: Work 1 slip stitch in each of the next 6 chains.
- 7 hdc: Work 1 hdc in each of the last 7 chains.
- At end of row, chain 1 and turn your work.
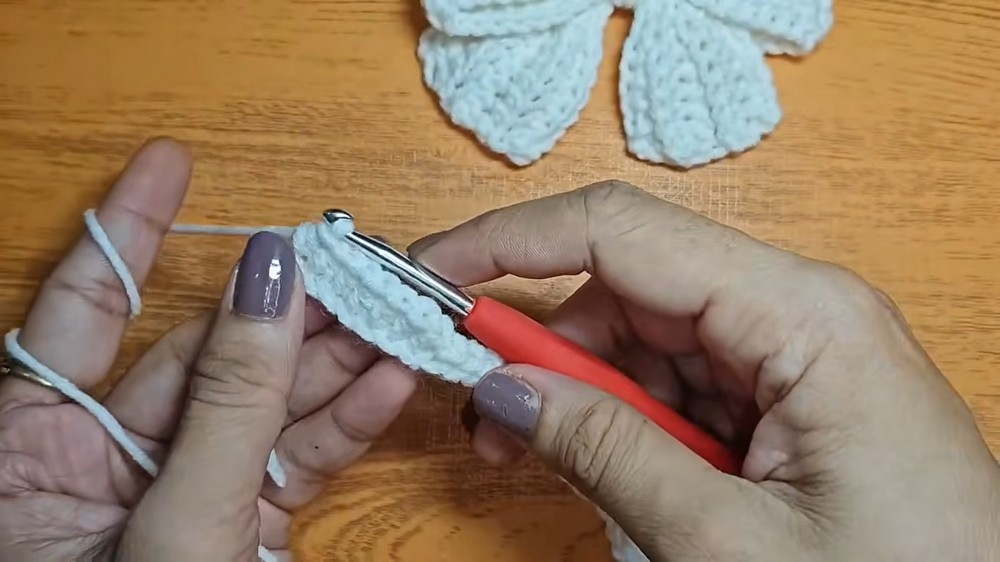
- Row 2: (Back Loop Only)
- Now working back across, always work into the back loop only:
- 7 hdc (BLO): Work 1 hdc in the back loop only for next 7 stitches.
- 6 sl st (BLO): Work 1 sl st in the back loop only for next 6 stitches.
- 16 hdc (BLO): 1 hdc in the back loop only for next 16 stitches.
- 6 sl st (BLO): 1 sl st in the back loop only for next 6 stitches.
- 16 hdc (BLO): 1 hdc in the back loop only for next 16 stitches.
- 6 sl st (BLO): 1 sl st in the back loop only for next 6 stitches.
- 7 hdc (BLO): 1 hdc in the back loop only for last 7 stitches.
- Chain 1 and turn.
- Now working back across, always work into the back loop only:
- Repeat Step 3 (Row 2) for Rows 3, 4, and 5 (total 5 rows), always working in the back loop only.


FINISHING THE BOW
- Fasten Off:
- After completing 5 rows, chain 1, cut the yarn and pull through to fasten off.
- Weave In Ends:
- Use your yarn needle to neatly weave both starting and ending yarn tails into the bow edge, hiding them securely.
- Shaping the Bow:
- Lay the strip flat.
- Locate the section where you made slip stitches (it will form the indentations of the bow).
- Fold the ends inward so the slip-stitch bands are toward the center and the outer hdc sections form the sides.
- Pinch the center into an accordion/pleat shape or fold so it forms a bow.
- Securing the Center:
- Use a spare length of yarn (same or contrasting color, or a piece of thread, as preferred).
- Wrap it tightly several times around the center of the bow, cinching it for that classic bow shape.
- On the back, knot securely and trim/hide the ends with your needle.
- Optional Embellishments:
- Sew/glue decorative elements (button, bead, stone, small crocheted flower) to the bow's center for extra flair.
- You may also hot glue or sew the bow to a hair clip, brooch pin, headband, or secure it to clothing/accessories.

Suggestions & Pattern Variations
- Color: Use contrasting yarns for stripes, ombre, or make a multi-colored bow.
- Size: Adjust the starting chain for a bigger or smaller bow. More rows = wider bow, more chains = longer bow.
- Texture: For a puffy bow, use chunkier yarn. For a delicate bow, use light cotton or baby yarn with a smaller hook.
- Center: For a neat center, crochet a small rectangle, wrap around, and sew or glue instead of using yarn ties.
Pattern Maintenance Tips
- Hand wash gently if needed and lay flat to dry.
- Store flat to retain shape.
- Reinforce center if frequently handling or using on accessories.
Final Words & Project Review
Congratulations! You have created a simple, classic crochet bow with beautiful ridged details from back loop work and sculpted shape from slip stitch indents. This versatile bow can be used for hairclips, gift toppers, décor, brooches, and much more.
Feel free to personalize it with creative embellishments and color choices.
Maintain by gentle care and enjoy showing off your handmade accessory!