
Crochet Bow Hair Clip Pattern Ideal For to Every Special Hairstyle
A tiny bow can make any hairstyle feel extra special and this Free Crochet Bow Hair Clip Pattern helps you make one with simple stitches.
Every accessory has a story, and sometimes, the smallest items bring the biggest charm to your look. Taking soft threads of yarn and turning them into something that adds instant elegance to your hair. This handcrocheted bow clip is one of those delightful creations that blend simplicity with style. With its gentle design, this clip feels like a touch of creativity woven into everyday wear. The texture is soft yet bright, and the unique layers of the bow and decorative details make it perfect for adding an extra spark to your outfit. Whether you're dressing up for a school event, gifting someone special, or simply elevating your casual look, this piece fits effortlessly into every occasion.
Free Crochet Bow Hair Clip Pattern for All Ages

You can swap or mix colors, add fringes, or even pair it with different types of clips like elastics or metal bases. Its versatility ensures that it's not just an accessory but a canvas for your creativity. Plus, it's lightweight and comfortable, making it ideal for long hours of wear.
Kids, especially, adore its playful charm-it's a little creation that feels unique and magical. Once you see it completed, you'll realize how a simple crochet project can turn into something special that feels both heartfelt and fashionable.

Crochet Pattern: Beautiful Bow Hair Clip with Clusters and Leaves
Materials Needed
To begin, gather the following materials:
- Yarn: Cotton yarn in two colors (e.g., pink and white).
- Crochet Hook: Size 2mm hook.
- Hair Clip Base: Metal clip or elastic band (for attachment).
- Scissors: For cutting yarn neatly.
- Silicone Glue (optional): For securing the clip to the bow.
Gauge
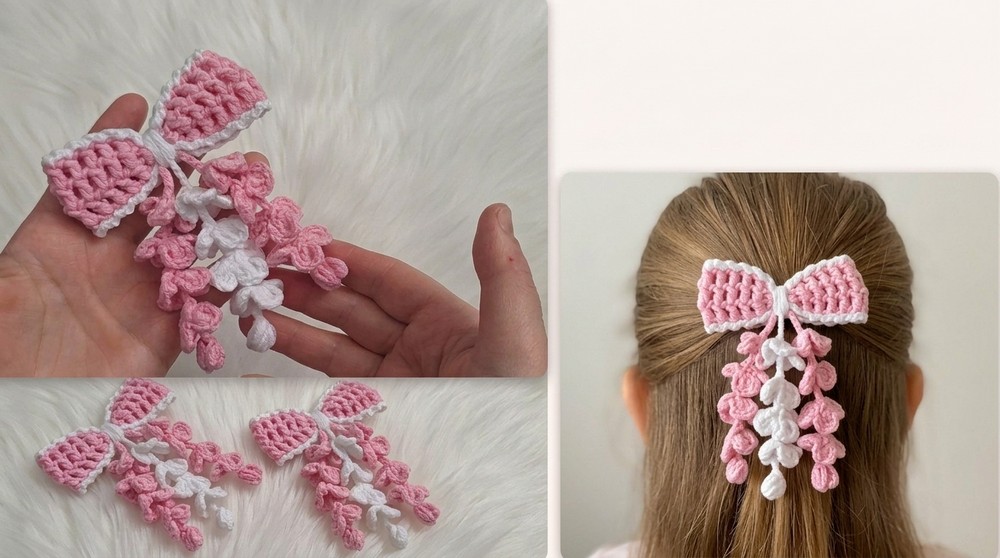
Gauge is not crucial for this project, but aim to keep your stitches consistent. If using the suggested materials, the bow will measure approximately 3 inches (7.5 cm) wide. Adjust the foundation chain for larger or smaller hair clips.
Finished Size
- Bow dimensions: Approx. 3 x 2 inches (7.5 x 5 cm).
- Overall length with clusters and leaves: Approx. 5 inches (14 cm).
Key Tips for Crochet Success
- Keep Stitches Loose: Avoid tight chains to ensure the final piece is flexible and soft.
- Secure Edges: When changing colors or cutting yarn, weave in loose ends to create a polished look.
- Customization: Experiment with different colors, yarn types, or clip bases (elastic or metal).
Pattern Instructions
Let's split this project into three components:
1. Bow Body
The bow is the main structure of the clip. This part consists of square boxes using treble crochet stitches.
Steps:
- Foundation Chain:
- Using the pink yarn, create a slip knot.
- Chain 50 stitches loosely. This forms the foundation.
- Join into a Circle:
- Bring the last chain around to the first.
- Slip stitch into the first chain to form a circle and secure the join.
- Row 1: Create Square Boxes:
- Chain 4 (this counts as your first treble crochet and 1 chain space).
- Skip 1 stitch. In the next stitch, make a treble crochet:
- Yarn over, insert your hook into the stitch, yarn over and pull through (3 loops on hook).
- Yarn over, pull through the first two loops. Yarn over again and pull through the remaining two loops.
- Chain 1, skip 1 stitch, and treble crochet into the next stitch.
- Repeat this pattern of chain 1, skip 1, treble crochet to form square boxes.
- When you reach the end of the row, slip stitch into the 3rd chain of the starting chain 4.
- Row 2 and Row 3 (Repeat):
- Chain 4 at the beginning of each row.
- Work treble crochets into the tops of the previous row's treble crochets, chaining 1 in between each treble.
- Repeat the process to create square boxes.
- At the end of each row, join with a slip stitch into the 3rd chain.

2. Edging the Bow with White Yarn
Now that the bow is formed, you'll add a white border around the edges.
Steps:
- Join White Yarn:
- Attach the white yarn to the top of the 4th chain from your last row.
- Secure the pink yarn by weaving it into the stitches or snipping it.
- Border Stitching:
- Chain 2 and slip stitch into the top of each box from the previous rows.
- Repeat this around all edges of the bow, ensuring clean and neat borders.
- Cut and Finish:
- Once the border is complete, cut the white yarn and secure any loose ends.

3. Clusters and Leaves (Decorative Element)
This step adds flair to the hair clip by crocheting small clusters resembling flowers, with layered leaves underneath.
Steps for Creating a Cluster:
- Foundation Bud:
- With pink yarn, create a slip knot and chain 2.
- In the second chain, make a puff stitch:
- Yarn over, insert your hook into the stitch, yarn over again, and pull up a loop (3 loops on hook).
- Repeat this process twice more, until you have 7 loops on the hook.
- Yarn over and pull through all loops to form the puff.
- Chain 1 to secure the puff.
- Create 8 Chains for Petals:
- After the bud, chain 8 stitches.
- Slip stitch into the 5th chain to form a small loop.
- Crochet Four Petals:
- In the loop, work:
- Double Crochet, 3 Chains, Slip Stitch (for Petal Tip).
- Repeat this process 4 times to create 4 petals.
- In the loop, work:
- Connecting to the Bow:
- After completing each cluster, leave a long tail for attaching.
- Secure these clusters along the bottom of the bow, placing one at the center and one on either side.


4. Attaching to the Clip
Choose a clip base (metal or elastic) and attach the bow.
Steps:
- Wrap Yarn Around Center of Bow:
- Tie the bow gently in the middle using white yarn. This creates the "waist" of the bow, giving structure.
- Use the same white yarn to secure the bow to the hair clip base.
- Secure the Knots:
- Wrap the yarn several times to cover gaps. Knot the ends and weave the tails securely into the bow.
- Final Adjustments:
- Ensure the clip is centered.
- Use silicone glue for added stability if needed.

Special Techniques
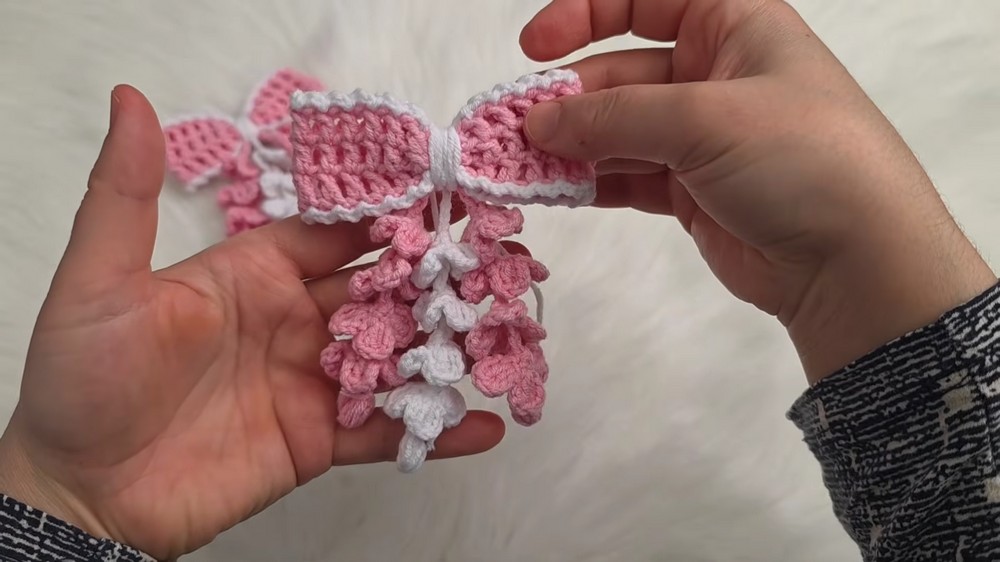
- Puff Stitch: Adds texture to the decorative cluster.
- Layering Leaves: Placing each leaf at different angles creates a 3D effect.
- Integration: Attaching elements securely enhances durability.

Customization Ideas
- Colors: Experiment with bold or pastel shades to match outfits.
- Additional Details: Add beads, pearls, or glitter to the center of the bow or petals.
- Size Variations: Adjust the foundation chain to make larger or smaller bows.
Conclusion
This Crochet Hair Clip with a Bow and Leaves is an elegant, versatile accessory perfect for kids or special occasions. Its combination of structure (bow) and creativity (clusters and leaves) makes it an appealing project for beginners and intermediate crocheters alike.

The clip exudes charm with its rich textures, vibrant colors, and handmade love. You can expand your creativity by adding layers, modifying sizes, or experimenting with fun embellishments. Whether it's a gift for a loved one or a personal accessory, this project is sure to impress.