
Crochet Cat Paw Gloves Pattern for Snowy Adventures
Bring a playful touch to cold weather with crochet cat paw gloves, featuring soft paw pads and a snug design that's perfect for fun loving hands.
Winter mornings have a special kind of chill, the kind that makes you reach for warm gloves and cozy layers. Instead of plain gloves, why not try something fun and unique this season? That's where Crochet Cat Paw Gloves come in-a whimsical way to keep your hands warm while adding a little charm to your outfit. These gloves are shaped like cute cat paws, with heart shaped accents on the fingertips and soft circles on the palms. They have a snug fit that feels comfortable and warm but still allows for flexibility. Light colors make the paw details pop, while darker shades give them a softer, cozy look.
Cozy Crochet Cat Paw Gloves to Bring Fun

Making them is simple and beginner friendly. The base of the glove is made in rounds to create the paw shape, while the pads and fingertips are added separately using basic circular stitches. For this project, soft yarn with a mix of cotton and acrylic works best. It's durable, comfy, and stretches nicely, making it ideal for colder days.
These cat paw gloves are great as thoughtful gifts for animal lovers or as a fun project to brighten up dull winter outfits. You can personalize them with stripes, polka dots, or even sparkly yarn to make them one of a kind. Whether for yourself or someone special, they're sure to bring an extra touch of fun to the season.

Crochet Cat Paw Gloves Pattern
Finished Size
The completed gloves are designed to fit an average adult hand. Adjustments are simple: you can increase or decrease the number of stitches in relevant sections to create smaller or larger sizes.
Materials Required
- Yarn:
- Main Yarn: A soft cotton or cotton blend yarn such as Nako Sport or Alize Cotton Gold.
- Paw and Heart Accents: Contrast-colored yarn of similar thickness, for example, Nako Diamond.
- Hook: Size 2 mm crochet hook (adjust based on your gauge).
- Gauge:
- 15 stitches and 20 rows = 4 inches in single crochet with suggested yarn and hook size.
- Other Supplies: Silicone glue (optional), scissors, tapestry needle (for weaving ends), measuring tape.
Tips and Customization Ideas
- Yarn Substitutions: Cotton yarn is soft and breathable, making it ideal for comfort. For colder climates, you may opt for wool or acrylic blends to add warmth.
- Color Choices: Experiment with colors for the main body, paws, and hearts to create personalized gloves suited to every style.
- Sizing Adjustments: Increase or decrease foundation chains and follow proportional adjustments for fingers to tailor the glove to your exact hand size.
- Added Embellishments: Consider adding beads or embroidery to highlight the hearts or make paws more playful.
Detailed Pattern Instructions
Step 1: Create the Base (Palm Section of the Glove)
- Foundation Chain: Using the main yarn, chain 15 stitches loosely. This will form the base structure of your glove.
- Row 1:
- Work single crochet (SC) stitches into the back loops of each chain to the end of the row (14 SC total).
- Once you reach the end, make 3 additional SC in the same stitch to turn the corner neatly.
- Row 2:
- Continue crocheting along the opposite side of the foundation chain, working 13 SC evenly.
- At the last chain, make 3 SC stitches again to turn the corner.
- Single crochet down the edges where possible.
- Subsequent Rows:
- Repeat the pattern of working 13 SC stitches across the flat length while adding 3 SC to increase at each corner of the glove.
- Ensure each row starts with a chain turn to provide uniformity and structure to your design.


Step 2: Crocheting the Fingers
- Thumb Section:
- Begin thumb construction by making 6 SC into a magic ring. Tighten the ring to form the base.
- Work several more rounds of SC increases as needed to widen the thumb area comfortably.
- Test fit the sizing as you go, ensuring ease of movement.
- Fingers:
- Follow the same approach for the remaining fingers. Create individual finger sections using combinations of SC and double crochet (DC) stitches.
- Skip 1-2 stitches between finger rows to create clean separations while maintaining adequate width.
- Joining Fingers:
- After completing all individual finger sections, align the edges and join sections using single crochet stitches.
- Maintain loose stitches to ensure flexibility in movement.
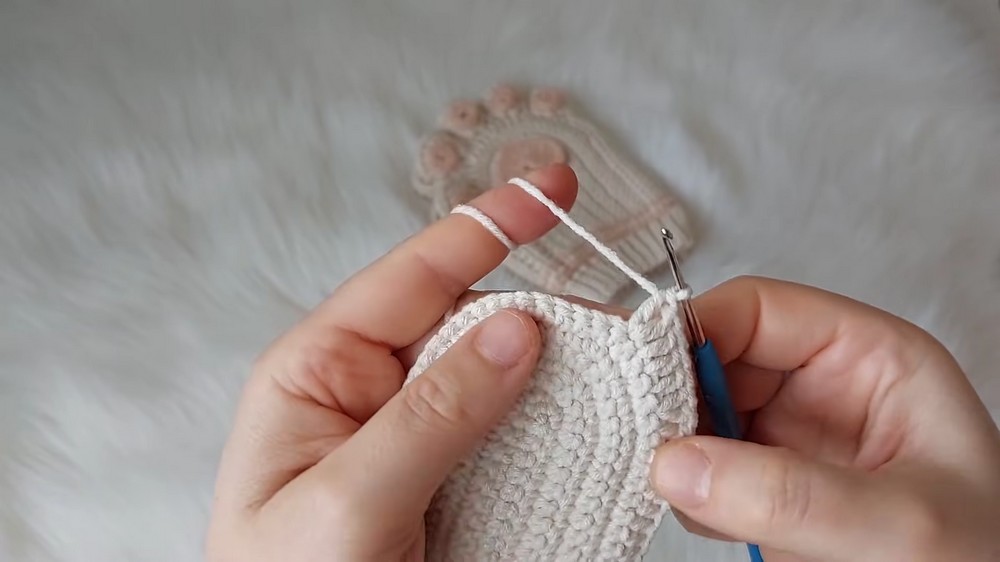


Step 3: Adding the Elastic Cuff
- Foundation Row:
- Once the glove's body is complete, crochet 50 single crochets evenly in the round around the base of the glove for the cuff area.
- Ensure stitches do not overlap to create a smooth and clean edge.
- Elastic Rows:
- Start the elastic portion by working 6 slip stitches (SL ST) per row. If desired, increase the chain length (e.g., chain 7 or chain 8) for a longer cuff area.
- To maintain a neat finish, keep stitches loose while working back and forth across rows.
- Repeat Rows: Continue repeating rows of slip stitches, creating visible ribbing on the cuff. Adjust the length of rows as needed for personal preferences.

Step 4: Creating Paw Circles
- Small Paw Circles:
- Use the contrast colored yarn to make 5 paw circles for accents.
- Begin with a magic ring, then crochet 10 single crochets inside. Tighten the ring gently, and join the round with a slip stitch.
- Heart for Palms:
- Begin the heart accent with a magic ring.
- Crochet three chains, then work three DC stitches, three triple crochet stitches, and one more DC stitch into the ring.
- Repeat on the opposite side of the heart base for symmetry. Use silicone glue or stitch the hearts and paws securely into place on the glove.
Special Techniques
Magic Ring for Circles and Hearts
To begin a crochet piece with a tightly closed center:
- Wrap yarn around fingers twice.
- Insert hook into the loop, pull up a loop, and chain to secure.
- Work desired stitches into the ring, and pull the tail of the yarn tightly to close.
Slip Stitches for Elastic Cuff
Slip stitches are worked by inserting the hook into a stitch, pulling up a loop, and immediately pulling it through the loop on the hook. These stitches create a subtle ribbed effect and offer stretch to the cuff.
Joining Fingers
Pinch glove finger edges together and use single crochet stitches across seams to unify them. Check stitching between joins to avoid gaps.
Finishing Touches
Final Assembly
- Heart and Paw Attachment:
- Use silicone glue or sew the paw circles and heart accents where desired. Common placements include the fingertips and palm area.
- Weaving Ends:
- Use a tapestry needle to weave in all loose ends on the inside of the glove.

Important Remarks
- Comfort Tips: Ensure stitches are relaxed to provide flexibility in the finished piece. Tight stitches can cause the glove to shrink or fit too snugly.
- Gauge Adjustment: Check your gauge early in the process to ensure the gloves fit as expected.
- Creative Customizations: Consider experimenting with different colors for stripes, embroidery, or beadwork to make each glove unique.

Conclusion
Congratulations, You've completed your sweet paw glove with adorable heart and paw accents. This versatile design not only keeps you warm but adds a playful and trendy element to your accessory collection. Be sure to experiment with colors, yarn types, and embellishments to make your gloves one of a kind.
By following this detailed pattern, you'll have a cozy and charming glove that's perfect for personal use or as a thoughtful handmade gift for loved ones. Make more pairs and surprise your friends and family with stylish, functional creations that showcase your crochet skills.