
Crochet Flower Headband Free Pattern to Brighten Your Look
Create a stunning crochet flower headband pattern to match any style and occasion while adding charm and creativity to your accessories collection.
Struggling to find the perfect accessory that's stylish, versatile, and easy to customize? A crochet flower headband pattern might be just what you need. This simple yet elegant project allows you to create headbands that perfectly match your personal style or the theme of any special occasion, all while solving the common problem of impersonal, mass-produced accessories. Whether it's finishing off an outfit, keeping your hair in place, or creating a thoughtful handmade gift, this crochet project checks all the boxes.
Crochet Flower Headband That Enhance Your Everyday Style

The beauty of this pattern lies in its flexibility, you can choose yarn colors to suit your wardrobe, add as many flowers as you like, and even adjust the size to fit anyone from babies to adults. It's also a great way to use up scrap yarn, making it an eco-conscious and resourceful choice.
For those new to crochet, it's a fantastic practice in creating small motifs like flowers, while seasoned crafters can enjoy experimenting with intricate designs or unique textures. A crochet flower headband isn't just a beautiful solution for accessorizing-it's a creative outlet that turns a simple idea into a practical and stylish addition to your collection.

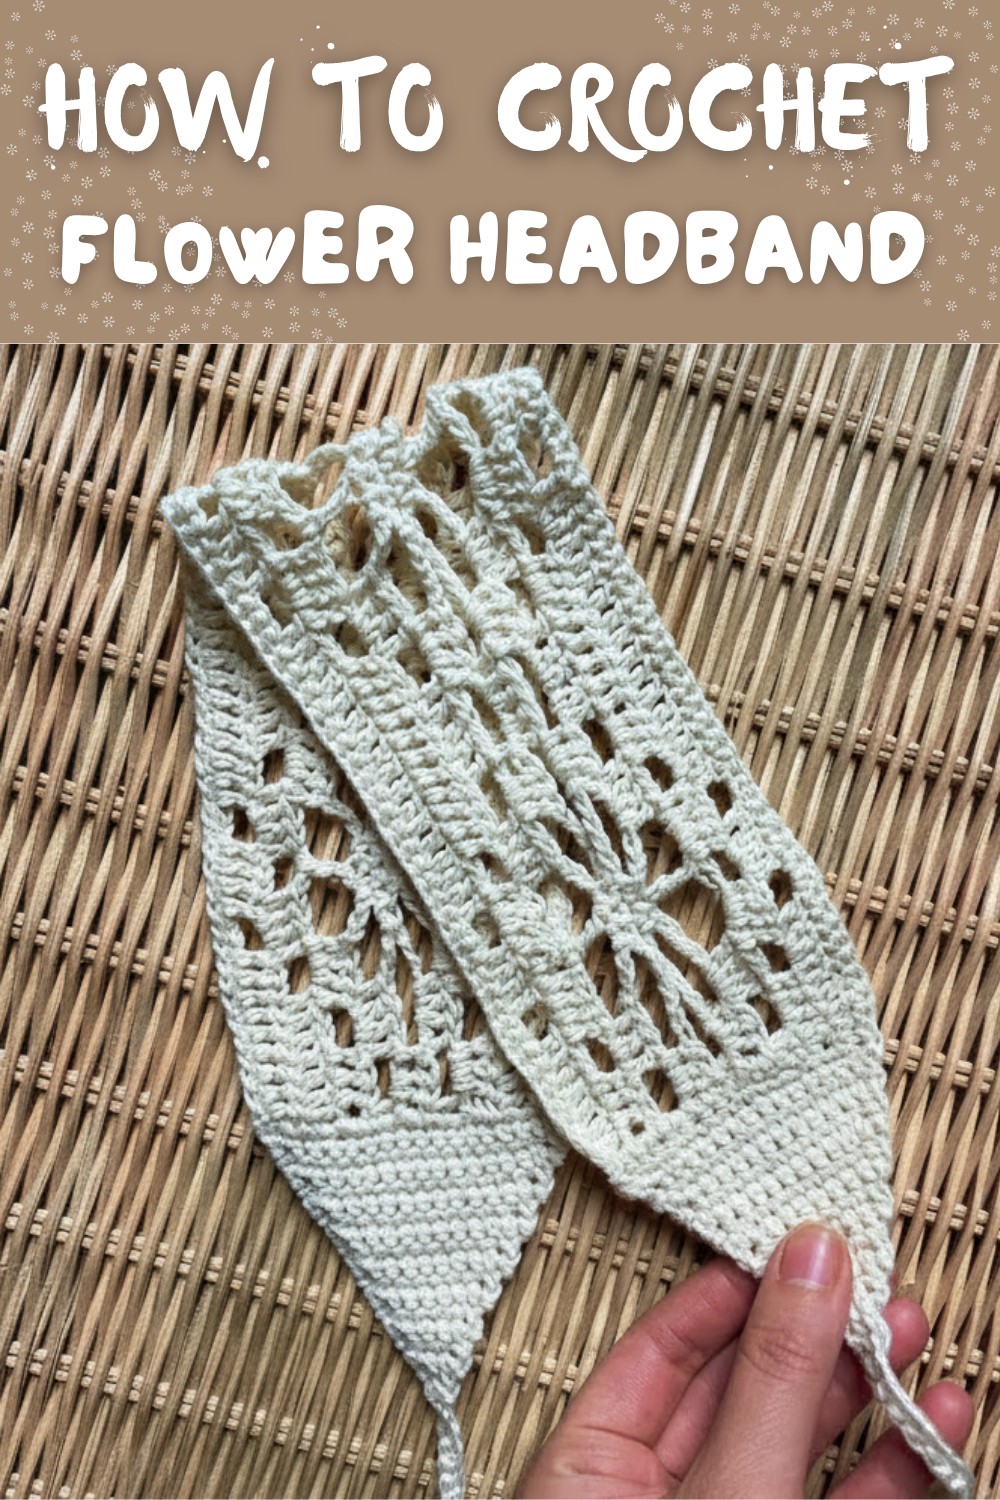
Floral Lace Headband - Crochet Pattern
Skill Level
Intermediate:
The project involves chaining, single crochet, double crochet, treble crochet, decreasing techniques, working into chain spaces, and creating clean edges. While not overly complex, it requires attention to detail with stitch placement and consistent counting.
Finished Dimensions
- Width of headband body: ~5 cm (2 in).
- Length: Adjustable to fit your head circumference plus two ties (customizable). Measuring as you work ensures a perfect fit.
Gauge
For 4-ply cotton yarn with a 3 mm crochet hook:
- 4 sc x 4 rows = 1 inch.
This is a decorative accessory, so gauge is not critical. However, check your stitch size to ensure proportional flowers and overall fit.
Materials
- Yarn:
- 4-ply (light worsted/DK-weight) yarn.
- Approximately 25 g of main color (e.g., white).
- Cotton yarn is recommended for durability, but acrylic or blends also work well.
- Hook:
- 3 mm crochet hook (adjust size for yarn weight or personal tension).
- Tools:
- Scissors: To cut yarn.
- Darning needle: To weave in ends.
- Measuring tape: Ensures precise sizing.
- Optional: Stitch markers or safety pins (useful for keeping track of flower sections when working across rows).
Key Abbreviations (US Terminology)
- ch - Chain
- sc - Single Crochet
- dc - Double Crochet
- tr - Treble Crochet
- sc2tog - Single Crochet Two Together (decrease): Insert hook in next st, yo, pull up a loop, insert in next st, yo, pull up a loop, yo, pull through all loops.
- sp - Space
- yo - Yarn Over
Pattern
Overview of Construction
- Begin with a foundation chain to set the width of the headband (adjustable).
- Work the headband body using floral design motifs created from chains and a blend of sc, dc, and tr stitches.
- Taper the ends of the headband on both sides into ties using rows of sc and decreasing.
Each flower consists of 25 stitches, so the foundation chain is a multiple of 25 + 1 for the turning chain. Taper off at the ends for the ties.
1. Foundation Chain
With your main color (Color A):
- Make a slip knot, leaving a short tail (~4 in) for weaving later.
- Ch 76, where:
- 75 ch = 3 flowers (25 stitches each).
- 1 ch = turning chain.
- Use a stitch marker to mark every 25th ch to help keep track of flower sections.

2. First Row (Single Crochet Base Row)
- Turn your work, starting in the back bump of the 2nd chain from the hook (for a neater edge).
- Sc in each ch across.
- Total: 75 sc.
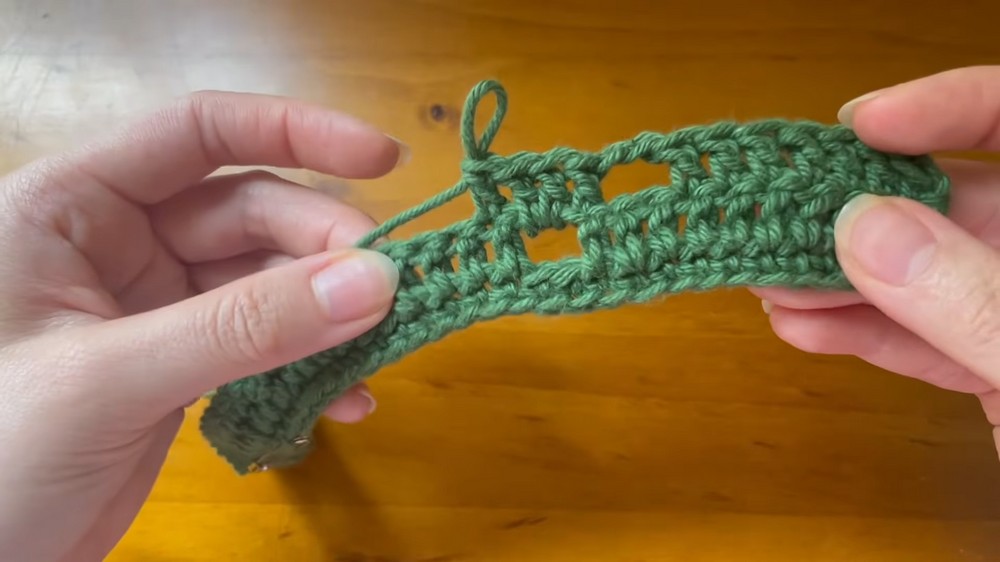
This forms the base of your headband and establishes the stitch count for the flowers. Any curling at this stage is normal and will resolve during the finishing process.
3. Floral Lace Pattern
The floral texture is achieved by combining dc, tr, chain spaces, and sc. Follow these instructions for the rows in the headband body:
Foundation for Flowers (Row 2)
With Color A:
- Start Row 2 with a double crochet:
- Option 1: Ch 2, counts as the first dc.
- Option 2: Start directly with a proper dc for a cleaner transition.
- Ch 2, skip 2 st, and dc in the 3rd st.
- Continue this pattern:
- (Ch 2, skip 2, dc) across the row.
- Total: 15 dc with chain spaces between, ending with a dc in the last sc.
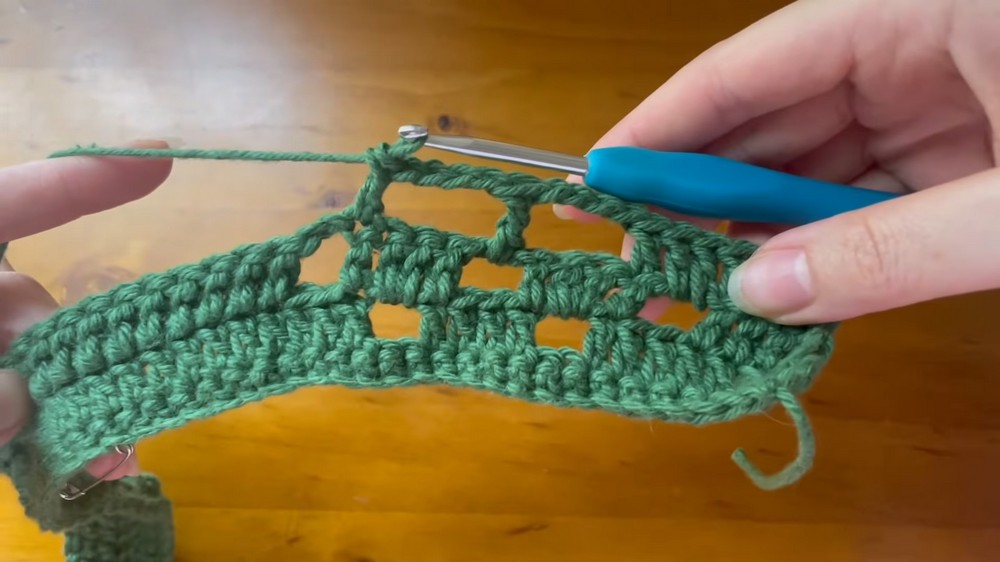
Rows 3-8 (Floral Motif Development)
You'll now layer treble crochet, chain spaces, and single crochet to create the flowers. Work carefully and count stitches in each row to maintain symmetry.
- Row 3: Attach tr stitches into chain spaces. Start with ch 4, then for each chain space:
- Tr into the middle of the ch sp.
- Leave sc stitches as they are and move to the next flower.
- Add sc in the specified rows (as shown in the transcription) to form centers of the flowers.
- Remaining Rows:
- Work sc into stitches as instructed, especially to highlight flower centers.
- For dc and tr, ensure you place them into chain spaces or desired stitches as required, building the floral fabric.


Continue following the logic of the floral lace pattern until it spans the entire body length of the headband.
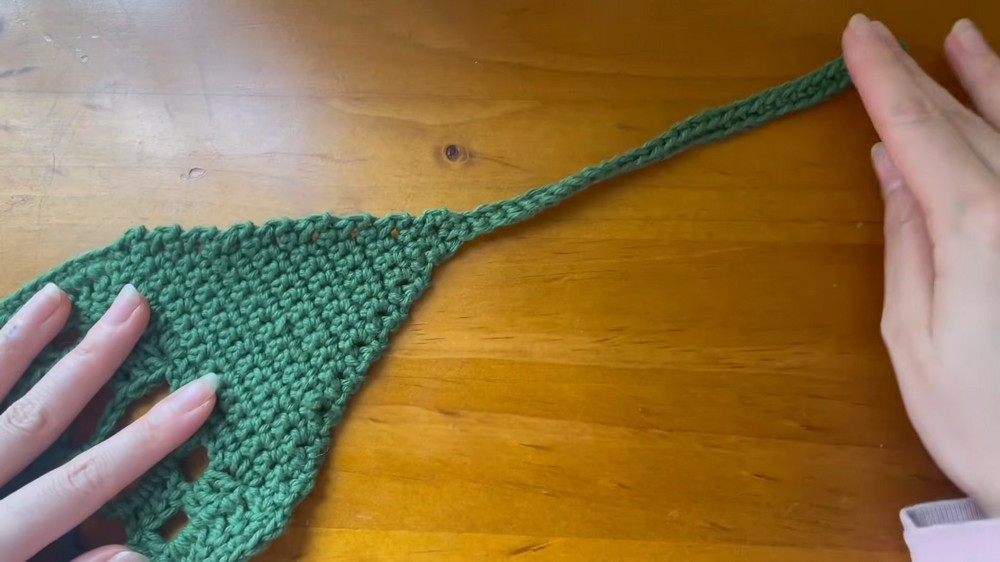
3. First Tie
After completing the final row of your flowers:
- Work along the left edge of the headband body (the side of your rows):
- Ch 1, then turn.
- 2 sc in the side of every dc: The edge consists of vertical dc stitches; insert your hook into the side of each dc and work 2 sc into each slot.
- At the end of the row, you should have 18 sc.
- Begin tapering (decreasing):
- For each row:
- At the start and end of the row, sc2tog (as described in Abbreviations).
- Work evenly in the middle sts.
- For each row:
- Continue decreasing rows until 2 sts remain.
- Form the tie:
- From the last row (2 sc), chain 30 for the tie.
- Turn and work sc into back bumps of the ch, back to the headband edge.
4. Second Tie
- Rejoin yarn with a sl st at the first sc of the other side of the headband body.
- Work the same process as the first tie:
- Add 18 sc along the edge (2 sc per dc side).
- Decrease to 2 sc, then form the tie with a 30 ch foundation, sc back into back bumps.
Finishing
- Weave in All Ends:
- Use a darning needle to secure ends into the work.
- For a durable finish, weave in at least 3 directions for each tail.
- Trim any excess yarn.
- Blocking:
- Gently block your headband by soaking it in lukewarm, soapy water.
- Lie flat to dry.
- This softens the fabric, evens out tension, corrects edge curling, and sharpens the flower design.
Tips
- Counting Is Key: Use stitch markers to ensure alignment, especially when placing chain spaces and flower centers.
- Experiment with Colors: For a more vibrant contrast, use two colors for your flowers and body.
- Custom Tie Length: Adjust the length of the ties (ch 30) to suit your needs.
Customization Ideas
- Different Yarn Weights: Use lighter lace-weight yarn for a more delicate appearance or heavier yarn for a textured winter accessory.
- Alternate Flower Styling: Apply beads to the flower centers by threading over your yarn while crocheting the sc in rows that form the centers.
- Scarf Extension: Extend the floral fabric length and eliminate ties to create a beautiful lacy scarf.
- Necklace Variation: Create a mini version of the floral lace to use as an elegant necklace or choker.
Conclusion
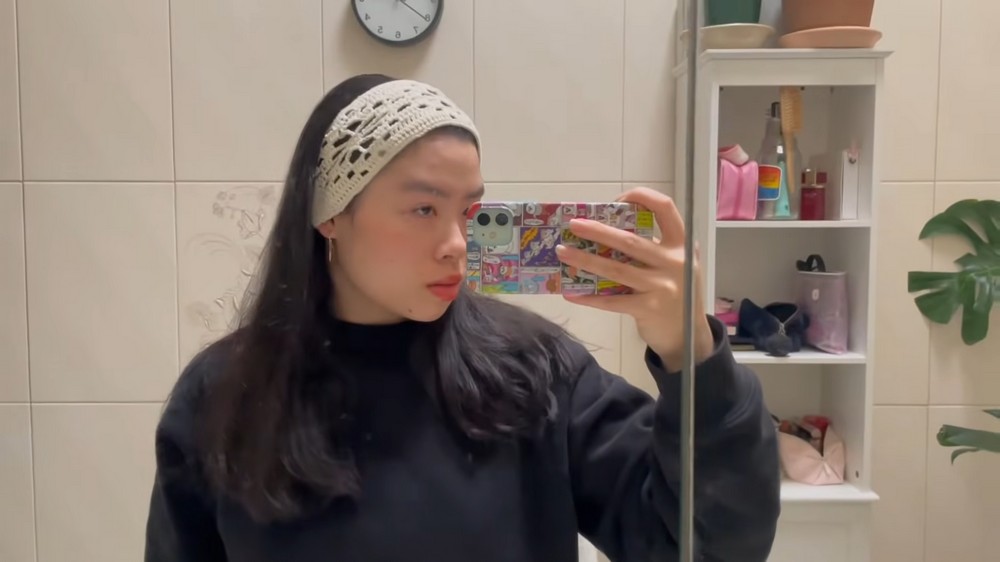
The Floral Lace Headband is a versatile and artistic crochet project. With its delicate floral motifs and cascading ties, this headband showcases your skill and creativity. By customizing the materials, colors, and even the stitch placement, you can create a variety of unique designs to match your personal style or make heartfelt handmade gifts.