
Crochet Granny Triangle Bandana Free Pattern Perfect for Any Season
Create a stylish statement with the Crochet Granny Triangle Bandana Pattern, blending classic charm and modern flair into a versatile handmade accessory.
Timeless charm meets modern style in this delightful crochet project that's both functional and fashionable. The Crochet Granny Triangle Bandana Pattern combines classic granny stitch techniques with a sleek triangular design, making it the perfect accessory for casual outings or boho-themed looks. Its versatility is unmatched-you can wear it as a headwrap, neck scarf, or even a cute accent piece tied to your bag.
Crochet Granny Triangle Bandana Pattern for Handmade Accessories

This pattern is beginner-friendly yet visually striking, offering a great opportunity for crocheters to explore creative color combinations or use up leftover yarn from previous projects. Lightweight and customizable, it's ideal for any season, whether you opt for airy cotton for summer or cozy wool for chilly days. Not only does it make a thoughtful handmade gift, but it also adds personality to your wardrobe with a touch of handmade charm. The small size and simple construction make it a quick and satisfying project for all skill levels.

Triangle Scarf Pattern
Materials
- Yarn: Cotton yarn - 100g/200m or 50g/100m per ball.
- Suitable types: Regular cotton, mercerized cotton, or silk cotton.
- Note: You can use a thinner yarn and hook to make a finer, lighter scarf, but you'll need to crochet more rows; thicker yarn is not recommended as it makes the scarf stiff.
- Crochet Hook: 2.5 mm (adjust as needed for yarn).
- Tapestry needle (for weaving in ends).
- Scissors.
Gauge
- Not strictly necessary for a scarf, but for reference:
- Sample swatch: Work in pattern for several rows; your arches/petals should be even and not too tight or too loose.
- Finished size: Typical scarf after 15 rows will be about 70-85 cm wide (bottom edge) and 30-38 cm deep at the center point. Size will vary with yarn, hook, and tension.
Finished Size
- As above, a medium scarf will fit most adults and teens as a spring/summer accessory, head scarf, or waist wrap.
- Customize: Add more rows for a larger scarf, fewer for a smaller one.

Key Stitches & Abbreviations (US Terminology)
| Abbreviation | Stitch |
|---|---|
| ch | Chain |
| sl st | Slip Stitch |
| sc | Single Crochet |
| tr | Treble Crochet |
| trtr | Triple (Double Treble) Crochet (2 yarn overs, aka "tripouble") |
| "arch" | Chain space from previous row |
Special Techniques:
- Triple Crochet (trtr):
- Yarn over twice, insert hook into stitch/space, yarn over and pull up loop (4 loops on hook).
- Yarn over, pull through 2 loops (3 loops remain).
- Yarn over, pull through 2 loops (2 loops remain).
- Yarn over, pull through last 2 loops (1 loop remains).
- Slip Knot and Ear Loops: See video's method or use a standard slip knot to start.
Pattern Instructions
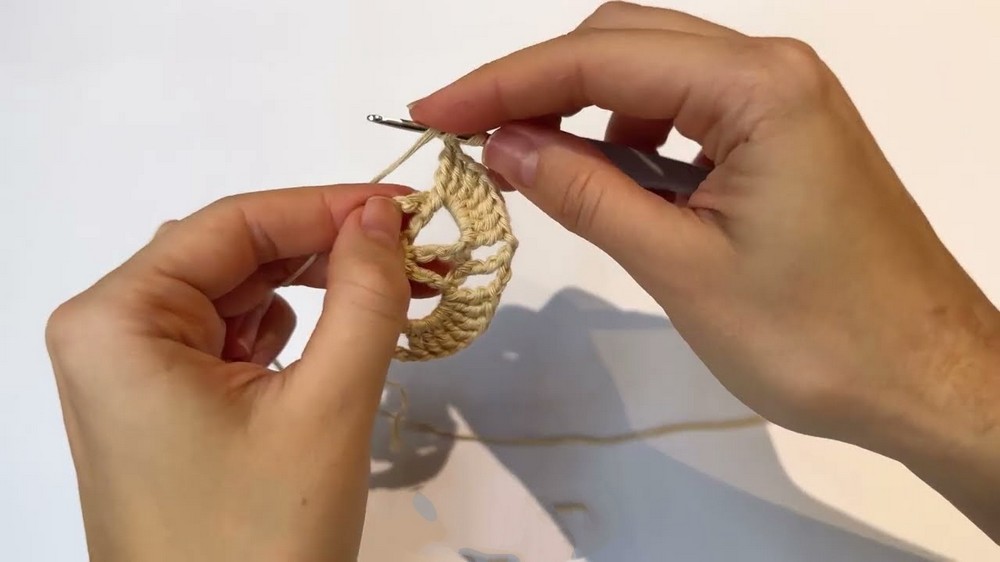
Row 1: Foundation
- Make a slip knot on your hook using the "ear loop" method described or your preferred technique.
- Ch 6 (air loops).
- Work all stitches into the first chain (ear loop):
- [trtr, ch 4] three times. (i.e. Work one trtr, ch 4, then another trtr, ch 2, another trtr, ch 4, another trtr, ch 2, etc.)
- In total you will have 5 trtr, separated by ch-4, ch-2, ch-4, ch-2 between them.
- The pattern should create a triangle by the end of row.
Row 2: Petal Row
- Turn your work.
- Ch 6.
- Skip first space," work 7 trtr into 2nd chain space (arch) of Row 1.
- This creates your first large petal.
- Ch 2.
- Work 1 trtr into the 3rd chain space ("center") of the previous row.
- Ch 2.
- Work 7 trtr into 4th chain space of Row 1 (second petal).
- Ch 2.
- Work 1 trtr into the 4th chain from the beginning of previous row (final edge trtr).

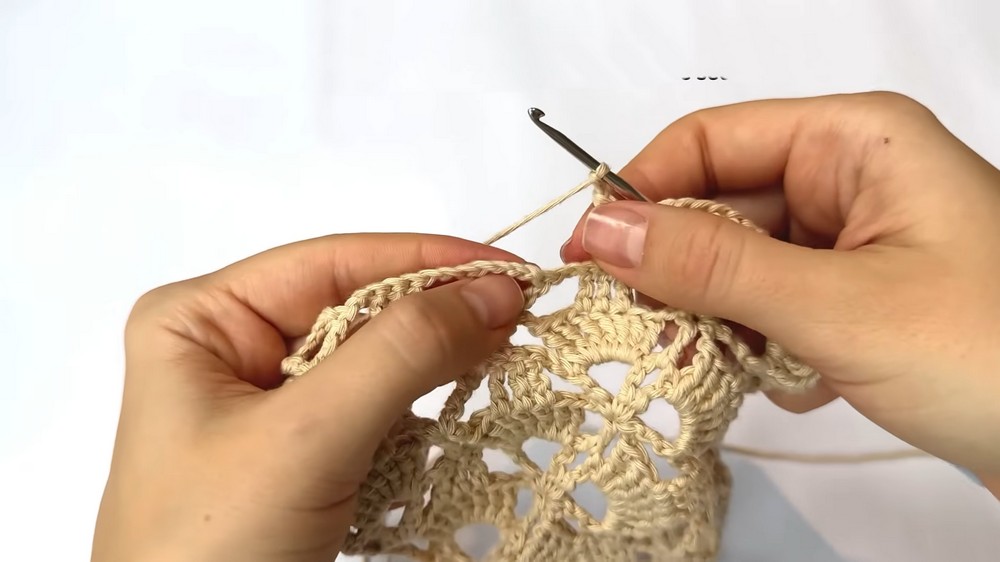
Row 3: Arch Row
- Turn your work.
- Ch 6.
- In first arch, work [trtr, ch 4, trtr].
- Ch 2.
- Work 3 trtr into the tops of the 3rd, 4th, and 5th trtr of the previous row.
- This creates "columns."
- Ch 2.
- Work [trtr, ch 4, trtr] into next arch.
- Repeat similar sequence for rest of row; at the end, ch 2, trtr into the fourth loop from the start of previous row.
Rows 4-15: Continue Alternating Petal and Arch Rows
- Even-numbered rows (petal rows): Begin with ch 6, work petals (7 trtr into chain space), connected by ch 2 and single trtr in center, mirrored on both sides.
- Odd-numbered rows (arch rows): Begin with ch 6, work [trtr, ch 4, trtr] into first arch, ch 2 between, then three trtr into tops of previous row's center petals, ch 2, [trtr, ch 4, trtr] into next arch, etc.
Increase: Each row, the number of petals/sectors increases naturally. End with an arch row (odd-numbered), not petal row.
Edging: Short Sides
- Turn the scarf so you're working along the short edge.
- Begin at the right.
- Work sl st into the first arch (no yarn over).
- In second arch, work 9 trtr (petal).
- Attach petal to middle stitch of previous row with sl st.
- Repeat: [9 trtr into next arch, sl st into top of middle stitch of previous row] across edge.
- If stitches crowd, gently stretch and space evenly.
Edging: Top of Triangle (Wide Edge)
- Work into each arch as follows:
- Under first arch: 7 trtr.
- Sl st into top loop of lower stitch.
- Next arch: 5 trtr.
- Sl st into top loop.
- Next arch: 7 trtr.
- Sl st into top loop of second stitch from previous row.
- Continue sequence; finish with sl st at edge.
Edging: Bottom Edge (Longest Edge)
- Work 4 sc in each arch across the row.
- This creates a neat, stretchy border.

Ties (Optional, for Head Scarf or wrap)
- Attach yarn at the side of the scarf.
- Ch 100 (adjust length for your use).
- Turn and sl st in each ch back to the scarf.
- Attach tie securely with several sl sts.
- Repeat for second tie on the opposite edge.
Special Techniques
- Tripouble Crochet (trtr):
- Yarn over twice (for a triple/"double treble") before insertion, not once (as for a regular treble or double crochet).
- Slip Stitch Edging: Insert hook, yarn over, pull through both loops. No yarn over before insertion.
- Petals: Work all 7 trtr or 9 trtr into the same chain space or arch.
- Chain Arch: Means the gap formed by previous row's "ch 2" or "ch 4."
Customization & Tips
- Length & Size: Add or subtract rows for your preferred depth or width.
- Yarn: Experiment with color, striping, or gradient for unique looks.
- Blocking: Lightly steam or wet-block your finished scarf for gentle drape.
- Finishing: Weave in yarn tails with a tapestry needle for a neat look.
- Edge Variation: Edging petals can be made larger or smaller by adjusting the number of trtr.
Conclusion & Final Remarks
- Your finished scarf should have a beautiful triangular shape with decorative petals and arches, a sturdy border, and ties for versatile styling.
- This scarf is beginner-friendly, quick to make, and ideal for warm seasons or for gifting.
- Take time to space your stitches evenly, and enjoy the meditative rhythm of the pattern.
- Customization is easy - try different colors or yarn types for varied results.
- Share your finished pieces on social media and inspire others!