
Crochet Mesh Halter Top Pattern – Stylish and Free
Enjoy making this stylish and breathable crochet mesh halter top that's light, comfy, and perfect for relaxed summer days and casual outfits.
Not all summer tops keep you cool and stylish at the same time, but this crochet mesh halter top changes everything. With its breezy, open mesh design, it's made to beat the heat while helping you stand out in the crowd. Imagine having a top that's both lightweight and trendy, perfect for sunny days at the beach or fun get-togethers with friends. Its unique tie-back design lets you adjust it for the perfect fit, so you'll feel comfortable and confident wherever you wear it. Free Mesh Halter Top Crochet Pattern with Easy Instructions
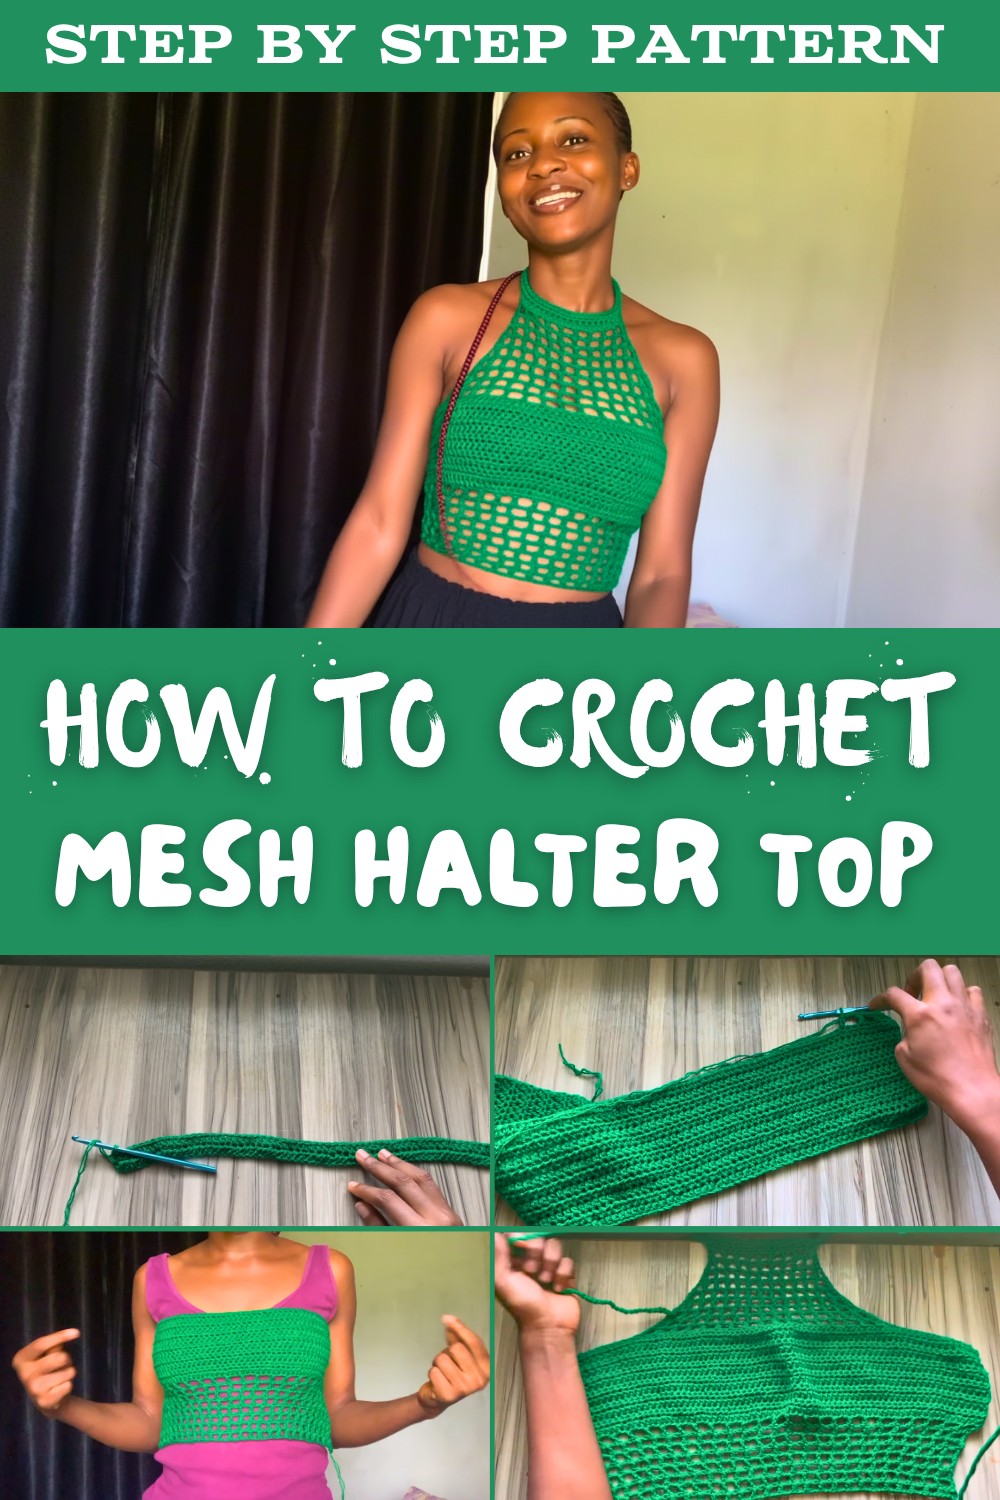
The simplicity of the pattern makes it easy to create, even if you don't have much experience, and the end result looks like it came straight out of a boutique. You can choose any color and make it your own, bringing your creativity to life. This is more than just a top-it's a versatile piece that pairs well with shorts, skirts, or even layered over a tank for a boho vibe. Whether you need something casual, cute, or effortlessly chic, this crochet mesh halter top not only delivers but leaves you excited to craft your next masterpiece.

Crochet Crisscross Back Top - Step-by-Step Guide
Materials Required
Yarn:
- 2 balls of yarn: Choose colors based on preference. For this tutorial, DK-weight yarn is used.
Crochet Hook:
- 5 mm crochet hook: Achieve a balance of good tension and proper drape.
Additional Supplies:
- Stitch markers: For marking key sections.
- Scissors: To cut yarn tails.
- Measuring tape: For sizing and ensuring a perfect fit.
- Button: To secure the neckline strap.
Finished Top Overview
- Bust Fit: Made to bust measurement with allowance for the crisscross back.
- Body Length: Adjustable based on preference, typically covering the bust or extending into a cropped design.
- Mesh Trim: Adds an elegant and breathable texture.
Special Techniques
- Half Double Crochet (HDC):
- Start with your yarn-over, insert hook into the stitch, pull up a loop, yarn-over and pull through all three loops on the hook.
- Double Crochet Decrease:
- Yarn-over, insert hook into first stitch, pull up a loop, yarn-over and pull through two loops. Yarn-over, insert hook into next stitch or chain space, pull up a loop, yarn-over, pull through two loops. Finally, yarn-over and pull through all remaining loops.
- Crisscross Back Lacing:
- Chains are threaded through the designated holes to create a decorative crisscross back detail.
Instructions
Part 1: Base Panel
Bust Measurement and Foundation Chain
- Measure around your bust loosely, leaving extra inches for the crisscross back. Example: If your bust is 36 inches, make chains to total 34 inches (2 inches left for crisscross).
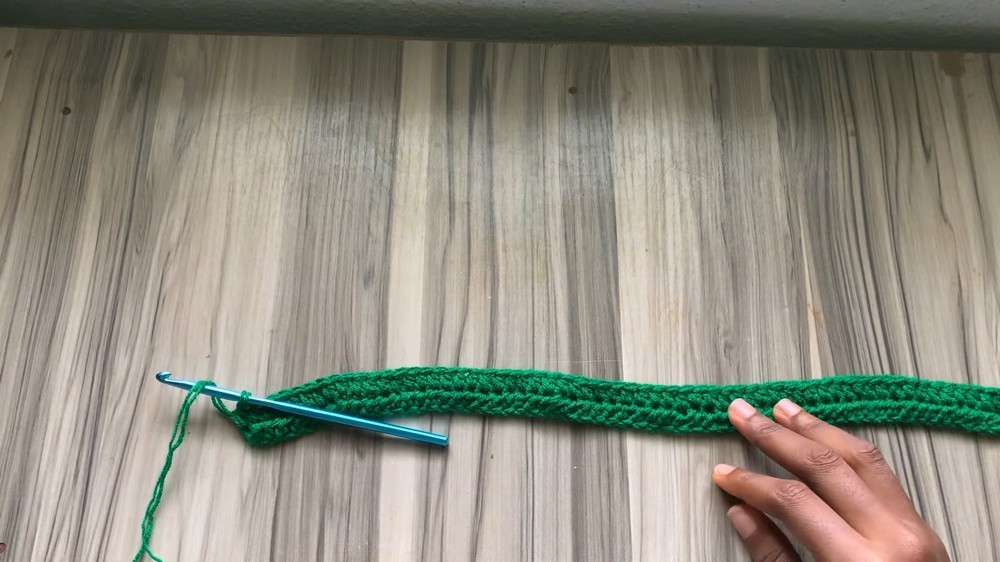
- Begin with a slip knot and chain 79 chains (or adjust according to your measurement).
Rows of HDC
- Row 1:
- Skip 1 chain (turning chain), yarn-over, insert hook into the next chain, and make HDC in every chain across.
- At the end of the row, chain 1 and turn your work.
- Row 2 (and beyond):
- For Rows 2-12, repeat the same HDC process, ensuring to make 1 HDC into the last stitch for consistency.
Note: You can add or reduce rows based on coverage desired.
Finished section: 12 rows of HDC for the base panel.
Part 2: Mesh Section
Row 1 (First Mesh Row):
- Start with a chain of 5.
- Skip 2 stitches, and insert a double crochet (DC) into the third stitch.
- Chain 2, skip the next two stitches, and insert DC into the next stitch.
- Repeat this pattern of Ch 2, skip 2 stitches, DC in the next stitch across the row.
- At the end, DC into the third chain of the turning chain.

Repeating Mesh Rows:
- Row 2:
- Chain 5, turn your work.
- Insert DC into the next DC of the previous row. Continue Ch 2, DC into every DC to the end.
- Repeat the mesh pattern for 8 rows (or as desired for length).

Part 3: Neck & Strap Area
Measurements:
- Lay the panel over your chest, using stitch markers to mark the starting and ending points of the neck strap area. Ensure the straps sit comfortably under your arms.
Decreasing Mesh Rows for Neckline:
- Attach yarn at one marked point and chain 3.
- Begin mesh stitches as usual but reduce rows by chaining 3 instead of 5 at the start of each row.
- Use double crochet decreases (as explained in techniques) for seamless shaping at the neckline.
- Work for 9 rows (or until you reach the desired strap shape).


Strap Edging & Button Loop:
- To form the button loop, make a chain of 15, slip stitch into the neckline starting point.
- Make single crochet stitches across the entire neckline, adding 15 more chains for the second neck strap.
Part 4: Crisscross Back Detail
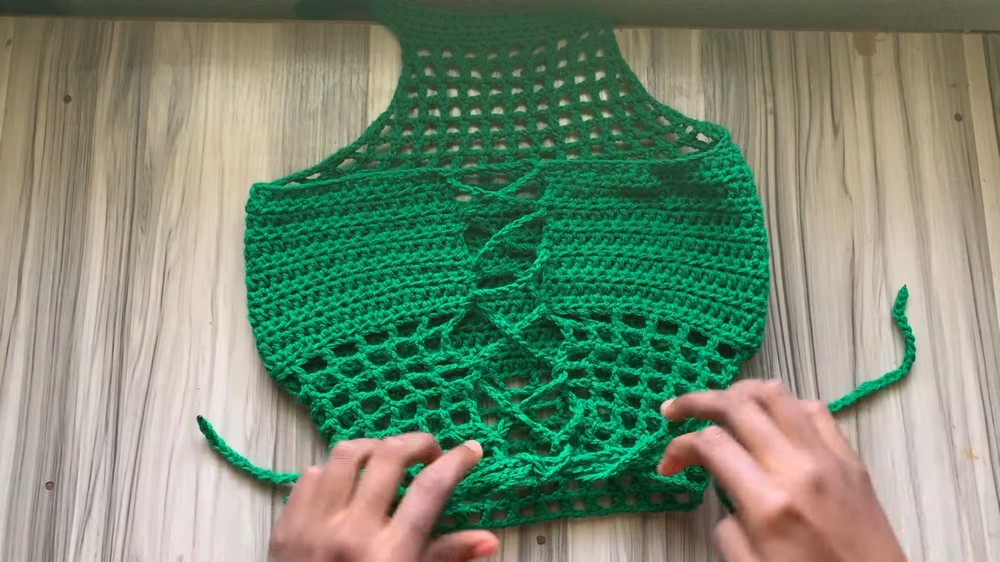
- Make 350 chains (or long enough for lacing and tying).
- Weave the chain through the mesh holes at the back, skipping 3 spaces for each loop. Adjust spacing for a neat crisscross effect.
Finishing Touches
- Weave Loose Ends: Use a darning needle to secure yarn tails.
- Blocking: Steam block the finished top for a polished look.
- Button Placement: Sew the button onto the strap opposite the button loop for adjustable closure.

Tips for Customization
- Length: Adjust row counts in the HDC base panel and mesh section for cropped or full-length tops.
- Fit: For loose-fitting tops, leave extra allowance in the bust measurement.
- Color Variations: Experiment with multicolor yarn or stripes for added flair.
Final Words
You have successfully created a stylish and versatile crisscross back top! Ideal for summer outings and casual wear, this top is both fashionable and functional.