
Free Crochet Placemats Pattern to Deck Up Your Dining Table
Add a pop of charm to your table with this easy crochet placemat pattern that's perfect for enhancing family meals and keeping surfaces protected.
Brighten your dining table with a stunning handmade table mat that is both useful and beautiful. This eye catching kitchen accessory features a flat surface with a graceful border resembling a high end boutique doily. It protects your wooden tables, breakfast desks, or even birthday party counters in the most stylish way. The rounded shape and neatly arranged circular rows make this table mat truly special. It is made with thick cotton yarn that gives it a polished and tidy appearance. All you need are regular skeins of yarn and a basic hook tool, making it a budget friendly project that's great for practicing smooth and steady loops.
Quick Free Crochet Placemats Pattern for Last-Minute Décor

This handmade table mat is a thoughtful gift for parents who love keeping their home neat and pretty. The soft, elegant borders and striking texture make your dining area look extra special when hosting guests or enjoying meals with loved ones. You can also use it during study sessions to brighten your desk or to catch crumbs while snacking. Its smooth finish feels gentle to touch, and the sturdy surface keeps dishes, cups, and bowls steady without tilting.
This durable mat adds a cheerful and cozy look to your family meals, making every moment feel warm and comfortable. Anyone can easily complete this project and enjoy the satisfaction of making something both practical and beautiful. Bring a touch of joy and usefulness to your home with this timeless table mat.
Crochet Placemats Pattern
Materials Required
- Yarn:
- Nakoplanta Yarn: Medium weight yarn is recommended for this design. It holds shape well and highlights intricate stitchwork.
- Alternatives: Cotton or macramé yarn. You can also use fine thread for a more delicate supla or bulky yarn for a statement piece.
- Hook:
- 3 mm crochet hook, ideal for medium weight yarn. Adjust the hook size for your chosen yarn to achieve the desired gauge and texture.
- Accessories:
- Scissors: For cutting yarn ends.
- Tapestry Needle: To weave in ends and secure any loose threads.
Gauge
Gauge isn't critical for this pattern since the size can be adjusted based on the number of rounds. However, when using Nakoplanta yarn and a 3 mm hook, the finished supla should measure approximately 32-33 cm in diameter after 12 rounds.
Finished Size
- Default pattern results in a 33 cm diameter doily with 12 rounds. For smaller or larger doilies, adjust the number of increase rows.
Customization Ideas
- Size:
- To make a smaller supla, stop at round 10 or 11.
- To make a larger supla, continue repeating the increase stitches for further rounds. You can also use thicker yarn for a bigger piece or finer thread for a delicate look.
- Color Combinations:
- Use multiple colors for each section to create a striking visual contrast. Gradient or ombré yarn enhances the windmill effect.
- Edging:
- You can customize the decorative edging with picots or a lace border for added elegance.

Pattern Instructions
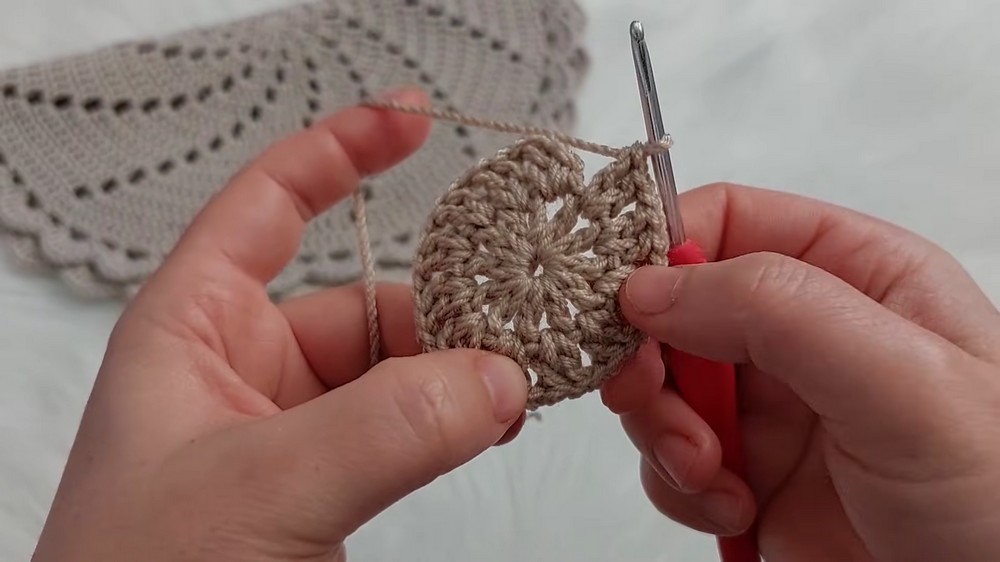
Part 1: Central Circle
- Magic Circle:
- Start by creating a magic circle. Wrap the yarn around your fingers to form a loop and pull a working loop through the circle. Secure with a slip stitch.
- Round 1: Create Base Boxes:
- Chain 3 (counts as the first double crochet). Work 1 double crochet (dc) into the magic circle.
- Chain 2, then work another dc. Repeat this pattern (1 dc, chain 2) 12 times, forming 12 sections or boxes.
- Close the round with a slip stitch into the top of the initial chain 3.
Part 2: Establishing the Windmill Framework
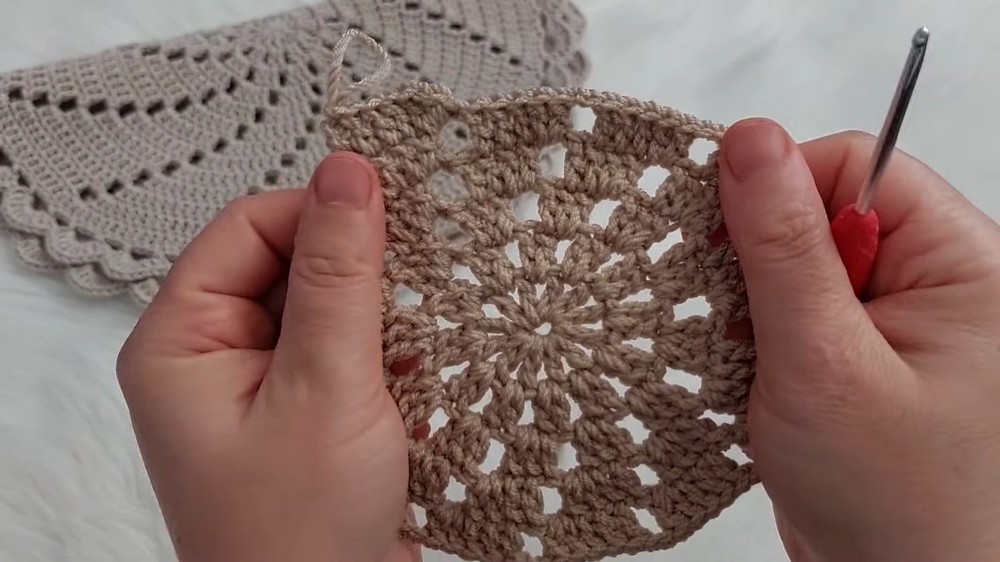
- Round 2: Begin the Expansion:
- Chain 1, work 1 single crochet into the same stitch, chain 1 again, and work 2 double crochets into the same chain 2 space.
- In every chain 2 space around, work: 2 dc, chain 1.
- Repeat the sequence (2 dc, chain 1) around the circle to create 12 groups of double crochets.
- Expand Over Rows:
- Each subsequent round adds more stitches to the boxes:
- Round 3: Work 3 dc in each box space.
- Round 4: Work 4 dc in each box space.
- Round 5: Work 5 dc in each box.
- Each subsequent round adds more stitches to the boxes:

Part 3: Building Up Rows with Increases
- Rounds 6-12: Increasing the Double Crochets
- For each new round, add an additional 1 dc per box, ensuring gradual expansion. Example:
- Round 6: 6 dc per box.
- Round 7: 7 dc per box.
- Continue this progression up through Round 12, so that by the final round, each section contains 12 double crochets.
- For each new round, add an additional 1 dc per box, ensuring gradual expansion. Example:
- Spacing Between Groups:
- Between each box, work chain 2, keeping the doily's shape balanced.
- Joining Rounds:
- After completing each round, close it with a slip stitch into the top of the starting chain-3 for a seamless transition.

Part 4: Decorative Edging (First Layer)
- Round 13: Prepare Chain Loops for Edging
- To form the base of the decorative edge:
- Chain 5, skipping the first 2 stitches of each section. Secure with a single crochet in the third stitch.
- Repeat this process (chain 5, skip 2, secure) around the circle. At the end of the round, you'll have evenly spaced chain loops around the supla's edge.
- To form the base of the decorative edge:
- First Layer of Edging - Scallop Design
- Into each chain space created in Round 13, work:
- 8 double crochets, creating a scalloped effect in each loop.
- Secure each scallop with a single crochet in the next chain loop.
- Into each chain space created in Round 13, work:

Part 5: Second Edging Layer (Optional)
- Round 14: Add Dimensional Loops
- Chain 6, secure in the scallop center of the first edge layer (between clusters of 8 dc).
- Repeat this process to create a loop connecting the scalloped edges all around.
- Final Round - Decorative Points (Optional):
- Into each loop created in Round 14, work 9 double crochets, creating a highly decorative second scalloped edge.
- Secure each scallop with a single crochet in the adjacent loop.
- Connection:
- Once all rows of loops and scallops are complete, close the doily with a slip stitch, ensuring the final edge aligns seamlessly.


Special Techniques
- Magic Circle:
- A helpful technique for ensuring a tight and polished center without gaps. Pull the tail end snugly to secure the first row.
- Consistent Increases:
- Ensuring a flat, circular shape depends on even increases. Monitor stitches at regular intervals to avoid rippling or curling.
- Decorative Layers:
- Layering crochet designs adds texture and elegance, especially for table centerpieces.
Finishing and Blocking Your Doily
- Weaving in Ends:
- After completing the doily, use a tapestry needle to securely weave in all loose threads. Hide them along the backside of the stitches.
- Blocking:
- Lay the doily flat over a clean towel or blocking mat. Use pins to stretch and shape the edges symmetrically.
- Lightly steam or iron over a damp cloth to set the shape. Do not iron directly to avoid damage to the yarn.
- Presentation:
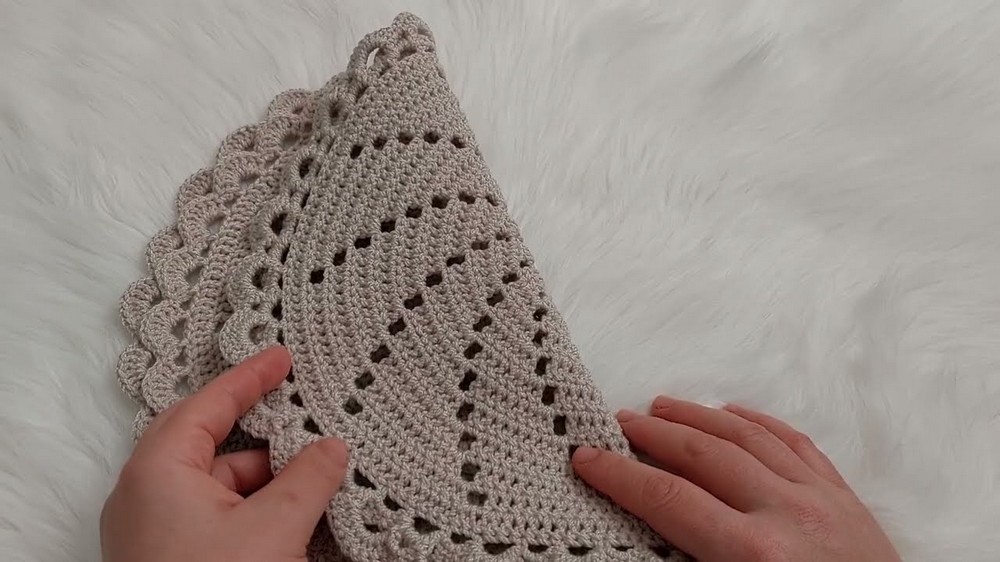
- Fold or place the windmill supla flat to emphasize the elegant and structured design.

Tips for Success
- Using Different Yarns:
- For delicate table decorations, use fine yarn or thread with a 1.5-2 mm hook.
- For a statement centerpiece, use bulkier yarn with a 4 mm hook or larger.
- Maintaining Flatness:
- If the edges start to ripple or curl, recheck your stitch counts, decrease tension, and adjust placement of increases as needed.
- Creative Adjustments:
- Custom border styles such as picots, shells, or ruffles can be added for a unique look. Experiment by alternating chain lengths in edging rows for variety.
Conclusion
Congratulations, You've completed your elegant Windmill Supla doily. Its spinning windmill design, coupled with scalloped and layered edging, makes it a stunning piece for any setting. With easy to follow increase rows and an adjustable size, this pattern works well for beginners and advanced crocheters alike.
Key Notes:
- Blocking the piece is vital for achieving a neat and balanced finished product.
- Experiment with colors, yarn textures, and edging styles to customize your masterpiece further.
This doily is not just a decor item but also a token of timeless craftsmanship perfect for gifting or personal use.