
Crochet Wool Headband Best Free Pattern with Unique Ties
Try this Free Crochet Wool Headband Pattern to bring warmth and style to your winter look with simple stitches, soft textures, and a cozy twist everyone will love.
A cozy and stylish headband can be the perfect accessory for colder days, keeping your head warm while adding a beautiful handmade touch to your outfit. The Free Crochet Wool Headband pattern stands out thanks to its simplicity and charm. Crafted with soft wool, it not only provides warmth but also ensures comfort throughout the day. Its textured design gives it a modern and elegant look, making it suitable for casual outings, evening walks, or even as a thoughtful handmade gift.
Elegant Free Crochet Wool Headband Pattern Using Simple Stitches

This pattern is beginner-friendly, breaking the steps down in a way that's simple to follow. With wool being the primary material, you can easily experiment with different colors to match your wardrobe or personal style. Many headband patterns include unique stitches or accents, like a twist in the middle or decorative edges, which make the piece look trendy yet timeless.
Use this headband throughout winter or as a fashionable accessory during the fall season. Its versatility, ease of making, and striking appearance are why this pattern is loved by both beginners and seasoned crocheters alike. Give it a try, and enjoy the satisfaction of creating something useful yet beautiful.
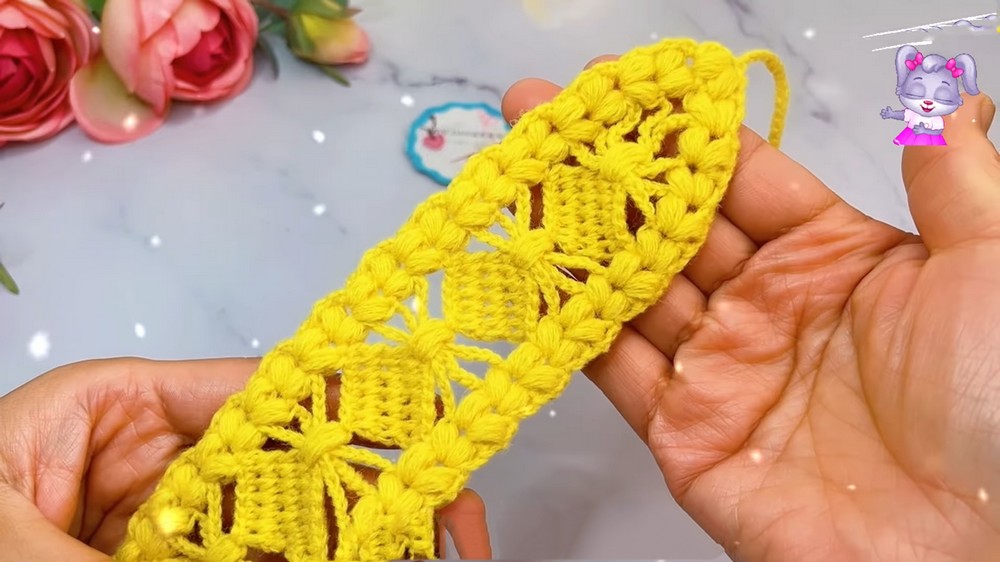
Crochet Pattern: Chic Winter Headband with Puff Stitch
Materials
- Yarn:
- Wool or wool-blend yarn, medium-weight (#4) for winter warmth. Choose your preferred color.
- Hook Size: 4.0 mm crochet hook.
- Additional Items:
- Scissors
- Yarn needle (for weaving in ends).
Skill Level
Intermediate to Advanced
The project includes puff stitches, working foundational back bumps, and alternating stitch patterns requiring attention to placement and consistency.
Key Abbreviations (US Terms)
- ch: Chain
- st: Stitch
- sl st: Slip Stitch
- dc: Double Crochet
- hdc: Half Double Crochet
- puff: Puff Stitch (4 half double crochets worked together in one stitch).
Special Notes
- Back Bumps of Chains: Always work the puff stitches and other stitches into the "back bump" of the chain for a cleaner and uniform edge.
- Consistency of Puff Stitches: Ensure all puff stitches are tight and the loops are evenly sized to maintain uniformity.
- Customizable Length: The pattern allows flexibility by adjusting the number of repeats to create the desired length of the headband.
Step-by-Step Pattern
Part 1: Foundation and First Row
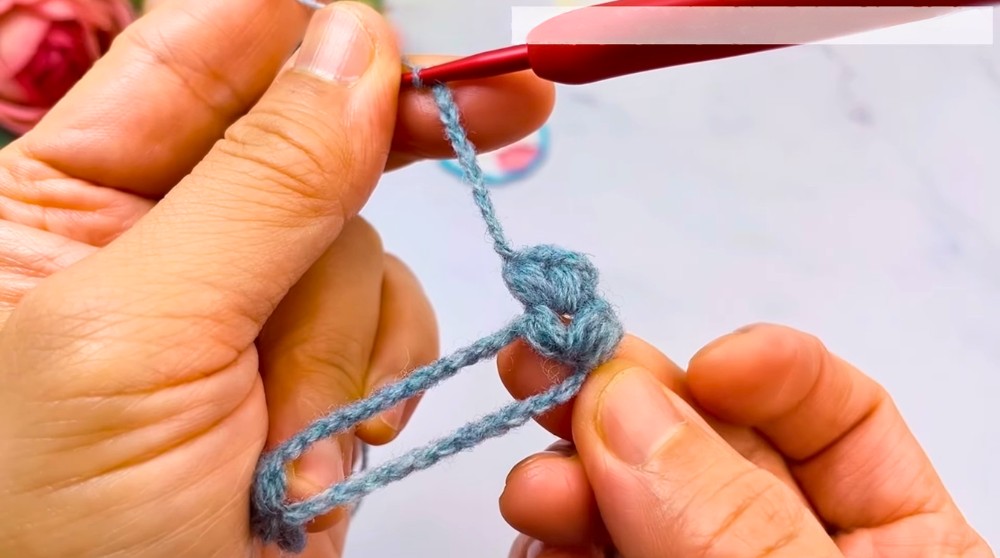
- Start with a slip knot and make 20 chains.
- Locate the fifth back bump of the chain from the hook:
- Work a 4 half double crochet puff stitch into this back bump.
- Chain 2, and make another 4 hdc puff stitch in the same back bump.
- Chain 12, skip stitches, and return to the 19th back bump:
- Work a 4 hdc puff stitch in the 19th back bump.
- Chain 2, and make another 4 hdc puff stitch in the same back bump.
- Work 1 double crochet (dc) into the last back bump to finish the row.
Part 2: Puff Stitch Rows
Row 2
- Turn your work. Chain 1, and make a slip stitch (sl st) to reach the first chain-2 space.
- Chain 2, then work:
- 4 hdc puff stitch into this chain-2 space.
- Chain 2 and work another 4 hdc puff stitch into the same chain-2 space.
- Chain 12, skip stitches, and move to the second chain-2 space:
- Repeat the same puff stitch pattern (4 hdc puff st, ch 2, 4 hdc puff st).
- Work 1 dc into the space between the starting chain and the puff stitch to finish the row.

Rows 3-6
- Repeat the pattern followed in Row 2, maintaining the same stitch structure.
Part 3: Central Section with Afghan Stitch Pattern
Row 7
- Turn your work. Chain 1, and make a slip stitch to reach the first chain-2 space.
- Chain 2, then work:
- 4 hdc puff stitch into this chain-2 space.
- Chain 2, and work another 4 hdc puff stitch in the same chain-2 space.
- Chain 6, skip 6 stitches, and create a 4 hdc puff stitch in the 9th back bump of the foundation chain.
- Work chain 1, turn your work to the next row.

Rows 8-10
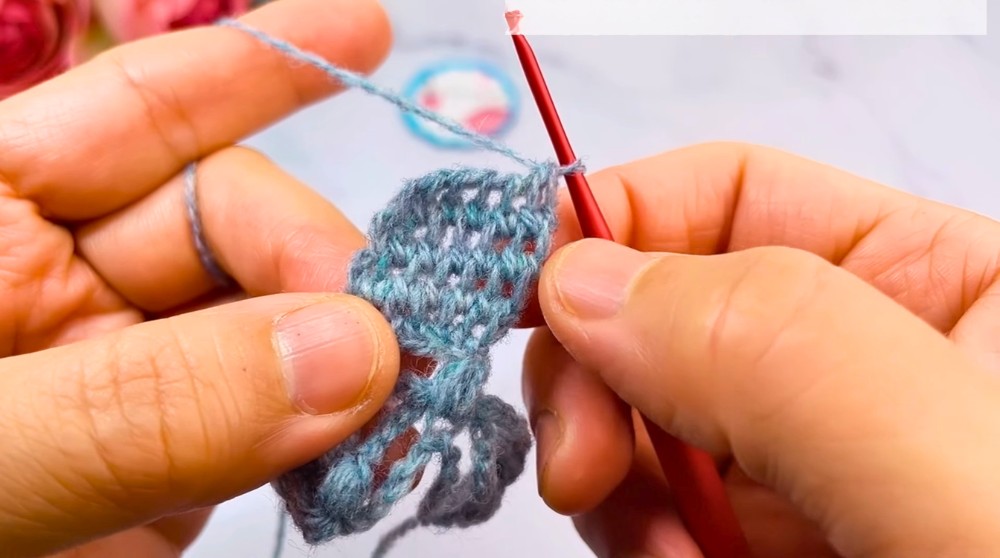
- Transition to Afghan stitch:
- Make an unfinished single crochet (sc) in the first stitch, and continue with unfinished sc stitches in the next 5 chain stitches.
- Yarn over and pull through two loops repeatedly until 1 loop remains on the hook. Chain 1.
- Continue working unfinished sc across the gaps in the previous row and complete 3 rounds using this method.
Part 4: Build the Length of the Headband
Rows 11-39
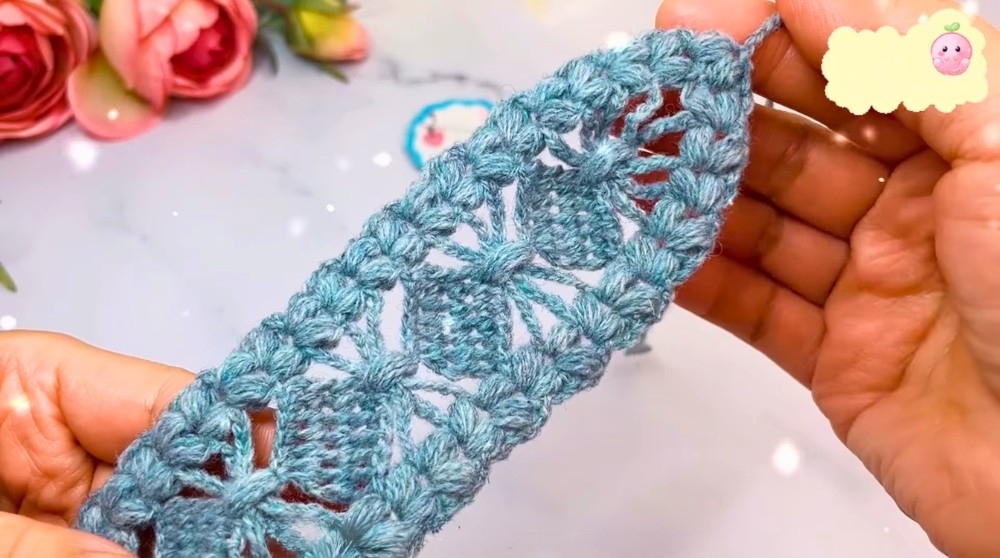
- Repeat the structure from Rows 7-10, alternating puff stitch rows and Afghan stitch rows.
- Adjust the number of repeats based on the desired length of the headband.
Part 5: Final Row and Tie Rope
Row 40
- Complete the row as above, finishing with puff stitches and dc in the appropriate spaces.
- Afterward, transition into the tie rope as indicated below.
Tie Rope
- Begin with chain 70 for each end of the headband tie.
- Return to the third chain stitch:
- Work one 4 hdc puff stitch, and chain 3.
- Make one slip stitch to finish the tie-end pattern.
- Repeat this process for the opposite side of the headband.
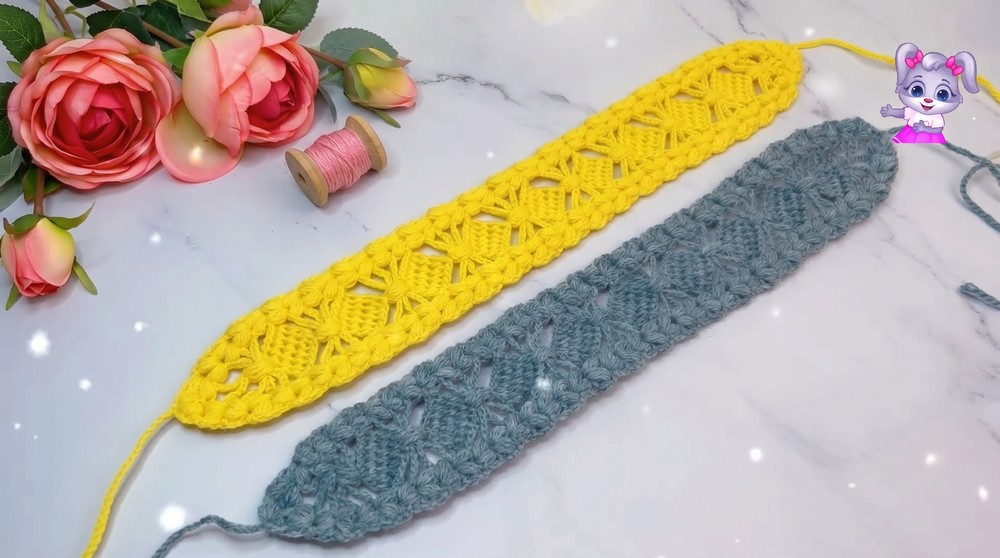
Finishing
- Fasten off and cut the yarn.
- Use a yarn needle to neatly weave in all ends.
- Check for any twists in the tie ropes or uneven puff stitches. Adjust if necessary.

Conclusion
Your stylish Chic Winter Headband is now complete! This versatile pattern pairs functionality with elegant texture and can easily be personalized to suit different styles. You can adjust the width, length, or even the tie rope design to create multiple variations.
Pattern Corrections
- If the puff stitches look uneven, check the tension of your yarn and ensure you pull through all loops evenly.
- Maintain consistent spacing in Afghan stitch rows for symmetry.
Tips
- Blocking: Lightly steam block the headband after finishing to align the stitches uniformly.
- Customization: Use variegated or speckled yarn for unique visual effects.
- Care Instructions: Hand wash the headband in cold water and lay flat to dry to maintain its shape over time.