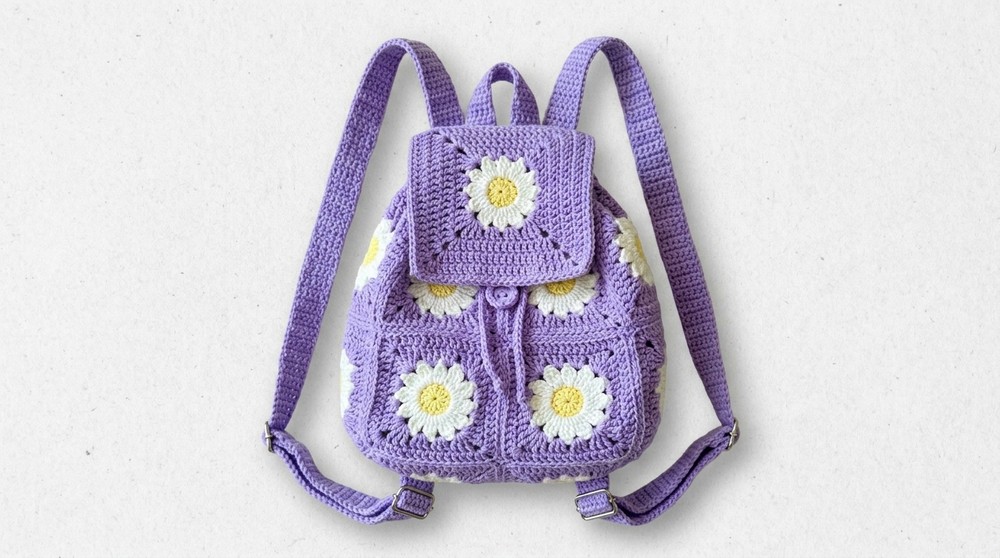
Easy Crochet Daisy Granny Square Backpack Pattern for Everyone
Convert your look with the Free Crochet Daisy Granny Square Backpack Pattern, introducing an artistic flair to your handmade creations.
Experience the charm of handmade accessories with this delightful crochet project that turns delicate daisy granny squares into a stylish and functional backpack. This Daisy Granny Square Backpack pattern combines timeless crochet techniques with a fresh, modern design that's perfect for everyday use. Whether you're heading to a casual outing, going shopping, or looking for a lightweight bag for your essentials, this pattern offers both practicality and personality. Its floral-inspired design brightens up any outfit, making it a unique addition to your wardrobe.
Bright & Trendy Crochet Daisy Granny Square Backpack Pattern

Designed for intermediate crocheters, this pattern teaches techniques like granny square crochet, stitching methods, and strap assembly while allowing room to customize colors and size. Adding adjustable straps and optional hardware makes it versatile for all ages and preferences. The use of cotton yarn ensures durability while maintaining a soft, lightweight feel.
As a thoughtful handmade gift or an elegant accessory for yourself, this backpack is more than just a crochet project-it's a useful, stylish statement. Bring a pop of creativity to your daily routine with a functional piece that stands out for its artistry and charm. It's not just a bag; it's a showcase of your crochet skills and a testament to the beauty of handmade designs.
Special Features
- Elegant Daisy Design: Unique granny square with a daisy motif adds charm and style to your accessory.
- Customizable: Easily adjust the size, strap length, colors, and hardware.
- Durable: Made with cotton yarn, perfect for everyday use.
- Intermediate Level: Ideal for those with experience in crochet techniques like magic rings, cluster stitches, and granny square assembly.
Use this backpack for carrying everyday essentials, as a summer accessory, or as a thoughtful handmade gift!
Materials Needed
- Yarn: Cotton yarn in three colors - one for main color, one for daisy center, and one for petals (300 grams for the main color).
- Hook: 4 mm crochet hook (and 3.5 mm hook for edges/height).
- Bag Hardware: Optional items like D-rings, strap adjusters, and magnetic buttons.
- Needle & Scissors: Essential for assembling and finishing.
Step-by-Step Pattern
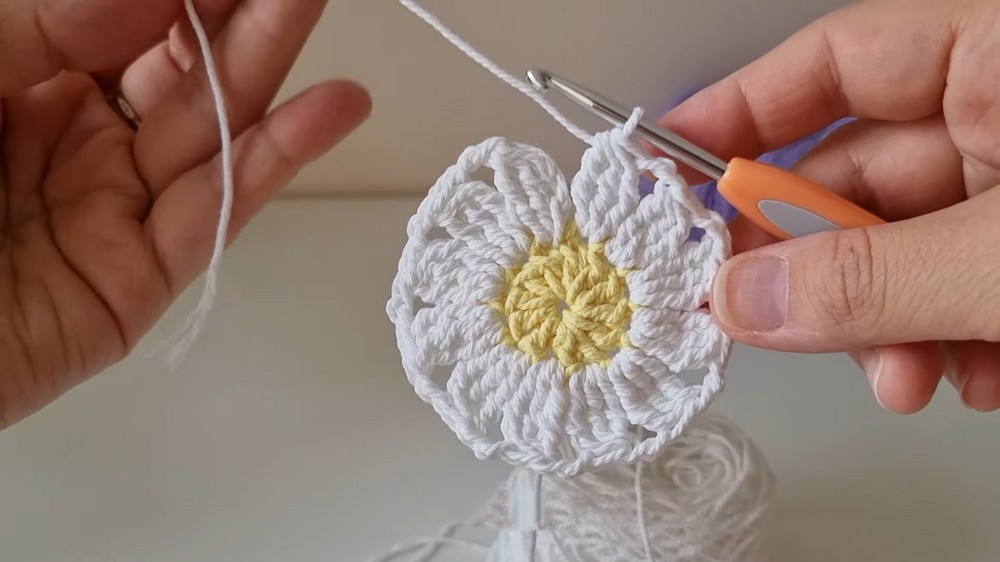
1. Crocheting the Daisy Square
Round 1:
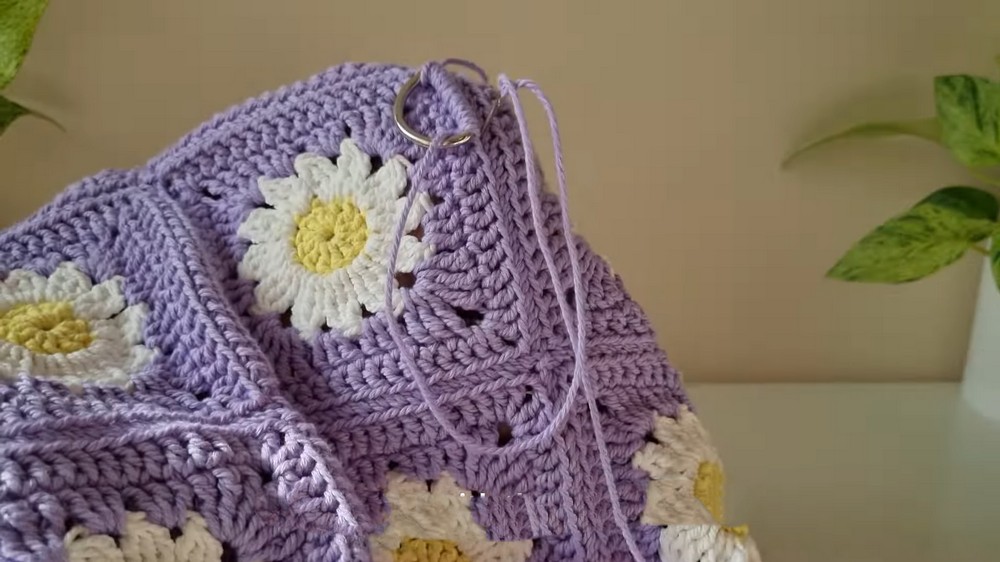
- Begin with a magic ring.
- Chain 1, twist, and chain 1 again (makes it look like a double crochet).
- Make 10 more double crochets (total: 12 trebles in the magic ring).
- Cut the yarn and use a needle to join instead of a slip stitch for a cleaner finish.
- Tie ends and weave them in.
Round 2:
- Switch to petal color and chain 2.
- Make 2 partial triple crochets into the same stitch.
- Join stitches into a cluster. Chain 2.
- In the next stitch, work another cluster by crocheting 3 trebles together.
- Repeat this around to create 12 petals.
- Use a needle to join and secure.
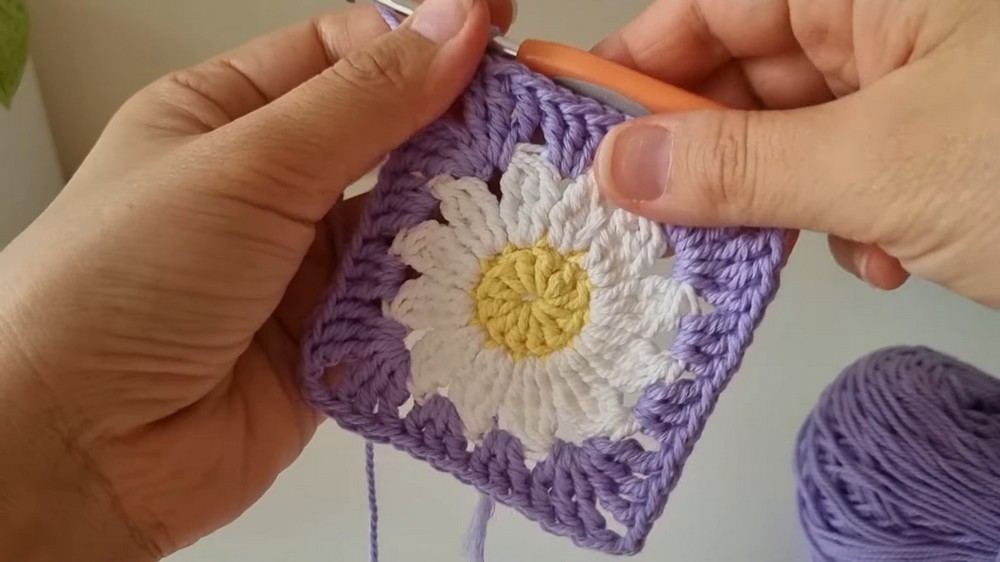
Round 3:
- Switch to background color.
- Chain 3 stitches and count as the first treble crochet.
- Make 2 treble crochets into the same space.
- Work 3 double crochets into each of the next spaces.
- Continue working clusters. Repeat the corners as 3 trebles, chain 2, 3 trebles.
- Complete the square by making 1 half-double crochet and weave in ends.
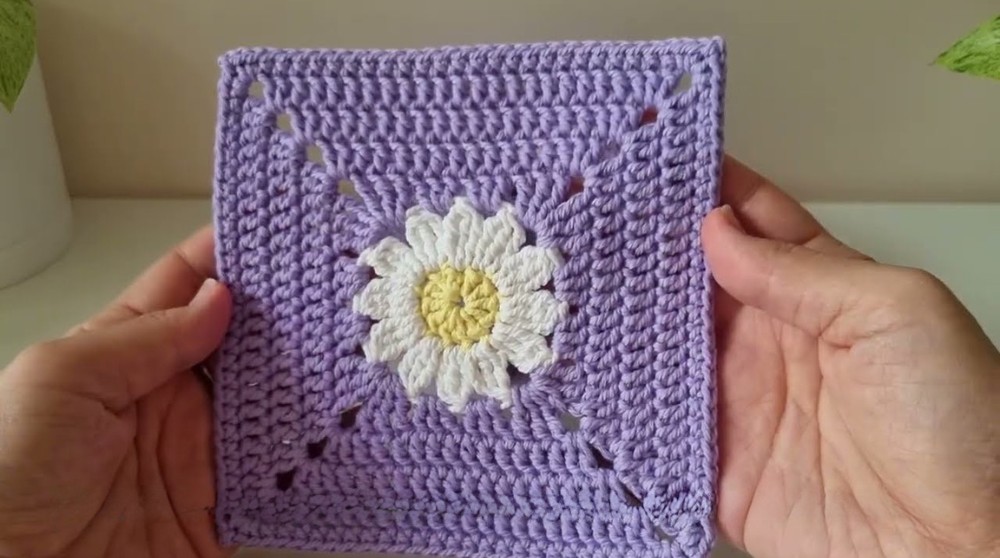
Round 4:
- Chain 2 (counts as the first double crochet). Make 1 double crochet into the same space.
- Work double crochets into each stitch until each side has 16 doubles.
- Repeat the pattern. Join using a needle for a seamless finish.
Complete 14 granny squares for the backpack base and 1 square for the flap.
2. Crocheting the Flap
- Add 3 more rounds of double crochets to the flap square.
- Round 5: Each side has 20 double crochets.
- Round 6: Each side has 24 double crochets.
- Round 7: Each side has 28 single crochets.
- Finish by weaving the yarn ends neatly.
3. Joining Squares & Forming the Backpack
- Lay out squares as follows: 4 for the back, 4 for the front, 2 for each side, and 2 for the bottom.
- Join squares through back loops only using a needle.
- Assemble into a rectangle with 10 squares. Add squares to the sides as necessary.
4. Backpack Adjustments
- Switch to a smaller crochet hook (3.5 mm) for the edges and height for a tighter tension.
- Crochet rounds using double crochets in the joined backpack body.

5. Crocheting the Straps
Long Strap:
- Chain 6 for the base row.
- Work 5 half-double crochets per row. Repeat until it reaches your desired length (e.g., 90 cm / 35 inches).
Cord:
- Chain 110 cm (43 inches) or use braided yarn/satin ribbon.
- Thread the cord through marked stitches in Round 2 of the bag's upper edge.
Optional Strap Adjustments:
- Sew D-rings or adjusters for flexibility.
6. Adding Hardware
- Attach magnetic buttons using thin strands of your yarn for invisibility.
- Sew carefully into the flap and backpack body.

Conclusion
Congratulations on creating this gorgeous Daisy Granny Square Backpack! Every stitch reflects your creativity and effort. This stylish and practical accessory stands out with its handmade charm, vibrant colors, and intricate design.
Tutor's Suggestions & Tips
- Difficulty: Intermediate. Perfect for crocheters with experience in granny squares and basic joining techniques.
- Uses: Ideal for casual outings, as a statement piece, or as a unique handmade gift.
- Customization: Experiment with colors and add extra embellishments for personal flair.
Pro Tip
When sewing hardware or joining parts, separate the yarn threads to make the sewing finer and less noticeable. This improves durability while maintaining the design aesthetic.

Final Remarks
This Daisy Granny Square Backpack is a perfect blend of creativity and functionality. Whether you carry it on a breezy summer day or gift it to someone special, this handmade accessory is sure to turn heads.