
Easy Crochet Jellyfish Keychain Pattern for Beginners
Enjoy creating a unique accessory with the free crochet jellyfish keychain pattern perfect for adding charm and fun to your everyday items.
Handmade items can add a lot of joy to your day. They make great gifts and bring a personal touch to everyday things. One such charming item is a keychain shaped like a tiny sea creature. It is soft light and easy to carry around. This kind of keychain adds color and life to your keys bag or backpack. You can quickly spot your belongings while showing off a cute little accessory made with care.
Crochet Your Own Adorable Jellyfish Keychain in Under an Hour
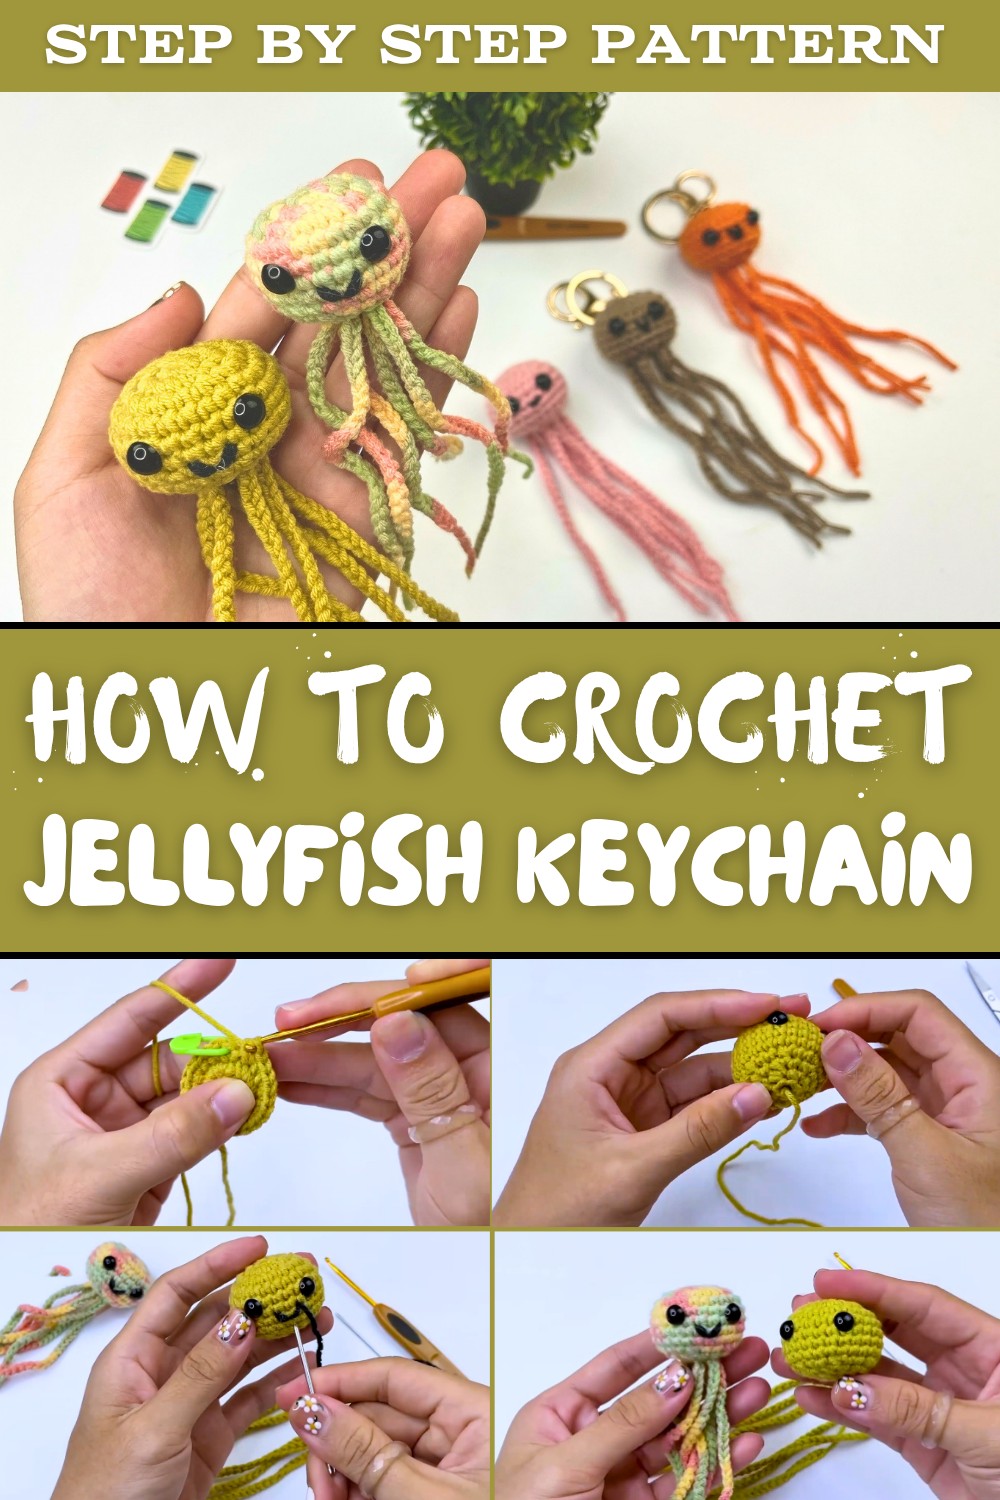
For those who enjoy crocheting there is a fun way to create this delightful accessory. The crochet jellyfish keychain pattern guides you through each step to make a soft jellyfish with tentacles that dangle playfully. The pattern is simple enough for beginners yet still exciting and satisfying. Using soft yarn and basic stitches helps make the final piece gentle to touch and durable enough to use every day.
Besides being adorable and practical this keychain holds special value when handmade. It is a small project that can brighten your mood and spark creativity. You can choose your favorite colors and decorate it with beads or other small touches to make it unique. The jellyfish design brings a bit of ocean magic that can remind you of nature's beauty wherever you go.

This little treasure is perfect for accessorizing your keys or bag but also makes a lovely gift for friends and family. It shows thoughtfulness and the time spent crafting something with love. Plus it's lightweight and easy to carry making it an everyday companion that stands out. With the crochet jellyfish keychain pattern you not only get a fun project to enjoy but also a cute item that brings joy and style to life.
Adorable Amigurumi Jellyfish Keychain Tutorial
Create a charming and easy-to-make jellyfish keychain with this beginner-friendly crochet pattern. This fun project is perfect for new crocheters eager to practice basic techniques and make a delightful accessory. Follow each step carefully to crochet your own cute jellyfish or octopus keychain!
Preparation Tips & Materials Overview
- Familiarize yourself with the following crochet techniques: slip knot, magic ring, chain (ch), single crochet (sc), increase (inc), decrease (dec), slip stitch (sl st).
- Use Milk Cotton yarn (5-ply, 125g recommended) or a similar lightweight yarn.
- Use a 3mm crochet hook for tight stitches suitable for amigurumi projects.
- Prepare cotton stuffing to fill your jellyfish head firmly but not overly tight.
- Have doll eyes, stitch markers, scissors, and black yarn (for sewing the mouth) ready.
- Work comfortably holding your yarn in any way you prefer.
- Maintain consistent tension to create an even fabric and accurate sizing.
- Use a stitch marker to mark rounds as this pattern is worked in continuous rounds.
- This pattern uses US crochet terminology.
Important Pattern Information & Tips
- The jellyfish is worked in continuous rounds (spiral) with no joining at the end of each round; stitch markers are used to track rounds.
- Started with a magic ring to create a tight center for the spherical head.
- The tentacles are worked separately and attached later.
- Eyes and mouth are sewn on at the end to bring personality to the keychain.
- Stuff the head firmly before finishing decreasing rounds to maintain shape.
- Operations like increases and decreases control the shaping of the head.
- You may customize color and length of tentacles to suit your style.

Construction Overview
- Crochet a round head using single crochet stitches beginning from a magic ring, increasing and decreasing to shape into a sphere.
- Attach safety eyes between specific rounds.
- Stuff the head with cotton during the narrowing rounds for a firm, plush shape.
- Crochet multiple tentacles separately as long chains with simple stitches.
- Sew tentacles to the bottom of the head.
- Embroider a cute smiling mouth with black yarn.
- Attach a keychain for easy carrying or gift-giving.
Difficulty and Experience Needed
Beginner (basic knowledge of crochet stitches and amigurumi shaping).
Final Dimensions
Approximately 6 cm (2.4 inches) in height (head), excluding tentacles. Tentacles length approx 10-12 cm (4-5 inches).
Required Supplies & Tools
- Milk Cotton Yarn, 5-ply, 125g (main color for body, black yarn for mouth)
- Cotton stuffing fiberfill
- 3 mm crochet hook
- Pair of safety doll eyes approximately 8 mm diameter
- Stitch markers
- Scissors
- Yarn needle
- Keychain ring or clasp
Size Details & Adjustments
- Head diameter: about 6 cm
- Tentacles length: about 10-12 cm (can be adjusted by chaining more or less)
- Strive for tight gauge to prevent stuffing showing through.
Stitch Density Information
- Worked in single crochet tight enough for amigurumi stitches
- No formal gauge swatch needed, but consistency is key
Crochet Symbol Legend
- ch = chain
- sc = single crochet
- inc = increase (2 sc in same stitch)
- dec = decrease (single crochet two stitches together)
- sl st = slip stitch
- st(s) = stitch(es)
Unique Techniques Explained
- Magic Ring: Create an adjustable ring that can be pulled tight to close the starting hole.
- Increase (inc): Work 2 single crochet stitches in the same stitch to widen your work.
- Decrease (dec): Crochet the next two stitches together to make your work narrower.
Crochet Pattern Instructions
Part 1: Head
Round 1:
- Begin with a magic ring.
- Ch 1, make 8 sc inside the ring.
- Sl st to join (8 sts).
- Pull tail to close ring tight.

Round 2:
- Ch 1.
- Make an inc (2 sc) in every st around (16 sts).
- Sl st to join.
- Place stitch marker at join point.
Round 3:
- Ch 1.
- [1 sc in next st, 1 inc in next st] repeat 8 times (24 sts).
- Sl st to join.

Round 4:
- Ch 1.
- Sc in each st around (24 sts).
- Sl st to join.
Rounds 5-8:
- Repeat Round 4 (one sc in every st) for four rounds total (24 sts per round).
- Attach safety eyes between back loops approximately halfway between rounds 6 and 7, leaving ~5 stitches spacing.
Round 9:
- Ch 1.
- [2 sc in next 2 sts, dec over next 2 sts] repeat 6 times (18 sts).
- Sl st to join.
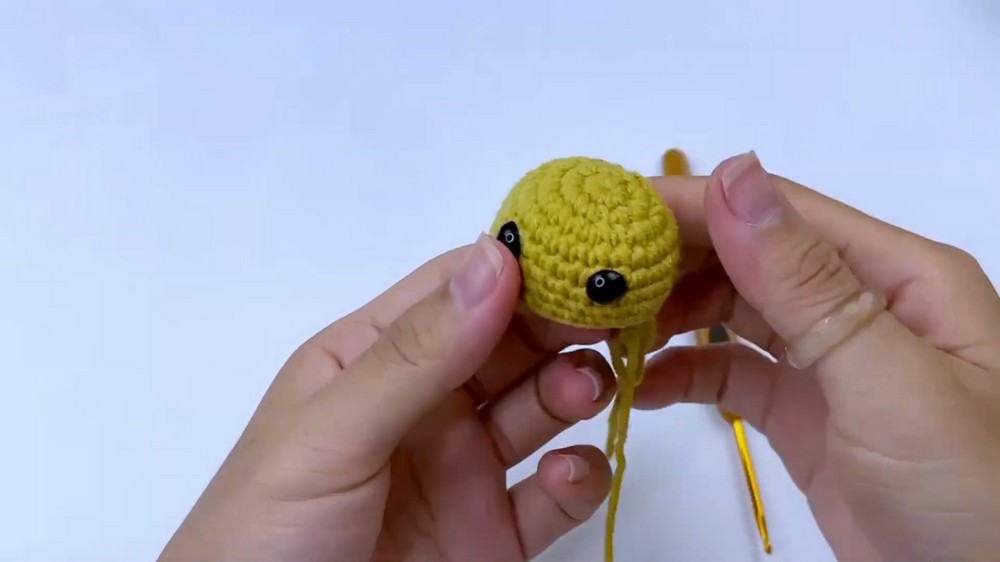
Round 10:
- Ch 1.
- [1 sc in next st, dec over next 2 sts] repeat 6 times (12 sts).
- Sl st to join.
Round 11:
- Stuff the head firmly before continuing.
- Ch 1.
- Dec over every 2 sts around (6 sts).
- Sl st to join.
- Fasten off and weave in end.
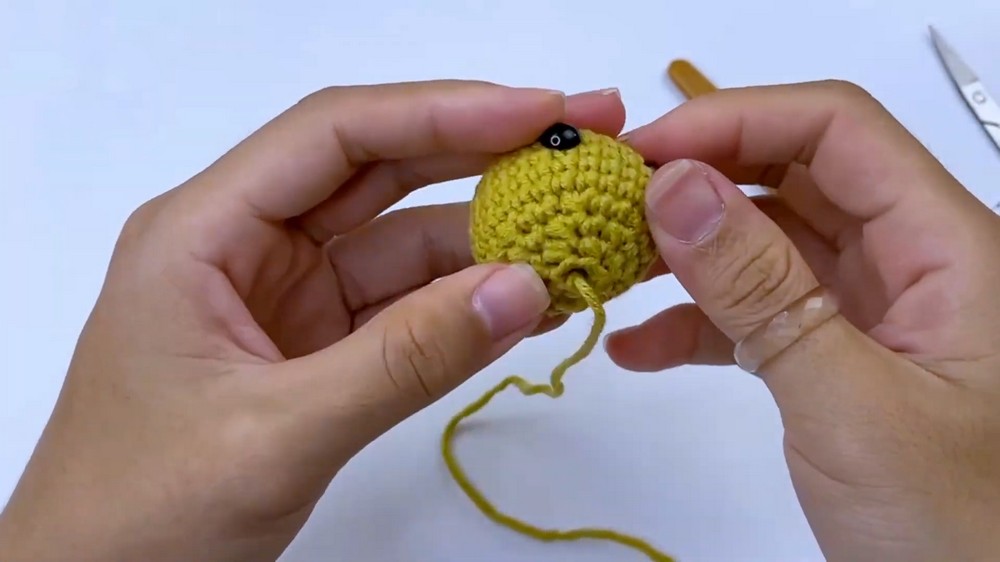
Explanation:
You have shaped a tight spherical head with eyes and sufficient stuffing.

Part 2: Tentacles
- Make a slip knot.
- Ch 25.
- Sc in each chain back (25 sc total).
- Fasten off leaving a small tail for sewing.
- Repeat this tentacle chain 6 times (or more for additional tentacles).
Explanation:
Tentacles are simple chains with sc stitches that hang down for cuteness.
Part 3: Assembly and Final Details
- Sew tentacles evenly spaced around the bottom of the head using yarn needle.
- With black yarn, stitch a small smiling mouth between the eyes on the front of the head.
- Attach the keychain clasp or ring securely to the top of the head (using yarn loops or metal rings).
- Weave in all loose ends neatly.
Final Steps & Finishing Touches
- Ensure tentacles are sewn tightly and evenly to maintain shape.
- Stuff head firmly but avoid overstretching stitches.
- Use yarn needle to weave in ends inside the head.
- Attach keychain securely to prevent loss.
- Optionally, lightly block the jellyfish by shaping gently with hands.

Common Issues and Solutions
- Hole in magic ring too large: Tighten tail until center closes snugly before continuing.
- Eyes not secure: Use safety eyes with washers or firmly sew plastic eyes on.
- Uneven tentacles: Count chains to keep tentacles uniform length.
- Stuffing shows: Crochet tighter with smaller hook or add more stuffing carefully.
Project Ideas & Variations
- Make other sea creatures such as octopus by altering colors and tentacle count.
- Use as bag charms, zipper pulls, or small toys.
- Add rattles or bells inside for baby-friendly items.
- Create matching amigurumi sets with shells or fish.
- Customize tentacle lengths and colors for party favors or unique handmade gifts.