
Easy Free Crochet Bag pattern : Step-by-Step Guide
Upgrade everyday style with this Free Crochet Bag Pattern featuring beautiful texture and practical charm for casual outings and daily use.
Everyone needs a reliable and stylish way to carry their things. A handmade bag can be the perfect answer. Using a crochet bag pattern lets you create a one-of-a-kind item that fits your style and needs. This bag is soft and comfortable to hold while being strong enough to carry everyday items like a book, groceries, or personal belongings. The beauty of this pattern is that it is easy to follow, even for beginners who want to try something new and practical. You can choose your favorite color and yarn type to make a bag that matches your wardrobe or brightens up a simple outfit.

Easy Free Crochet Bag pattern for Market Days
A crochet bag is lightweight but durable, making it a great companion for a trip to the market or a casual outing. Its handmade nature means each stitch adds a personal touch, giving your bag charm and character. Besides being a functional accessory, this project is a fun way to practice crochet skills and enjoy time crocheting. Carrying your belongings in a bag made this way brings comfort since you know it was made with care and skill.
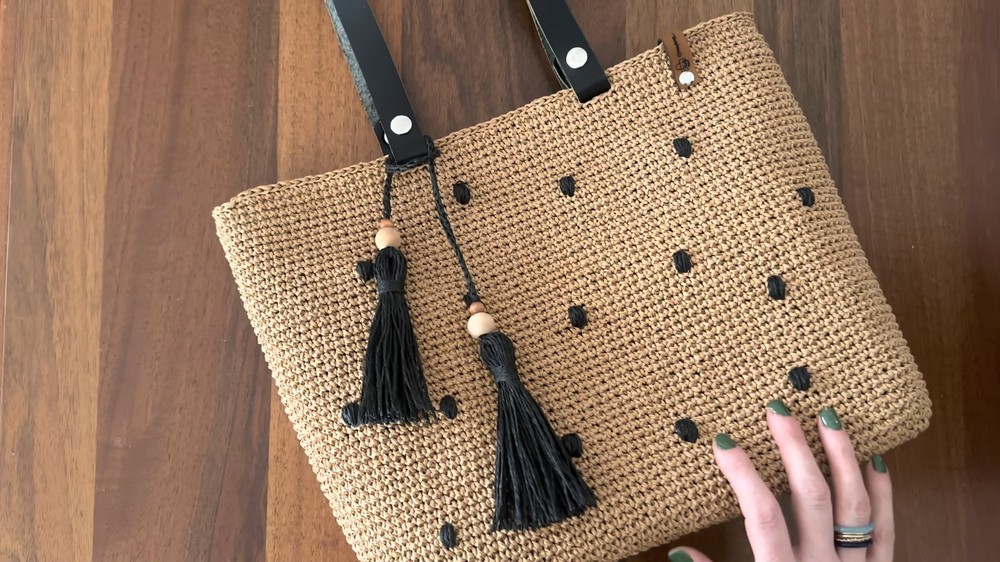
Whether you like a simple design or something more detailed, the crochet bag pattern offers endless possibilities to express your creativity while staying practical. This cozy and stylish accessory blends function with fashion effortlessly. It's the kind of project that makes your daily routine a little brighter and more enjoyable. Making and using a crochet bag pattern is a wonderful way to combine art, utility, and personal style all in one.
Easy Single Crochet Shoulder Bag with Hand-Embellishment
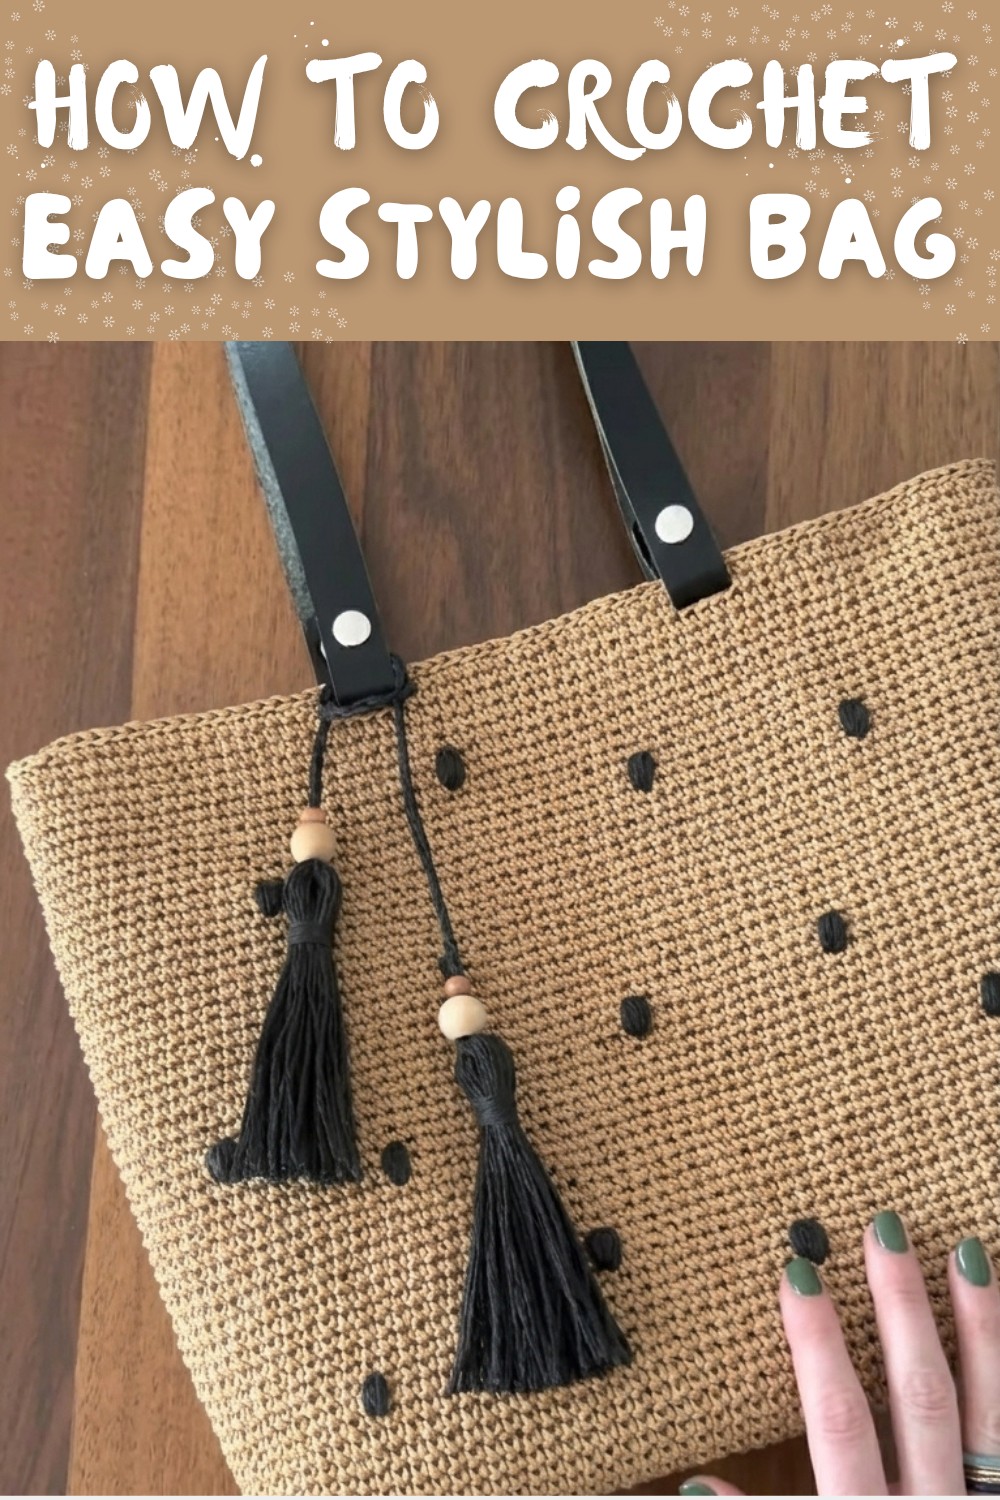
Transform a plain rectangular base into a stylish and sturdy shoulder bag using basic single crochet stitches complemented with beautiful hand embroidery accents. This step-by-step pattern will guide you to create a versatile bag with customizable size, secure strap loops, and neat finishing touches including optional lining and adhesive backing for durability.
Important Preparation Tips Before Starting
- Choose any medium-weight yarn you prefer; paper yarn is highly recommended for structure and texture. Cotton blends or acrylic yarns can be used as well.
- Use a 3 mm (US size D/3) crochet hook or size appropriate to your yarn for neat, firm stitches.
- Rectangular base: Make your own or purchase a ready-made base approx. 40 cm wide (customize as desired). A clear tutorial for rectangular base creation is available online (link recommended).
- Prepare sewing needles for threading yarn during the embellishment process. Large-eyed needles facilitate yarn passage.
- Gather supplies for handle loops: snap-on or sewn handles, your choice of strap style.
- Optional: Adhesive backing strips and fabric for lining to tidy and reinforce bag interior.
- Have scissors, stitch markers, measuring tape, and a steam iron (for finishing) handy.
Notes on Design and Construction
- The bag is built on a simple rectangular base and worked upward using single crochet (sc) stitches in continuous rows, without any increases or decreases, to create a uniform, sturdy fabric.
- Opening loops for handles are created by chaining instead of sc stitches about four rows before finishing top edge. These loops secure metal or fabric handles.
- Hand embroidery embellishment ("wrapping" or "pıt pıt" technique) is worked directly onto the bag fabric with yarn and sewing needle, adding texture and style.
- Optional adhesive backing strips are recommended to affix on the bag's inner surface for a polished interior finish and extra firmness.
- Bag interior can be lined with fabric cut to size and sewn in for a refined look and enhanced durability.
- Finishing touches include ironing the bag from the inside to set shape and secure embroidered designs.
- Snap-on handles or other strap options may be attached through openings formed by chained loops.
General Construction Outline
- Begin by creating or acquiring a rectangular base of desired size. (Recommended approx. 40 cm width)
- Crochet the bag body upwards with rows of single crochet stitches until desired height is reached (approx. 25 cm).
- Four rows before completion, create loop openings for bag handles by chaining at regular intervals along the row instead of sc stitches.
- Embellish bag fabric by hand wrapping yarn into "pıt pıt" stitches using a needle, randomly arranged or planned motifs.
- Attach adhesive strips inside, then line with fabric cut to bag dimensions, sewing neatly.
- Attach bag handles through formed loops, secure firmly.
- Finish by blocking and ironing for shape and polish.
Skill Level
Ideal for Beginner to Intermediate crocheters comfortable with basic stitches, working in rows, and simple hand stitching.
Approximate Finished Dimensions
- Width: 40 cm (15.75 inches) (modifiable based on base chain length)
- Height: 25 cm (9.85 inches) (adjustable by working more or fewer rows)
- Strap/handle length and style variable per choice.
Required Materials List
- Medium-weight yarn (paper yarn recommended) - approx. 100-150 g depending on bag size
- 3 mm crochet hook (or as per yarn recommendation)
- Snap-on bag handles or alternate strap components
- Embroidery needle with large eye for yarn threading
- Adhesive backing strips for interior reinforcement (optional)
- Fabric for lining (optional) cut to bag interior dimensions
- Sewing needle and thread for lining attachment
- Stitch markers, scissors, measuring tape, steam iron
Suggested Gauge
- Gauge is flexible; recommended approx.:
22 single crochet stitches and 24 rows = 10 cm square (4 inches) with paper yarn and 3 mm hook. - Gauge impacts finished size; adjust hook or yarn to suit desired dimensions and firmness.
Crochet Abbreviations Used (US Terms)
- ch = chain
- sc = single crochet
- st(s) = stitch(es)
- sl st = slip stitch
- rep = repeat
Unique Techniques
- "Pıt Pıt" Wrapping Embroidery: Yarn wrapped and stitched onto bag surface using embroidery needle to create textured decorative patterns.
- Creating Handle Loops by Chaining: Replace sc stitches with chains in specified row to form sturdy openings for strap attachment.
- Use of Adhesive Backing Strips: Applied inside bag to cover and flatten visible yarn tails and add stiffness.
- Fabric Lining Attachment: Sewing fabric cut exactly to bag dimensions to interior, providing structure and hiding raw edges.
Step-By-Step Crochet Instructions
Part 1: Constructing the Rectangular Bag Base and Body
- Start with a rectangular base approximately 40 cm wide or as desired. (You may crochet or purchase.)
- Attach yarn at base edge and begin working rows of single crochet stitches evenly around the rectangular shape, continuing upwards.
- Crochet continuously without increasing or decreasing, maintaining consistent stitch count per row.
- Work until the bag body reaches approx. 25 cm height, counting roughly (depending on gauge) 40-45 rows.
Note for Beginners: This creates the main fabric of your bag, sturdy and structured due to uniform sc stitches.
Part 2: Creating Handle Loops Through Chaining
- About four rows before finishing the bag length, create loops for handles:
- At desired intervals across the row (commonly spaced evenly), chain a suitable length (4-6 chains) instead of making sc stitches.
- Skip corresponding stitches in the row below to create openings.
- Resume single crochet stitches normally between chain spaces.
- Complete remaining rows to finish the top edge of the bag.
Explanation: These loops allow easy threading of hardware or handles, adding both design and function.
Part 3: Hand Embroidery Embellishment ("Pıt Pıt" Wrapping Technique)
- Thread a length of yarn onto a large-eye embroidery needle.
- Beginning on the inside of the bag (turned inside out if easier), knot the yarn at starting point concealed inside the bag.
- Bring needle through the fabric at desired location on bag surface; wrap yarn over surface with gentle tension forming a neat line or design.
- Continue wrapping the yarn by piercing into same or adjacent stitches, controlling tension to form small "pıt pıt" bulges or lines.
- After completing a line or design, secure yarn within bag interior with knots or weaving through stitches.
- Embellish both front and back of bag to your liking.
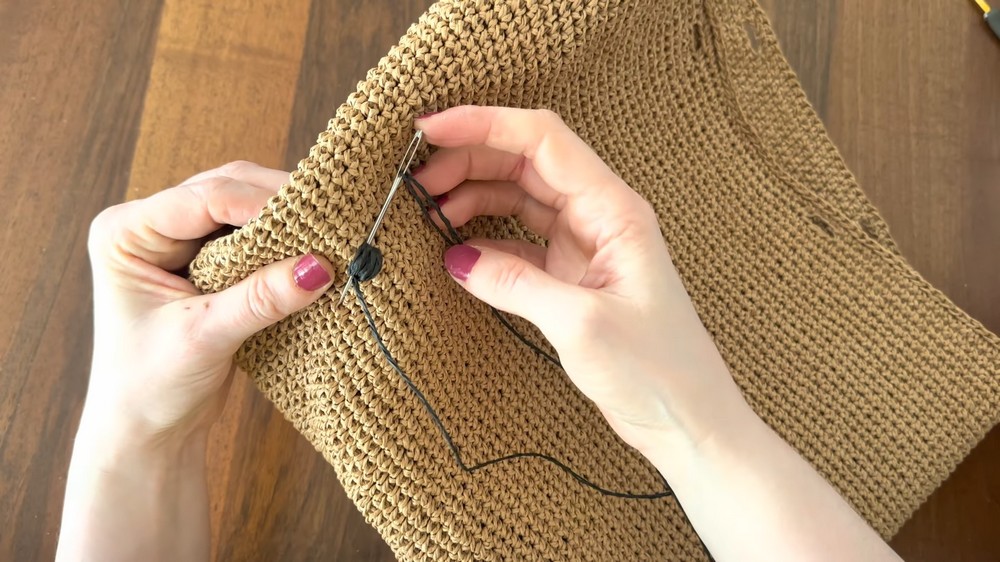

Tips: Work slowly and tighten wrapping carefully to avoid fraying paper yarn.

Part 4: Applying Adhesive Backing Strips Inside
- Once hand wrapping is complete, clean all loose yarn ends inside the bag.
- Cut adhesive backing strips (available at craft stores) to size and apply neatly over inside surface of the bag.
- These strips hide visible yarn tails and provide reinforcement, making the bag more durable and polished.
- Allow adhesive to set fully before handling.
Helpful Hint: Press strips firmly and evenly, avoid wrinkles for a smooth finish.

Part 5: Sewing in Fabric Lining
- Measure bag interior and cut two pieces of chosen fabric to fit front and back panels exactly.
- Position fabric pieces inside the bag, smoothing out wrinkles.
- Pin fabric in place and hand sew along edges, making neat seams.
- Sew around base and sides if necessary for secure fit, leaving bag top edge free for straps.
- This lining hides bag interior yarn ends and adds structure.
Part 6: Attaching Handles and Final Touches
- Thread your chosen snap-on or sewn handles through handle loops created by chains.
- Secure handles firmly and test for sturdiness.
- Tidy bag by trimming excess yarn or thread.
- Iron bag interior gently with steam to firm up fabric and set wrapping designs.
- Optionally, add decorative tassels or other accents as desired.

Beginner-Friendly Explanation
In this pattern, you start with a rectangular base and crochet straight rows of single crochet stitches to build the bag sides. A few rows from the top, you make chain spaces to form loops where you will attach your handles. The outside of the bag gets a unique touch by stitching colored yarn onto the surface in a wrapping style using a needle - think of it like embroidery. Finally, you tidy up the inside with adhesive strips, sew fabric lining to make it neat, and attach sturdy handles to complete your stylish shoulder bag.
Assembly Guidelines and Finishing Tips
- Secure all loose ends by weaving in knots to prevent unraveling.
- Apply adhesive strips after embroidery to reinforce and tidy the interior.
- Sew lining firmly but gently to avoid puckering or stretching.
- Attach handles securely, adjusting for tension on handles and bag body.
- Finish by steam ironing for a polished, professional appearance.
Troubleshooting Common Problems
- Handle loops too tight or loose: Adjust chain length or tighter/weaker tension when making loops until desired size and strength achieved.
- Yarn frays when wrapping: Use shorter lengths of yarn on your needle and avoid over-twisting. Work slowly to maintain yarn integrity.
- Uneven embroidery lines: Use stitch markers or lightly sketch your design with a pencil before wrapping.
- Bag edges puckering: Check stitch tension; keep even and consistent throughout. Block or iron bag to help even out fabric.
Other Creative Applications for These Techniques
- Fashion totes or beach bags using similar rectangular base and embellishments.
- Stylish clutches with embroidered textured accents.
- Home decor: small storage baskets with tough lining and wrapped yarn.
- Decorative pillow covers using the wrapping technique for surface texture.
- Unique gift bags or pouches using custom sizes and colors.