Easy Free Crochet Sweater Pattern for Beginners at Home
Start making a cozy free crochet sweater pattern at home with easy steps simple stitches and a soft warm look perfect for daily wear and gifts today.
A handmade wool sweater pattern can feel like a quiet story told through soft yarn and simple stitches, where each row builds warmth and comfort in a gentle way. The Free Crochet Sweater Pattern gives a clear and easy path to shape a cozy sweater that looks neat and feels soft on the skin. It often uses basic stitches, so even a beginner can follow along without stress.
Stylish Free Crochet Sweater Pattern for Everyday Wear

The sweater usually has a clean and simple look, with smooth lines and a relaxed fit that suits daily wear in cool weather. It can be used at home, at school, or while going out, making it a useful part of any wardrobe. One special thing about this pattern is how it allows choice in color and size, so each piece can look a little different and personal. Its beauty lies in its soft texture and simple design, while its strength comes from warm yarn that lasts long and keeps the body comfortable.
Crochet Sweater Pattern
Materials
- Yarn: Medium or bulky-weight yarn of your choice (the example uses thick yarn). Approximate amount depends on size; see Customization.
- Hook: Size suitable for your yarn, such as 5.5 mm for bulky yarn.
- Scissors
- Measuring tape
- Yarn needle (for sewing and weaving in ends)
- Stitch markers (optional)
Gauge
- Example for Small Size:
- Chain 66 = approx. 42 cm width.
- 37 rows = approx. 33 cm height.
- Swatch:
- Pattern stitch over 10 cm: x stitches and y rows (make a small swatch and measure).
- It is recommended to make a swatch in the stitch pattern and adjust hook/yarn to achieve desired measurements.
Finished Size (Small Example)
- Back Panel: Approximately 42 cm (width) x 33 cm (length)
- Front Panel (each): Approximately 15.5-16 cm (width) x 40 cm (length)
- Sleeves: Approximately 31 cm (width) x 43 cm (length)
- Neck opening: Approx. 10 cm

For other sizes, see Customization.
Special Techniques
- Pattern Stitch: Alternating single crochet, chain, and double crochet, worked in the back loop for added texture.
- Joining: Mattress stitch or slip stitch seam, focusing on aligning rows and stitches.
- Ribbing (spring): Post-edge ribbing, worked perpendicular to sweater edge and sewn or joined as you go.
- Working in the Back Loop: Insert hook only into the back strand of each stitch, producing ribbed texture.
Step-by-Step Instructions
1. Back Panel
- Foundation Chain:
- Create a slip knot.
- Chain an even number for desired width (e.g., 66 chains for small size, approx. 42 cm).
- Tip: The chain count determines the sweater's width; adjust for other sizes.
- Row 1 (Pattern Setup):
- Skip the first chain from the hook.
- Repeat: Single crochet in the back loop of next chain, chain 1, skip 1 chain, double crochet in the next chain.
- Continue this sequence across, ending with a double crochet in the last chain.
- Each row alternates single crochet and double crochet, separated by chain stitches.
- Row 2 and Onwards:
- If the previous row ends with single crochet, begin with 2 chains (counts as first double crochet); turn.
- Work double crochet over single crochet from previous row, chain 1, single crochet over double crochet from previous row.
- Repeat: Chain 1, double crochet over single crochet, single crochet over double crochet.
- Continue for the desired length (example: 37 rows for small size, approx. 33 cm).


2. Front Panels
- Measurement:
- Measure your back panel. Divide width in half, subtract 5 cm from each side to create a neck opening of approx. 10 cm (5 cm per side).
- Foundation Chain:
- For small size: chain 26 (approx. 15.5-16 cm). Adjust for custom sizing.
- Rows:
- Using same pattern stitch, make the front panels slightly longer than the back (e.g., 40 rows for small size, approx. 40 cm).
- Make two identical front panels.
3. Sleeves
- Foundation Chain:
- Measure your arm circumference, accounting for desired fit and ribbing.
- For small size: chain 52 (approx. 31 cm width).
- Rows:
- Using pattern stitch, work the sleeve to desired length (e.g., 45 rows, approx. 43 cm for small size).
- Make two sleeves.

4. Sewing the Pieces
- Back Panel: Lay flat.
- Front Panels: Place each front panel along the back panel's sides, aligned at the shoulders and sides.
- Sleeves: Attach sleeves along the top edge, aligning rows and stitch counts.
- Seaming Technique: Use mattress stitch or slip stitch seam for joining, matching stitches row by row.
- Side and Sleeve Seams: Fold sweater, align sides and under arms, and seam continuously.

5. Ribbing (Springs/Borders)
Bottom Edge Ribbing
- Attach yarn at one bottom corner.
- Chain desired rib width (e.g., 7 chains for a 7-stitch rib; customize as desired).
- Row 1: Single crochet in each chain back toward the sweater; attach with a slip stitch to edge.
- Row 2: Slip stitch in next edge stitch to advance, turn ribbing, single crochet in back loop only across ribbing.
- Repeat: Continue joining rib to each edge stitch with slip stitches, turning and working single crochet in back loop for the ribbed effect, all around the bottom.
Sleeve Ribbing
- Repeat above method for each sleeve edge.
- Attach yarn at seam, crochet ribbing perpendicular to sleeve edge.
Neck Ribbing
- After finishing bottom and sleeve ribbing, attach yarn at one neck edge (where bottom rib ends).
- Work chains for desired rib width.
- Attach rib to neck edge, spacing stitches evenly to avoid puckering.
- Stop at opposite side of neckline, fasten off, and weave in ends.

Tips & Customization
- Sizing: Adjust chain count and row numbers to fit measurements for any size.
- Fit: Front panels can overlap for extra coverage or be spaced apart for a wider neckline.
- Sleeve Fit: Try on sleeves before final seaming; adjust length/width via chain or row count.
- Neckline Shape: Increase/reduce width of ribbing, customize opening as desired.
- Ribbing Length: Customize rib thickness by increasing or decreasing chain count.
- Yarn Choice: Bulky yarn speeds up the process; lighter yarns produce a more delicate sweater.
- Stitch Markers: Mark armholes, sides, and ribbing starting points for ease of assembly.
Conclusion & Important Remarks
- The final sweater consists of five main pieces: one back panel, two front panels, and two sleeves, each worked with the alternating single, chain, and double crochet stitch pattern.
- Assembly is crucial: Align panels and sleeve edges carefully; seam using mattress stitch or slip stitch for neat finish.
- Ribbing adds elegance and snug fit: Worked perpendicular to edges, giving a professional touch to the hem, sleeves, and neckline.
- Finished look: A classic, textured sweater suitable for layering, with a ribbed hem, cuffs, and collar. All seams are on the inside for a clean outer finish.
- After final assembly, weave in all yarn ends securely, make sure the sweater is right side out, and block if necessary for shape and drape.
Enhancement Ideas
- Color Blocking: Work panels and sleeves in different colors for a trendy, modern take.
- Textured Yarns: Experiment with yarns with slight halo or speckled color for extra charm.
- Embellishments: Add buttons or patches for personalization.
- Length Adjustments: Extend hem or sleeves as desired for tunic or cropped fits.
- Neckline Variations: Make ribbing thinner/wider, or create v-neck by shaping front panels.
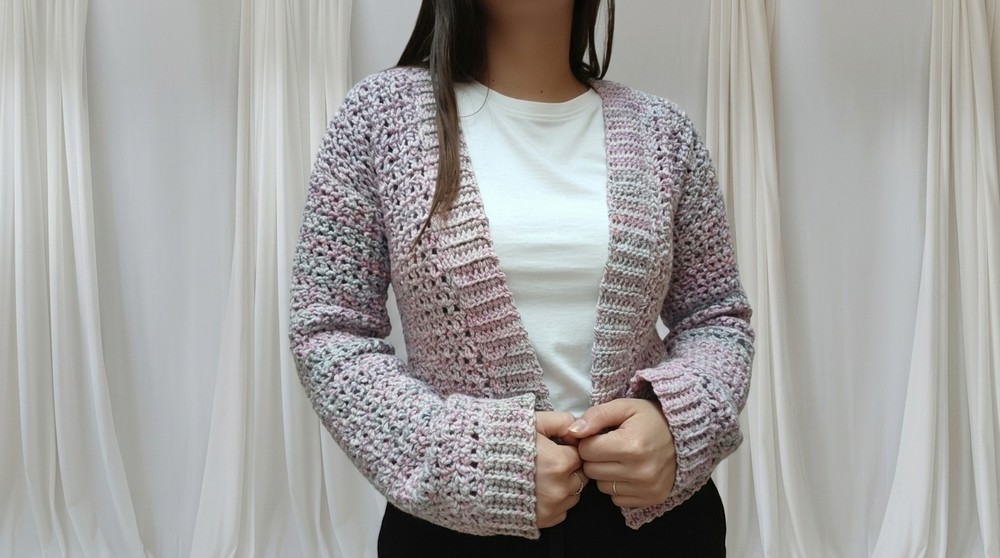
Final Look
Your finished sweater will have a boxy, classic silhouette with ribbed trim and a textured body. The seams are on the inside for a polished appearance. The sweater is versatile, comfortable, and perfect for beginners and advanced crocheters looking for a quick project.