
Free Crochet Baby Sun Hat Pattern for Little Explorers
Follow this easy free crochet baby sun hat pattern to weave a bright beach hat that protects sweet toddlers from bright light while playing outside.
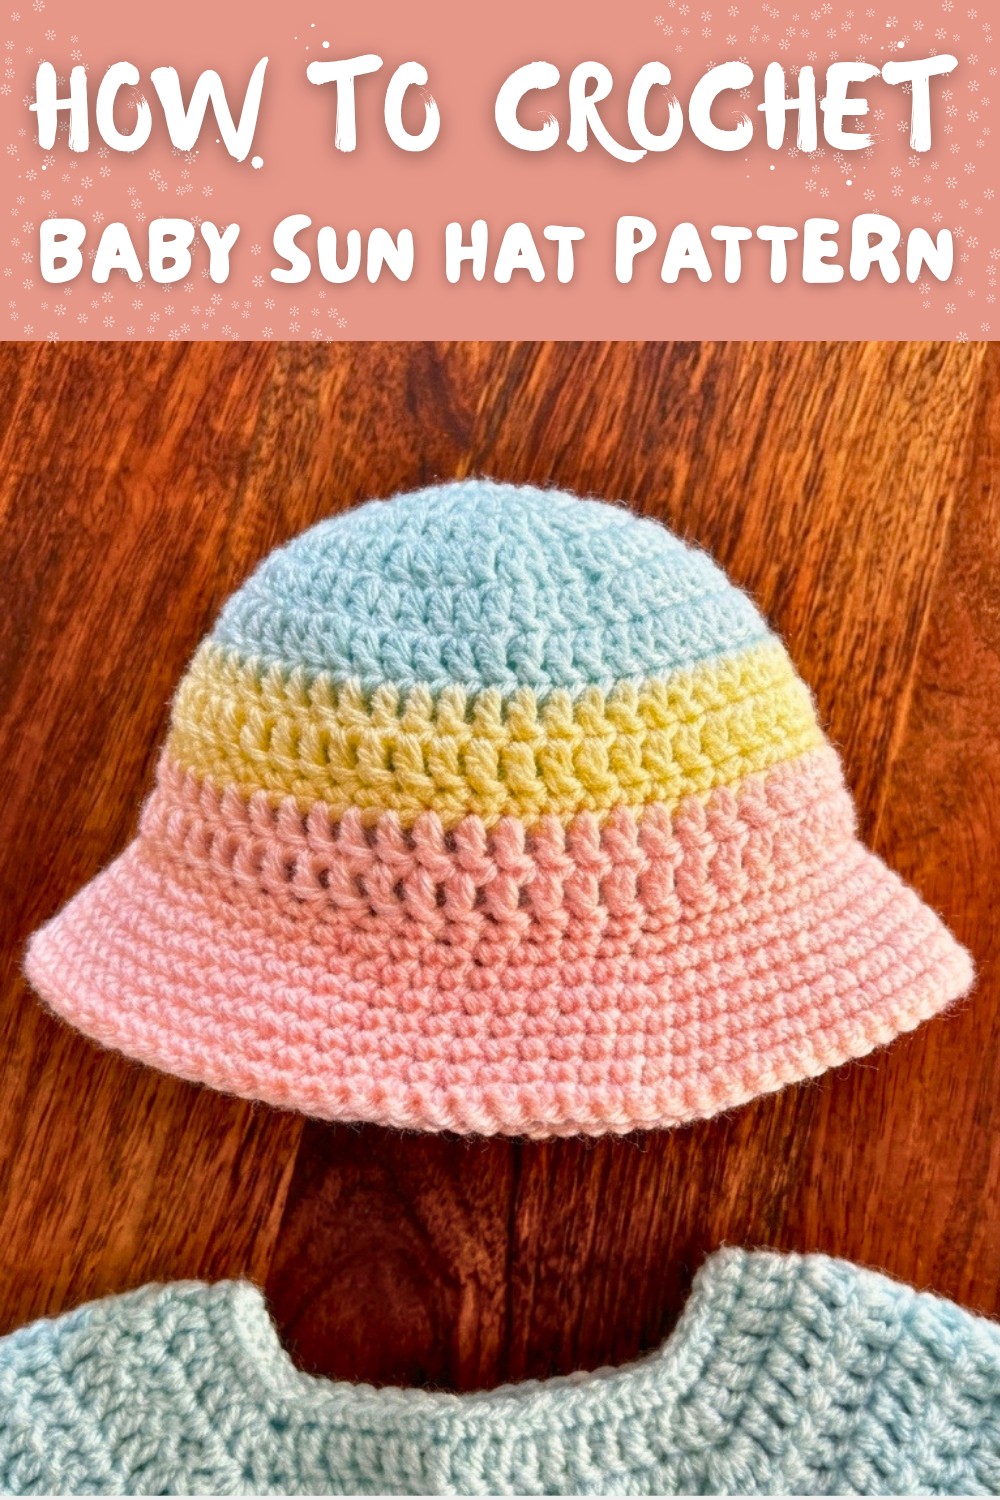
Create a stylish and practical summer accessory that's perfect for little ones. This adorable sun cap features a beautifully rounded crown combined with a wide, wavy brim that looks just like a charming boutique bonnet. It's a versatile and eye catching design that makes every outing, from beach picnics to family strolls, extra special. The bright and cheerful colors, paired with a scalloped edge border, create a delightful and sunny appearance.
Free Crochet Baby Sun Hat Pattern That Parents Love

Crocheted with soft cotton threads, the hat is lightweight and breathable, ensuring comfort for even the most active playtimes. A hidden mesh lining at the top adds functionality by keeping the wearer cool while securely in place. Using thin pastel yarn and a simple hook, it's the perfect way to practice basic crochet techniques like circle loops without breaking your budget. Additionally, this project lets you create something highly durable that feels like a luxury handmade gift for loved ones.
The playful waves and creative design of this sun cap add a unique sparkle to any baby's outfit. Whether shielding little eyes from the bright sunlight or keeping things cozy during a stroller ride, this pretty hat ensures both style and protection. Its gentle texture is perfect for delicate skin, while the wide brim effortlessly blocks harsh sunlight, making it an excellent choice for warm summer days.
Materials Needed
- Yarn: DK weight yarn (Size 3) You will need three colors.
- Example: Color A, Color B, and Color C.
- Crochet Hook:
- 3 mm hook: Makes a hat for 0-6 months.
- 3.5 mm hook: Makes a hat for 6-12 months.
- 4 mm hook: Makes a hat for 1-3 years.
- Tapestry Needle: A blunt ended needle for sewing ends.
- Scissors: For cutting yarn ends.
Special Techniques Explained
- Slip Knot: Create a loop, insert the yarn through the loop, and tighten it.
- Double Crochet (DC): Yarn over, insert your hook, yarn over again, pull through the stitch, then yarn over twice to fully complete the stitch.
- Single Crochet (SC): Insert hook into the stitch, yarn over, pull through, yarn over again, then pull through both loops on the hook.
- Slip Stitch (Sl St): Insert hook into a stitch, yarn over, then pull through both loops.
- Chainless Starting Double Crochet: A beginner friendly method to start a DC row without chaining at the beginning.

Steps to Crochet the Baby Sun Hat
Step 1: Crown of the Hat
- Foundation Ring
- Start with a slip knot, ensuring the tail tightens the loop. Next, chain 3 to create the base ring where you'll crochet the pattern.
- Round 1 (Base Circle)
- Into the first chain (base ring), make 10 double crochets (DC).
- To complete this round, insert your hook at the top of the first DC, yarn over, and make a slip stitch (Sl St).
- Tighten the middle hole by pulling the tail end of the yarn gently.
- Round 2 (Increase)
- Begin with a chainless starting DC or chain 2.
- Make 2 DC into each stitch from the previous round, increasing the stitch count with every stitch.
- At the end of this round, you should have 20 DC stitches.
- Round 3 (Increase)
- Start with 2 DC into the first stitch, followed by 1 DC into the next stitch. Repeat this sequence (2 DC, 1 DC) around the circle.
- You will have 30 DC stitches at the end of this round.
- Round 4 (Increase)
- For this round, make 2 DC into the first stitch, then 1 DC into the next two stitches. Repeat this sequence (2 DC, 1 DC, 1 DC) throughout the round.
- Finish the round with 40 DC stitches.
- Round 5 (Final Increase for Crown)
- Make 2 DC into the first stitch, followed by 1 DC into the next three stitches. Repeat this sequence (2 DC, 1 DC, 1 DC, 1 DC) around the circle.
- At the end of the round, you should have 50 DC stitches.


Step 2: Body of the Hat
- Round 6:
- Crochet 1 DC into each stitch for the round. This round will not involve any increases or decreases. The stitch count remains 50 DC stitches.
- Change to Color B:
- After completing Round 6 with Color A, pull through Color B to start the next section. Secure the new color by pulling the old yarn tight.
- Round 7-8:
- Work 1 DC into each stitch for two rounds using Color B, maintaining the stitch count.
- Round 9 (Single Crochet Round):
- Switch to Single Crochet (SC) for this round. Work 1 SC into each stitch to create a tighter band.
Step 3: Third Color Section
- Change to Color C:
- Pull through Color C after finishing Color B, just like before.
- Rounds 10-11 (Double Crochet in Color C):
- Work 2 rounds of DC, making 1 DC into each stitch.
- Round 12 (Single Crochet in Color C):
- Switch to SC and complete 1 round of SC using Color C.
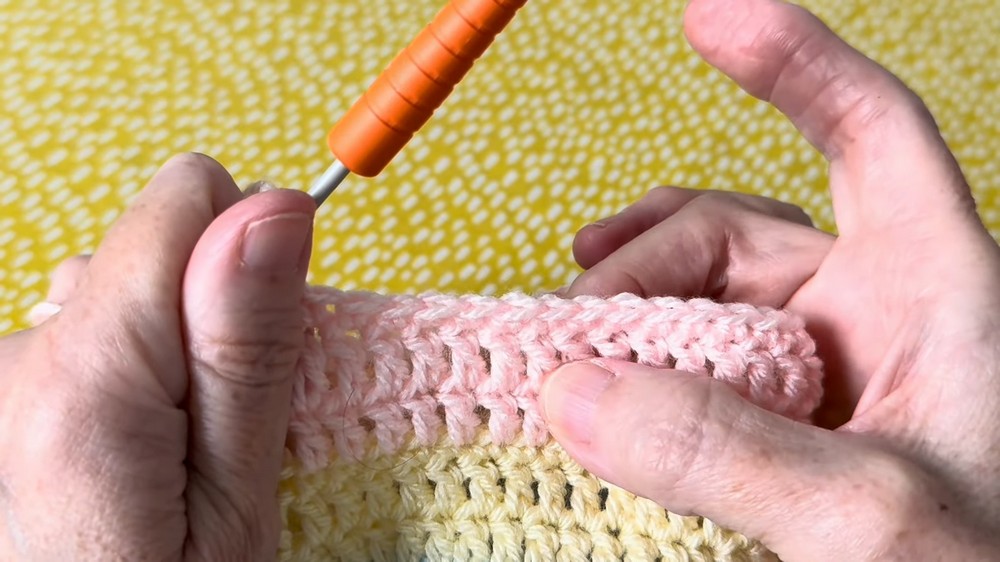
Step 4: Brim of the Hat
- Round 13 (Increase for Brim):
- Start with 1 SC into the first stitch and make 2 SC into the next stitch.
- Repeat this sequence (1 SC, 2 SC) all the way around to add width to the brim.
- Round 14 (Optional Increase):
- For a firmer brim:
- Make 1 SC into 14 stitches, then make 2 SC into the next stitch (repeat sequence evenly across the round).
- At the end of this round, your stitch count should increase to approximately 80 stitches.
- If you prefer a more floppy brim, increase further by evenly spacing your increases.
- For a firmer brim:
- Rounds 15-18 (Brim Rows without Increases):
- Work 4 rounds of SC without any increases or decreases. Make sure to keep the stitch count steady throughout each round.
Step 5: Final Round (Optional Reverse Crochet)
- Reverse Single Crochet (Decorative Edge):
- Chain 1, then turn your work.
- Work 1 SC into each stitch in the opposite direction (reverse crochet). This technique creates a textured edge, distinguishing the brim's finish.
- Regular Edge (Optional):
- If you prefer a smoother edge, complete the final round with SC in the regular direction.

Finishing the Project
- Fasten Off:
- After completing the hat, cut the yarn, leaving a small length. Pull the loop tight to secure the end.
- Weaving Ends:
- Use a blunt ended tapestry needle to neatly weave the yarn ends into the fabric.
- Split the yarn fibers slightly to ensure the tail stays hidden and secure.

Final Words and Size Comparisons
This adorable hat is perfect for babies of varying ages, with its size determined by the crochet hook used. The smallest size (0-6 months) is made with a 3 mm hook, while a 3.5 mm hook creates the 6-12 months size. Finally, a 4 mm hook suits toddlers from 1-3 years.
The versatility of the pattern allows you the freedom to customize colors and brim width based on personal preferences.
Tips for Success and Maintenance
- Sizing Adjustments: Always measure your crown diameter after completing the increase rounds to confirm the correct size. Detailed sizing and crown measurements can be found in the video description.
- Neat Color Transitions: When changing colors, always secure the new yarn by pulling the previous color tight.
- Blocking for Shape: Soak the hat lightly and shape it to perfection using a bowl or mannequin head. Let it air dry to maintain its form.
- Creative Additions: Add embellishments like bows, ribbons, or crochet flowers for extra charm.
- Care Instructions: Handwash the hat gently with mild detergent to maintain its stretch and quality. Lay flat to dry to avoid distortion.
This baby sun hat pattern is simple yet elegant. It's perfect as a handcrocheted gift or a summer essential for little ones. Crochet a few in fun color combinations and enjoy the beauty of this easy crochet project.