
Free Crochet Bag Pattern – Ultimate Style Hack
Try your hand at this free crochet bag pattern for a creative and useful way to carry your essentials with handmade flair.
Have you ever thought about making a bag that's not only beautiful but also super useful? With a simple crochet hook and some yarn, you can bring to life a stunning and functional bag that's perfect for any occasion. What makes this bag special is how it combines elegance and practicality. Its texture is smooth and eye catching, while the detailed stitches make it strong enough to carry your daily essentials. The sturdy base ensures the bag keeps its shape, and the charming handles make it easy and comfortable to carry. Whether it's for shopping, carrying books, or even as a subtle fashion statement, this bag ticks all the boxes.
Customize Your Look with This Amazing Free Crochet Bag Pattern

The best part? You can let your creativity shine by choosing your favorite colors and materials. Use bright shades for a fun, cheerful look or go for soft tones for a more classy vibe. You can even add extra details like zippers or embellishments to make it your own. This bag is also durable and eco friendly. Instead of buying bags from the store, you're making something by hand that you can use again and again. It saves money, looks beautiful, and is a perfect example of something valuable made with love.
Whether you're new to crochet or have some experience, this project is perfect for you. It's not just a bag-it's something useful, memorable, and personal. Get started today and enjoy watching your hard work turn into a real masterpiece.

Crochet Bag Pattern
Materials Required
- Yarn: 4-5 skeins of acrylic yarn (Recommended: Ami brand or similar, 50g per skein).
- Prepare up to 5 skeins if you intend to make a longer handle.
- Choose your preferred color for customization.
- Crochet Hook: Size 6 mm (Tulip size or similar).
- Accessories:
- 1 handle made of pearls, 23 cm in length.
- 2 round open close rings.
- 2 clips for attaching the handle.
- Nylon zipper teeth (zipper head and strip).
- Canvas plastic for base stiffening (prepare 2 pieces).
- Optional: Sewing machine (if you are adding lining) and pins for zipper alignment.
- Additional: Scissors, tapestry needle (for weaving in ends), and stitch markers.
Gauge
- Gauge isn't critical for this project but should result in a dense and uniform fabric for structural integrity.
- Gauge Swatch: 10 sts × 12 rows (Single Crochet) with a 6 mm hook = 4" × 4".
Finished Size
- Tote dimensions: Length-23 cm; Width-8 cm; Height-24 cm (excluding handle).
- Handle length: 23 cm (pearl strap) or 48 cm (if crocheted). Adjust handle length as per preference.
Pattern Sections
- Base
- Body
- Joining Zipper
- Handles
- Final Assembly
Pattern Instructions
Base of the Tote Bag
- Start: Create a slipknot and chain 9.
- Row 1: Single crochet (SC) into the second chain from the hook and in each chain across (8 SC). Turn.
- Row 2-34: Chain 1, SC across (8 SC per row). Repeat until you have 34 rows.
- Second Base Panel: Create another identical panel by repeating steps 1-3.Tip: If you plan to line your bag, you'll only need one base panel.
- Joining the Panels:
- Place the 2 panels together. Using SC, join the panels around the edges.
- Corners: At each corner, work 3 SC (this acts as an increase to ensure proper shaping).
- Insert the canvas plastic inside before completely closing the sides. This provides structure.

Body of the Tote Bag
- Foundation Round:
- Chain 1. Work a round of SC around the base (approximately 90 SC in total). Slip stitch to the first stitch to close.
- Start the Body Motif:
- Chain 5 (counts as the first double crochet (DC) and chain 2 space).
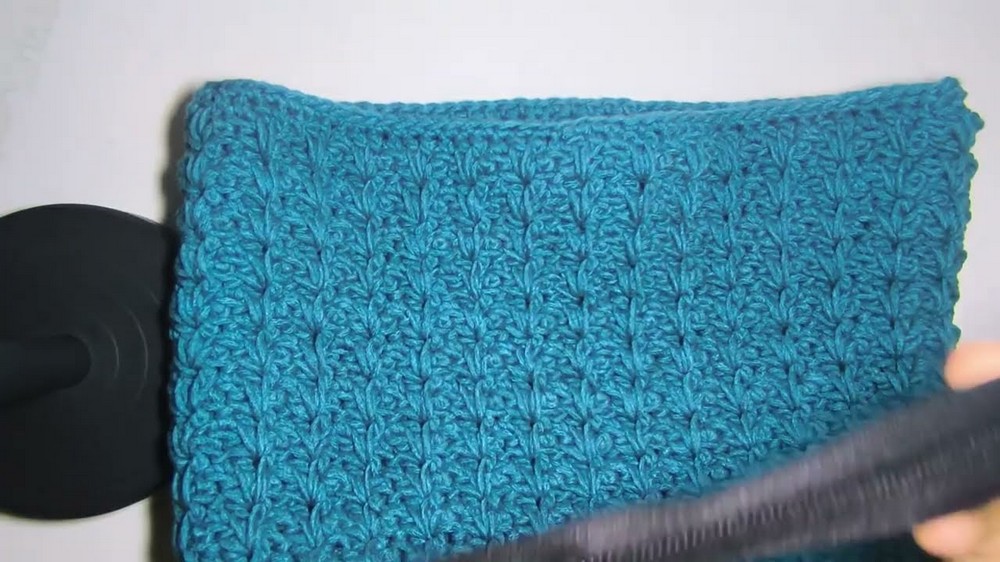
- Work a DC in the same stitch (but don't complete it, leaving two loops). Skip the next 2 stitches, and work another DC in the next stitch. Pull through all three loops (this creates the "DC Cluster").
- Chain 2. Repeat this cluster pattern around.
- Subsequent Rounds: Follow an alternating pattern:
- Odd numbered rounds (e.g., 1, 3, 5): Use the DC Cluster pattern.
- Even numbered rounds (e.g., 2, 4, 6): SC into the "V" created by the cluster, and work 2 DC into the spaces formed by the previous row's clusters.
- Repeat Pattern: Continue alternating the rounds (DC Cluster and SC-DC pattern) for 24 rounds total, or until the desired height is achieved.
- Tip: Always end on an even numbered row for a cleaner finish.
- Edging Round: Work an SC stitch in each stitch around to create a smooth finish. Slip stitch to join and fasten off.


Zipper Installation
- Zipper Preparation:
- If adding a zipper, align the zipper along the bag's opening using pins to prevent shifting.
- Sew the zipper in place either using a needle/thread or a sewing machine.
Tip: Keep the zipper teeth aligned cleanly with the crochet edges for a neat look. If you plan to add a lining, attach the lining along with the zipper.


Creating Crochet Handles (Optional)
Follow this step only if you're crocheting handles instead of attaching the pearl handle.
- Start with Clip Attachment:
- Attach your yarn to the metal clip by chaining 1 and working 4 SC into the clip's loop.
- Thermal Stitch Handle:
- Chain 1, turn. Work SC in the back loop only (BLO). Repeat for the second row.
- From the third row onwards, grab both the back loop of the current stitch and the loop behind from the previous row. Continue with SC, creating a thermal stitch texture.
- Length of Handle: Repeat rows until the handle reaches the desired length (48 cm recommended).
- Attach Second Clip: Work SC across the loop of the second clip to secure the handle in place. Fasten off and weave in ends.
Handle Assembly
- Round Rings: Attach the round open close rings to the bag through the SC edge stitches adjacent to the zipper.
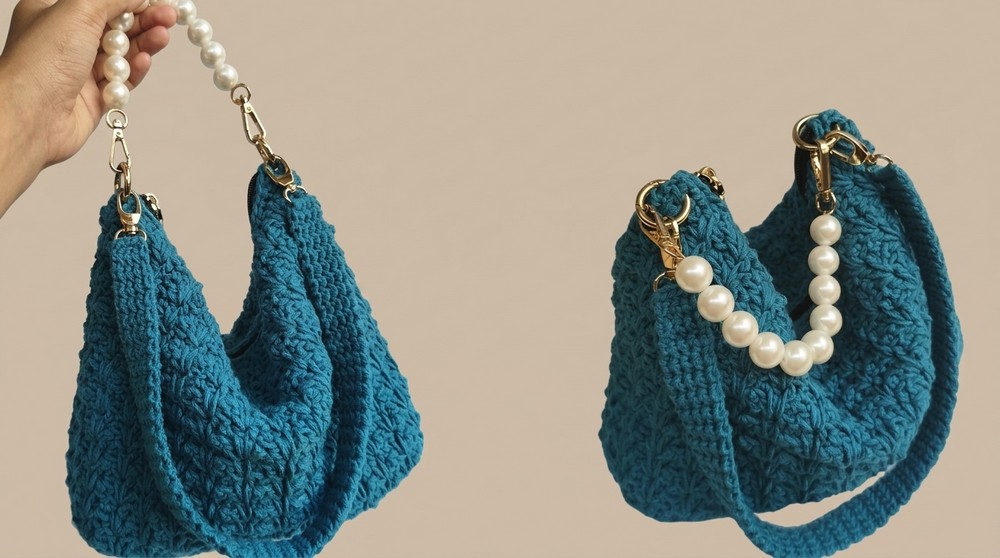
- Handle Attachment: Clip the crochet (or pearl) handle to the round rings.
Customization Ideas
- Colors: Use a single or multiple colors. Stripes, gradients, or blocks can add visual interest.
- Embroidery: Once the bag is complete, embroider patterns like flowers, monograms, or abstract designs.
- Lining & Pockets: Add a fabric lining with inside pockets for organization.
- Strap Options: Replace the crochet handle with leather or chain handles for a more polished look.
Special Techniques
- Thermal Stitch: This creates a double thick fabric, ideal for sturdy handles. Always insert the hook through both the current row's back loop and the previous row's loop.
- DC Cluster (or DC Tutok): This creates a prominent "V" design throughout the bag body, lending it texture and personality.

Tips for Success
- Use stitch markers to track the start of each round, especially when working in spirals or clusters.
- Plan cutting and joining points for a neat overall finish.
- Block finished panels before assembly for a polished shape and uniform size.
Conclusion
By following this pattern, you'll create a durable, stylish tote bag perfect for daily use or as a thoughtful handmade gift. The combination of functional design and decorative motifs leads to a versatile result. Whether carried to the market or used as a project bag, this tote is as practical as it is beautiful.
Final Look: The completed bag features a structured base, a textured body with eye catching patterns, and secure handles ready for everyday carrying. The mix of crochet with hardware elements gives it a polished, professional finish.
Enjoy the crocheting process, and remember-the best part about handmade items is the story they tell through every stitch.