
Free Crochet Bandana pattern with step-by-step guide
Style casual looks with Free Crochet Bandana Pattern, featuring soft texture and trendy charm that fits easy outfits and sunny day moods.
Adding a little flair to your outfit can be simple and fun. A handmade accessory often makes the biggest difference. One such creative idea is a crochet bandana pattern. This pattern is perfect for someone just starting with crochet. It's easy to follow and doesn't take long to complete. The bandana feels soft and cozy, making it nice to wear around your head or neck. Because it's made from yarn, it won't irritate your skin like some rough fabrics can. Besides looking good, it can help keep the sun off your face or hold back stray hair when it's windy.
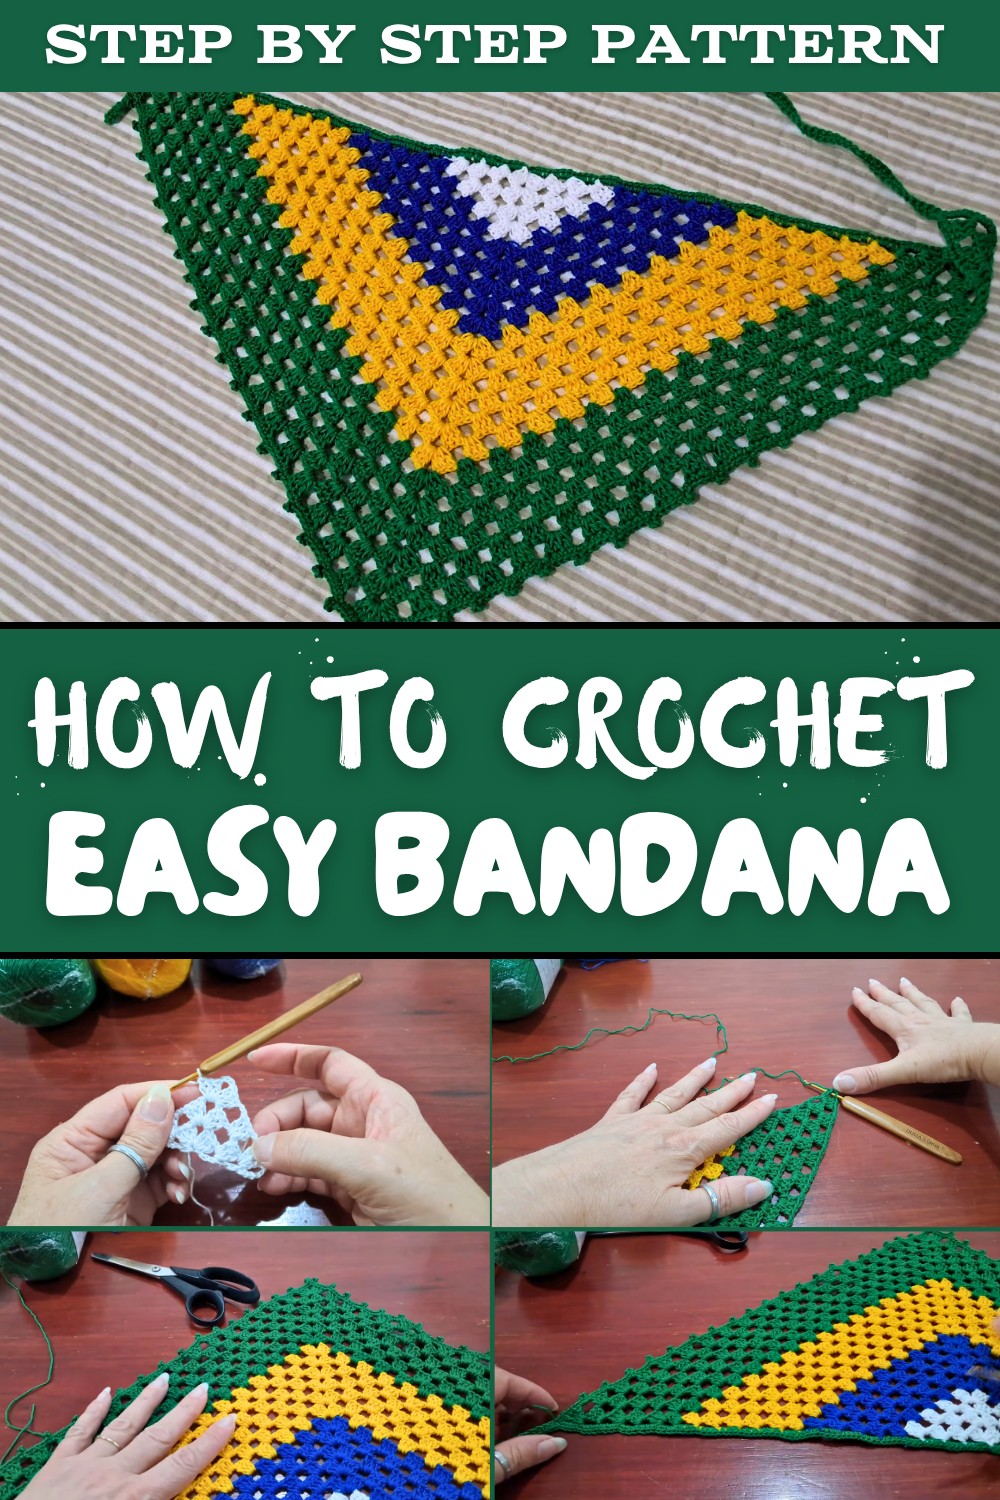
Simple summer accessory Free Crochet Bandana pattern
What's great about this project is how you can pick any color you like. That way, your bandana matches your personal style or brightens up an outfit. You can also add tiny decorations like beads or pretty edges to make it truly one-of-a-kind. The stitches in the crochet create a lovely texture that adds charm you won't find in a regular store-bought bandana.
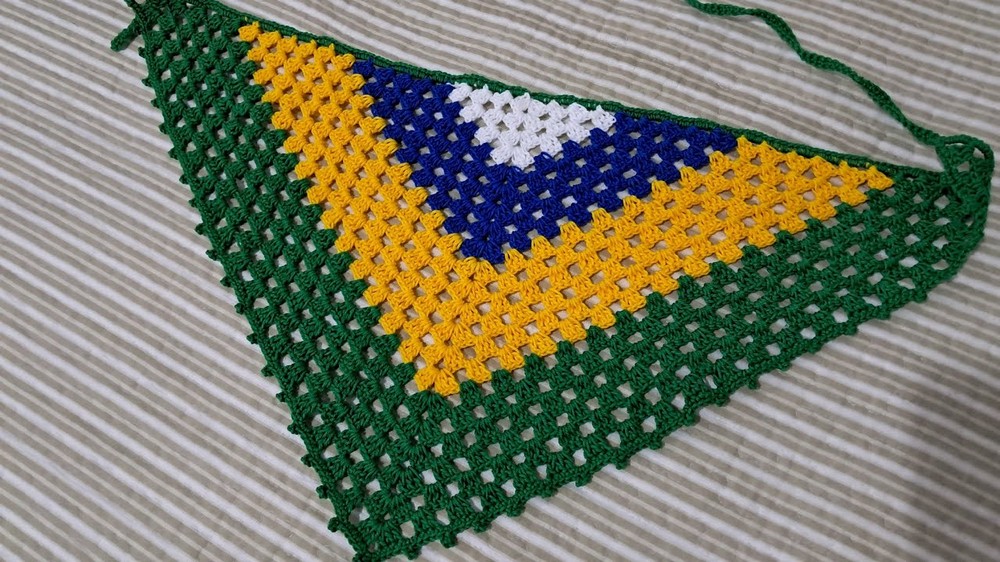
Sizing is no problem either. You can make a snug, small bandana or a bigger one to keep you warmer on chilly days. This makes it a handy item no matter the season. Plus, as you work on it, you'll get better at crochet and gain confidence. All in all, a crochet bandana pattern is a great way to blend comfort, style, and practicality in a small, handmade piece that feels special every time you wear it.
Brazilian Flag-Inspired Crochet Bandana Pattern
Add a unique handmade touch to your wardrobe with this fan-shaped crochet bandana featuring the vibrant colors of the Brazilian flag. This pattern walks you through creating a textured fan motif base layered in stripes of white, blue, yellow, and green, finished with a delicate pointed edge. Perfect for beginners with some crochet experience, it's a stylish accessory that wraps beautifully and can be adjusted to your size preference.
Important Preparations Before You Begin
- Yarn Choice: Use medium-weight cotton or acrylic yarn suitable for shawls or bandanas.
- Hook Size: Recommended crochet hook size is approximately 3 mm, but adjust based on your tension and yarn thickness to keep fabric flexible but not stiff.
- Colors: You'll need yarn in white, blue, yellow, and green to mirror the Brazilian flag's color palette, but feel free to customize.
- Tools: Small crochet needles for finishing and thread management, scissors, and adhesive fabric glue for securing ends if desired.
- Note on Tension: Maintain loose, relaxed stitches to achieve the soft drape and fan texture characteristic of this design.
- Workspace: A flat surface for laying out and measuring the bandana helps maintain shape and size.
- Time & Patience: The bandana involves repetitive fan motifs and rows, so take your time for even stitches and consider using stitch markers for row beginnings.
Detailed Notes About the Pattern
- The bandana is composed of fan-shaped crochet stitches worked in consecutive rows, each separated by chains to create lacy texture.
- Stitches are worked loosely to attain a soft, pliable fabric.
- Each color is worked in rows to build stripes representing the flag colors, starting with a white base.
- The pattern includes chain spaces used for fan formation and turning chains that act as lacy points.
- Special attention is given to turning chain length and fan stitch spacing for maintaining shape and flow.
- The final bandana size is adjustable according to the number of rows and chains at start.
- The edge is finished with small picot points or a simple edge depending on your preference.
- Embellishments like sewing in threads and light ironing help shape and stabilize the final piece.
How the Bandana Is Constructed
- Start with a magic ring to create a small circular center, then build out fans by chains and treble crochet stitches.
- Work initial rows in white yarn for a neutral base, maintaining fan stitches separated by chains.
- Continue with rows in blue, yellow, and finally green, each forming neat color bands.
- Keep stitch count and spacing consistent for smooth transitions and fabric drape.
- Finish with pointed picot edges by crocheting small chain loops secured with single crochet or slip stitches.
- Weave in yarn ends gradually through colored stripes, and optionally secure with fabric glue or light ironing.
Skill Level
This pattern suits Advanced Beginners to Intermediate. Familiarity with chain stitches, double (dc) and treble crochet (tr), turning techniques, and color changes is helpful. Beginners may need some practice with fan stitch groups.
Approximate Finished Size
- Width: Approximately 60 cm (24 inches) across the widest point.
- Length (height from center to edge): Approximately 28-30 cm (11-12 inches).
- Adjust size by increasing or decreasing number of rows worked.
Materials Needed
| Item | Specification |
|---|---|
| Yarn | Medium-weight cotton or acrylic yarn |
| Crochet Hook | 3 mm (or size needed for yarn weight) |
| Small Crochet Needle | For finishing and weaving in threads |
| Scissors | For cutting yarn |
| Fabric/Artistic Glue | Optional, for securing finishing touches |
| Stitch Markers | Optional, for marking rows or fans |
Suggested Gauge
- Gauge not crucial but approximate:
10 chains + 5 rows of fans = about 10 cm (4 inches) width and height. Adjust hook/yarn for desired drape.
Stitch Abbreviations (US Terms)
- ch = chain
- sc = single crochet
- dc = double crochet
- tr = treble crochet (also called triple crochet)
- sl st = slip stitch
- st(s) = stitch(es)
- pico / picot = small decorative loops made of chains, secured with sc or sl st
- rep = repeat
Explanation of Special Techniques
- Magic Ring: Start by making an adjustable loop to work the initial stitches; allows tight center with no hole.
- Fan Stitch: Typically consists of groups of 3 dc or tr stitches into same stitch or space, separated by chains creating a fan or shell appearance.
- Loose Stitching: Looser tension keeps fabric flexible and prettier; avoid tight stitches for this pattern.
- Picot Edge: Creating a decorative trim by chaining 2-3 then anchoring back with a sc or sl st to add a pointed edge.
- Color Changing: Transitioning between yarn colors by finishing one row and starting the next with new color without holes or breaks.
Pattern Instructions Step-by-Step
Part 1: Begin with the Magic Ring and First Row
- Create a magic ring.
- Ch 4 (counts as first treble crochet), then work 3 treble crochets (tr) into the magic ring for a total of 4 tr.
- Chain 5, then work another group of 4 tr into the magic ring.
- Repeat chain 5 and 4 tr groups until you have completed 4 fans separated by chain-5 loops.
- Do not pull the ring tight yet.
- Join with a slip stitch (sl st) to the 4th chain of the beginning chain-4.
- Gently pull magic ring to close the center.
Part 2: Fan Rows in White Yarn (Foundation)
- Ch 5 to start next row (counts as first tr + chain 2).
- In next chain-5 space, work 4 tr.
- Ch 2, 4 tr in next chain-5 space.
- Continue around for 4 sets of 4 tr, separated by ch 2.
- Join with sl st.
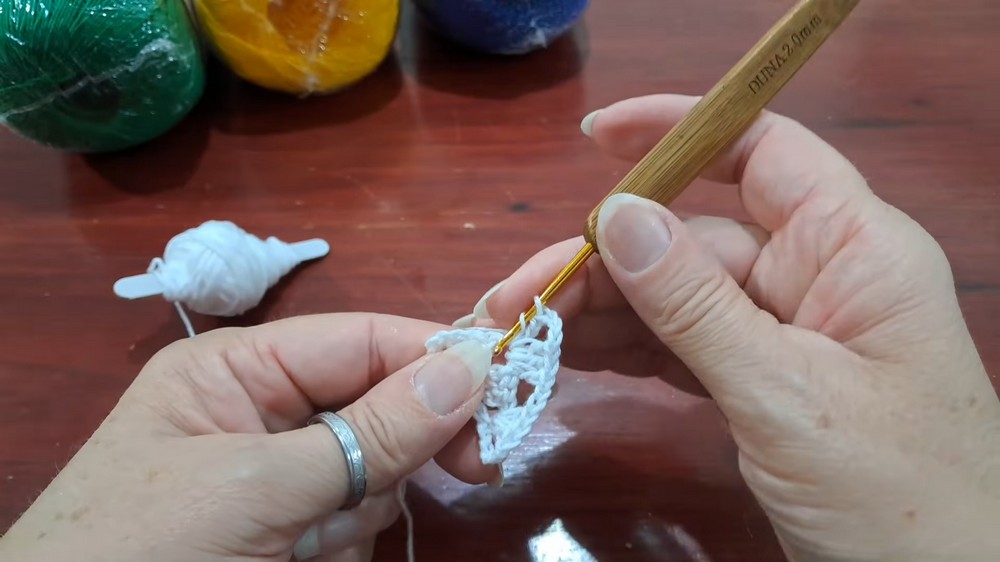
Part 3: Continue Rows and Color Changes
- Repeat previous step for 4 rows of white yarn, making sure chain spaces and fans align.
- Finish last row in white with ch 5 to turn.
- Change yarn to blue.

Part 4: Blue Yarn Rows
- Repeat the same fan and chain pattern for 5 rows with blue yarn, maintaining shape and tension.
- Complete all blue rows with a turning chain consistent with previous rows.
Part 5: Yellow Yarn Rows
- Change to yellow yarn.
- Work 6 rows repeating the fan and gap pattern, ensuring smooth color transitions.
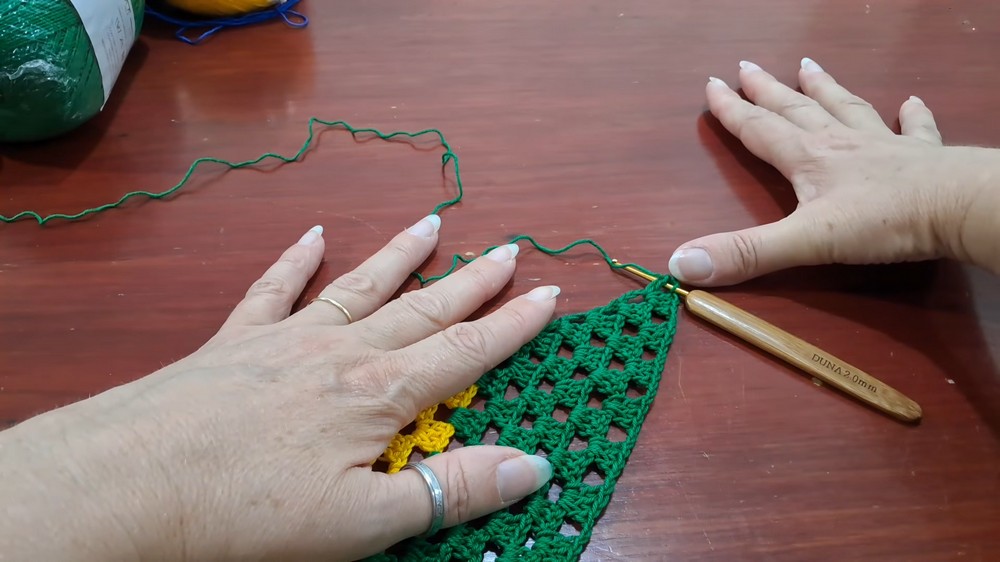
Part 6: Green Yarn Rows
- Change to green yarn.
- Work 6 rows continuing the fan stitch pattern as above.
- Finish last green row with ch 5 and join.
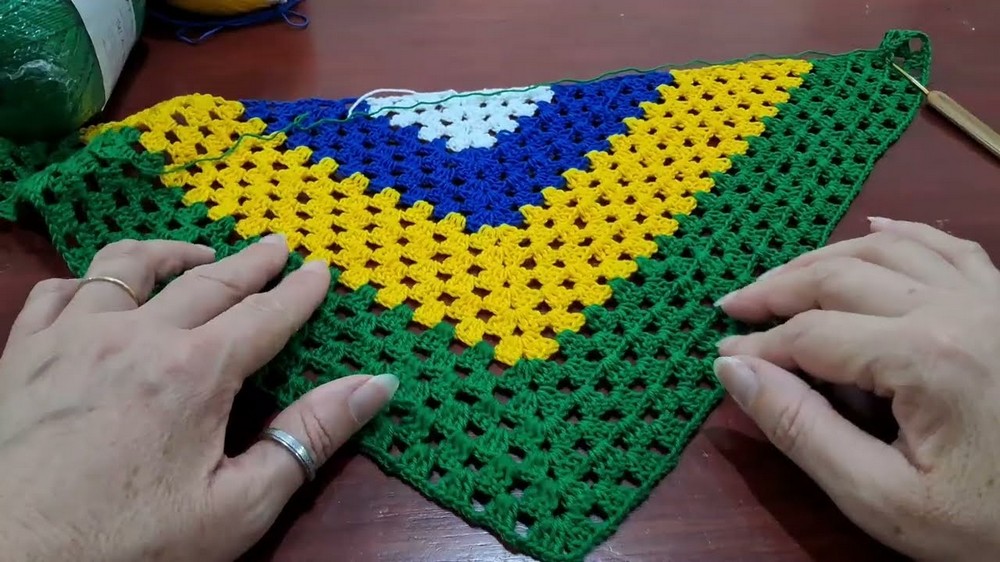
Part 7: Finish Edging with Pointed Tips
- Across the final row's chain spaces, work fan-shaped groups ending with picot points: chain 3, sc in prior stitch to form the point, or create small triple chain loops secured with sc for decorative edges.
- Make 2 or 3 picots at fan edges based on preference for more open or closed trim.

Part 8: Final Touches
- Fasten off yarn.
- Weave in all loose ends carefully with a tapestry needle.
- Optionally, lightly steam and shape bandana for best drape and flat finish.

Beginner's Explanation
Start by crocheting a small circle formed of fan stitches separated by chain loops. Build layers of fan rows separated by chain spaces, adding colors as you progress to represent the Brazilian flag theme. Switch yarn colors cleanly at row ends. Finish by adding a pretty pointed edge along the outer border. Take time to maintain loose, even stitches to keep the bandana flexible and elegant.
Assembly & Finishing Guidelines
- Secure all ends with weaving or small, neat knots pinned inside bandana fabric.
- Optionally use fabric glue to secure tricky yarn tails.
- Pin or lay flat and steam gently with an iron to set shape and relax fibers.
- Store folded or rolled to maintain crispness.
Troubleshooting and Helpful Tips
- If fans appear tight or stiff: Switch to a larger hook or loosen tension for better fabric drape.
- Uneven edges: Check stitch counts carefully and use stitch markers to keep track.
- Color bleed or messy joins: Weave in ends securely and switch yarns at row ends using accepted color change methods.
- Difficulty with picot edges: Practice picot stitches separately before attempting border.
Related Project Ideas Using Similar Techniques
- Color-block shawls or wraps combining fan stitches and color stripes
- Triangle scarves with fan stitch edging
- Fan stitch blankets and throws in multiple colors
- Decorative afghan squares featuring fan motifs
- Lacy shawls with point-edged borders for formal wear