
Free Crochet Cardigan Pattern That's Travel-Friendly
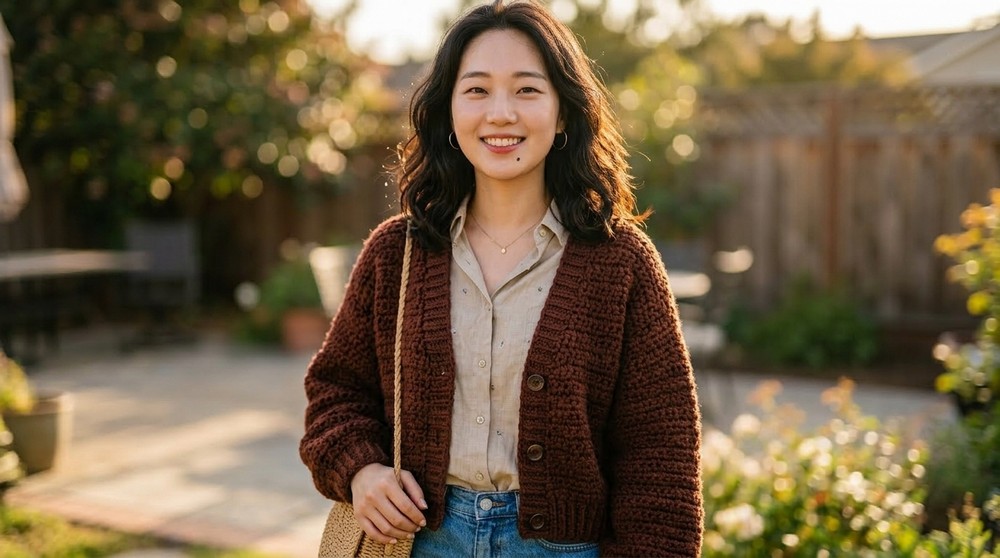
Enjoy the feeling of wearing something made by you with this Free Crochet Cardigan Pattern designed for comfort and timeless style.
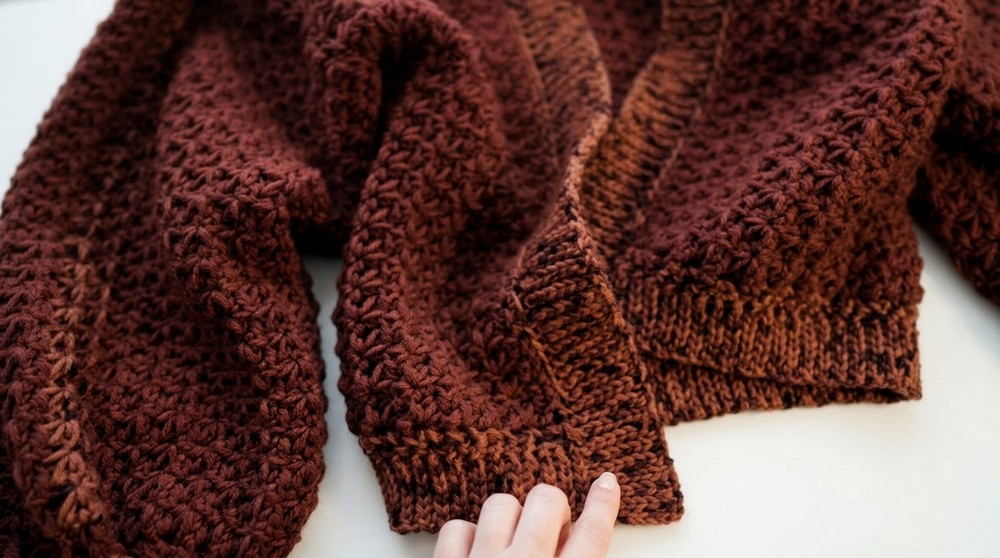
Do you want to make a stylish and cozy cardigan? With this Free Crochet Cardigan Pattern, you can create something beautiful that is practical, comfortable, and perfect for any weather. This cardigan has a gorgeous texture created using the Trinity Stitch, which gives it a modern and classy look. The design features two front panels, a back panel, and long sleeves, all joined together seamlessly. You can easily adjust the size and length to fit your needs or personalize it as a gift for loved ones. The added ribbed borders on the edges and cuffs create a polished, finished feel while making it snug and practical.
Free Crochet Cardigan Pattern that's Perfect for a Boho Look

This cardigan can be worn for almost any occasion. It's great for cozy nights at home, layering during chilly winter evenings, or as a trendy accessory for casual outings. Plus, the pattern lets you use different yarn colors or textures, which means you can make it truly yours.
One standout feature of this pattern is its easy to understand steps, explained clearly so anyone can follow along. The back loop stitching and clever joining techniques ensure that the cardigan looks clean and professional, even if you're new to crocheting. So grab your yarn, a crochet hook, and some patience, and get started. Not only will you enjoy making this cardigan, but you'll also have a stylish, handmade piece to wear proudly or gift to someone special. It's practical, beautiful, and so much fun to make.
Crochet Cardigan Pattern
Materials Needed:
- Yarn: Worsted weight yarn (quantity depends on the desired size of the cardigan; refer to your gauge swatch for accurate estimation). Opt for soft, durable yarn for wearability.
- Crochet hook: Recommended size as per yarn label or adjust for gauge. Use a smaller hook (optional) for tighter stitches in cuffs and borders.
- Scissors
- Measuring tape
- Yarn needle for weaving in ends
- Stitch markers (optional, for marking armholes and other points)
- Stitch count reference: Gauge swatch for determining size.
Techniques Used:
- Chain Stitch (ch): Foundation chain, adds height to the piece.
- Single Crochet (sc): Primary stitch used.
- Slip Stitch (sl st): For joining and seamless finishes.
- Back Loop Work: Stitches worked into the back loop only.
- Decreases: Reducing stitch count via slip stitch or single crochet.
Pattern Instructions:
1. Front Panels
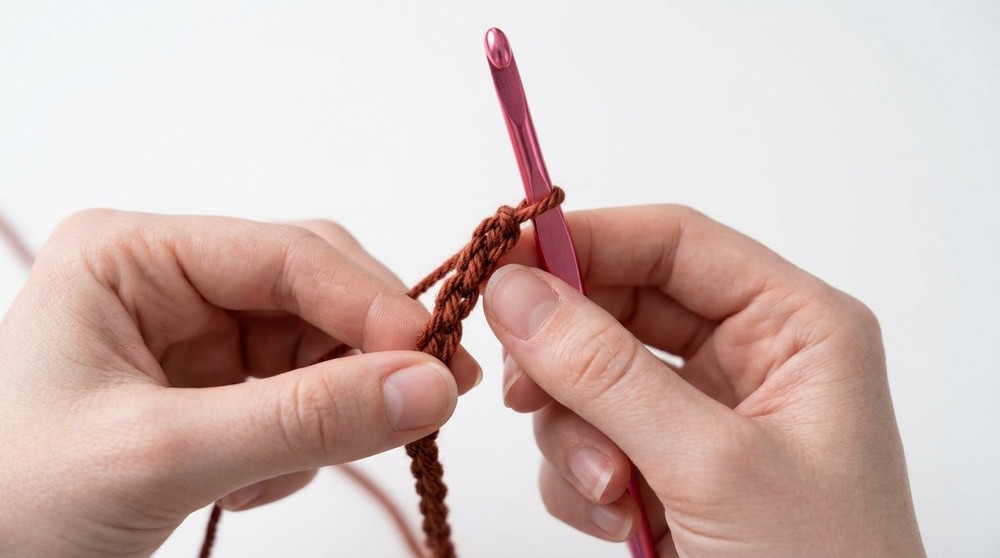
- Begin with a foundation chain using an odd number of chains as per the desired width for the front panels. For example, create a chain of 51.
- Chain an additional 1 for turning.
- Work the first row:
- Turn the chain to expose the back bumps.
- Crochet a single crochet (sc) in the second back bump from the hook. Draw up a loop in the same stitch.
- Draw up loops in the next two back bumps, maintaining four loops on your hook.
- Yarn over, pull through all four loops, and chain 1.
- Repeat these steps until the last stitch:
- For the final Trinity Stitch, do not chain 1. Instead, complete the stitch and work a single crochet in the last stitch.
- Turn your work, and chain 1.
- For subsequent rows:
- Work a single crochet in the first stitch.
- Repeat the Trinity Stitch process (pulling up loops in consecutive stitches, working in sets of four loops).
- Chain 1 after each complete stitch, except for the final one in each row.

2. Back Panel
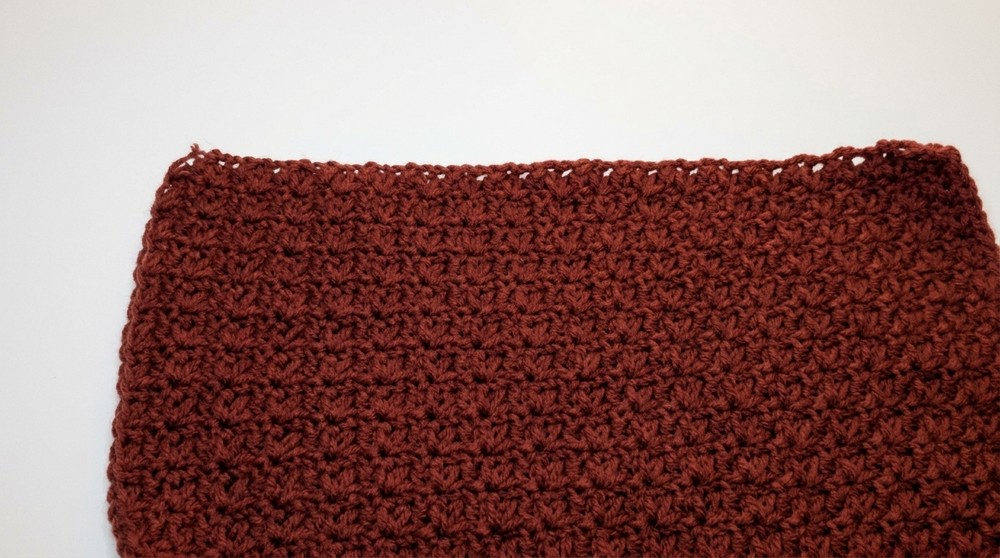
- Follow the same steps as the front panels but adjust the width with a longer starting chain. The back panel width is typically twice the size of one front panel.
- Use the same stitch pattern, starting with an odd number chain, turning with a chain 1, and continuing until the back panel's desired height matches the front panels.
3. Seaming the Panels
- Align the front panels and back panel with the wrong sides facing up. This ensures the seams are hidden when flipped over.
- Use a single crochet stitch to join the tops of the panels (shoulder seams).
- Insert your hook into the first side row of one front panel and the corresponding side row of the back panel.
- Yarn over, pull through the loops, and work a single crochet.
- Continue along the top edges until both shoulder seams are joined.
4. Seaming the Sides
- Decide the length of your armholes. Place stitch markers to mark where your side seams will begin.
- Flip the cardigan inside out to ensure the seam is on the inside.
- Seam the sides using single crochet or slip stitches, starting from the bottom, stopping at the stitch marker for the armholes.
5. Sleeves
- Attach yarn to any stitch in the armhole using a slip knot.
- Chain an odd number for the sleeve width. For instance, chain 47 for your desired width.
- Work sleeves similar to the front panel:
- Chain an additional 1 for turning.
- Follow the Trinity Stitch pattern, pulling up loops and creating sets of four loops on the hook.
- Join the sleeve to the armhole by slip stitching into the base of the armhole after completing one row.
- Turn your work, skipping the two stitches you just slip stitched into, and continue the Trinity Stitch pattern for subsequent rows.
- Follow this process until the full sleeve is complete.
- Once the sleeve is finished, turn it inside out and close the side seam with slip stitches or single crochet.
6. Cuffs
- Attach yarn to any side row of the sleeve with a slip knot.
- Chain 1 and work a single crochet in the same stitch.
- Begin decreasing for a snug cuff:
- From the first side row, draw up a loop. In the next side row, draw another loop. Yarn over and pull through all three loops on the hook.
- Repeat the decrease process all the way around the sleeve.
- Join the round with a slip stitch into the first single crochet and chain 1. Cut the yarn and tie it off.
7. Borders
- Bottom Border:
- Attach yarn to any stitch in the bottom edge using a slip knot.
- Work a single crochet in each stitch across the bottom edge.
- Decide on the depth of your border (e.g., chain 8).
- Work back loop slip stitches into the chain to create a ribbed texture. Once at the base, slip stitch into the next stitch of the bottom edge and repeat.
- Opening Border:
- Start from the bottom border near the opening of the cardigan.
- Attach yarn and work a single crochet stitch in each stitch along the opening edge.
- At the bottom row of the opening, slip stitch to connect with the bottom border. Chain the desired length (matching the bottom border) and repeat.
- Repeat this pattern all the way up and around the opening.

Finishing
- Once all elements are crocheted and joined, weave in the yarn ends using a yarn needle.
- Gently block your cardigan to ensure it lays flat and maintains its shape. Lay it on a flat surface and use a blocking mat if necessary.
- Try on the cardigan after blocking to ensure proper fit and comfort.
Final Words and Tips
- Consistency: Maintain even tension throughout to ensure smooth stitches, especially with the Trinity Stitch.
- Customization: Adjust chain counts, panel lengths, and widths to fit your body. Always measure and compare to your preferred dimensions.
- Yarn Choice: Opt for breathable yarn for warm weather wear or wool blends for colder months.
- Maintenance:
- Wash the cardigan as per the yarn care instructions.
- Store it flat to avoid stretching over time.
- Troubleshooting:
- If your stitches feel tight, size up your crochet hook.
- For gaps, ensure your tension is consistent, and adjust if necessary.
Congratulations on completing your crochet cardigan. The addition of sleeves, the classic Trinity Stitch, and ribbed borders make this piece a chic and versatile wardrobe essential.
