
Free Crochet Crop Top Pattern for Boho Chic Looks
Feel cool and confident all summer with free crochet crop top pattern for stylish, adorable and comfortable handmade fashion for everywhere.
Stylish tops can be made easily at home and worn for any occasion whether it's a sunny day out or a special gathering with friends and family. A crochet crop top pattern makes it simple to create beautiful and comfortable clothing with just some yarn and a hook. You do not need fancy machines or lots of materials to get started even a beginner can follow along with simple steps and pictures. You can wear your top over a dress or with your favorite jeans to feel relaxed and confident.
Free Crochet Crop Top Pattern for Trendy Outfits
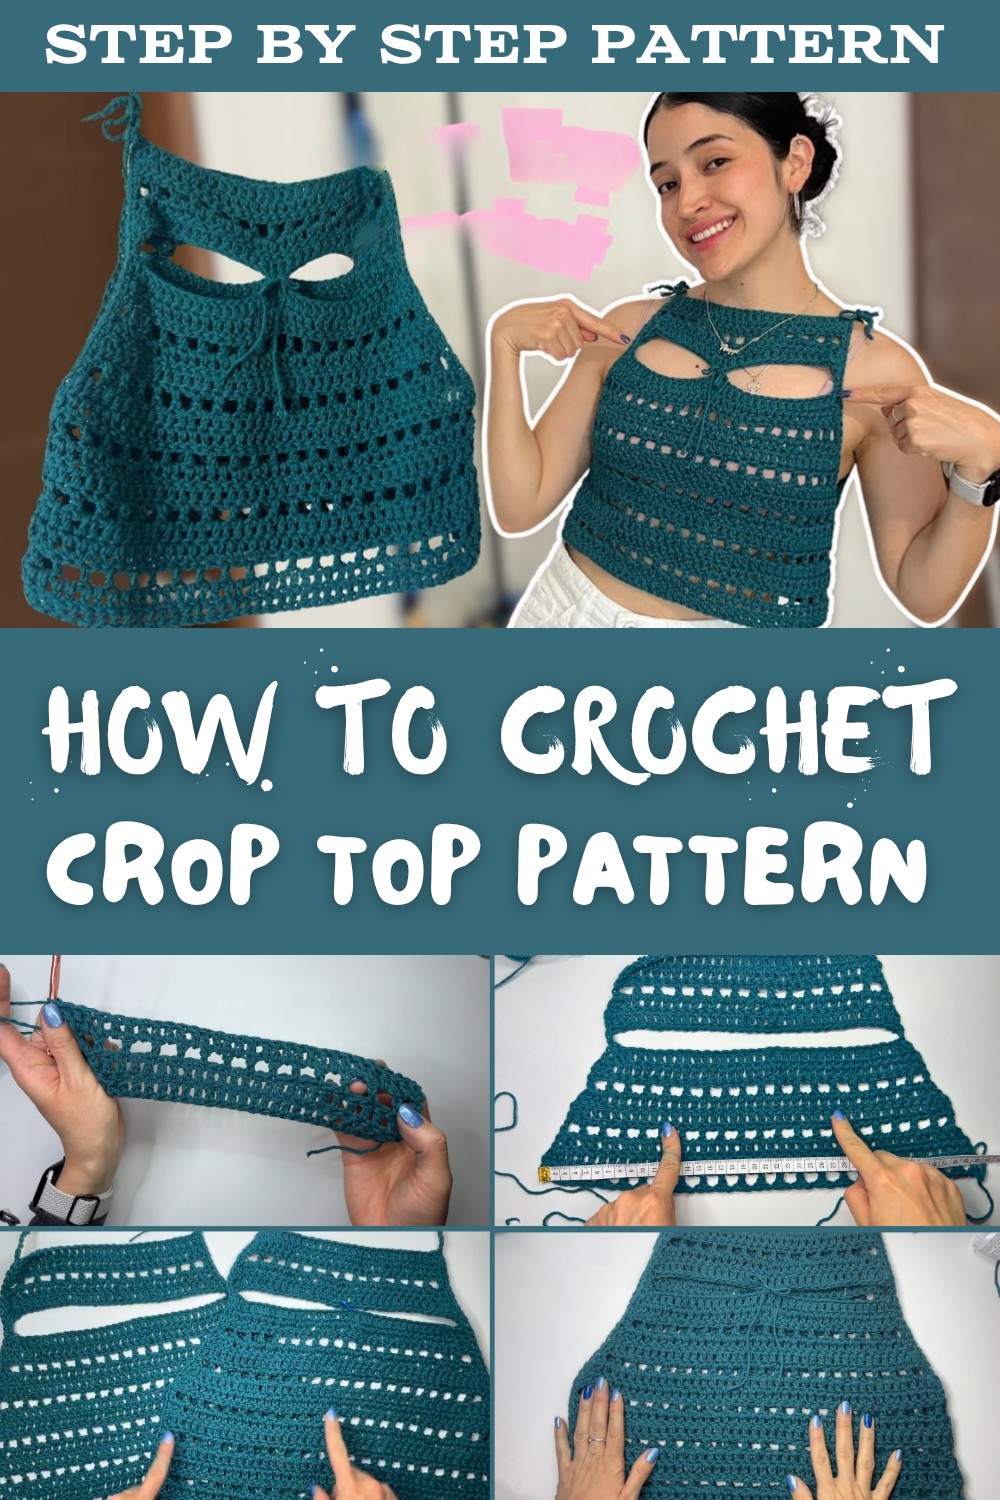
Choosing your favorite colors will make your new top stand out from the crowd and show your personal taste. Because the fabric allows air to flow you will stay cool during hot weather and feel light all day. Using a crochet crop top pattern is a fun way to spend time make new memories and even create thoughtful gifts for loved ones.

Crochet Loose Blouse/Top Pattern
Materials
- Yarn: 100% cotton, medium weight (approx. 3-4 mm thick)
- Yarn Quantity: ~140g for size S; adjust accordingly for larger sizes
- Crochet Hook: Size 5.5 mm
- Stitch Markers
- Scissors
- Measuring Tape
- Tapestry needle (optional, for seaming)
- Optional: Ribbon or cord for neckline ties
Abbreviations (US Terms)
- ch: chain
- sl st: slip stitch
- sc: single crochet
- dc: double crochet
Special Notes
- Always measure your work and compare to your body for a custom fit.
- Pattern requires two panels, front and back, and joined at the sides.
- Odd stitch counts are maintained throughout to align pattern sections.
- Increases are worked at the beginning and end of all double crochet rows until reaching desired bust width.
- Pattern uses standard US crochet terminology.
Pattern Steps
1. Taking Measurements
- Measure the desired width at the base of your neck (slightly wider than your actual neck measurement).
- Measure the bust width (front only), from one side to the other.
- Measure full length from neck to desired hem.
- Record these measurements for reference.
2. Foundation Chain
- Using cotton yarn and 5.5 mm hook, make a slip knot.
- Ch an even number that matches your neck width. Example: 26 ch = 21 cm (as sample).
- Add 2 extra ch for turning.
3. Row 1: Double Crochet Row
- Starting from 3rd ch from hook, dc in each ch across.
- End of row stitch count: Number of foundation chains + 2 (turning chains count as a stitch).
- Example: 26 ch + 2 turning ch = 27 dc.
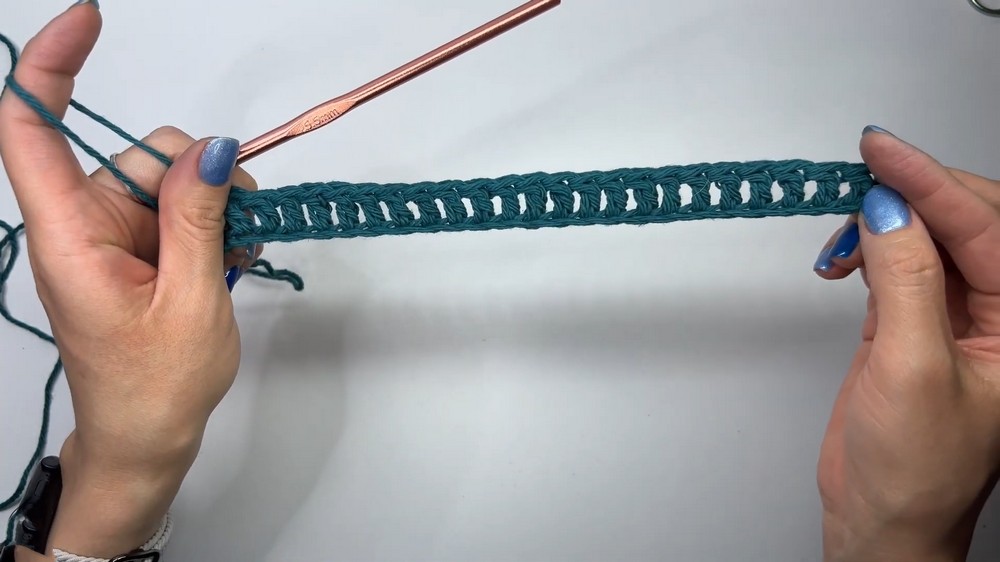
4. Rows 2-3: Double Crochet Rows with Increases
- Ch 2, turn.
- Increase at beginning: dc in same space as turning ch.
- Dc in each stitch across.
- Increase at end: 2 dc in the last stitch.
- Stitch count increases by 2 each row.
- Repeat for second row.
- Example: Row 2 = 29 dc; Row 3 = 31 dc.
- Always maintain odd stitch counts.
5. Row 4: Mesh/Square Row
- Ch 2 (counts as dc), turn.
- Ch 1, skip next st, dc in next st.
- Repeat: [ch 1, skip 1 st, dc in next st] across.
- End with dc in last st.
- Mesh row must have odd number of stitches to align pattern.
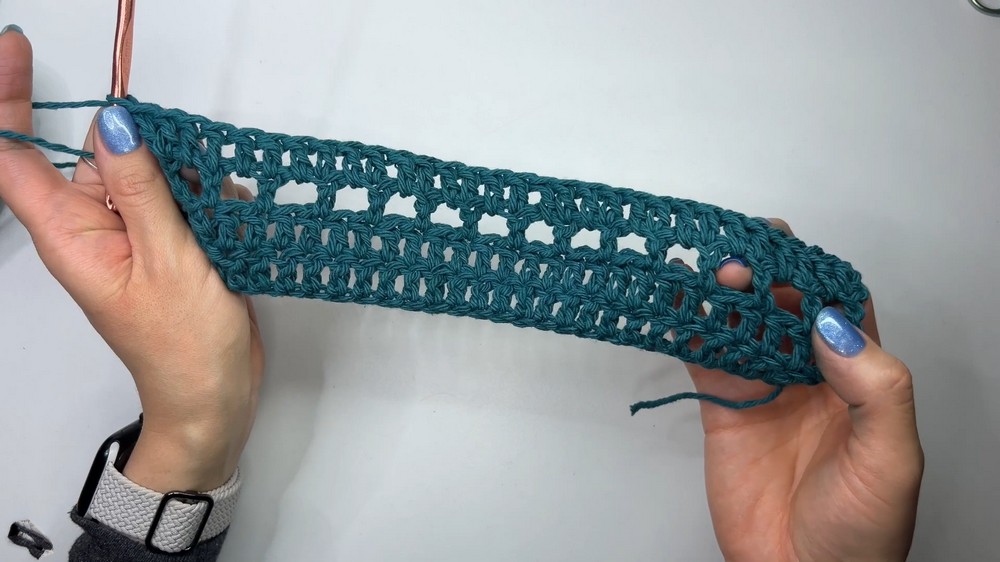
6. Rows 5-6: Double Crochet Rows with Increases
- Ch 2, turn.
- Increase at beginning: dc in same space.
- Dc in each ch-1 space AND in each dc across.
- Increase at end: 2 dc in last st.
- Repeat for the next row.
7. Sequence Repeat: Alternating Rows
- Alternate 2 rows of dc with increases, then 1 mesh/square row, repeating until panel reaches desired bust width.
- Continue measuring to ensure sizing matches your bust measurement.
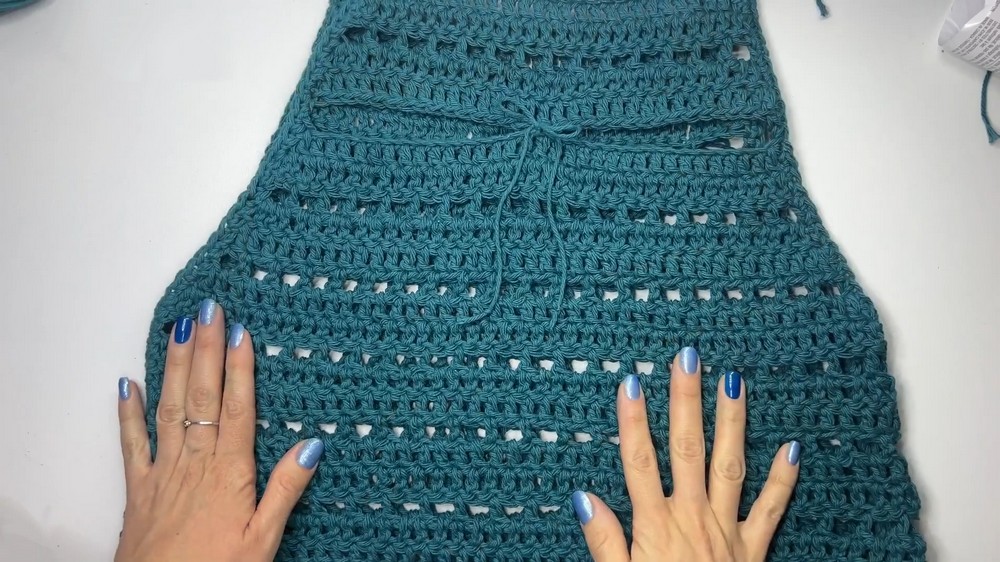
8. Creating the Neckline Opening
- Once desired bust width is achieved (front panel width), stop working increases.
- Next Row: Neckline Separation
- Ch 2, turn.
- Dc in first and last st only.
- In between: chain number equivalent to total middle stitches skipped (i.e., panel stitch count minus 2).
- Example: 33 sts - 2 = 31 ch across the middle.
- Dc in last st.
9. Continuing Rows: Without Increases
- Ch 2, turn.
- Dc in first st, dc in each ch across the neckline gap, dc in last st.
- Repeat rows with dc in each st, without any increases, until desired hem length is achieved.

10. Edge Finishing & Strap Construction
- With panel completed, sc evenly along top edge where strap will be attached.
- Ch desired strap length (sample: 23 ch for a narrow strap, can increase for wider strap).
- Turn, sc (or sl st for thinner strap) in each ch back to panel.
- Attach strap to panel with sl st and fasten off.
- Repeat on opposite top corner.
11. Repeat for Second Panel
- Make an identical second panel for the back.
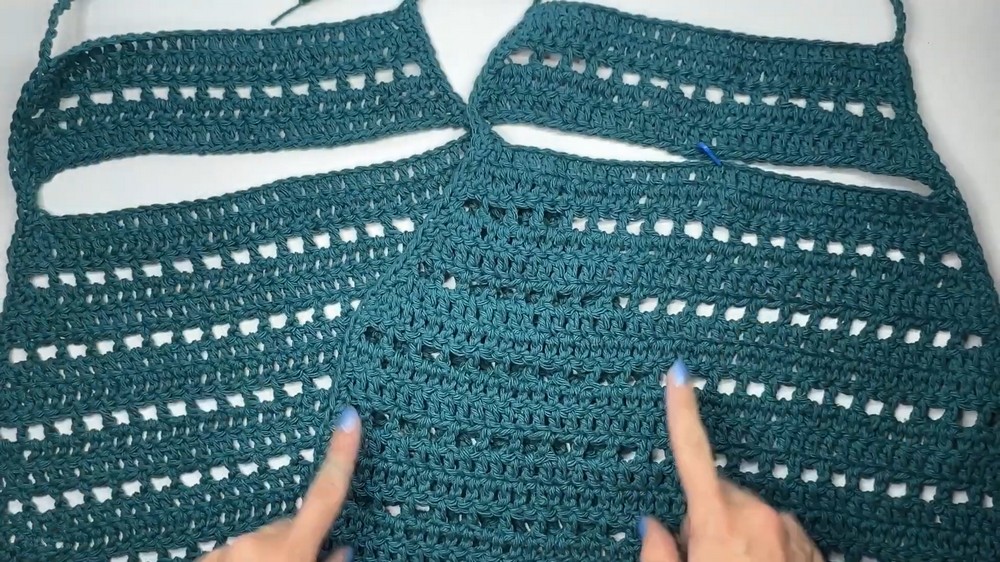
12. Joining Panels
- Place panels with preferred sides facing inwards (wrong side out).
- Align edges and hold together with stitch markers.
- Join panels from hem up to underarm using sl st or sc (your preference), stopping where increases end (underarm opening).
- Fasten off and weave in ends.
- Repeat joining on the other side.

13. Neckline Options
- Leave neckline open for a v-neck look.
- Optionally, use ribbon, cord, or additional yarn to sew/tie the opening, creating bows or closures.
Correction & Tips
- Correction: Always start mesh rows with odd-numbered stitch counts to ensure proper alignment.
- Tip: Measure often! Adjust increases and row repeats to ensure a loose, relaxed fit as per your desired look.
- For a looser garment, add extra rows before stopping increases.
- Colorful ribbon or cords can be used for a decorative neckline closure.

Conclusion
This crochet blouse is a versatile, customizable project ideal for summer. By working in two panels and customizing increases, you can easily tailor fit and style. The pattern provides a straightforward sequence of double crochet rows with increases, mesh rows, followed by rows without increases to complete the body. Decorative straps and neckline options allow you to personalize your garment.