
Free Crochet Granny Square Sweater Pattern with Colorful Squares
Boost your style with this free crochet granny square sweater pattern for stylish outfit idea easy all seasons comfort handmade fashion look.
Small shapes slowly come together and form a warm and cozy piece that feels soft and looks full of charm. Each part joins smoothly and builds a stylish sweater that stands out with a classic and colorful look. The Crochet Granny Square Sweater pattern helps guide this piece in a clear and simple way that feels easy to understand. It gives a relaxed fit that feels comfortable for daily wear and allows free movement all day.
Classic Free Crochet Granny Square Sweater Pattern with Cozy Fit
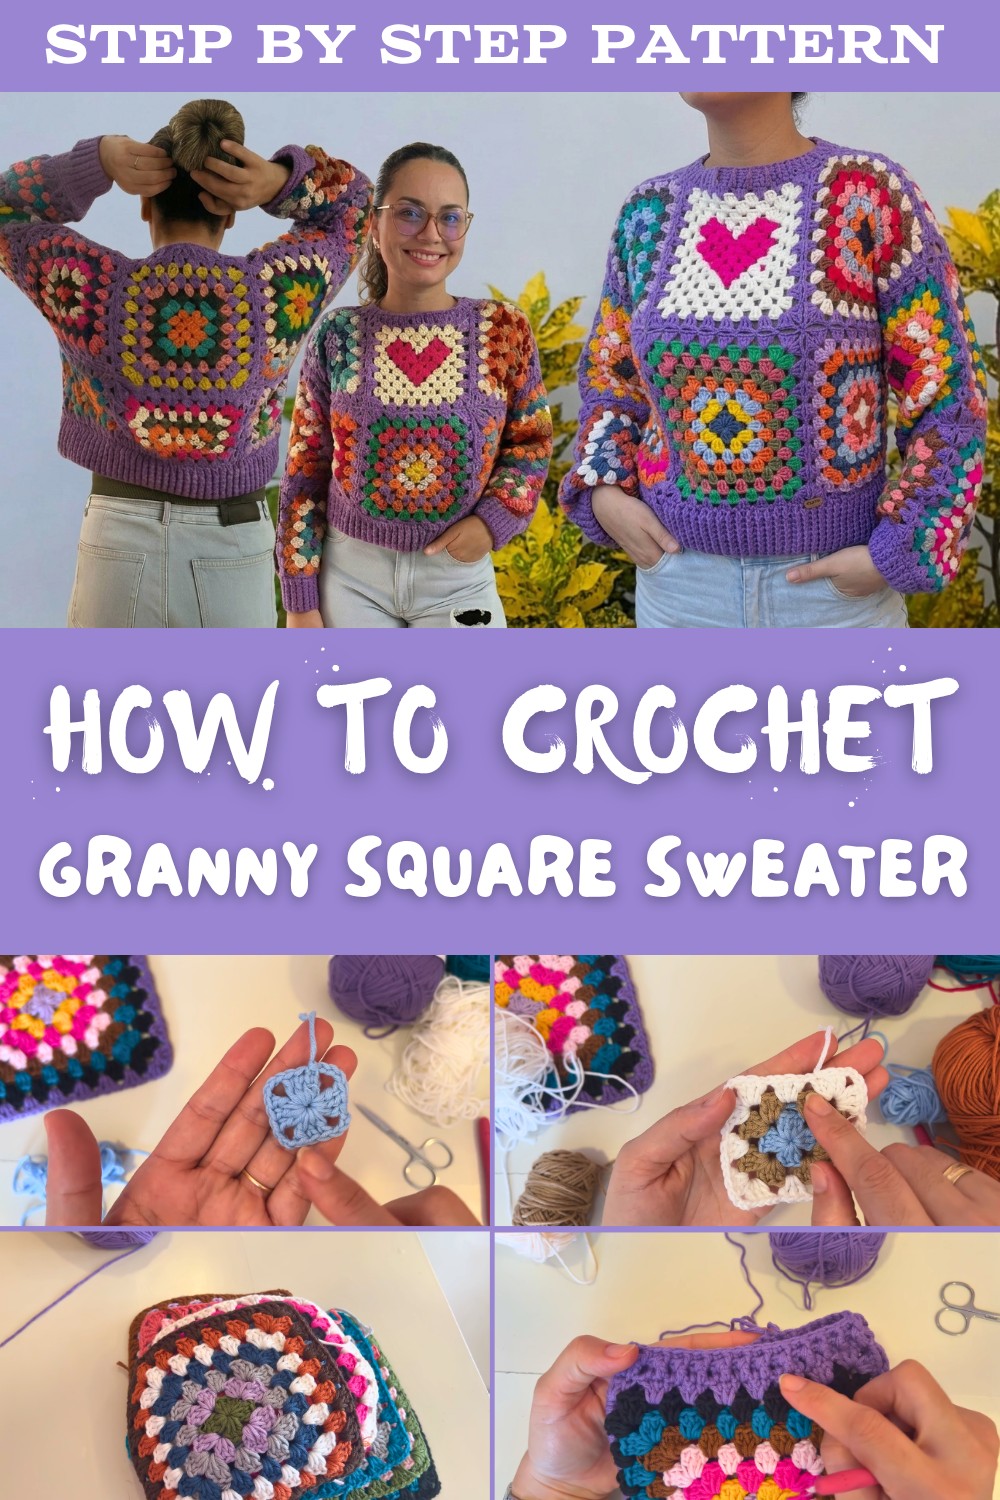
The unique block style gives a playful and neat appearance that looks good on all ages. It keeps the body warm during cooler days while still feeling light and easy to wear. It works well for casual outings home wear or simple daily use. The smooth finish and balanced shape give it a clean look from every side. This lovely sweater offers comfort warmth and a soft stylish feel that fits easily into everyday life with a touch of creative beauty.
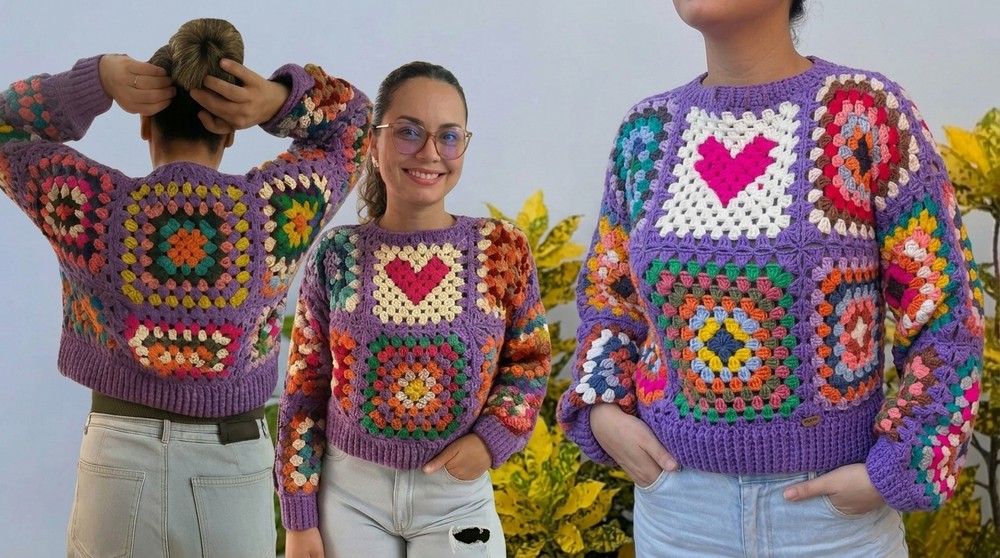
Victoria Granny Square Sweater Crochet Pattern
Materials
- Yarn: Light worsted/DK weight cotton or acrylic yarn; assorted colors for granny squares and 2 skeins for main background/joining color (sample uses purple)
- Crochet Hook: 3 mm (or 3.5 mm / 4 mm for a looser sweater)
- Scissors
- Measuring Tape
- Yarn needle: For weaving ends and joining panels
Key Abbreviations (US Terms)
| Abbreviation | Stitch Name |
|---|---|
| ch | chain |
| sl st | slip stitch |
| dc | double crochet |
| fpdc | front post double crochet |
| bpdc | back post double crochet |
| st(s) | stitch(es) |
| rep | repeat |
Special Notes
- Each granny square is worked to approx. 19 cm (7.5 in) per side; adjust for desired fit.
- The sweater is composed of 20 squares (3 front, 3 back, remaining for sleeves).
- Be creative with leftover yarn for colorful squares; the background/joining color unifies the look.
- Finished size is adjustable by adding or removing squares.
Pattern
Granny Squares
Each granny square:
Round 1
- Make a slip knot and ch 5.
- Sl st into the first ch to form a ring.
- Ch 2 (does not count as a dc).
- 3 dc into the ring.
- Ch 3, 3 dc into the ring - rep from * to * for a total of 4 sets of 3 dc and ch 3 (making four corners).
- After last ch 3, sl st to the top of the first dc to join.
- Fasten off. Change color.
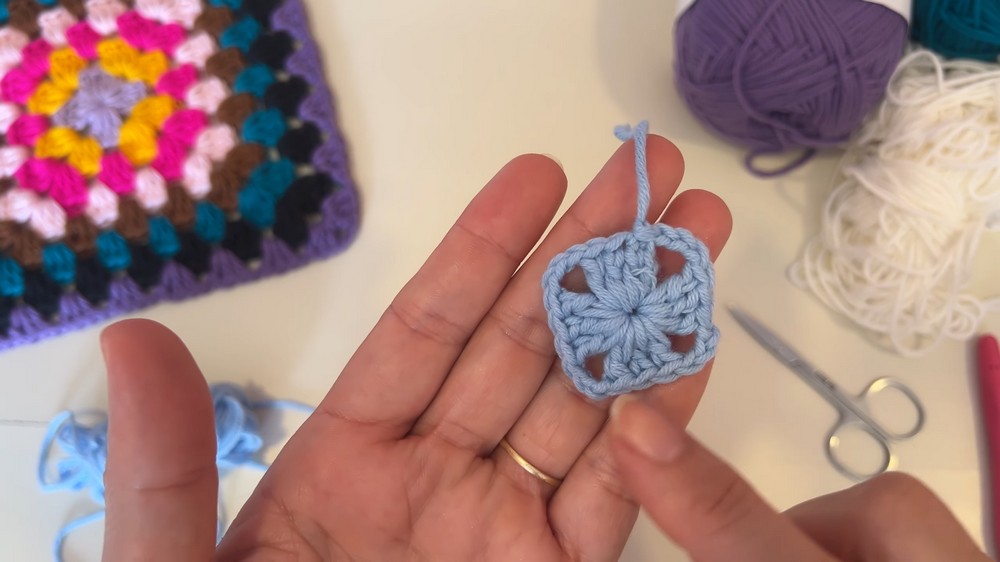
Round 2 (New Color)
- Join new color in any corner ch-3 space.
- Ch 2 (does not count as a dc).
- 2 dc into same corner space (this completes the 3 dc for the corner).
- Ch 1, move to next corner ch-3 space.
- 3 dc, ch 3, 3 dc into the same corner space (corner).
- Ch 1, rep for each corner.
- At end, after last corner, finish with ch 1.
- Sl st to top of first dc, fasten off, change color.
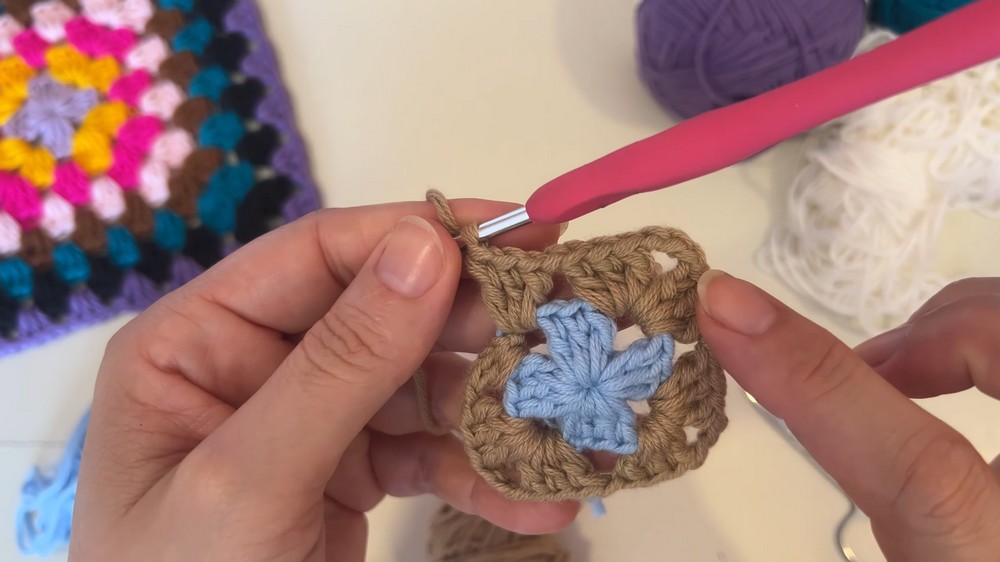
Round 3 and Subsequent Rounds (New Color Each Round)
- Join yarn in any corner.
- Ch 2 (does not count as dc).
- 2 dc in same corner.
- Ch 1 between corner and next cluster (in chain space).
- In each chain-1 space, 3 dc.
- In each corner: 3 dc, ch 3, 3 dc.
- Continue around, working in each chain space and corners.
- End with ch 1, sl st to first dc.
- Fasten off, change color.
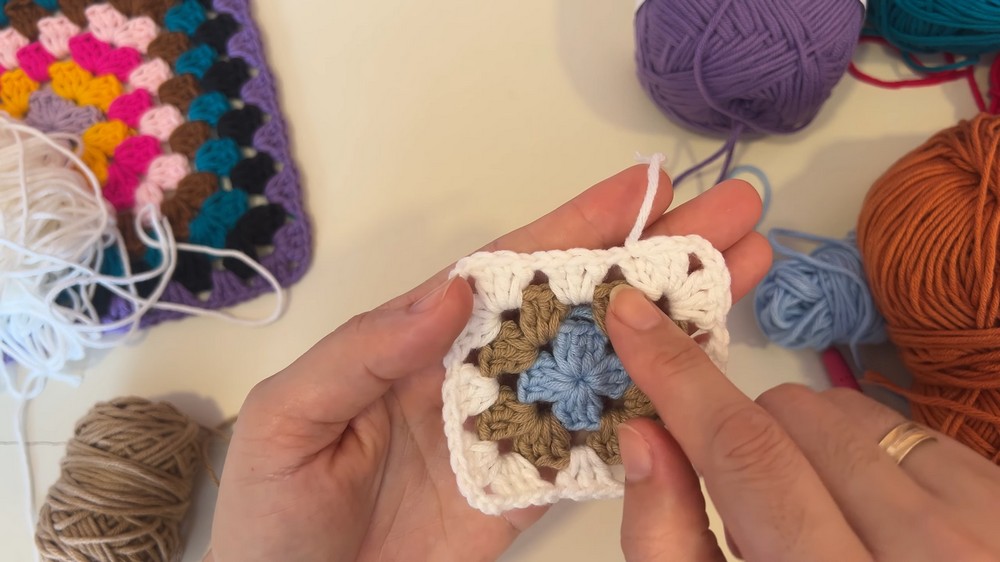
Repeat as above for 7 rounds for each square. For the final round, reserve main background color (sample uses purple).
Assembly - Joining the Squares
- Lay out all 20 granny squares in desired arrangement (3 for front panel, 3 for back, remainder for sleeves and shoulders). Leave a neck opening as desired.
- Begin joining with main color (e.g., purple).
- Slip stitch join: with right sides facing, hold adjacent squares together and work slip stitches through both squares at corners and chain spaces (see video description).
- When joining corners, make 1 chain, use second chain to pass through corresponding corner of the adjacent square, and make the third chain; then complete corner cluster.
- Continue joining squares at corners and sides, repeating slip stitch joining method for all connections.
- Leave neck opening and shoulder as shown.
Tip: If sewing, use yarn needle and mattress stitch or whip stitch through back loops only for clean joins.

Sleeves
- Arrange squares along sleeves to desired length.
- Join as above, making sure to leave cuffs for ribbed edge.
Ribbing - Sleeve Cuffs, Hem & Neckline
Ribbed Cuff (Elastic stitch):
- Attach yarn at edge of sleeve.
- Ch 2 to start round.
- Work 1 dc in each dc across (do NOT work into chain spaces for a snug fit).
- At large chain spaces (between squares), work 1 dc in chain space and next square's corner space if necessary.
- Sl st to first dc to close round.
- Ch 2, begin next round.
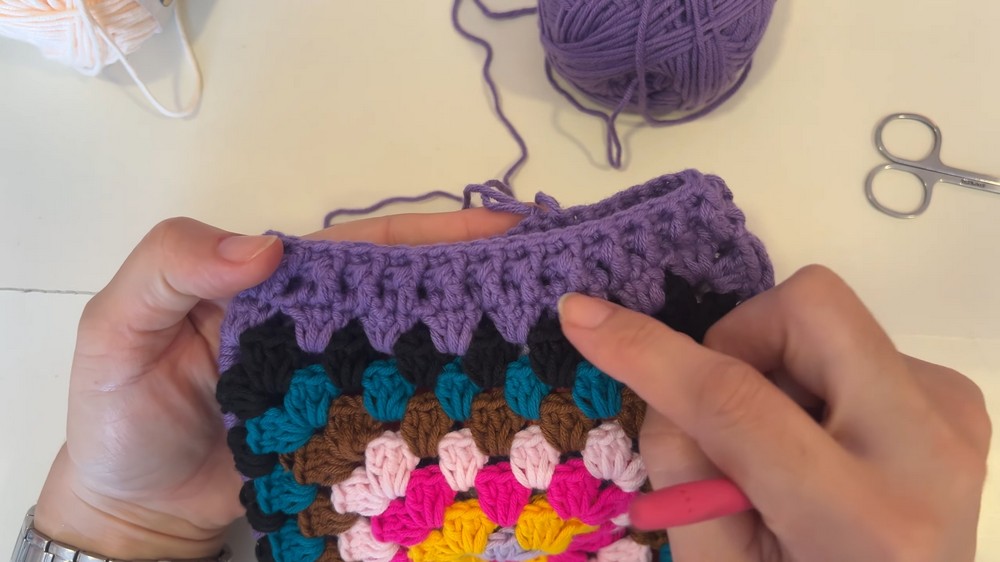
Ribbed Effect:
- Work fpdc (front post double crochet) and bpdc (back post double crochet) alternately:
- fpdc in first dc, bpdc in next dc; repeat around.
- Continue for desired number of rounds to achieve cuff width.
Repeat ribbing on sweater bottom hem and neck opening, adjusting for desired fit.
Conclusion
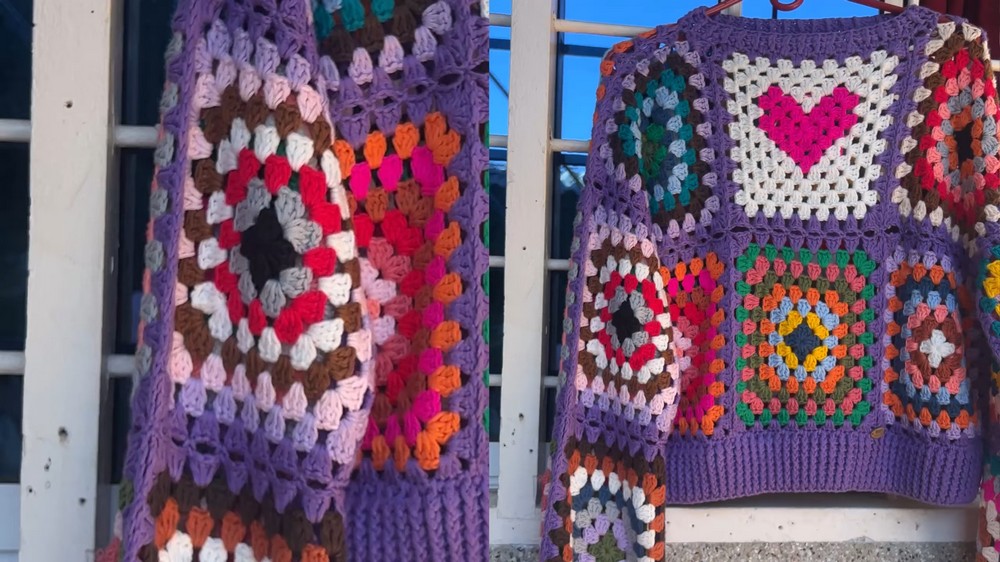
Your Victoria Granny Square Sweater is complete. This customizable sweater lets you use up scrap yarn creatively, with flexible sizing and bold, colorful flair. The elastic ribbing at cuffs, hem, and neckline gives a comfortable finish.

Pattern Correction
- Ensure the stitch count for granny squares is consistent; each side's chain space should accommodate 3 dc clusters.
- For ribbing, skip chain spaces on cuffs for a tighter fit; include spaces on hem for a looser fit.
Tip
- Use blocking for granny squares before joining for a crisp finish.
- Make sure to lay out your squares and visualize the color arrangement prior to joining.
- If slip stitching feels complicated, use a sewing needle with the main color for joining.