
Free Crochet Hair Tie Pattern for Happy Hair Moment
A simple and fun crochet hair tie pattern to create colorful and soft hair accessories, perfect for beginners and school girls to enjoy crocheting easily.
This hair tie is simple and pretty and it helps you make a special hair tie that looks better than a normal store hair tie. Choose a strong elastic hair tie that is not too loose so the hair tie keeps a nice round shape. Add a soft cream color yarn and make double crochet stitches all around. You put two double crochet stitches in each single crochet. This makes the hair tie look full and curly and gives it a cute wavy edge. The cream color makes the hair tie look gentle and elegant and it goes well with many outfits.
Free Crochet Hair Tie Pattern for Beginners

You make small chains and single crochet in between to form a light mesh look. This colorful layer adds extra beauty and makes the hair tie more eye catching. The mix of cream and lilac gives a sweet and soft look that many girls like.
A special part of this pattern is the crochet butterfly accessory. You make the butterfly with simple chains and stitches in a magic ring and then tie the middle to shape the wings and antenna. The butterfly is then glued or sewn on the hair tie. This makes the hair tie look unique and more fun and it is nice for little girls and older girls too.
The yarn choices also give different features. Alize Cotton Gold is softer and better for small children and thin hair while Nako Pırlanta is a bit stronger and better for thicker hair. Both yarns make the hair tie look stylish and lovely and the finished piece is beautiful handmade art that is easy to use every day.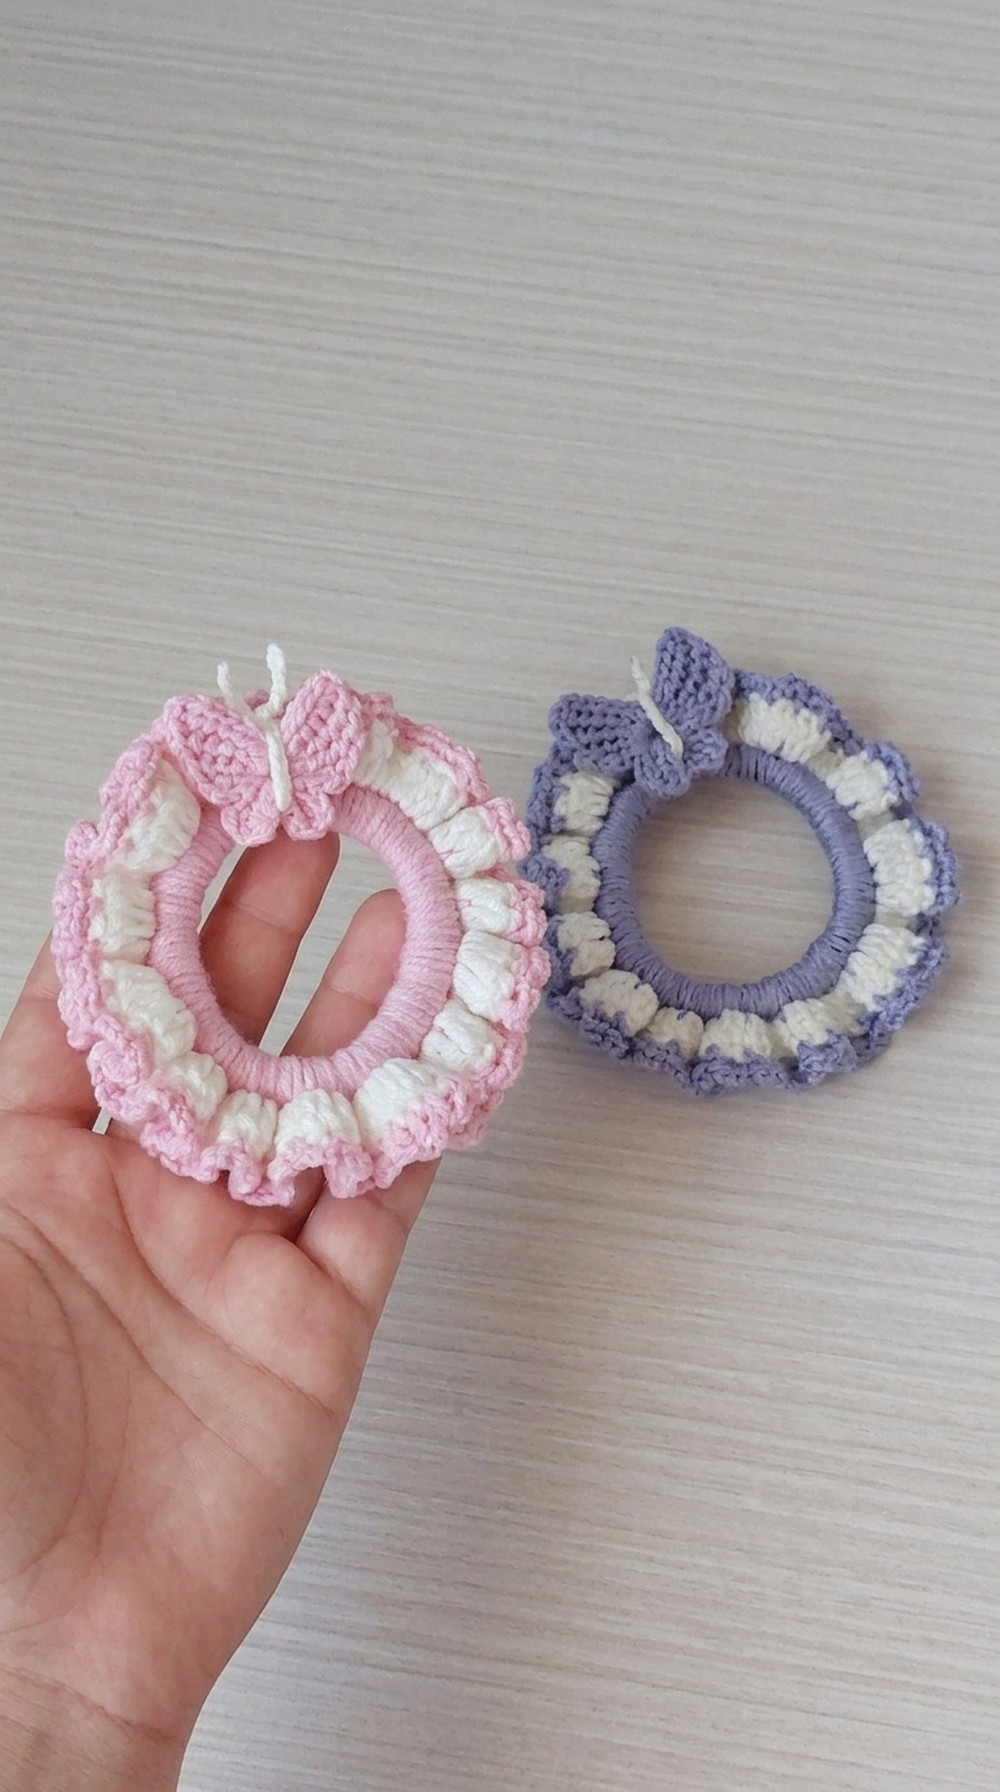
Detailed Crochet Pattern: Elastic Hair Tie with Butterfly Accessory
Materials Required
To create this beautiful elastic hair tie with a butterfly accessory, you will need the following materials:
- Yarn: You can use yarn such as Nako Pırlanta or Alize Cotton Gold. Both work beautifully. Choose two colors for the butterfly and another color for the base.
- Hook Size: A 5mm crochet hook (appropriate for your chosen yarn).
- Elastic Hair Band: Preferably one that is not overly stretchy for a better hold and shape.
- Scissors for cutting yarn.
- Needle for weaving in ends.
- Optional: A lighter (to seal loose yarn ends).
- Hot Glue or Silicone (if attaching the butterfly with glue to the band).
Pattern Instructions
1. Preparing the Base (Covering the Elastic Band)
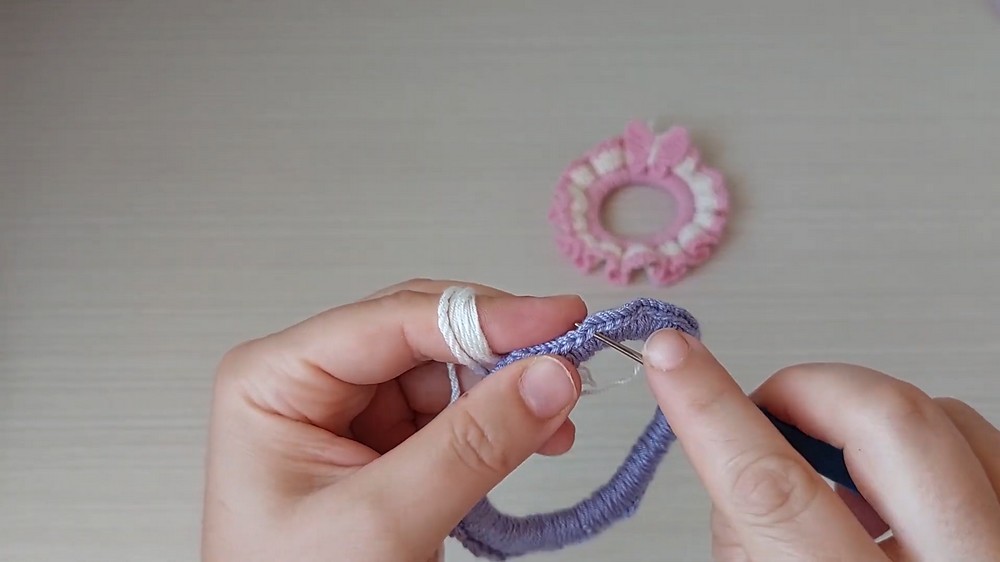
- Start by attaching the yarn to your elastic hair band. Use a single crochet stitch to work around the elastic band, ensuring the band is completely covered.
- Tip: Make sure the stitches are tight and close together, leaving no gaps. This will hide the elastic band entirely and provide a neat look.
- Continue crocheting single crochet stitches until the band is fully covered.
- Once complete, join the last stitch to the first single crochet using a slip stitch. Cut the yarn and weave in the ends carefully to secure the work.

2. Adding the First Decorative Layer
- Attach a second color of yarn to any stitch on the covered band.
- Chain 3 to start the first round. This chain will also count as the first double crochet (DC).
- Work 2 double crochets (DC) into the same stitch.
- Continue by crocheting 2 DC into each single crochet stitch around the elastic band until you reach the starting point.
- Slip stitch into the top of the chain 3 to close the round.
- Cut the yarn and secure the ends by weaving them into the work.
3. Creating the Mesh Layer
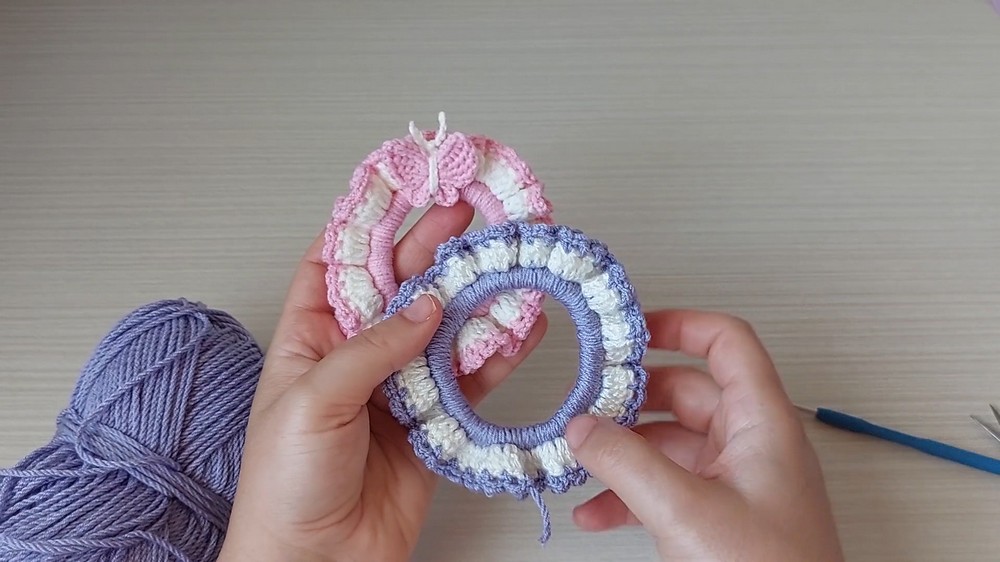
- Attach a third yarn color to any stitch of the previous round.
- Begin by chaining 3 (this counts as the first chain space).
- Skip 1 stitch and single crochet (SC) into the next stitch.
- Repeat the pattern: Chain 3, skip 1 stitch, SC into the next stitch all the way around the edge.
- Finish the round by slip stitching into the starting chain. This will create an airy and decorative mesh layer.
- Secure and weave in the ends.

Butterfly Pattern
The butterfly is a beautiful addition to this project. Follow these steps to create it:
1. Creating the Magic Ring for the Butterfly
- Begin with a magic ring (or adjustable loop).
- Chain 6 to create the starting loop for the larger upper wing.
- Work 7 treble crochets (TR) into the magic ring, making the upper wing fuller.
- Secure the last stitch of this section by slip stitching into the magic ring.

2. Making the Second Wing
- Again, chain 6 and repeat the steps to create another wing on the opposite side of the magic ring.
3. Creating the Smaller Lower Wings
- Chain 3 (instead of 6, for the smaller wings).
- Work 4 double crochets (DC) into the magic ring for the first lower wing.
- Slip stitch to secure.
- Repeat on the opposite side of the ring to create the second lower wing.

4. Finishing the Butterfly Shape
- Pull the magic ring tight to close the center, forming a butterfly shape.
- Wrap yarn tightly around the center of the butterfly to define its middle and secure the shape. You can also add a few knots to ensure it stays tight.

5. Adding Antennae (Optional)
- Cut a piece of yarn and tie it around the middle of the butterfly snugly.
- Leave two loose ends for the antennae. Trim them to your preferred length.
- Optionally, use a lighter to carefully seal the ends and prevent fraying.
Assembling the Hair Tie
- Position the butterfly on the crocheted band at your preferred spot.
- Secure the butterfly using hot glue or silicone for a durable hold. Alternatively, use a needle and thread to sew it to the band.
- Press and hold the butterfly in place until it sets if you're using glue.

Tips for Success
- Elastic Band Selection: Choose a sturdy elastic band that is not overly stretchy to help maintain the shape of the finished hair accessory.
- Yarn Choice: For a smaller butterfly, use thinner yarn like Alize Cotton Gold. For a larger project, opt for thicker yarn such as Nako Pırlanta.
- Neat Finishing: Always weave in your ends securely. Use a lighter for sealing yarn ends if needed.
- Customization: Experiment with colors to match outfits or create themed designs (e.g., pastel colors for spring or festive shades for holidays).
- Gentle Washing: If the accessory requires cleaning, wash it carefully by hand to maintain its structure and color. Avoid over stretching the band.


Final Words
This crochet elastic hair tie with a butterfly accessory is a quick and rewarding project. It combines functionality with beauty, making it an excellent gift for girls or a cute addition to your own collection. The flexibility in yarn choices and colors allows for endless customization, ensuring that each creation is one of a kind. Whether made for yourself, a child, or a friend, this project is bound to bring joy.
With its simple stitches and creative flair, this pattern is suitable for both beginners and experienced crocheters. Once completed, you'll have a durable, lightweight, and stylish hair tie that's perfect for any occasion. Crochet enthusiasts of all skill levels will appreciate how versatile and practical this project is.
Enjoy crocheting and let your creativity shine with this charming project.