
Free Crochet Hooded Beanie pattern with step-by-step instructions
Stay cozy outdoors with Free Crochet Hooded Beanie Pattern, featuring warm coverage soft texture & comfortable style for chilly weather days.
Keeping warm during chilly days can be a challenge. A cozy hat that covers your head and ears makes a big difference. One great option is a crochet hooded beanie pattern. This design combines the snug fit of a beanie with the extra warmth of a small hood attached to it. It feels soft and comfy thanks to the thick yarn and thoughtful crochet stitches. Wearing it keeps you warm while adding a stylish edge to your outfit.

Free Crochet Hooded Beanie pattern for outdoor adventures
The crochet hooded beanie works well in many situations. It is perfect for cold walks, outdoor work, or casual outings when the wind bites. The hood portion gives added protection to your neck and head, keeping out drafts better than a regular hat. The beanie fits close around your forehead and ears so chilly air stays away. Plus, the handmade touch makes it look unique and personal.
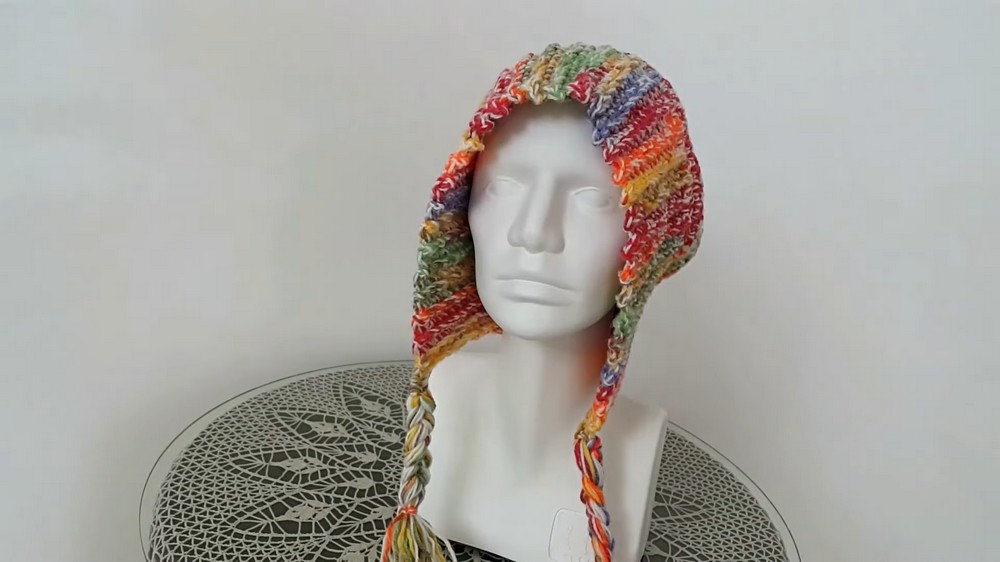
This beanie style pairs nicely with winter coats scarves and boots for a complete cold-weather look. You can choose colors that match your favorite jackets or pick bright tones to stand out. Using a crochet hooded beanie pattern lets you decide the size shape and yarn type, making it easier to get exactly what you want. Beginners find this pattern manageable while learning important crochet skills.
A crochet hooded beanie pattern offers warmth comfort and style all in one. It's an excellent project for anyone wanting to create a practical yet fashionable accessory. Whether gifting it or keeping it yourself this hat will add charm and coziness to many cold season moments.
Bohemian Style Crochet Hooded Beanie Pattern
Welcome to this easy and beautiful crochet hooded beanie pattern inspired by a bohemian style. This hat features a cozy ribbed brim, a loose drape at the back, and long tassels for a relaxed and playful look. Perfect for cooler days, it fits comfortably over the ears and provides extra warmth while adding flair to any outfit. Ideal for beginners and crochet enthusiasts alike, this hat can be made in just a couple of hours with simple stitches and basic shaping techniques. Let's dive in!
Before You Begin Your Project
- Use medium-weight baby yarn or similar medium-weight (worsted) yarn for softness and warmth.
- Combine two yarn colors as desired for a subtle marled effect, or use a single color for simplicity.
- Select a 6 mm (US J-10) crochet hook to create a balanced fabric that is neither too tight nor too loose.
- Keep stitch tension relaxed, especially when working foundation chains, to ensure flexibility of the ribbed brim.
- Have stitch markers ready to help track groups of stitches during decreases.
- Prepare yarn scissors, yarn needle for weaving ends, and extra yarn strands for attaching tassels.
- This pattern works well for adult head sizes - adjust the ribbing length to fit smaller or larger heads.
Key Notes on the Construction
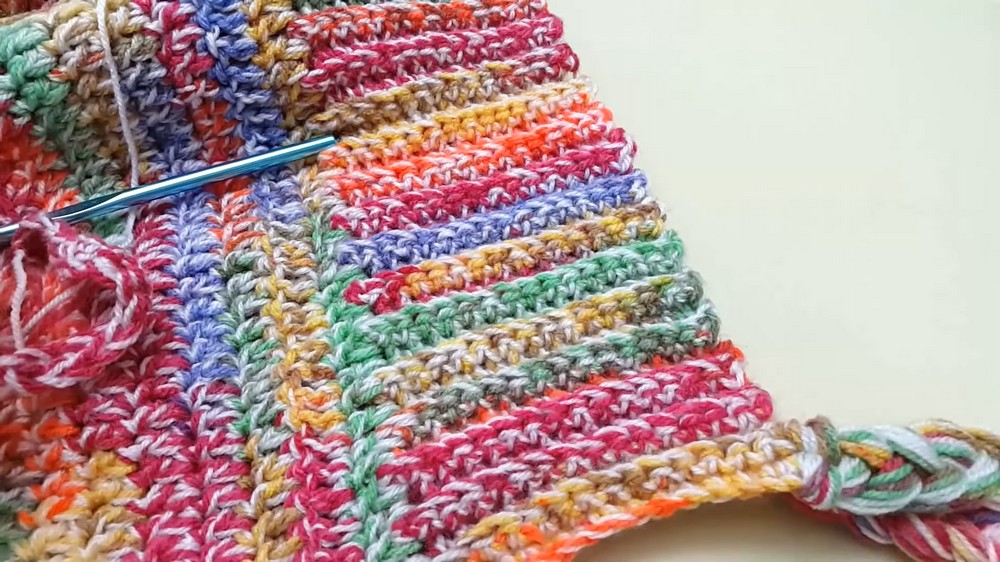
- The beanie begins with a ribbed band worked in single crochet by inserting the hook through the back loops only to create the stretchy rib effect.
- After the ribbing, the hat body is built upwards with double crochet rows, forming a gentle slope that drapes at the back.
- Decreases are worked evenly in groups to shape the crown and reduce stitch count smoothly.
- Tassels are added at two opposite ends of the ribbed band for a playful touch.
- The hat is made in flat rows, not in the round, then seamed together at the end.
- Standard US crochet terminology is used throughout.
Project Overview
- Crochet a wide ribbed strip as a base.
- Work a top section in double crochet with a combination of straight and decreasing rows to form the hood shape.
- Seam the sides and close the crown with finishing stitches.
- Add tassels to complete the boho look.
Difficulty Level
Suitable for beginner to intermediate crocheters comfortable with chaining, single and double crochet stitches, and basic decreases.
Approximate Finished Dimensions
- Ribbed band length (circumference): 50 cm (19.7 inches)
- Ribbed band width (height): 11.5-12 cm (4.5 inches)
- Hat height from ribbing to crown closure: about 28 cm (11 inches)
Gauge Information
- Ribbing: Single crochet in back loops only forms a thick, stretchy fabric.
- Hat body: Double crochet stitches form a dense but flexible texture.
- Gauge is flexible; focus on achieving correct size by measuring length of rib band and height of top section.
Crochet Terms & Abbreviations
- ch = chain
- sc = single crochet
- dc = double crochet
- st(s) = stitch(es)
- sl st = slip stitch
- sk = skip
- dec = decrease (worked by crocheting two stitches together as one)
- ... = repeat instructions between asterisks as directed
- BLO = back loops only
Unique Techniques Used
- Ribbing created by working single crochet stitches in the back loop only (BLO) for stretchy rib texture.
- Decreasing by crocheting two stitches together in double crochet rows to shape the hat crown evenly.
- Working flat rectangular pieces then seaming to form the hooded beanie shape.
- Attaching thick tassels by folding yarn strands in half and pulling through stitches at band ends.
Step-By-Step Crochet Instructions
Part 1: Crafting the Ribbed Base
Foundation Chain:
- Ch 16 loosely (ensure chains are not tight to provide stretch).
Row 1:
- Starting in second ch from hook, work 1 sc into each ch across - 16 sc total.
- Turn your work.
Row 2 to Row 70:
- Ch 1, sc BLO into each stitch across (16 stitches per row).
- Turn after each row.
- Continue until the rib strip measures about 50 cm in length (usually 70 rows).
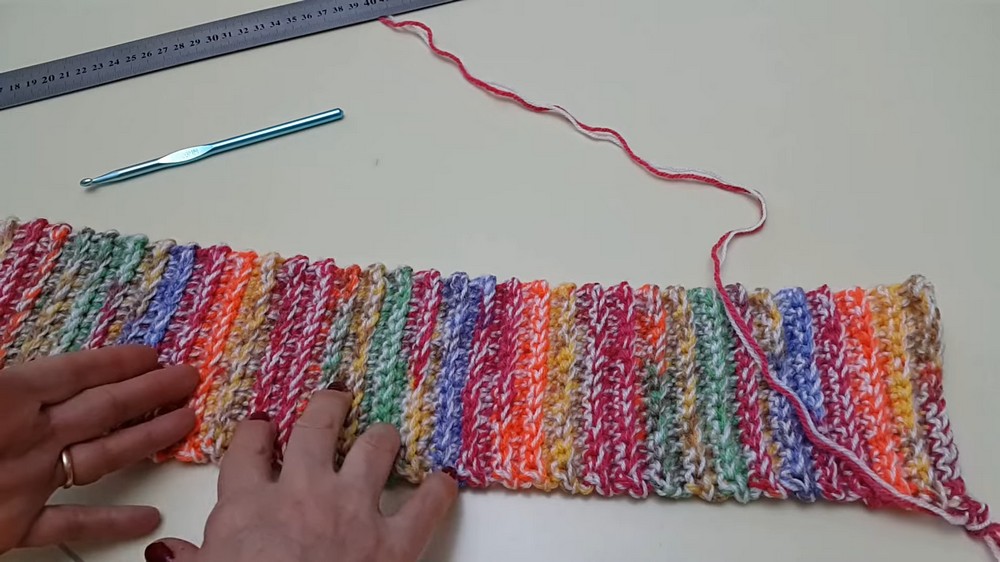
Easy explanation: You start by making a loose chain and then crochet single crochets only into the back loops of the stitches. This creates a rib pattern which feels stretchy and cozy. You keep working this stitch pattern back and forth until the strip is long enough to wrap comfortably around your head.
Part 2: Forming the Top Section of the Hat
Row 1 (Top Section Start):
- Attach yarn at one end of ribbing.
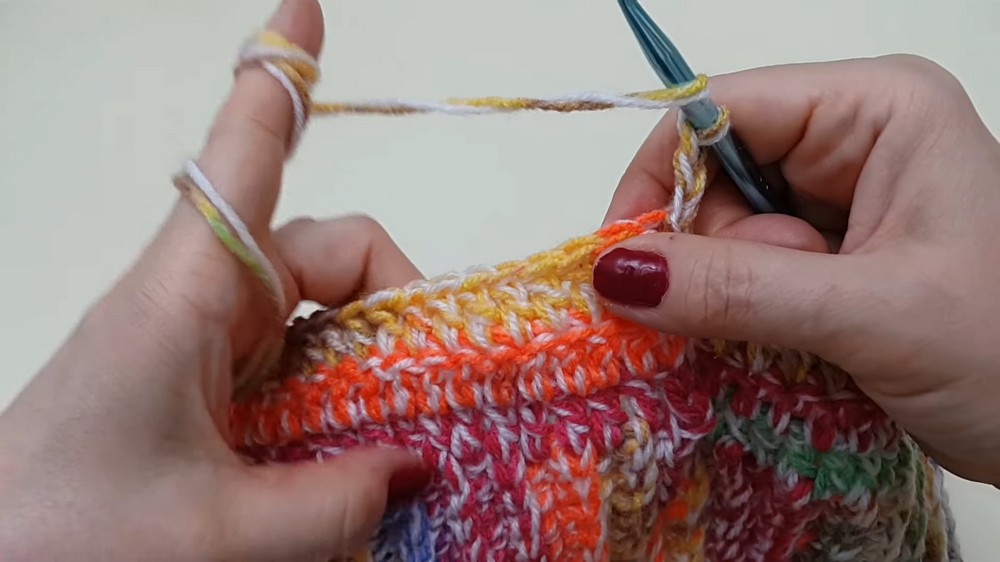
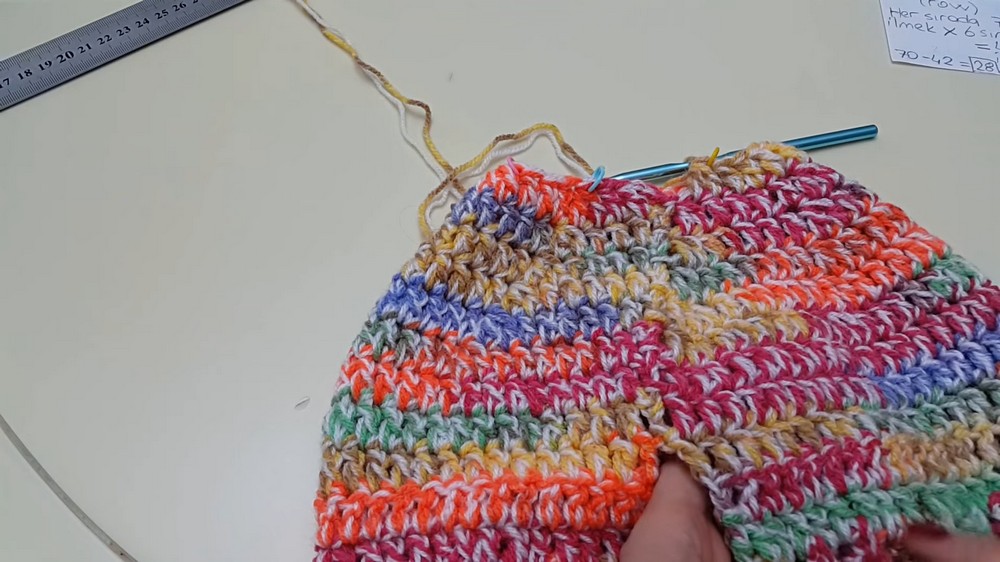
- Ch 3 (counts as first dc), then work 1 dc into each sc stitch and chain space along the rib strip (70 dc total).
Rows 2 to 4:
- Ch 3, turn.
- Dc in each dc stitch across (no increases or decreases).
Rows 5 to 10 (Begin Decreases):
- Place stitch markers to divide 70 stitches into 7 groups of 10 stitches each.
- Each row: Ch 3 (first dc), dc in each stitch until 2 stitches before a marker.
- Dc2tog over these 2 stitches before the marker to decrease one stitch per group.
- Repeat across all 7 groups - total decrease of 7 stitches per row.
- Continue for 6 rows, ending with 28 stitches remaining.

Row 11: Final Decreasing Row
- Ch 1, turn.
- Dc2tog across entire row, taking two stitches together each time across 28 stitches - 14 sts remain.
Row 12: Crown Close
- Dc2tog across row again, resulting in 7 stitches.
- Pull yarn through remaining stitches tightly to close top.
Simple explanation: The top part of the hat is worked in double crochet stitches. You first work straight rows, then start decreasing evenly by crocheting two stitches together at specific points to make the hat narrow at the crown. This shapes the hat so that it drapes nicely at the back.
Part 3: Joining and Finishing the Beanie
- Fold the piece so the ribbed band forms a circle fitting around your head.
- Seam the side edges together using whip stitch or mattress stitch with yarn needle, from the ribbing to the crown.
- Sew the small hole at the crown closed neatly.
Part 4: Adding Decorative Tassels
- Cut 50 strands of yarn approximately 60 cm long.
- Fold strands in half.
- Insert crochet hook through edge stitch at each end of the ribbed band.
- Pull folded yarn loop through stitch and pull ends of strands through loop.
- Tighten to secure, making thick tassels on both ends of the hat.
- Trim tassels if needed for neatness.
Easy explanation: Tassels are made by folding many yarn strands in half and attaching them to the ends of the ribbed band. This adds a fun detail and balances the hat's bohemian style.

Final Touches and Assembly Tips
- Weave in all loose ends securely with a yarn needle.
- Block the finished hat lightly if desired to help shape it.
- Use matching or coordinating yarn to keep a neat appearance.
Troubleshooting Advice
- Ribbing too tight: Loosen your hand when chaining and try a bigger hook size if needed.
- Difficult to count stitches during decreases: Use stitch markers to group stitches evenly.
- Seams puckering: Seam gently without pulling yarn too tight and consider blocking to smooth the fabric.
Related Creative Ideas Using This Technique
- Bohemian-style ear warmers using the ribbed band technique.
- Slouchy hats or berets with similar decreasing methods for crown shaping.
- Handmade scarves or cowls combining ribbed edges and open double crochet rows.
- Tassel-adorned mittens or gloves made with medium-weight yarn.
- Cozy hooded baby blankets featuring ribbed edges and attachment shaping.