Free Crochet Scarf With Roses Pattern for a Chic Winter Look
Wrap yourself in beauty with this free crochet scarf with roses pattern that brings warmth, comfort and a lovely floral touch every day.
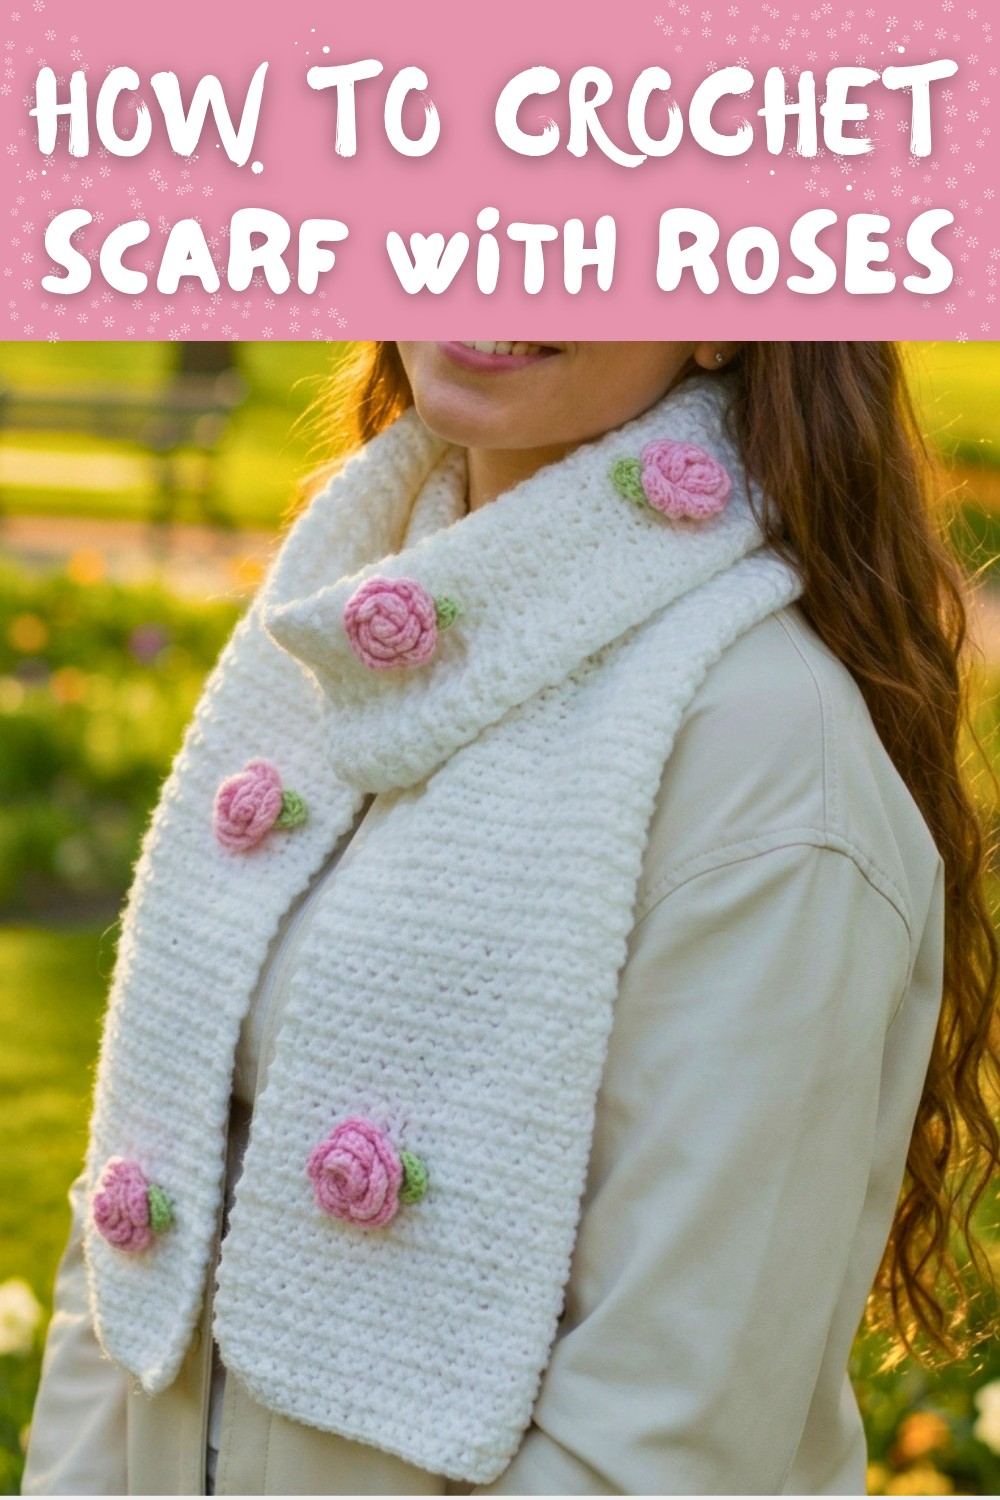
On a chilly morning, think about wrapping yourself in something soft, warm, and eye catching. A crochet scarf with roses is not just another scarf; it's a piece of art you can carry proudly. This special scarf combines warmth and beauty, making it the perfect accessory for cold days. Imagine a regular scarf, now brought to life with delicate little roses that seem to bloom on its fabric. Doesn't that sound lovely?
Beautiful Free Crochet Scarf With Roses to Feel Fabulous
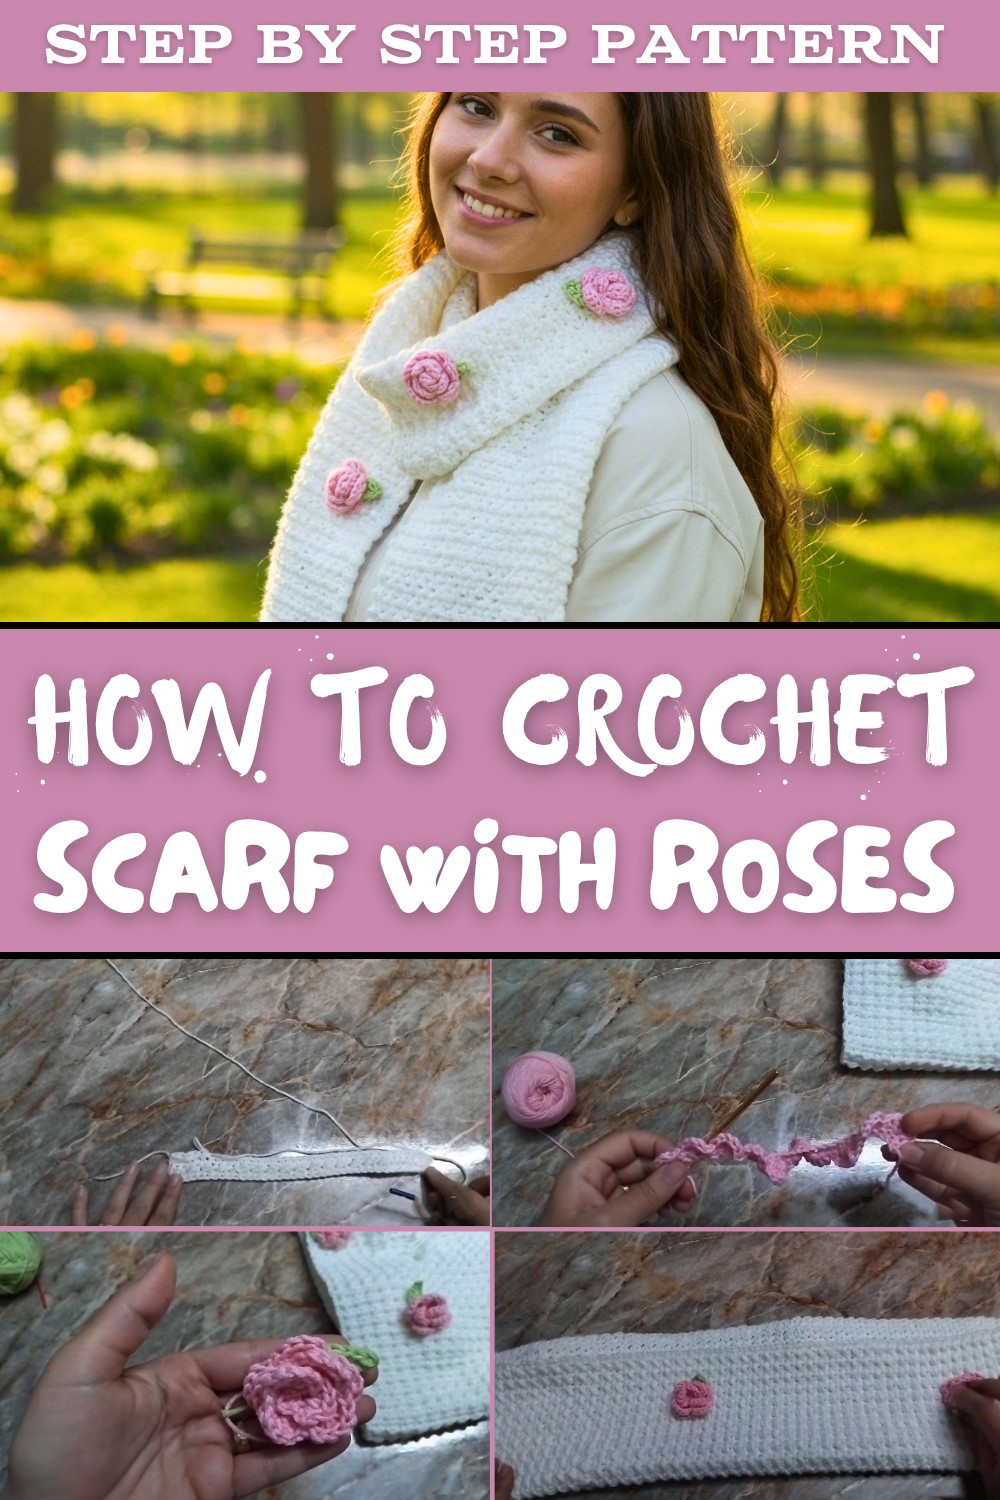
This scarf stands out because it's not only practical but also stunning to look at. The base is soft and cozy, with a wavy pattern that feels comfortable and snug. The real magic, though, is in the roses. These tiny, handmade flowers sit perfectly on the scarf, giving it an elegant and romantic vibe. Each rose looks like it's been carefully crocheted, adding charm and uniqueness to the whole look. You can choose bright red roses for a bold look, pastel shades for a soft and delicate feel, or even mix colors to make it unique to your style. Adding a few small green leaves alongside the roses can make it resemble a little garden that you can wear.
This scarf can be worn almost anywhere - to school, work, family gatherings, or even casual weekend outings. It's a great way to express your personality while staying warm. Not only is it a great addition to your wardrobe, but it's also a thoughtful gift for loved ones. A scarf with roses makes everyone smile, and making one is a relaxing and rewarding experience. This project isn't just about having something nice; it's about wearing something that feels special every time you put it on.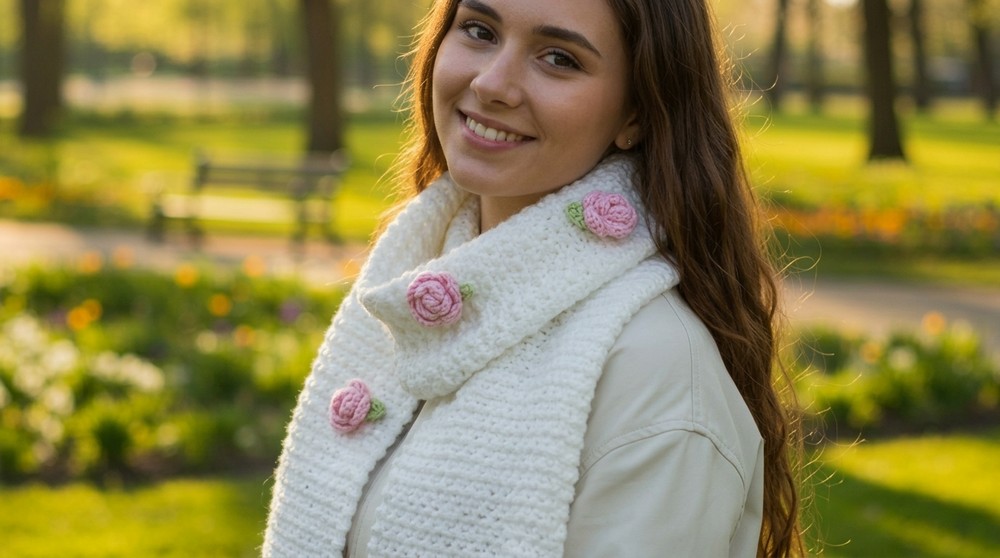
Pretty Crochet Scarf With Roses Pattern
Materials Needed
- Yarn: Medium weight yarn in your desired color for the scarf. Cotton or bamboo yarn can be used for additional elements like the flowers and leaves.
- Crochet Hook: Size suitable for your yarn (a 4 mm or 5 mm hook is recommended).
- Scissors: To cut yarn.
- Darning Needle: For weaving in ends and attaching floral decorations.
Gauge
- The gauge is flexible for this project and not confined to specific measurements. The pattern mainly focuses on customization based on the desired size. Adjust hook size and tension based on the yarn you are using.
Finished Size
- Width: 30 cm (approximately 12 inches).
- Length: 120 cm (approximately 47 inches).
- The size can be adjusted to suit your preference.
Special Techniques and Stitches
- Chain (ch): Yarn over, pull through a loop.
- Single Crochet (sc): Insert hook, yarn over, pull up a loop; yarn over, pull through two loops.
- Half Double Crochet (hdc): Yarn over, insert hook, pull up a loop; yarn over, pull through all three loops.
- Slip Stitch (sl st): Insert hook, yarn over, pull through all loops on the hook.
- Alternating hdc and sl st: This creates a textured wave pattern.
Pattern Instructions
1. Start with the Foundation Chain
- Chain the length of the scarf. In this case, chain until the length measures 50 cm (half meter). This starting chain length determines the width of your scarf.
- Optional: To create a smaller or larger scarf, adjust the number of chains. The pattern is not dependent on an exact stitch count.
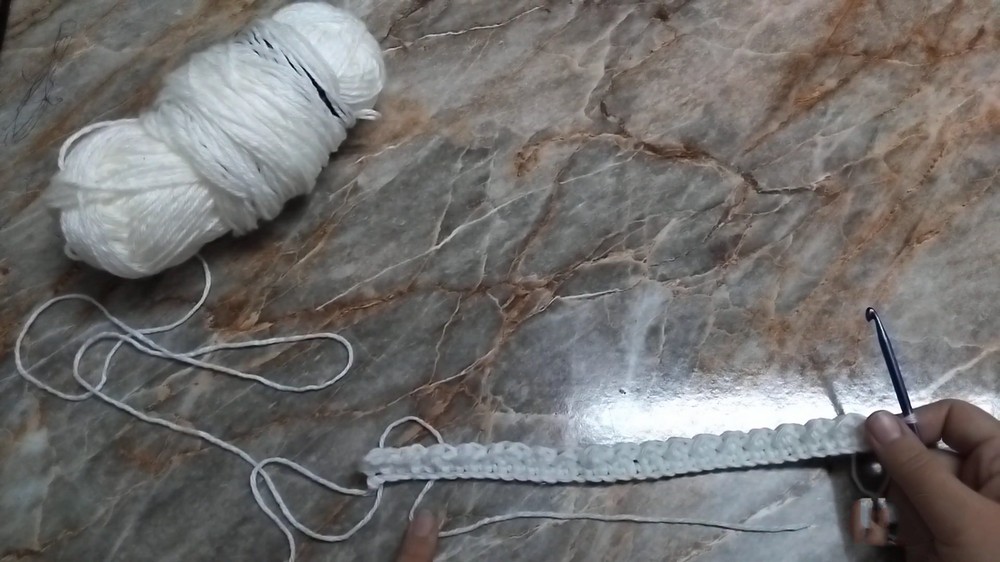
2. Row 1: Single Crochet Foundation
- After chaining the desired length, skip the first chain.
- Insert the hook into the second chain and single crochet (sc).
- Work one sc into each chain across the row.
- Once you reach the end, turn your work.
3. Row 2: Alternating HDC and SL ST
- Start the second row by chaining 1. Turn your work.
- Half Double Crochet (hdc) into the first stitch.
- In the following stitch, work a slip stitch (sl st).
- Alternate between hdc and sl st across the row.
- Example: hdc in one stitch, sl st in the next. Repeat until you reach the end.
- At the end of the row, turn your work.
4. Row 3: Single Crochet
- Start the third row by chaining 1. Turn your work.
- Work single crochet (sc) stitches across the entire row, with one sc per stitch from the previous row.
- At the end, turn your work.
5. Pattern Repeat
- Repeat Rows 2 and 3 alternately until you reach the desired length of your scarf. For this pattern, the scarf is worked to 120 cm in length.
- Note: Alternating the hdc and sl st in Row 2 creates a subtle ripple texture, while Row 3 (sc) provides stability to the pattern overall.
Optional: Add a Decorative Edge
- At the end of the scarf, you can add a decorative fringe or tassels for a stylish finish.
- Simply cut yarn to equal lengths, fold them over, and attach them to the edges by pulling them through with a hook and knotting them.
Flower Decoration Instructions
For this scarf, you can add floral embellishments, such as roses and small leaves, to enhance its design. Below are the instructions for the flowers and leaves.
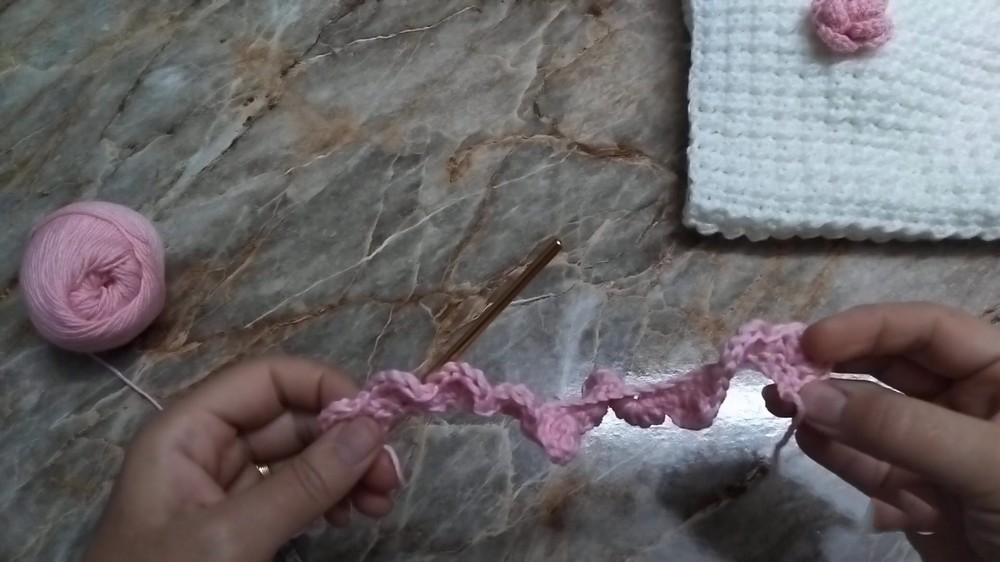
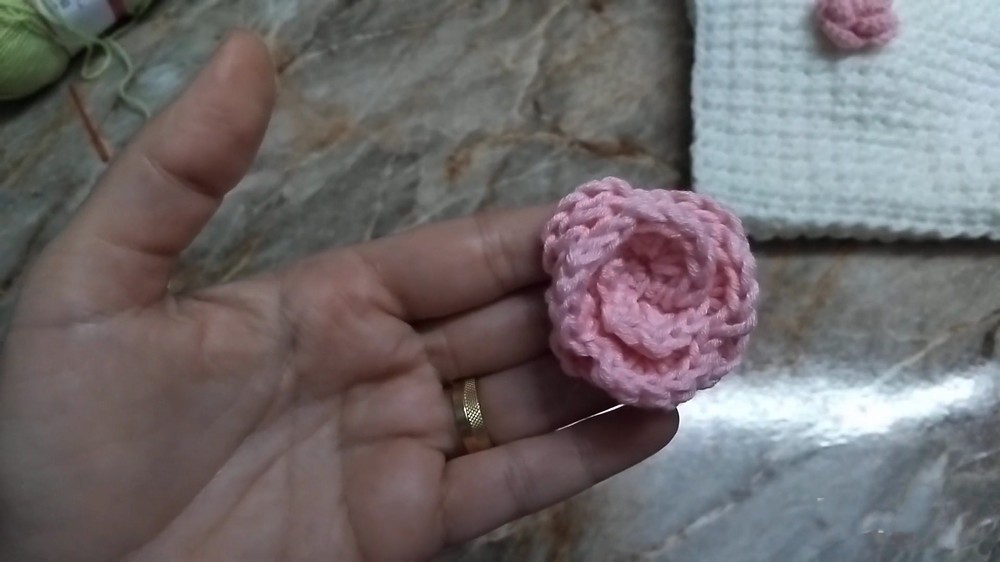
1. Crocheted Rose
- Start by making a foundation chain of 31 stitches using cotton or matching yarn.
- Work one row of single crochets into the chain.
- Row 2:
- Chain 1, sc into the first stitch.
- In the next stitch, work 5 hdc.
- Continue alternating: sc into the next stitch, [5 hdc in the following stitch].
- This creates the petals of the rose.
- Once you've completed the row, fasten off, leaving a long tail for sewing.
- Roll the rose into shape, arranging the petals as you go, and use the long tail to sew the base together.
2. Leaf
- Chain 6.
- Row 1:
- Sl st into the first chain, sc in the next, hdc into the third chain, dc into the fourth, and work 2 dc into the last chain.
- Work back across the opposite side of the chain, mirroring the stitches (dc, hdc, sc, sl st).
- Fasten off, leaving a tail for sewing.
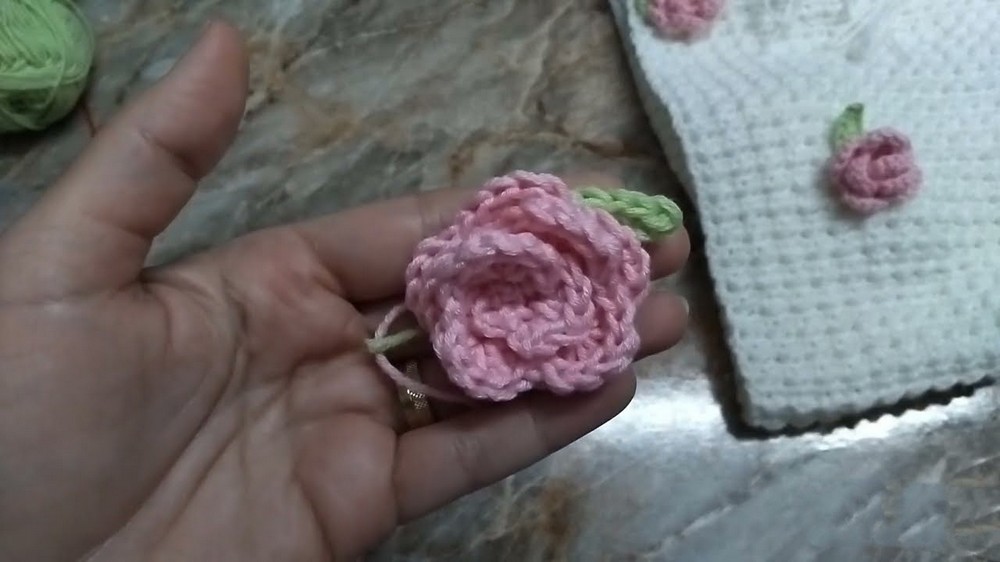
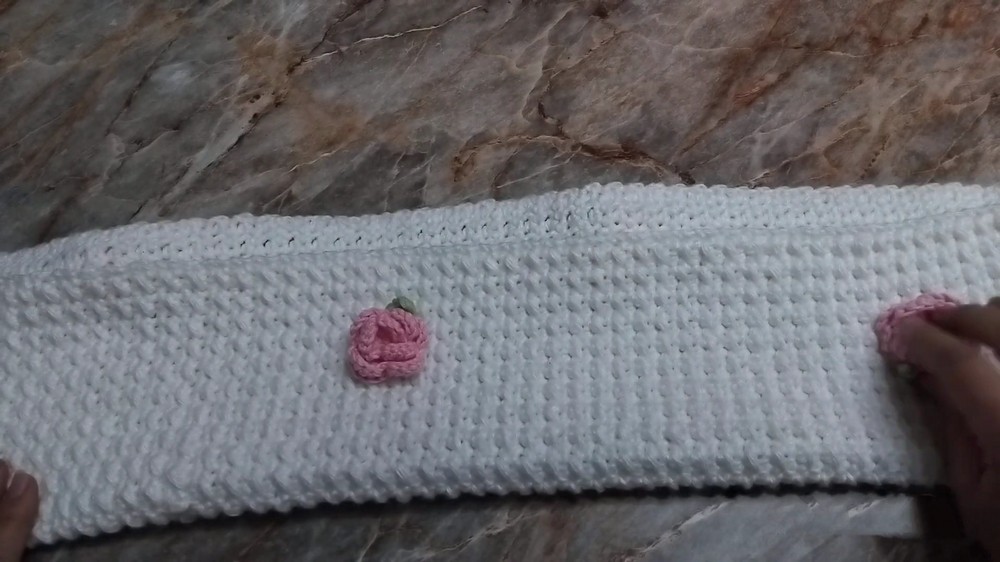
Attaching Decorations
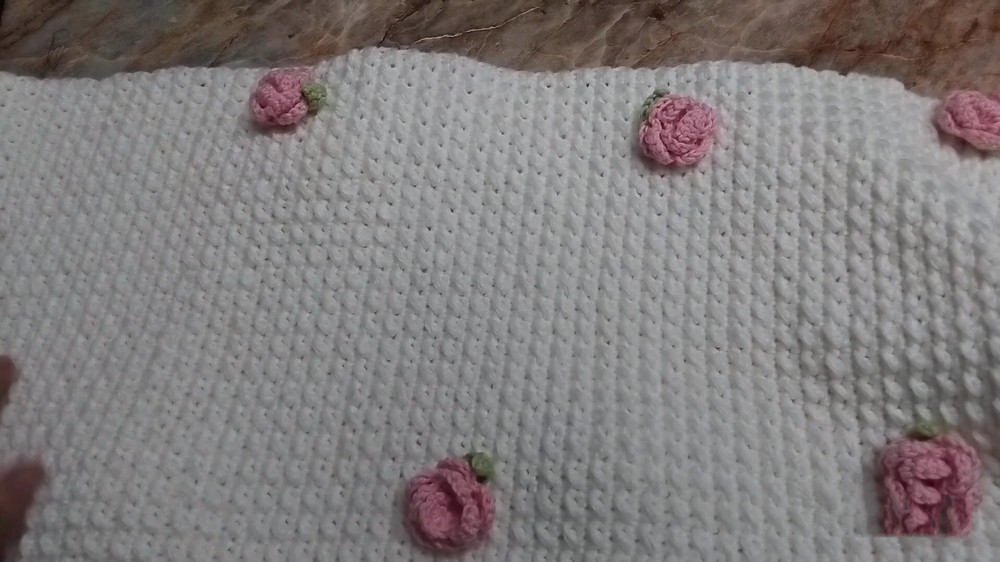
- Position the roses and leaves evenly across the scarf. For the sample, 12 roses and matching sets of leaves were used. You can adjust the number based on your preference.
- Use the darning needle and the tails left from the flowers and leaves to securely sew them onto the scarf.
- Ensure all elements are attached firmly so they don't detach during use.
Customization Ideas
- Size: Adjust the starting chain and number of rows to create a bigger or smaller scarf.
- Yarn Type: Experiment with different yarns (chunky, fine, metallic, or novelty yarns).
- Colors: Use gradient or variegated yarn for a striking effect. Alternatively, add stripes or blocks of contrasting colors.
- Edges: Consider a scalloped or picot edge instead of fringes for a more delicate finish.
- Decorations: Add beads to the flowers or use metallic thread to accent the leaves.
Tips
- Maintain Tension: Ensure consistent tension to keep the scarf edges straight and even.
- Practice the Stitch Pattern: Practice the alternating hdc sl st technique on scrap yarn to get comfortable with the motion.
- Count Your Stitches: Regularly count stitches to ensure that your project's width remains consistent.
- Secure Attachment: Ensure the floral elements are tightly sewn to prevent them from loosening with wear or washing.
- Blocking: Lightly steam block your scarf to smooth out irregularities and enhance the stitch definition.
Final Look
The finished scarf is elegant and versatile-perfect for both daytime and evening occasions. Its gentle ripple texture adds a touch of sophistication, while the floral decorations and optional leaf accents give it a unique, handcrocheted charm. When worn, it can be styled as a simple scarf or folded into a shawl for a warmer, more fashionable look.
Conclusion
Congratulations on completing your crochet scarf with floral decorations. This project combines simple yet delightful techniques, making it ideal for everyday use or as a gift for someone special. Whether worn for casual outings, evening events, or merely as a cozy accessory, this scarf will showcase your creativity and skill.
Experiment with different yarns, colors, and decorations to personalize the design further. You can make matching accessories, such as mittens or a hat, to complement your new scarf.
Above all, enjoy the creative process and showcase your work with pride.