
Free Crochet Market Bag Pattern Perfect for Daily Adventures
Take a handmade bag on your next shopping trip, crocheted with care using a free crochet market bag pattern for a stylish, durable, and practical companion.
Build a gorgeous shopping bag and make a stunning grocery tote that you'll want to take everywhere. This stylish, wearable travel companion has a wide, stretchy body and a sturdy matching shoulder handle that resembles a chic boutique tote, but it's handmade by YOU. Perfect for beginners and budding crocheters, this Free Crochet Market Bag Pattern is simple to follow and helps you create a lightweight, durable bag for all your needs-whether that's carrying your fresh farmer's market fruits or those heavy weekend library books.
What makes this bag so special is its unique open mesh design combined with a neat, dense bottom. Crocheted with bright cotton threads, it radiates positive vibes and gives you a cheerful, fresh look. The breathable mesh allows airflow while keeping everything secure, and the expandable chain loops are designed to hold even the heaviest vegetable bundles without tearing. That means you can walk, shop, and live your active life worry free.
Free Crochet Market Bag Pattern That's Trendy
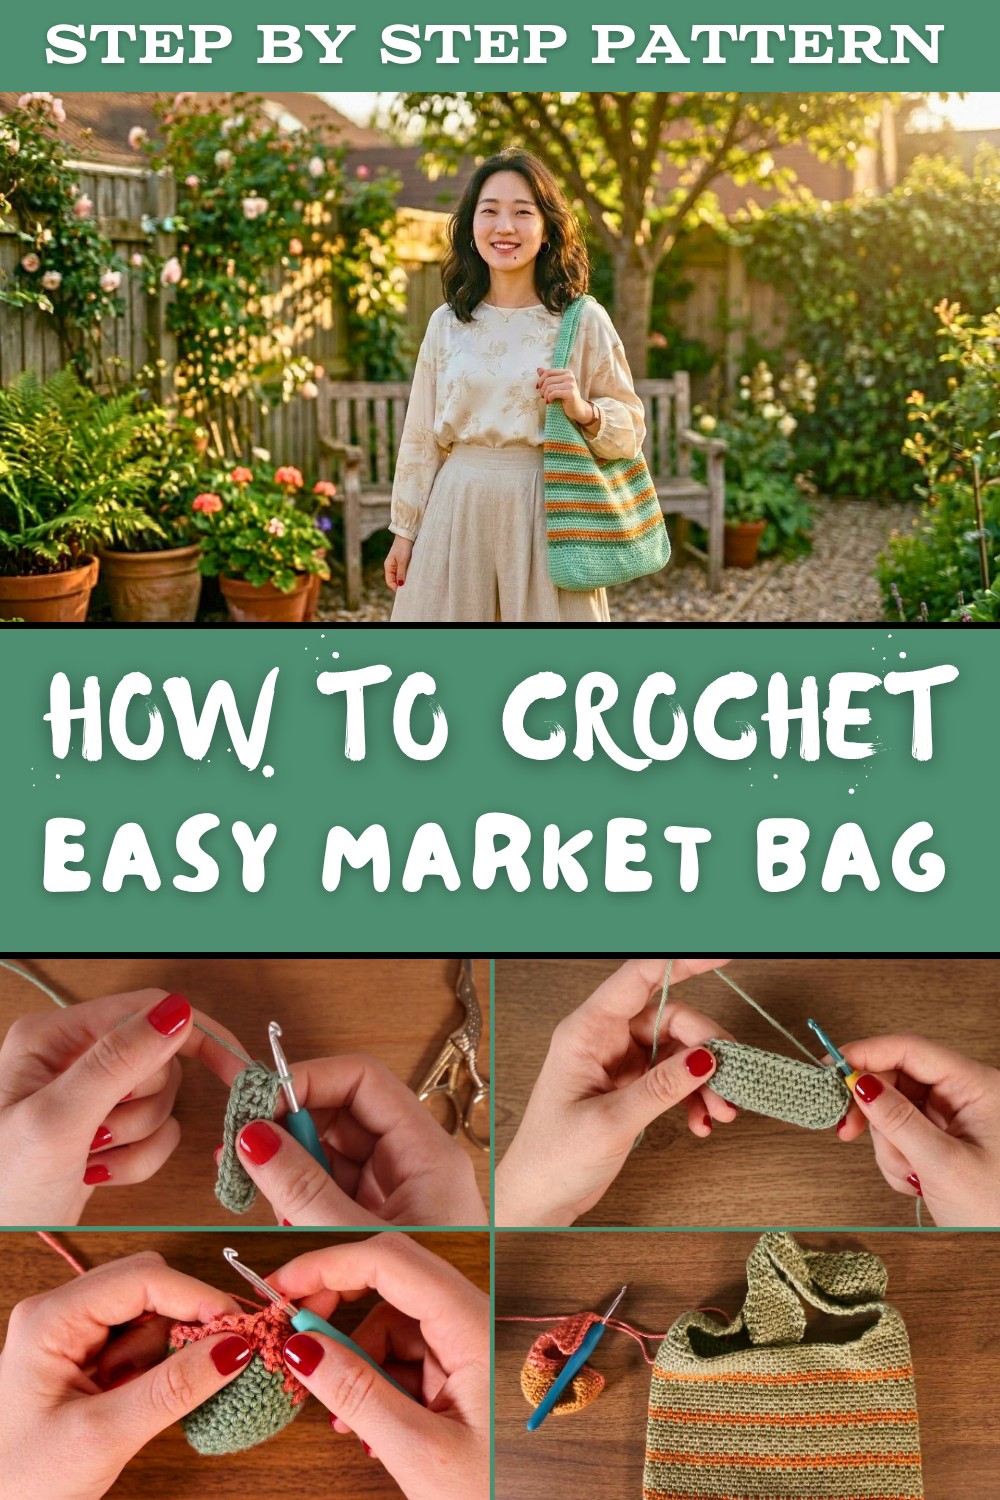
With standard cotton yarn and a simple crochet hook, you'll find it easy and affordable to create this bag. It's the perfect project to practice your skills without spending your hard earned money. Plus, it makes a lovely handmade gift for friends and family. This durable, practical bag is not only functional but also looks like a luxury fashion accessory that you'll be proud to show off.
The wide opening makes it super easy to access your items quickly, whether you're packing picnic snacks, swimming towels, or even groceries. Its soft texture feels gentle on your skin, and the pretty diamond shaped mesh holes add a stylish sparkle that'll turn heads at the park or on your shopping trips.
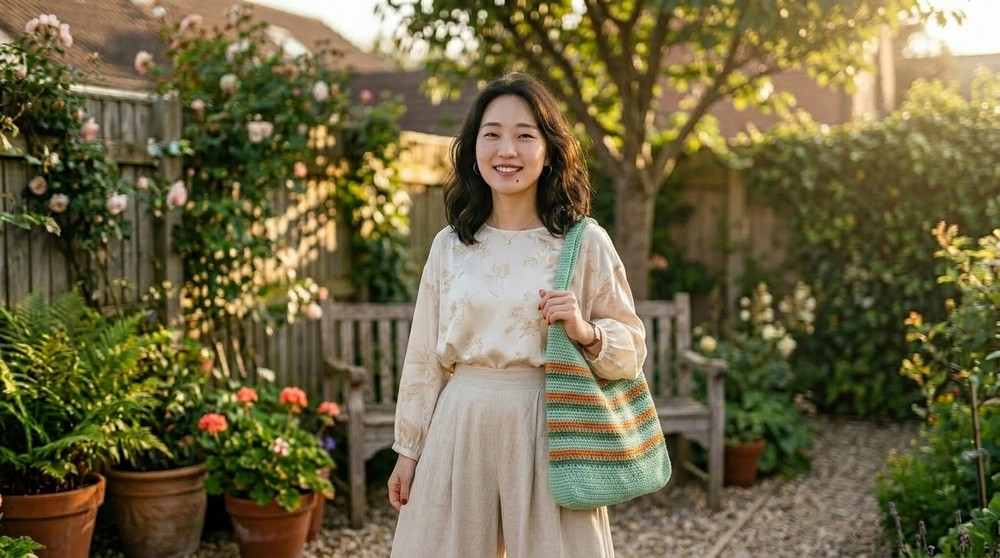
Make your shopping trips colorful, practical, and stylish with this wonderful crochet market bag-it's more than just a bag. It's a statement of creativity and beauty that anyone can crochet effortlessly. Start weaving and enjoy the magic of your handmade masterpiece.
Crochet Market Bag Pattern
Finished Size
The size of the bag can vary depending on the base dimensions you choose. The original project was small enough to fit approximately the size of a hand, but by adding more chains during setup, you can make a larger bag. For reference:
- Small bag: Begin with 35-36 chains.
- Medium bag: Begin with approximately 45-55 chains.
- Large tote bag: Start with 55+ chains.
The finished size depends entirely on your preference and the stitch height achieved using the specified yarn and hook.
Necessary Materials
- Yarn:
- Type: Yarn Bee Yarn Topia (or similar medium/lightweight yarn).
- Colors:
- Gold (for the base and accents).
- Cream (secondary striped accents).
- Green (tertiary accent color).
- Amount: Approximately one skein of each color.
- Hook Size:
- Tutorial hook: 4 mm.
- Original project hook: 3 mm - choose the size depending on the texture and stiffness you want for the bag.
- Other Tools:
- Sharp scissors (for clean yarn cuts).
- Finishing needle or a hook (for weaving in ends).
- Gauge:
- While gauge for the moss stitch isn't critical for the bag, aim for 4-5 stitches per inch using the specified hook.
Special Techniques
Understanding these techniques will be key to completing the project properly:
- Moss Stitch:
- Alternating between single crochets (SC) and chains (CH) to create a textured, breathable design.
- Decreasing:
- Worked at the edges of the bag handle sections to reduce the stitch count, shaping the handle.
- Increasing:
- Worked at the circular ends of the handle to expand the width, creating the rounded detail.
Pattern Instructions
Step 1: Base of the Bag
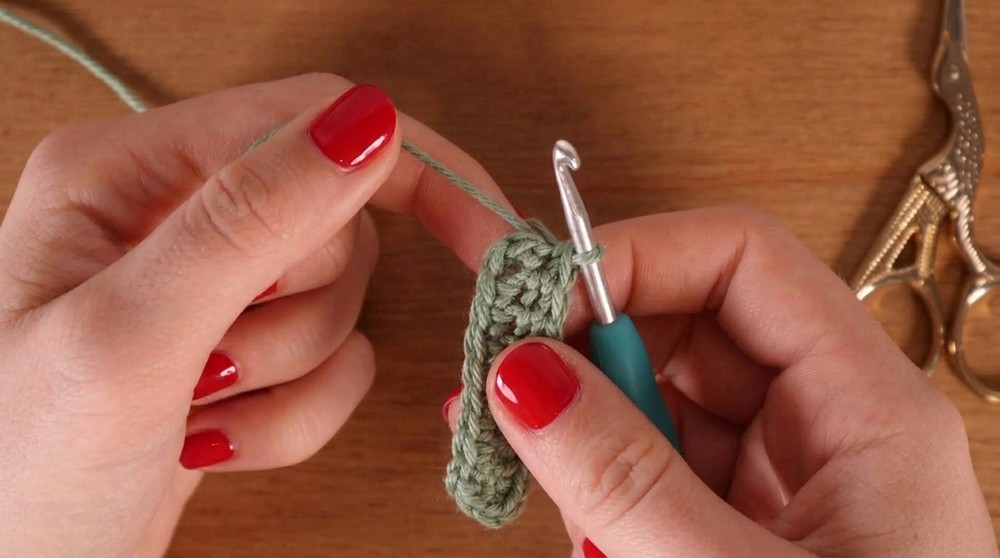
The base serves as the foundation of the bag. Follow these steps carefully to achieve a clean oval shape:
- Foundation Chains:
- Begin with a slip knot.
- Chain 35-36 for a small bag. For demonstration purposes, the video starts with 10 chains.
- The number of chains determines the width of your bag, so adjust this count to your desired width.
- Creating Round 1:
- Start in the second chain from the hook. Insert your hook, yarn over, and pull through to make the first SC.
- In the same chain, work 2 additional SC (making 3 SCs total in the first chain).
- Continue working 1 SC into each chain until you reach the last chain.
- Into the last chain, work 3 SC to form a rounded corner.
- Rotate the work, working into the bottom of the chain row (opposite side), placing 1 SC into each stitch.
- Slip stitch into the first SC to close the round.
- Expanding the Base:
- Round 2: SC into the first stitch, followed by 3 SC into the next stitch (forming the corner increase).
- Continue working 1 SC into each stitch until reaching the next corner. There, place 3 SCs into the same stitch.
- Slip stitch into the first SC to complete the round.
- Repeat Rounds:
- Continue expanding the base by increasing the number of SC stitches between corner increases:
- Round 3: Place 2 SC between increases.
- Round 4: Place 3 SC between increases.
- Continue this pattern until the base reaches the size desired for your bag.
- Continue expanding the base by increasing the number of SC stitches between corner increases:

Step 2: Building the Body
- Cease Increasing:
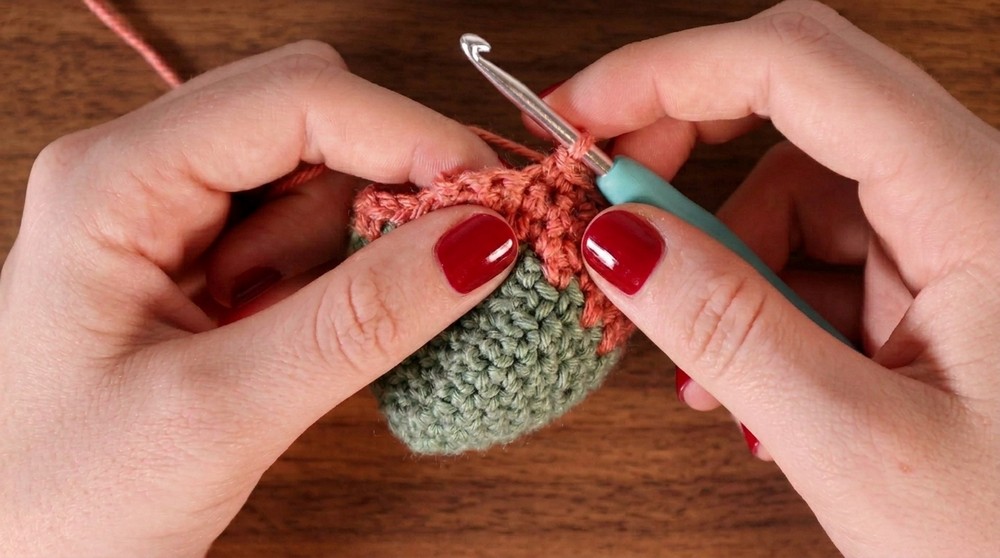
- Once the base is the desired size, stop increasing. For approximately 8 rounds, crochet 1 SC into every stitch around. This will cause the structure to grow vertically, forming the sides of the bag.
- Moss Stitch:
- Transition into the moss stitch by alternating single crochet and chain stitches:
- Begin each round with 1 SC into the first stitch (or CH 1 to represent the SC).
- Chain 1, skip the next stitch, and place 1 SC into the following stitch.
- Repeat this pattern (SC, CH 1, skip 1) until the round is complete.
- Slip stitch into the first SC to close the round.
- Transition into the moss stitch by alternating single crochet and chain stitches:
- Subsequent Rows:
- Work SC stitches into the chain 1 spaces from the previous round, maintaining the moss stitch pattern.
- Add striped patterns by incorporating color changes.
Step 3: Adding Color
- Switching Yarn Colors:
- When completing the last slip stitch of the round, introduce the new color yarn:
- Insert the hook into the slip stitch, yarn over with the new color, and pull through.
- Proceed with the moss stitch using the new color.
- When completing the last slip stitch of the round, introduce the new color yarn:
- Stripe Sequence:
- Original Stripe Pattern:
- The base starts with gold yarn and transitions to stripes using cream and green.
- Example: [Gold base ➝ 4 cream ➝ 2 green ➝ 1 gold ➝ repeat sequence].
- Alternate color layouts as desired for greater creativity.
- Original Stripe Pattern:
Step 4: Handle Formation
- Side Decrease:
- At the edges of the bag where the handles are positioned, decrease the stitch count gradually:
- Skip the first stitch after turning the work, then SC across the row.
- Near the end, decrease 2 stitches into one.
- At the edges of the bag where the handles are positioned, decrease the stitch count gradually:
- Handle Body:
- Once the handle is reduced to the desired width (4 stitches wide in the video), crochet even rows of SC until the handle reaches the desired length.
- Circular Ends:
- Start increasing at both ends to create rounded edges for the handle:
- Begin by placing 2 SC into the first and last stitch of each row.
- Repeat for 2-3 rows until the circular section is formed.
- Start increasing at both ends to create rounded edges for the handle:
- Decreasing Circular Ends:
- Reverse the increase process to mirror the opposite rounded end.
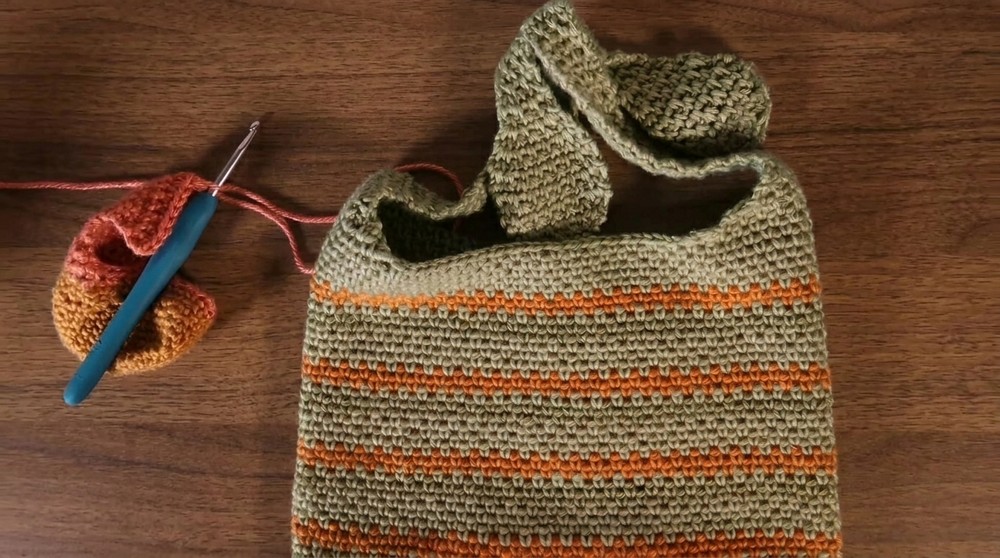
Final Assembly
- Repeat Handle for Opposite Side:
- Follow the handle instructions for the second handle.
- Secure Ends:
- Tie the handle ends securely using a double knot. Optionally, you can weave the loose ends into the bag's body using a finishing needle.
Customization Ideas
- Experiment with Yarn: Combine different textures or weights for added drama and structure.
- Add Embellishments: Sew on beads, buttons, or patches to personalize the design.
- Create a Lining: Add a fabric lining to reinforce the bag and provide additional durability.
- Adjust the Handle Thickness: For sturdier handles, avoid reducing the width too much - stop decreasing at 6 stitches instead of 4 for more durable handles.
- Shape Adjustments: Experiment with oval or circular bases for varied bag shapes.
Tips to Enhance Your Crochet Experience
- Keep Consistent Tension: Uneven tension can alter the shape of your bag, especially with multiple rounds.
- Count Every Stitch: Errors in stitch placement can cause the bag to warp, especially during increases and decreases.
- Use Stitch Markers: This helps track corners and starting points.
- Block the Bag: Wet blocking upon completion improves texture and structure.
Conclusion
This moss stitch crochet bag blends simplicity with style, making it an easy yet rewarding project for crocheters of all levels. The moss stitch creates a textured body, while the careful increases and decreases contribute to its functional details like handles. Whether used as a compact daily accessory or a fun gift idea, this bag can be tailored entirely to your needs through size, color, and design variations.
Important Remarks:
- Take your time with new techniques like increasing or decreasing for smooth results.
- Test yarn combinations to ensure the structure is sturdy enough for daily use.
- Practice special techniques before starting to build confidence.