
Free Crochet Mickey Bow Hair Clip Pattern For Party Style
Learn how to crochet a cute Mickey bow hair clip with this free and easy pattern, perfect for adding fun Disney vibes to your hairstyle in just a few steps.
Bringing Disney magic to your home is fun and creative with a special project that lets you make unique accessories. This adorable hair clip combines the charm of Mickey Mouse and a cute bow, making it perfect for adding a playful touch to your hairstyle. Whether you're dressing up for school, a party, or just enjoying a relaxing day, this handmade clip lets you show off your love for Disney in the sweetest way.
Sweet Free Crochet Mickey Bow Hair Clip Pattern for Happy Hair Days

It features the classic Mickey silhouette with a bright bow in the center, creating an accessory that stands out and adds a little sparkle to your look. You can choose your favorite color combinations to match your outfits or even your favorite Disney character. The soft yarn gives it a cozy, handmade feel, while the neat stitches make it look creative and well crocheted. It's lightweight and comfortable to wear, so it's great for daily use.

Not only is this hair clip cute, but it's also useful. It keeps your hair neat while making you look stylish and unique. You can clip it to a ponytail, braid, or loose hair for a playful Disney inspired flair. It's a simple way to make your hairstyle a little more special and fun.
The free pattern provides easy to follow steps, making it ideal even for beginners. You don't need a lot of experience to create something beautiful. With just a little time and effort, you'll have a lovely Mickey Bow Hair Clip that's handmade and full of charm. It's also a thoughtful gift for friends or family members who adore Disney magic.
Free Crochet Mickey Bow Hair Clip Pattern
Materials Required:
To successfully complete this crochet project, you'll need the following materials:
- Yarn: Cotton yarn in your choice of colors (red, pink, or any bright shade works well). Cotton yarn is recommended for its structure and durability.
- Crochet Hook: 2 mm crochet hook for precise and small stitches.
- Hair Clip: Medium-sized hair clip or barrette. Approx. 2-3 inches.
- Beads/Decor: Optional, such as pearl beads for decorating the center or edges.
- Silicone Glue: To secure the clip in place (optional but handy).
- Tapestry Needle: For sewing and weaving in loose ends.
- Scissors: To cut threads neatly.
Gauge:
- Gauge Check: 10 stitches × 10 rows = 1 inch (single crochet).
- Accuracy in gauge ensures your bow retains its intended size and appearance.
Finished Size:
- Approximate Diameter of Circular Base: 3-3.5 inches.
- Bow Center Width: 1 inch (can be customized for preferred thickness).
Pattern Instructions:
This crochet pattern consists of three main parts: creating the circular base, forming the bow wings, and finishing with the center strip and clip attachment. Let's get started.
Part 1: The Circular Base
The circular base provides the structure for the Mickey Bow Hair Clip. Follow these steps:
- Create a Magic Ring:
- Wrap the yarn around your finger to form a loop. Insert the hook into the loop, yarn over, and pull through. Chain 1 to secure the ring.
- Round 1:
- Chain 2 (this counts as the first double crochet). Make 12 double crochets into the magic ring.
- Pull the tail tightly to close the ring into a small circle.
- Slip stitch into the top of the first double crochet to join. (Total: 12 stitches)
- Round 2:
- Chain 2. Work 2 double crochets into each stitch around.
- Slip stitch into the top of the first double crochet to finish the round. (Total: 24 stitches)
- Round 3:
- Chain 2. Work a pattern of 1 double crochet into the first stitch, then 2 double crochets into the next stitch (increase). Repeat this sequence around.
- Slip stitch to close the round. (Total: 36 stitches)
- Round 4 (Optional for larger base):
- Chain 2. Alternate between 2 double crochets in one stitch (increase) and 1 double crochet in the next three stitches. This creates a smooth, gradual expansion.
- You should finish with 48 stitches in total.

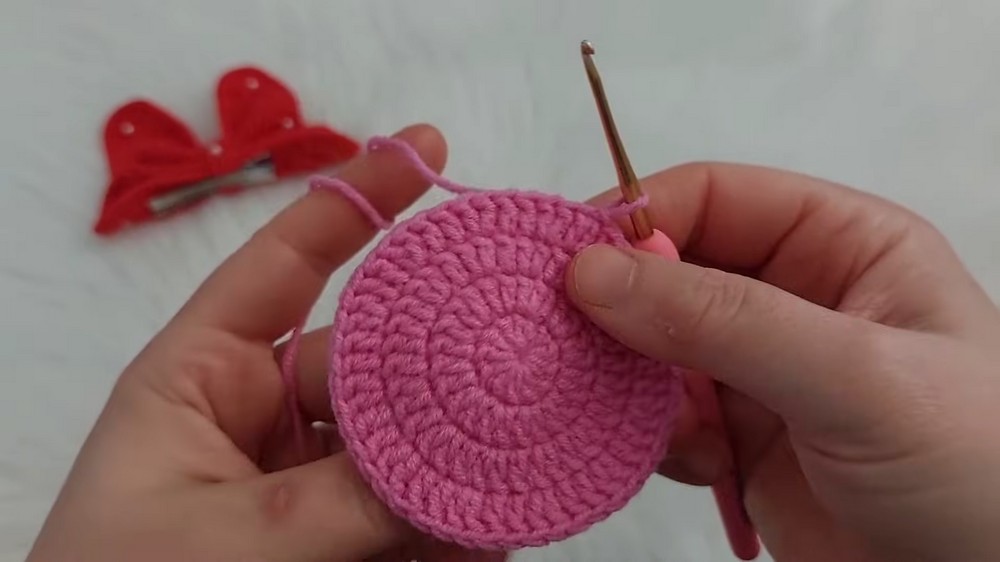
Tip: For beginners, using a stitch marker to mark the first stitch of each round will help keep track of where your row begins and ends.
Part 2: Creating the Bow Wings
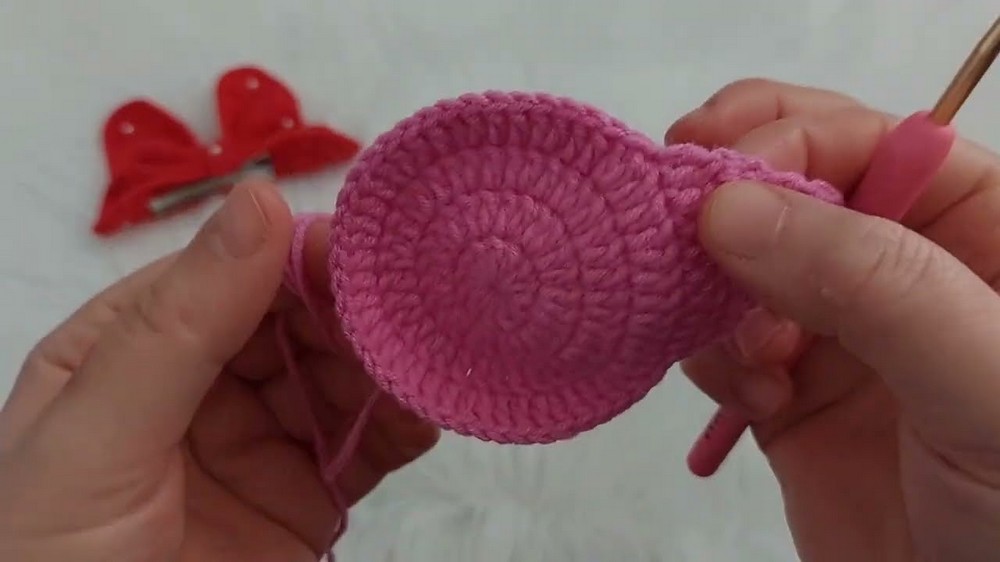
Now, divide the circular base into four sections to form the bow wings. These steps will give structure to the Mickey bow.
- Mark the Sections:
- Divide your circular base into four equal segments with stitch markers. Keep two stitches of space between each section to leave room for separation.
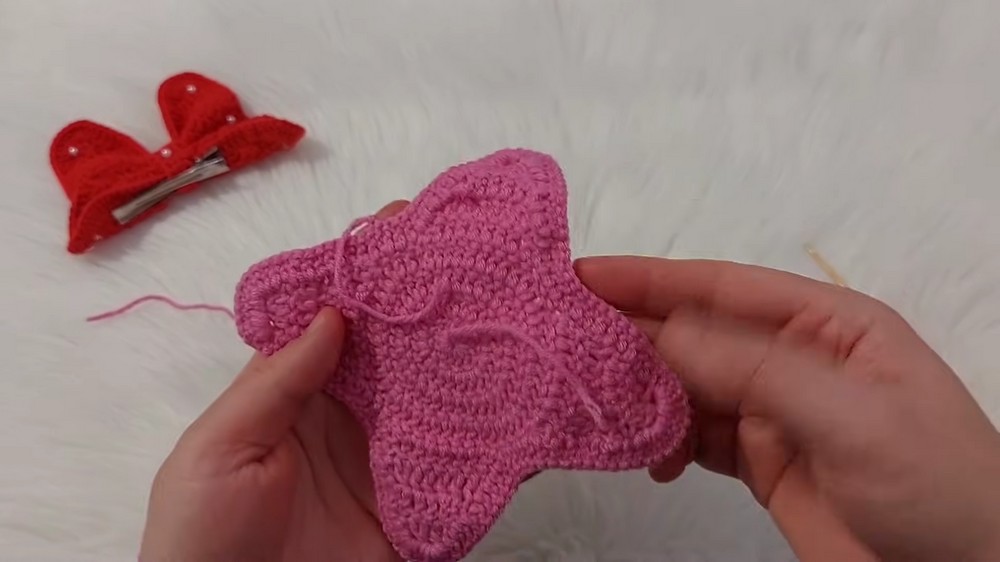
- First Wing:
- Chain 2. Crochet 4 double crochets into the marked section of the base.
- Row 2 (Start Tapering): Chain 2. Work 2 decreases (crochet two double crochets together) at the beginning and end of the row to leave 2 stitches in total.
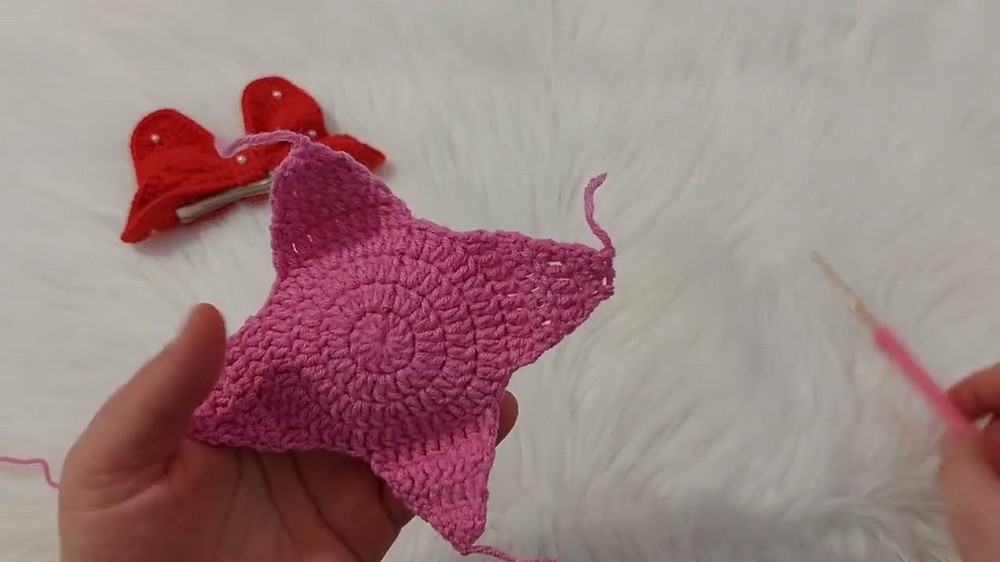
- Row 3 (Final Taper): Chain 2. Crochet 2 double crochets together to form the wing's point. Cut the yarn, leaving a tail, and weave it in.
- Repeat the steps for the remaining three sections, ensuring each wing tapers symmetrically.
- Edging:
- After finishing the wings, crochet single stitches along their edges. This creates a polished and rounded finish.
- If desired, change to a contrasting yarn color for the edging to highlight the bow shape.
Part 3: Bow Center Strip
This small strip ties the bow wings together and creates the iconic bow look.
- Foundation:
- Chain 5. Turn your work, skip the first chain, and crochet 4 single crochet stitches across.
- Rows:
- Chain 1, turn, and work single crochet stitches across (4 stitches per row).
- Continue until you've completed 12 rows (or adjust for your desired width).
- Finish:
- Leave a long tail for sewing when cutting the thread.
Tip: If you want the center strip to appear chunkier, simply increase the number of foundation chains or rows.
Part 4: Assembly and Attachment
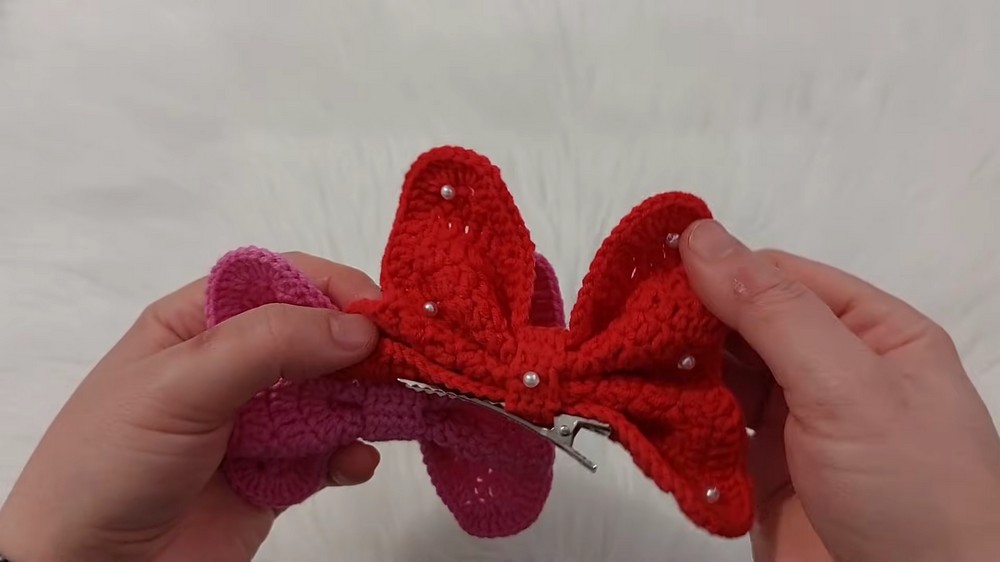
- Assemble the Bow:
- Fold the bow wings inward toward the center. Adjust the shape until they are neat and symmetrical.
- Wrap the completed center strip around the middle tightly to hold the wings in place.
- Use a tapestry needle to sew the ends of the strip together at the back of the bow, making sure it is secure.
- Attach the Clip:
- Open your hair clip and insert it into the back of the bow.
- Use silicone glue to secure the clip for extra durability. Allow the glue to dry fully before use.
- For a cleaner look, crochet a small rectangular cover for the clip and sew it onto the back.
- Decorate (Optional):
- Sew pearl beads onto the center of the bow or along the edges for added flair.
- Alternatively, use glitter or metallic yarn threads for a shimmering effect.

Special Techniques and Tips
- Magic Ring Method: This technique prevents a noticeable hole in the middle of your circle.
- Invisible Finish: For a seamless appearance at the end of rounds, use a slip stitch or invisible join.
- Customization: Play around with colors, textures, and yarn types to create unique looks.

Customization Ideas
- Multiple Sizes: Vary the size of the base circle and extend the wings to make the bow larger or smaller.
- Color Play: Alternate colors in each round or wing for a fun, multicolored look.
- Accessories: Attach the bow to headbands, brooch pins, or keychains instead of hair clips.

Final Touches
To complete your Mickey Bow Hair Clip:
- Check all loose ends and weave them in neatly.
- Adjust the wings and pull on the sections gently to ensure symmetry.
- Use the clip to secure your bow to your hairstyle.
Conclusion
The Free Crochet Mickey Bow Hair Clip Pattern provides an easy yet delightful way to create a handmade accessory with a touch of Disney magic. This project suits crocheters of all levels, whether you're a beginner exploring crochet or an experienced artisan looking for a fun and creative gift idea. From fun color combinations to playful finishes, the possibilities are endless.