
Free Crochet Mini Handbag Pattern with Simple stitches
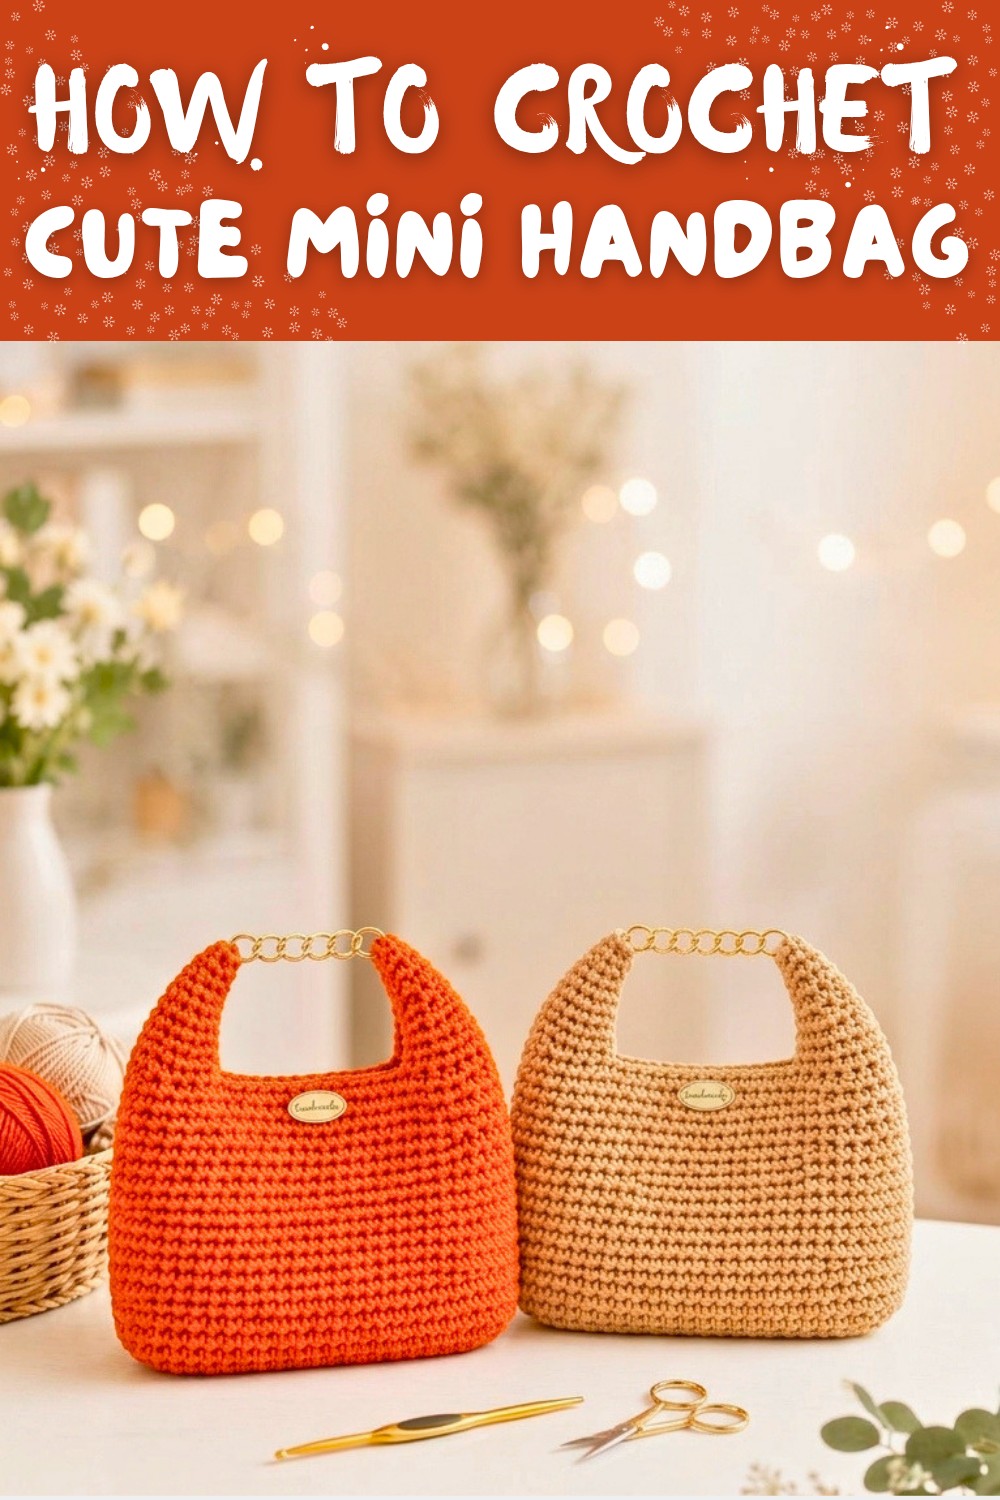
Carry essentials in style with Free Crochet Mini Handbag Pattern, featuring compact size soft texture and cute charm for daily casual looks.
A small bag can be both useful and stylish for carrying little items. Using a Crochet Mini Handbag pattern is a popular way to make a cute and practical bag by hand. It is perfect for holding keys lip balm or money when you want to travel light.
The finished bag feels soft yet sturdy enough to hold small essentials. Because it is handmade the size can be adjusted easily to fit what you need. The yarn material means the mini handbag is light to carry and gentle on your skin. Handmade bags also last a long time and are easy to clean.


By following the Crochet Mini Handbag pattern you can make your very own small stylish bag. It combines function with charm and is a great way to carry your essentials with personality. Whether for yourself or as a thoughtful present this mini handbag adds a personal touch to daily life.
Everyday Crochet Handbag Pattern
Create a stylish and practical handbag perfect for everyday use. Worked in single crochet and half double crochet stitches, this pattern builds a sturdy oval base, a structured body, and a simple yet elegant handle. Suitable for beginners and rewarding to complete, follow this detailed guide to craft your very own handmade tote.
Preparation Guidelines
- Use medium weight yarn with approximately 4.5 mm recommended thickness. Acrylic or cotton blends are both excellent choices depending on desired texture and durability.
- Crochet hook size: 6 mm (US size J) recommended for even, balanced stitches and comfortable gauge.
- Keep stitch markers and a yarn needle nearby for finishing and seaming.
- Take time to count stitches regularly to maintain consistency.
- Relax your tension and keep your stitches neat for the best shape and feel.
- Measure your progress with a tape measure to ensure proper sizing.
Pattern Highlights
- Constructed in continuous joined rounds for a seamless look.
- Begins with an oval base shaped through targeted single crochet increases.
- Body worked in rounds of single crochet with steady stitch count for a smooth finish.
- A shaped handle is worked separately with strategic decreases for form and comfort.
- Finishing rounds use slip stitches to join and secure work neatly.
- Stitches used mainly include single crochet (sc) and half double crochet (hdc), with increases and decreases to shape the bag.
Basic Construction Overview
- Form oval base using chains and increases worked in single crochet.
- Crochet bag body in continuous single crochet rounds, maintaining stitch count for even walls.
- Shape handle with rounds of single crochet and decreases to contour.
- Join all components neatly and weave in ends to complete the bag.
Difficulty Level
This project is suitable for beginner to intermediate crocheters familiar with basic stitches, increases, and decreases. It offers clear repetition and shaping techniques valuable for skill building.
Finished Dimensions
- Approximate base length: 26-28 cm (10.2-11 inches)
- Base width: 14-15 cm (5.5-5.9 inches)
- Bag height including handle: 20-22 cm (7.9-8.7 inches)
Supplies Needed
- Medium weight (category 4) yarn, about 150 grams
- Crochet hook 6 mm (US J)
- Stitch markers
- Tapestry needle for weaving ends
- Scissors
- Optional: measuring tape to check gauge
Size Estimations
- Base oval is approximately 26 cm by 14 cm, expanding slightly with yarn tension and hook size.
- Handle length designed for comfortable handheld carrying but can be adjusted.
Stitch Gauge
- About 14 single crochet stitches and 13 rows = 10 cm (4 inches) in single crochet with 6 mm hook and recommended yarn.
- Gauge is approximate and not critical for project success; however, consistent tension ensures even fabric.
Stitch Key
- ch - chain
- sc - single crochet
- hdc - half double crochet
- inc - increase (2 sc in same stitch)
- dec - decrease (single crochet two stitches together)
- sl st - slip stitch
- st(s) - stitch(es)
Special Techniques Clarified
- Increase (inc): Work 2 single crochet stitches into the same stitch to widen the project.
- Decrease (dec): Insert hook into next stitch, yarn over, pull through, repeat for next stitch, yarn over, and pull through all loops on hook to reduce stitch count.
- Slip Stitch (sl st): Insert hook, yarn over, pull through both stitch and loop on hook to join rounds or finish work without adding height.
Step-by-Step Crochet Instructions
Oval Base Formation
Round 1:
- Chain 19.
- Skip first chain from hook, sc 17 chains.
- At end, turn work and sc 16 stitches along opposite side of foundation chain.
- Make 1 increase (2 sc in same stitch) at corner to shape base end.
- Join with sl st to first sc.
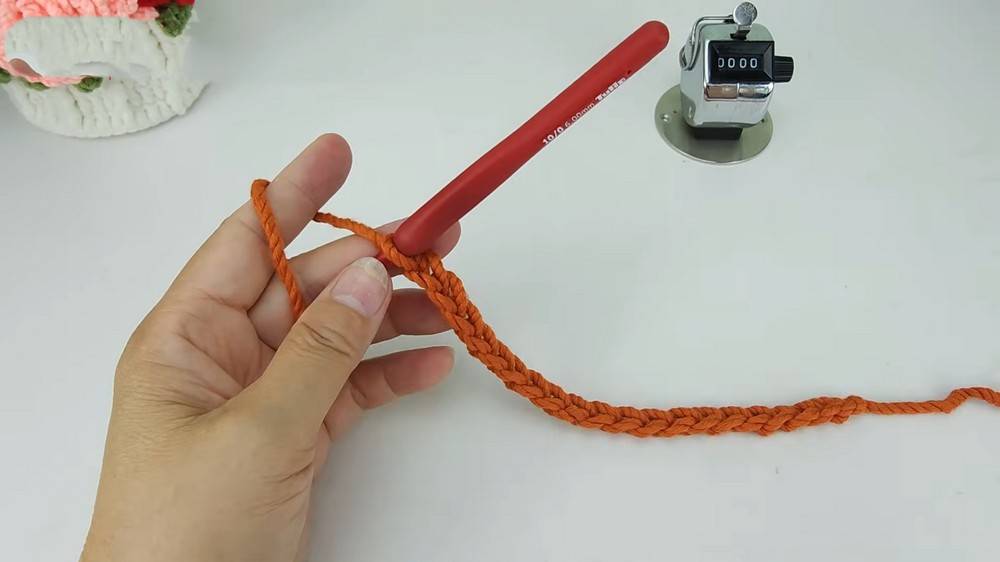

Stitch count tip: Count all single crochets before joining. You should have an oval shape taking form.
Round 2:
- Ch 1, sc 16.
- Work 3 increases evenly spaced on curved end.
- Sc 16 stitches on opposite side.
- Make 3 increases on other curve.
- Join with sl st.
Watch your shaping carefully-your base is becoming defined.
Round 3:
- Ch 1, sc 16.
- Repeat (1 sc, 1 inc) three times on first curve.
- Sc 16 stitches along side.
- Repeat (1 sc, 1 inc) three times on opposite curve.
- Join with sl st.
Keep your edges smooth with consistent increases.
Round 4:
- Ch 1, sc 16.
- Repeat (1 inc, 2 sc) three times on curved ends to round corners.
- Sc 16 stitches along straight sides.
- Repeat curved pattern on opposite end.
- Join with sl st.
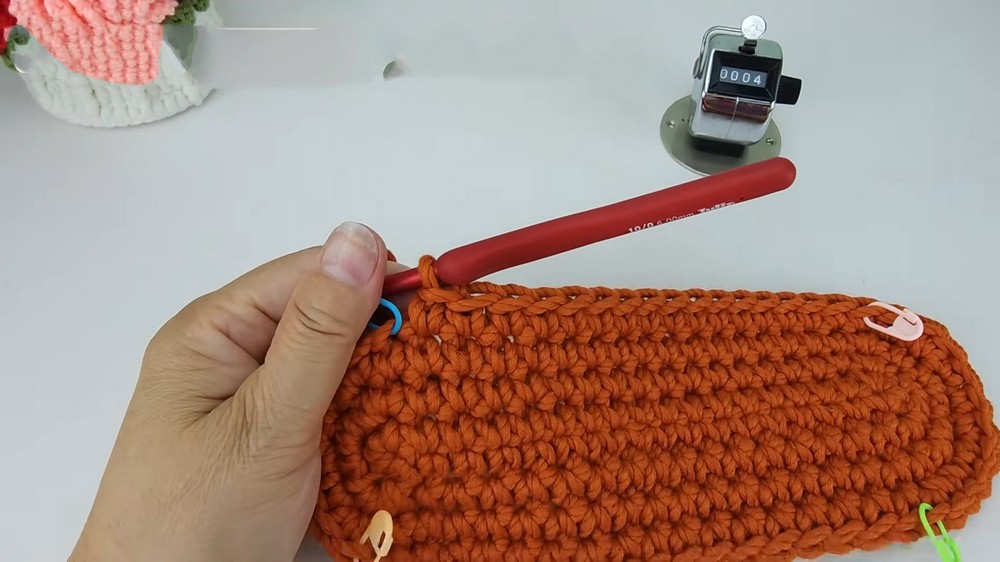
Now your oval base is fully shaped, ready for the bag walls.
Constructing the Bag Body
Round 1 (body):
- Ch 1.
- Sc 56 around entire base.
- Join with sl st.
This forms the initial wall of the handbag.
Rounds 2 to 14:
- Ch 1.
- Sc 56 stitches in each round, joining with sl st.
- Maintain stitch count to build height evenly.
- Count stitches regularly to avoid mistakes.

Simple repetition helps the bag grow taller with a smooth surface.
Shaping the Finishing Round
Round 15:
- Ch 1.
- Work 5 hdc, 14 sc, 14 hdc, 14 sc, 9 hdc.
- Join with sl st.
This round adds a pleasing finishing shape to transition the bag body toward the handle.

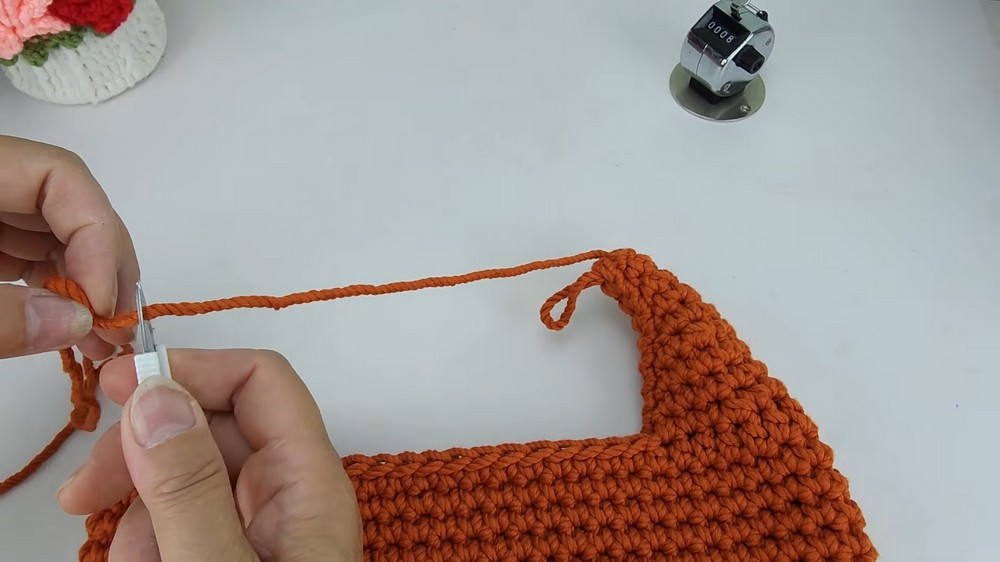
Crafting the Handle
Round 1 (handle starting):
- Work 3 sc, dec (sc2tog), 4 sc, dec, 3 sc, join with sl st.
Starting to shape handle comfort and curve.
Rounds 2 & 3:
- Ch 1.
- Sc 12 around handle.
- Join with sl st.
Keep stitches even and consistent for a neat handle.
Round 4:
- Ch 1.
- Sc 2, dec, sc 4, dec, sc 2, join with sl st.
Refining shape for ergonomic fit.
Round 5:
- Ch 1.
- Sc 3, dec, sc 4, join with sl st.
This round continues narrowing the handle.
Round 6:
- Ch 1.
- Sc 3, dec three times, join with sl st.
Handle is almost complete, shaping it smaller for grip.
Round 7:
- Ch 1.
- Sc 2, dec three times, join with sl st.
Final shaping rounds.
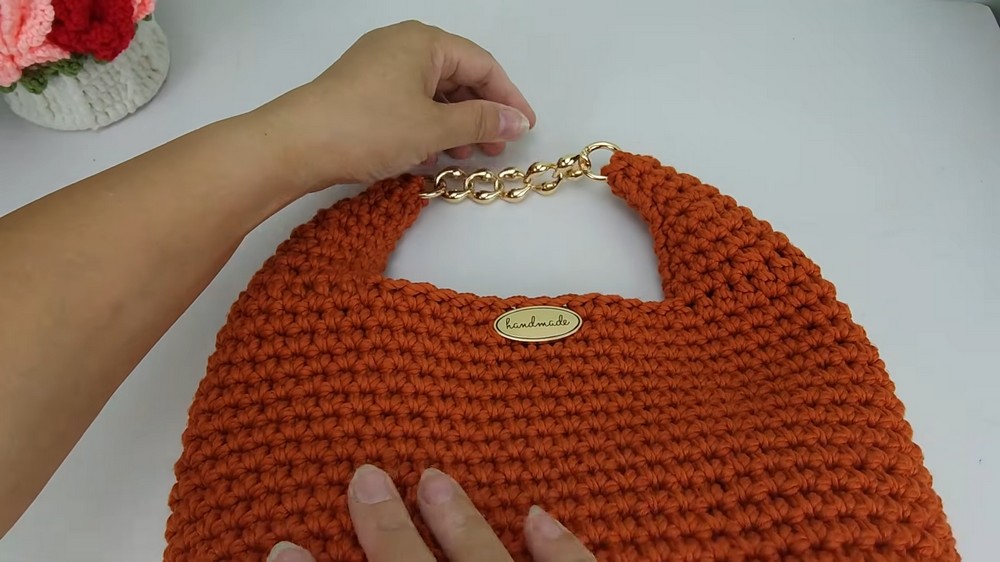
Final Round:
- Ch 1.
- Sc 2, dec two times, join with sl st.
- Fasten off.
Handle is complete and ready to attach or use.

Helpful Clarifications
- Be sure to count all stitches carefully after each round-especially increases and decreases-to maintain the oval shape and neat body.
- Work slip stitches to join rounds gently for a clean, seamless look.
- If you find tension too tight during base or handle steps, try using a slightly larger hook or loosening grip.
Finishing Touches and Assembly
- Weave in all yarn ends neatly with a tapestry needle.
- If desired, block the finished bag by dampening and shaping on a flat surface to even out stitches.
- Check that handle is securely shaped and comfortable to hold.
- Optional: Add a lining sewn inside for extra structure and durability.
Troubleshooting Tips
- Uneven base shape: Recheck stitch counts and follow increase placement exactly.
- Handle too tight or stiff: Use a larger hook for handle rounds or try loosening tension.
- Loose stitches creating holes: Use tighter tension or smaller hook for a denser fabric.
- Difficulty joining rounds: Use a stitch marker to track beginning of each round and join carefully with slip stitches.
Creative Variations to Explore
- Add colorful stripes or variegated yarn for a personalized look.
- Make larger sizes by increasing foundation chain and adjusting stitch counts proportionally.
- Create matching accessories like coin purses or small pouches using the same stitch pattern and body shape.
- Embellish with buttons, crochet flowers, or appliques for added style.
- Use the handle shaping technique to craft wristlets or bag straps in different projects.