
Free Crochet Ruffled Neck Warmer Pattern for Winter Charm
Add a cozy and fashionable twist to your winter days with this crochet ruffled neck warmer pattern that's easy to make with free step by step instructions.
It's a chic and cozy accessory that keeps you warm while adding a touch of elegance to your winter wardrobe. The Free Crochet Ruffled Neck Warmer Pattern is a perfect choice for anyone looking to stay comfortable and stylish during those chilly months. Simple yet stunning, this neck warmer stands out with its unique soft ruffled edges that make it a beautiful piece to wear anywhere. It wraps softly around your neck, providing warm comfort on cold days. Its lightweight feel ensures it's easy to wear all day without feeling heavy, whether you're out running errands, heading to school, or simply enjoying time with friends and family.
Crochet a Neck Warmer Free Pattern for Snowy Photo Days

The ruffles are not just a functional addition-they bring a fashionable twist that makes this neck warmer ideal for any casual or semi formal outfit. Pair it with a sweater, coat, or even a simple top, and it instantly adds charm to your look.
This neck warmer isn't just for yourself-it's an amazing handmade gift for your loved ones. With the pattern being completely free and easy to follow, even beginners can confidently create something beautiful. Imagine the smiles on your family or friends' faces when they receive such a warm, thoughtful, and stylish present.
Comfortable, practical, and wonderfully unique, this ruffled neck warmer is all set to brighten up your winters. Take the time to make one, and enjoy staying warm in style.

Step-by-Step Crochet Pattern: Elegant Ruffled Neck Warmer
Materials Required
- Yarn:
- Alize Angora Gold, or similar lightweight wool blend yarn with a soft and airy texture.
- Use two strands of yarn for the project, pulling one strand from the center of the ball and the other from the outside. This approach creates the desired fluffy thickness.
- Hook:
- 3 mm crochet hook, which ensures a light, elegant finish for this neck warmer.
- Other Tools:
- Stitch markers: You will need two for the start and end markers.
- Scissors: For trimming excess yarn.
- Tapestry Needle: To weave in ends.
Gauge
Gauge is not crucial for this piece. However, the lace section (worked with a 3 mm hook and double stranded yarn) measures approximately 4 cm in width.
Finished Size
- Length: 140 cm (adjustable based on preference).
- Width: About 4 cm for the lace base, with the ruffle edges adding flair and width to the design.
- Neck Circumference: Approximately 36 cm, suitable for adults (adjustable via chained stitches).
Customization Suggestions
- Length: Adjust by chaining more or fewer stitches for the base lace (add/remove in multiples of chain stitches to achieve your desired length).
- Width: If you desire a denser or fluffier ruffle effect, increase the stitch count in the ruffle rows.
- Colors: Use contrasting colors for the base and ruffles for a vibrant design.
Pattern Instructions
Part 1: Lace Base
- Create the Lace Foundation Chain
- Using double stranded yarn, create a loose chain of 280 stitches for a base length of 140 cm.
- If your chain falls short of this length, add extra stitches in multiples of 10 to reach 140 cm.
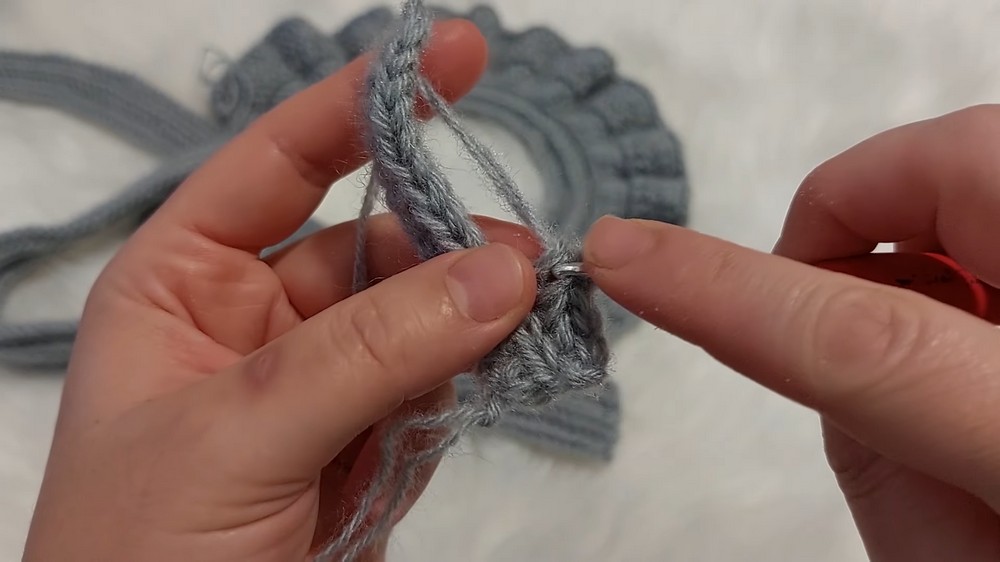
- Work the First Lace Row
- Starting from the second chain from the hook, insert your hook into the back loop of the chain and work single crochets (sc) across the chain. At the end of this row, you will have 279 stitches.
- This row forms the first foundation of the lace.
- Subsequent Lace Rows
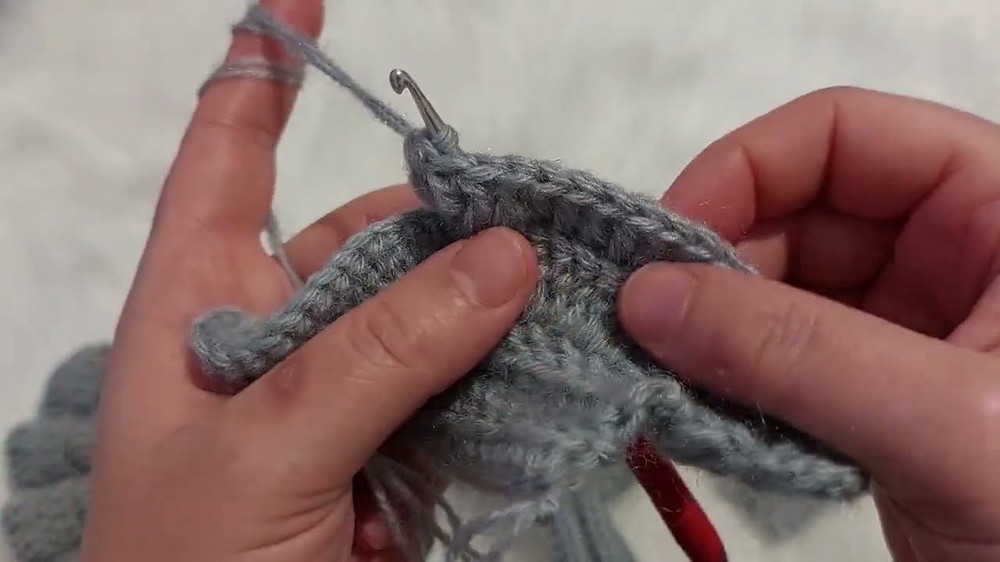
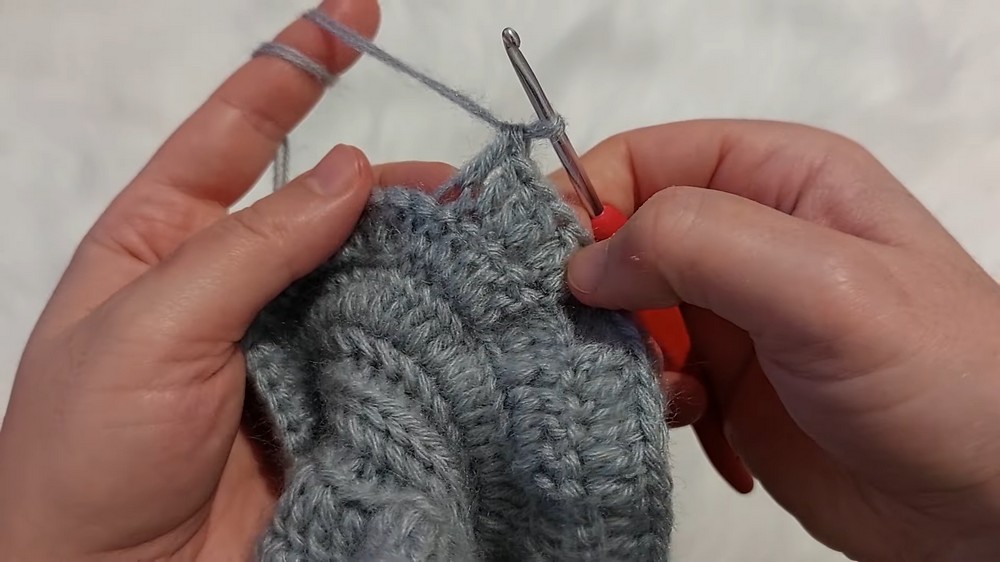
- Row 2: Chain 2. Insert your hook into the back loop only of the first single crochet, and work 1 single crochet. Continue working into the back loops of each stitch across the entire row.
- Repeat the same process (Row 2) for 5 rows total or until your lace reaches your desired width (recommended width is about 4 cm).
- Tips for the Lace Section
- Keep your tension consistent to maintain the lace's flexibility and even width.
- If following the suggested measurements of 280 chains, ensure the final lace section measures 140 cm in length and 4 cm in width.

Part 2: Ruffled Edges
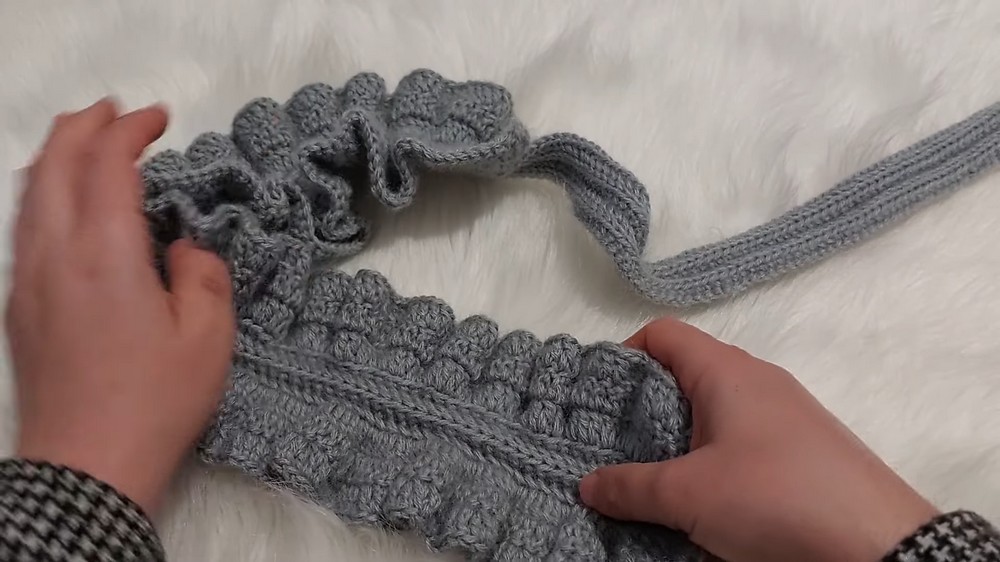
- Mark the Neck Section
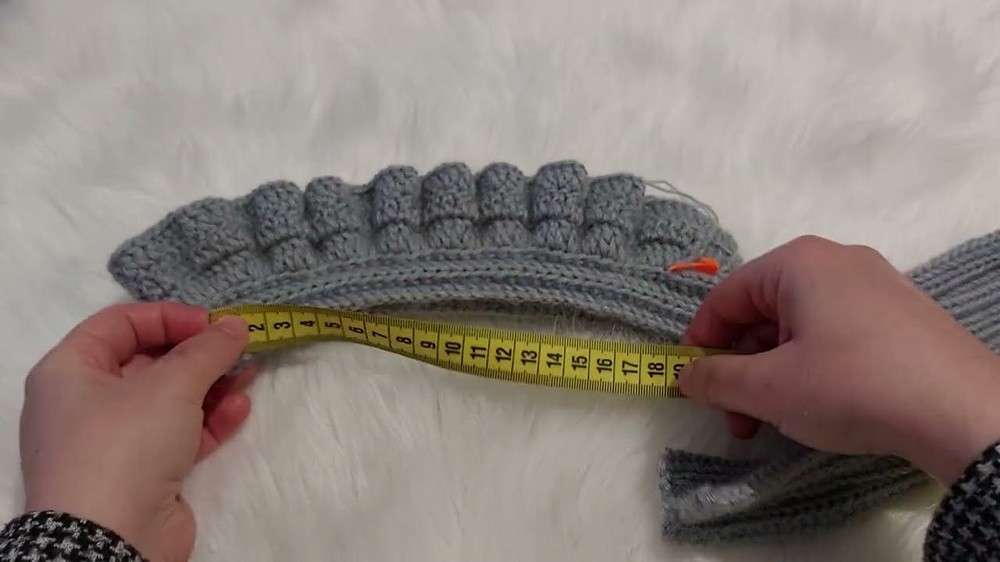
- Fold the lace base in half to find the center.
- From the center point, measure 18 cm on each side (a 36 cm central neck section). Place stitch markers at both ends.
- Work Ruffles on One Side
- Starting from one stitch marker, attach the double stranded yarn and chain 3 (counts as the first double crochet, dc).
- In the same stitch, work 1 more dc.
- For each subsequent stitch, alternate between:
- Work 2 dc in one stitch (increase).
- Work 1 dc into the next stitch.
- This pattern increases the number of stitches and creates the ruffled shape.
- Increase Rounds for the Ruffle
- For Round 2 and onward:
- Chain 3 at the start of the row. Work 2 dc into each stitch of the previous row to continue expanding the ruffle.
- Continue for 3-4 rows, increasing as necessary to achieve desired fullness in the ruffles.
- For Round 2 and onward:
- Repeat the Ruffle on the Opposite Side
- Attach the yarn to the opposite stitch marker. Repeat the ruffle pattern following the same steps as above.

Part 3: Neck Section
- Work Even Double Crochet Rows
- For the 36 cm central neck section, work rows of double crochets (dc) evenly between the ruffles.
- Create 2-3 rows of dc to form a smooth texture and comfortable fit around the neck.
- Ribbing Option (Optional)
- To add texture and stretch, use front post and back post double crochets around for additional rows after completing the double crochet rows.
Finishing
- Weave in Ends
- Use a tapestry needle to securely weave in all loose yarn ends. Aim to hide them within the lace or ruffles for a polished finish.
- Optional Blocking
- Lightly block the neck warmer to give the lace definition and smooth the ruffles-particularly if using a wool blend yarn.
- Final Touches
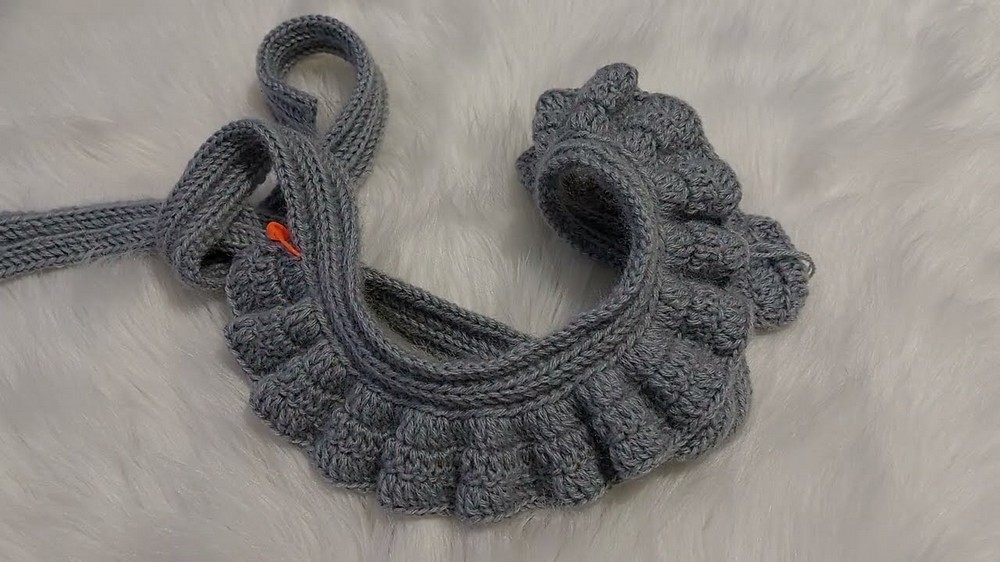
- Fold the neck warmer into position and ensure the ruffles fan out evenly on both sides.
Care Instructions
- Wash gently by hand in cold water and lay flat to dry to maintain the yarn's texture and elasticity.

Tips for Success
- Consistency: Work with even tension to produce clear, even ruffles and a smooth lace foundation.
- Adjust Length and Width: Test the neck warmer's fit by adjusting the foundation chain length or stitch gauge based on the recipient's measurements.
- Experiment: Play with different types of light or fluffy yarns for unique textures.

Conclusion
Congratulations on completing your ruffled lace neck warmer. The elegant lace base, paired with the flared ruffles, offers versatility and style. This accessory is perfect for cold winter days and complements both casual and formal outfits.
We hope you enjoyed this pattern and the process of crocheting your very own neck warmer.