
Free Crochet Scarf And Hat Pattern to Keep You Warm
Prepare cozy outfit sets with this Free Crochet Scarf And Hat Pattern featuring matching style and comforting texture for chilly weather days.
Cold days call for something warm soft and cozy to keep you comfortable all day long. A scarf or hat is a perfect choice to block out chilly winds and add style to your outfit. When made with a Crochet Scarf And Hat pattern you get the extra joy of something handmade. This piece is gentle on your skin and allows air to flow so you stay warm without feeling hot or itchy.
Crochet scarves and hats come in many shapes and designs but all offer great benefits. They wrap you up snugly around your neck or head helping to hold in body heat. What makes the crochet version special is the textured stitching. This creates little pockets that trap warmth while giving a soft stretch for a perfect fit. You can pick your favorite colors and yarn types to match your style whether that means bright and bold or soft and subtle.

Quick Free Crochet Scarf And Hat Pattern Perfect for Cold Days
Wearing a scarf or hat made from crochet can lift your mood and boost your confidence. Scarves can be draped in many ways like loosely wrapped or tied simply at the front. Hats add a charming touch to casual or dressier looks. This combination is also a practical way to protect your ears and throat from cold air. A gift made using the crochet scarf and hat pattern shows care and love by offering something handmade and personal.
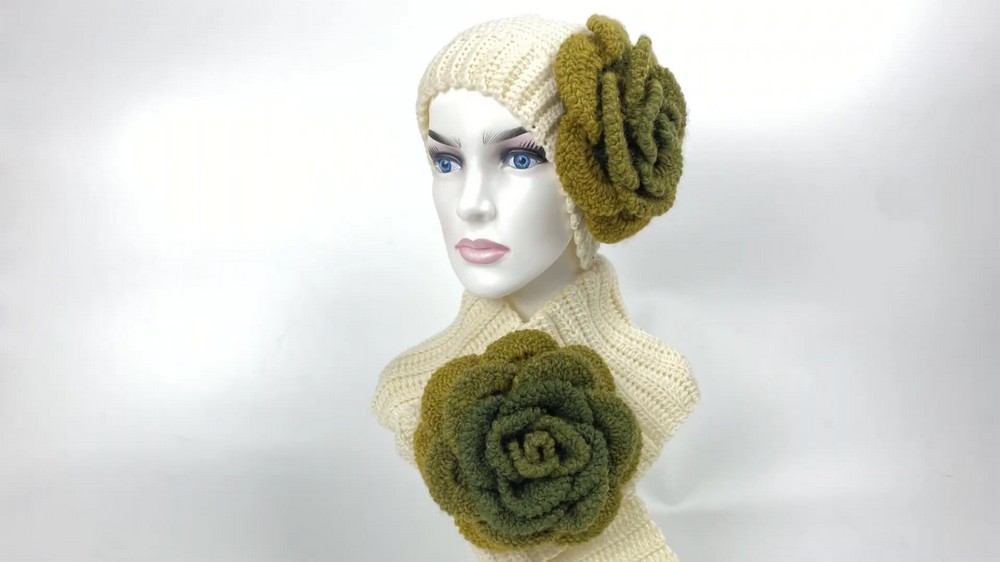
Overall this pattern offers a great balance of warmth comfort and creativity. It is simple enough for beginners and enjoyable for all skill levels. The chance to wear something you made yourself or share with someone special makes it truly rewarding. Whether for yourself or as a gift the crochet scarf and hat pattern gives you cozy style in every stitch.
Crochet Neck Warmer and Beanie Pattern with Rose Detail
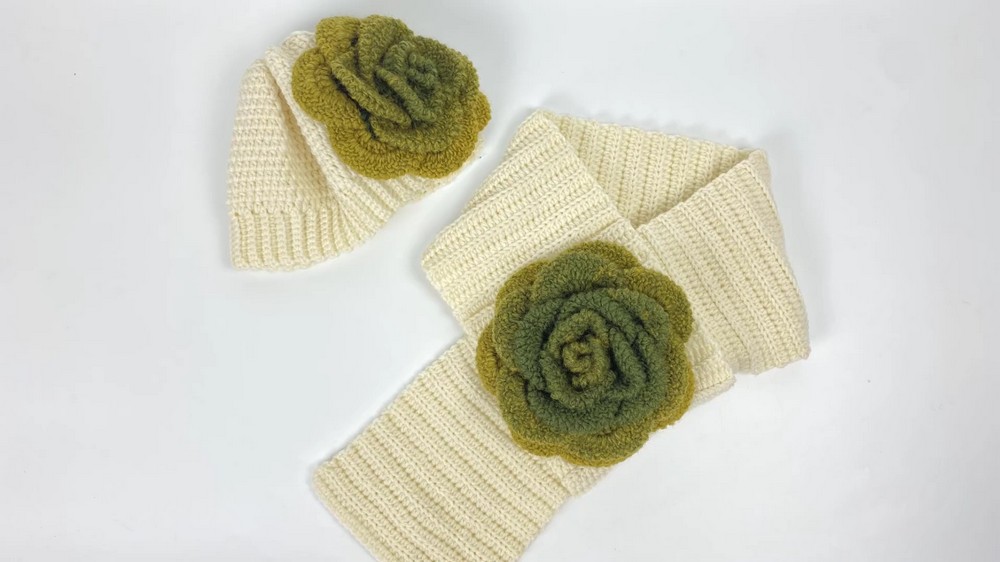
Welcome to this detailed crochet pattern for a warm and stylish neck warmer paired with a charming beanie, featuring a lovely rose accent. This pattern is perfect for crocheters of all skill levels who want to create cozy handmade accessories for cold weather. Follow the step-by-step instructions below to make your own beautiful set!
Preparation Before Starting
- Gather Nako Super Lemp yarn for the neck warmer (49% wool, 51% acrylic) - one skein weighs 100 grams with approximately 200 meters of yarn.
- Use Nako Ombre yarn to crochet the rose detail for an elegant touch.
- Crochet hook size: 4 mm (7/0) recommended for both pieces.
- Have a measuring tape handy to check size for head circumference and neck fit.
- Keep scissors, yarn needle, and stitch markers ready for assembly and finishing.
- Familiarize yourself with basic crochet stitches: chain (ch), single crochet (sc), half double crochet (hdc), slip stitch (sl st).
Pattern Insights & Instructions Overview
- The neck warmer is worked flat in rows with a focus on crochet stitches picked up in the back loops only to create texture.
- The beanie is crocheted in rows and seamed later to form a snug fit.
- Rose embellishments are crocheted separately using an easy spiral pattern and sewn onto the beanie for decoration.
- The neck warmer and beanie are joined by simple seams and finished with careful weaving of ends to ensure durability.
- Measurements can be adjusted to fit different sizes by changing the number of starting chains and length of rows.
How This Project Comes Together
- Start by crocheting the neck warmer flat with chains and back loop single crochets to create a neat ribbed texture.
- Work the beanie starting with a chain band fitting the head circumference, then crochet with back loop stitches in rows to build the body of the hat.
- Decrease rows shape the crown of the beanie.
- Crochet rose details separately following spiral petal formation.
- Attach the roses to the beanie with needle and yarn.
- Finish by sewing and weaving in all loose ends.

Skill Level
- Beginner to intermediate
- Easy stitches with simple construction
- Detailed explanations provided at every step
Finished Dimensions
- Neck warmer length: approximately 33 cm (~13 inches) to comfortably wrap the neck.
- Beanie circumference: adjustable with standard adult size example at 50-55 cm (~19.6-21.6 inches).
- Beanie height: approximately 20 cm (~8 inches) from band to crown before decreases.
Materials Needed
- 1 skein Nako Super Lemp wool/acrylic yarn (100g, 200m) for neck warmer
- Nako Ombre yarn for rose decoration (small amount)
- 4 mm crochet hook (7/0)
- Yarn needle for assembly
- Scissors
- Tape measure
Sizing & Adjustments
- Neck warmer width: 30 chains at start, adjustable per preference.
- Beanie band length: Measure head circumference and chain accordingly (example: 50 cm = about 55 chains).
- Remember to measure and gauge rows as you go, making adjustments for personal size.
Gauge Information
- Gauge is not critical but approximately:
- 12 single crochet stitches & 8 rows = 10 cm (4 inches) in back loop single crochet stitch.
- Adjust hook size if needed to meet gauge.
Stitch Abbreviations Used
- ch = chain
- sc = single crochet
- hdc = half double crochet
- sl st = slip stitch
- st(s) = stitch(es)
- BLO = back loop only
- dec = decrease
Special Techniques Explained
- Back Loop Only (BLO) Stitch: Insert hook into the back loop of the stitch only to create ribbed texture.
- Crocheting Rose Spiral: Work a foundation chain, then crochet increased stitches in each row spiraling outward to form petals.
- Decreasing Rows: Skipping stitches and crocheting fewer sts to taper beanie crown.
Step-by-Step Crochet Instructions
Neck Warmer
Foundation chain:
- Ch 30 (or desired width).
- Turn.
Row 1:
- Sc in second ch from hook and in each ch across (30 sc).
- Turn.
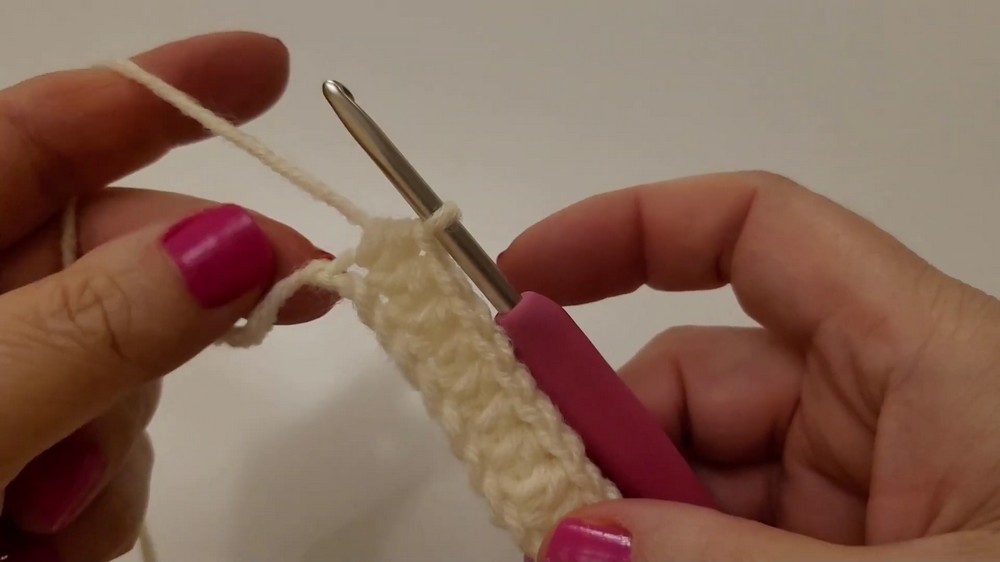
Row 2 to 32 (approx.):
- Ch 1, sc in BLO of each stitch across.
- Turn.
- Repeat until piece measures about 33 cm long.
Ending row:
- Work one row of normal sc (not BLO) for a neat edge.
Explanation for Beginners:
Start with a simple chain - this is the base of your work. Instead of crocheting into both loops, insert your hook into the back loop only to create a nice ribbed texture. Keep repeating these rows until your neck warmer reaches 33 cm. Finish with a single crochet row to make the edge smooth.
Beanie Band
Foundation chain:
- Measure around your head. Chain to match this circumference; for example, ch 55 for 50 cm.
- Join with sl st to form a round, careful not to twist.
Round 1:
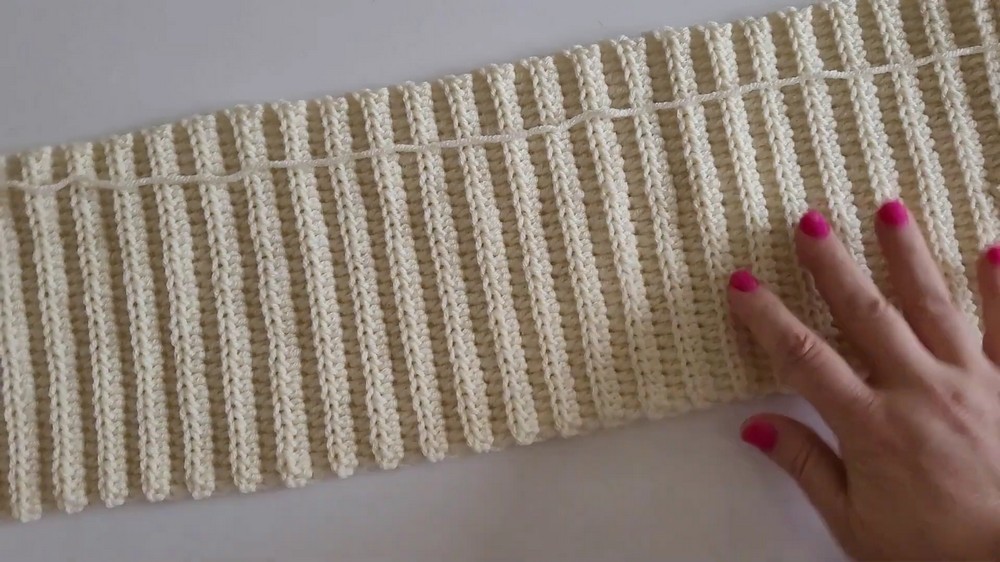
- Ch 1, sc in BLO of each chain stitch around.
- Join with sl st in first sc.
- Repeat this round until band is about 7-8 cm tall.
Beanie Body
Row 1:
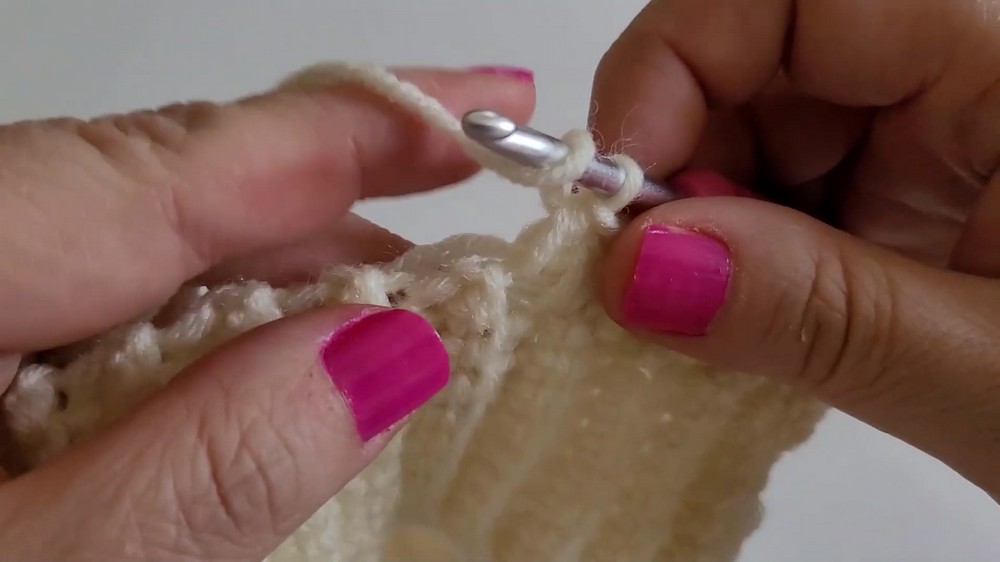
- Turn, ch 1, sc in BLO across band stitches.
- Turn.
Rows 2-…:
- Continue sc BLO in rows, turning at end of each row, working back and forth to build height.
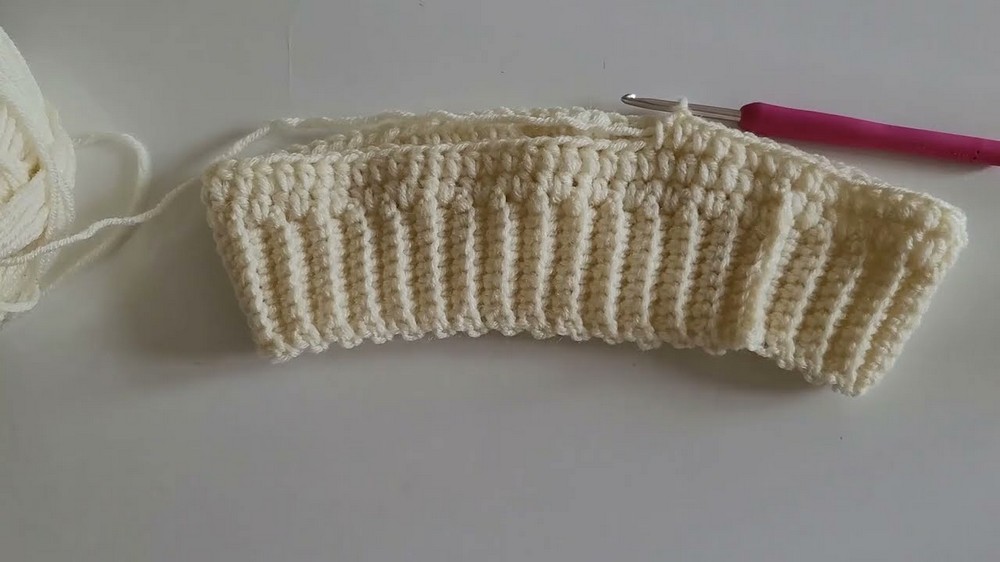
Decrease rows:
- Begin decreases by skipping one stitch at the start and/or end of rows to taper top shape.
- Examples: Skip 1 st, sc across to last 2 sts, sc 2 together.
- Continue decreases every few rows until you reach a small opening at the crown.
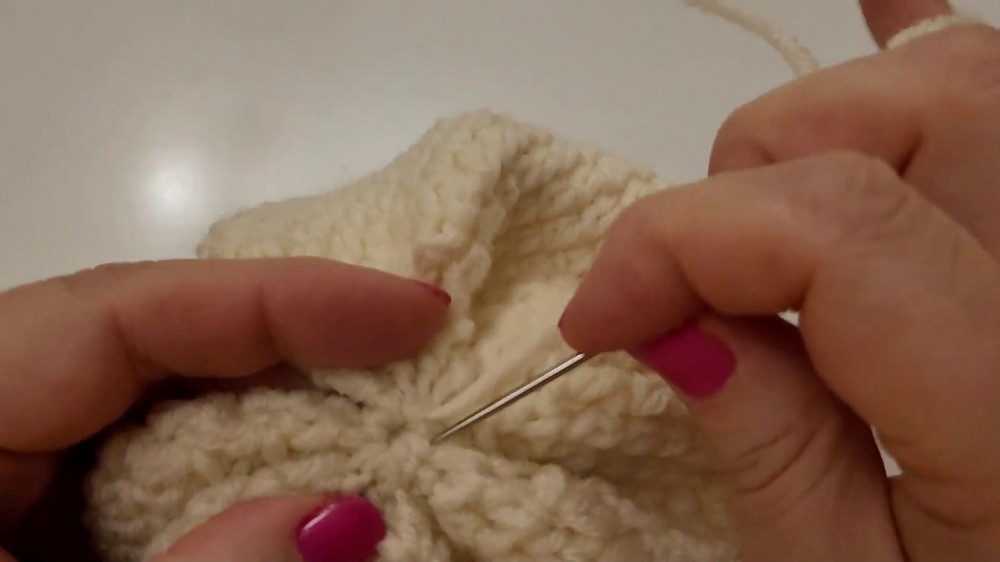
Rose Detail
Foundation: Ch 5, sl st to form ring.
Petal formation:
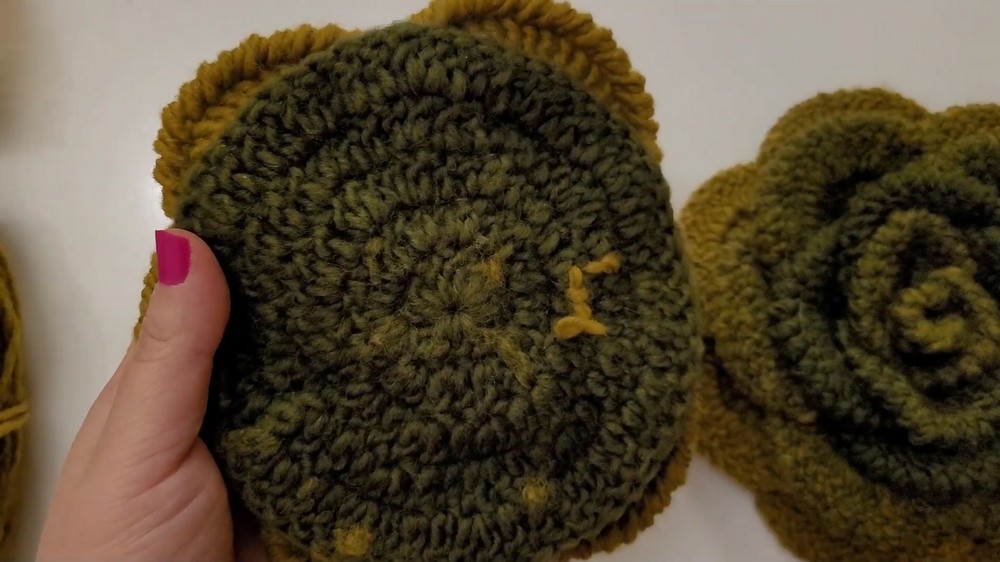
- Work a spiral of hdc, dc, tr stitches increasing as you go to create a ruffled petal effect.
- Make desired size by adjusting the number of rows or stitches.
- Finish off and weave ends.
Explanation for Beginners:
Start with a small loop from chaining and joining. Crochet several rows using taller stitches (like half double crochet and triple crochet) to make the petals curl outward. You can make the rose bigger or smaller by adding or subtracting rows.
Assembly and Finishing Touches
- Fold neck warmer in half and sew short edges together with a yarn needle to form a loop.
- For the beanie, fold flat and sew seam to close the open side.
- Weave in all yarn ends securely using a yarn needle.
- Attach rose(s) to the beanie using yarn and needle, placing them where desired (front, side).
- Optionally block finished pieces by lightly wetting and shaping flat; allow to dry.

Quick Fixes & Tips
- Neck warmer too tight? Add more chains at foundation.
- Hat band too loose? Use smaller hook or fewer chains.
- Shape not forming well? Check tension and adjust decreases.
- Rose loose or floppy? Crochet extra petals or tighten ends.
Ideas for Creativity and Variations
- Use sport or bulky weight yarn for different texture and warmth.
- Add buttons or beads to the rose for extra charm.
- Create matching gloves or mittens using the same stitch pattern.
- Make shorter or longer neck warmers for layered looks.
- Use colors that match your winter coat for a coordinated outfit.