
Free Crochet Star Blanket Pattern for Unique Home Decor
Wrap yourself in cozy star beauty with this free crochet star blanket pattern made for warm naps soft comfort and calm relaxing moments at home.
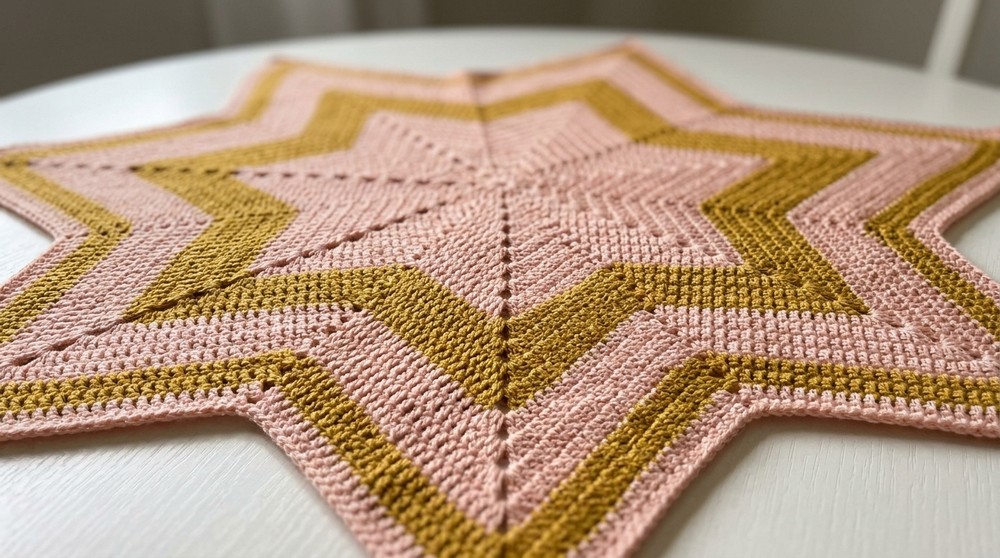
Brighten your world with a blanket that's shaped like a dazzling star. This Free Crochet Star Blanket Pattern is simple, unique, and designed to help anyone crochet with ease. Its star shape makes it unique and different from regular rectangular or square blankets. You can use any type of soft, non bulky yarn, and pick colors that match your mood or style. Whether you choose one color or several, this pattern lets you customize the blanket to your liking.
Free Crochet Star Blanket Pattern That's Fun, Free, and Fabulous

This blanket is not just pretty; it is versatile as well. You can use it as a cozy throw, a baby blanket, or even a decorative piece for your home. The design itself has lovely pointed edges that give it a bold yet elegant appearance. The magic circle technique used to begin the blanket ensures the center is neat and adjustable. With gradual increases in stitches, the star pattern expands beautifully as you continue crocheting.
Switching colors every few rounds adds extra flair and makes each point of the star stand out. This project is perfect for gifting or keeping as a one of a kind handmade treasure. Follow this pattern to create something truly special while enjoying every stitch.
Crochet Star Blanket Pattern
Materials Needed
- Any non bulky yarn in two or more colors (e.g., green and off white, as demonstrated in the video). Cotton or acrylic yarn is ideal for baby blankets.
- Crochet hook appropriate for your yarn size (check the yarn label for recommendations-typically 4.0mm to 5.5mm for non bulky yarn).
- Scissors
- Yarn needle (for weaving in ends)
Special Techniques
- Magic Circle: Used to start the project and create an adjustable center ring.
- Double Crochet (dc): Standard crochet stitch for building height and texture.
Star Baby Blanket Pattern
Round 1 - Magical Circle Setup
- Create a magic circle: Lay the tail end of your yarn against your fingers, wrap the working yarn around your fingers to form a loop, go under the first layer, and pull up a loop. Chain 1 to secure (this chain does not count as a stitch).
- Place 20 double crochets (dc) into the magic circle.
- Tighten the magic circle by pulling the tail end of the yarn firmly to close the center.
- Slip stitch (sl st) into the top of the first double crochet to close the round.

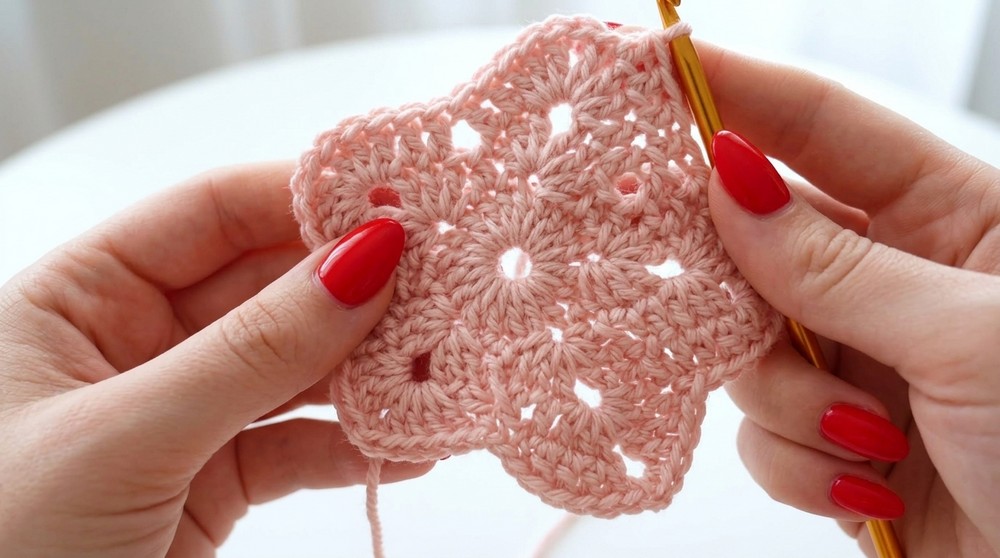
Round 2 - Forming the Star Points
- Skip the first stitch.
- Insert your hook into the next stitch and place a single crochet (sc).
- Skip the next stitch. In the following (second) stitch:
- Place 3 double crochets.
- Chain 3.
- In the same stitch, place 3 more double crochets. This forms the first star point.
- Skip the next stitch. In the second stitch, place a single crochet.
- Repeat the above steps (3 and 4) around until you have 5 star points.
- Finish the round with a slip stitch into the first single crochet.

Round 3 Expanding the Star
- Slip stitch into the next stitch (skip the stitch you are in).
- In the next stitch, place a double crochet.
- Work 1 double crochet into the next stitch.
- In the chain 3 space (tip of the star point):
- Place 3 double crochets.
- Chain 3.
- Place 3 more double crochets into the same chain 3 space.
- Place 1 double crochet into each of the next 2 stitches.
- Skip the next 2 stitches. In the third stitch, place a double crochet.
- Repeat the pattern of working up to the tip (3 double crochets, chain 3, 3 double crochets) and working back down with double crochets until you complete the round.
- Slip stitch into the top of the first double crochet to finish the round.

Round 4 and Beyond - Increasing the Star Size
- At the beginning of each round, slip stitch into the stitch where the previous round ended. Then proceed as follows:
- Work up to the star tip: Place 1 double crochet into the available stitches between points, increasing by 2 stitches per round.
- Star Tip (in the chain 3 space): Place 3 double crochets, chain 3, and 3 more double crochets into the chain 3 space of the previous round.
- Work back down from the star tip: Place 1 double crochet into the stitches descending from the point, again increasing by 2 stitches per round.
- Skip 2 stitches at the base of each valley, then continue.
- Repeat this process for each round, increasing two stitches on either side of each point for every new round.
Color Changes
To add color changes to your star baby blanket:
- Perform the color change at the end of a round when working the final slip stitch.
- Instead of yarning over with the current color, yarn over with the new color and pull through the slip stitch to secure it.
- Work the slip stitch into the next stitch with the new color to start the next round.
- Ensure the tails of both yarns are secured tightly; weave them in before continuing to prevent loosening.
Finishing the Blanket
- Keep repeating the pattern until the blanket reaches your desired size. For reference, you may switch colors every 4 to 5 rounds for added visual interest.
- When you reach your final round, finish off with a slip stitch. Cut the yarn, leaving an 8 inch tail.
- Use a yarn needle to weave in all loose ends securely.
Final Tips for Success
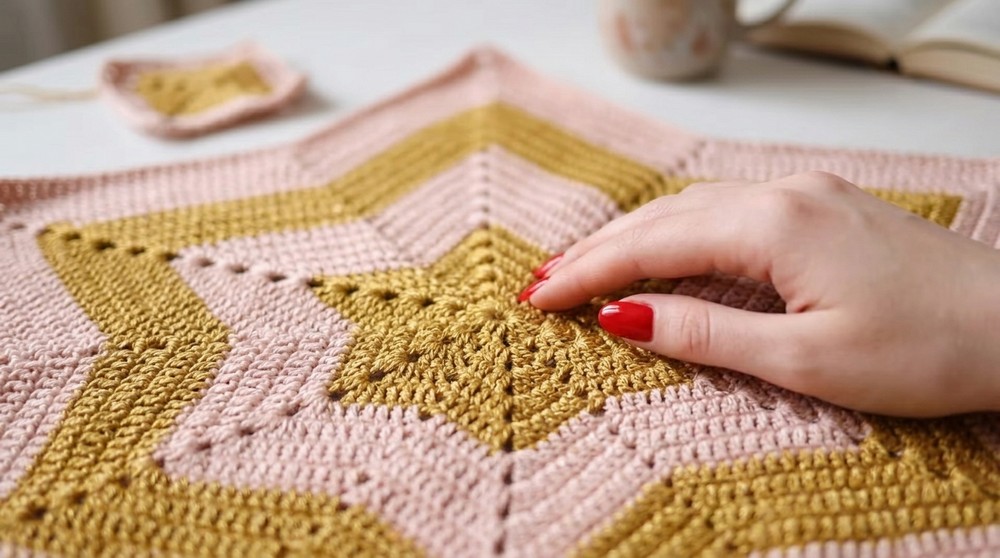
- Maintaining Shape: Ensure that the chain 3 point stitches are snug to retain the sharpness of the star tips. Too loose, and the points may appear rounded.
- Tension Control: Keep your tension consistent throughout to ensure even sizing of stitches and smooth edges.
- Blocking: After completing the blanket, consider blocking it for a polished, professional look. Blocking helps the star points stay crisp and the blanket lie flat.
- Yarn Choice: Use soft, baby friendly yarns to keep the blanket lightweight and gentle for infants.

Final Words
This Star Baby Blanket pattern is an elegant gift for a baby shower or a charming keepsake for your little one. The beauty of this project lies in its versatility-adjust the size, choose your favorite colors, and make it uniquely yours. If you encounter challenges or have questions, feel free to refer to crochet tutorials or experienced crocheters for guidance.