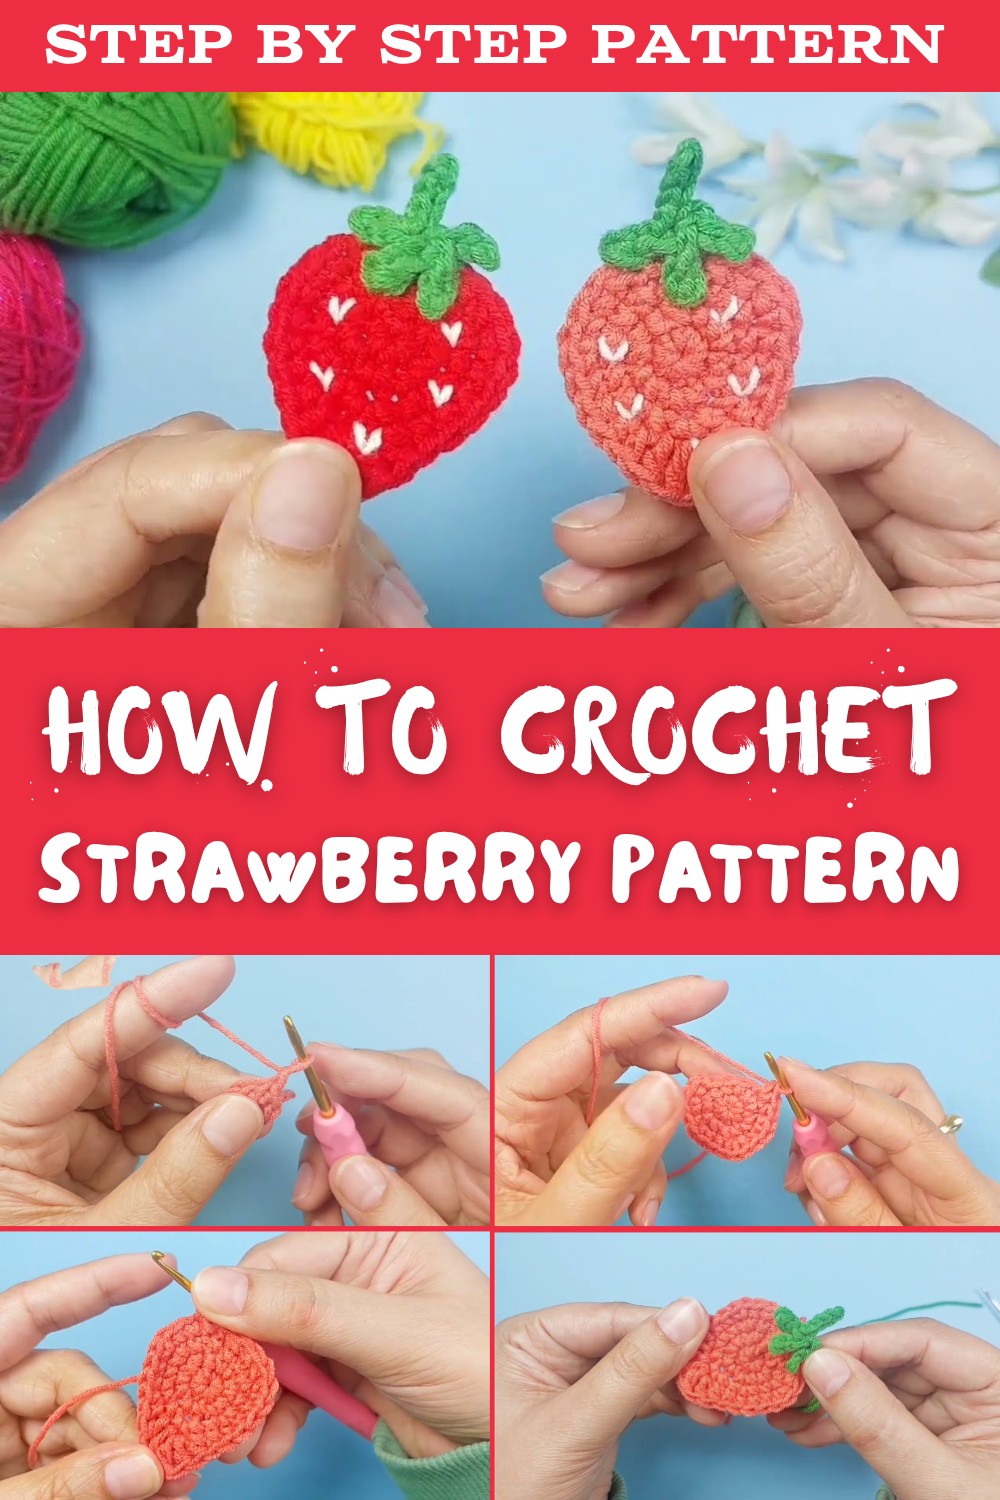
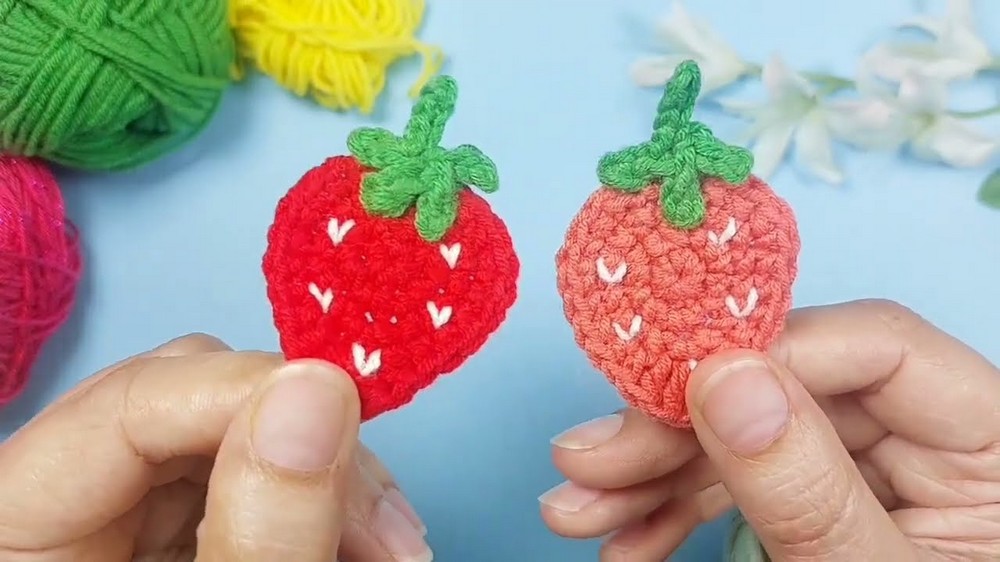
Free Crochet Strawberry Pattern for Fun Decor
Whip up a sweet treat with this free crochet strawberry pattern that's perfect for beginners and a fun way to add charm to your space.
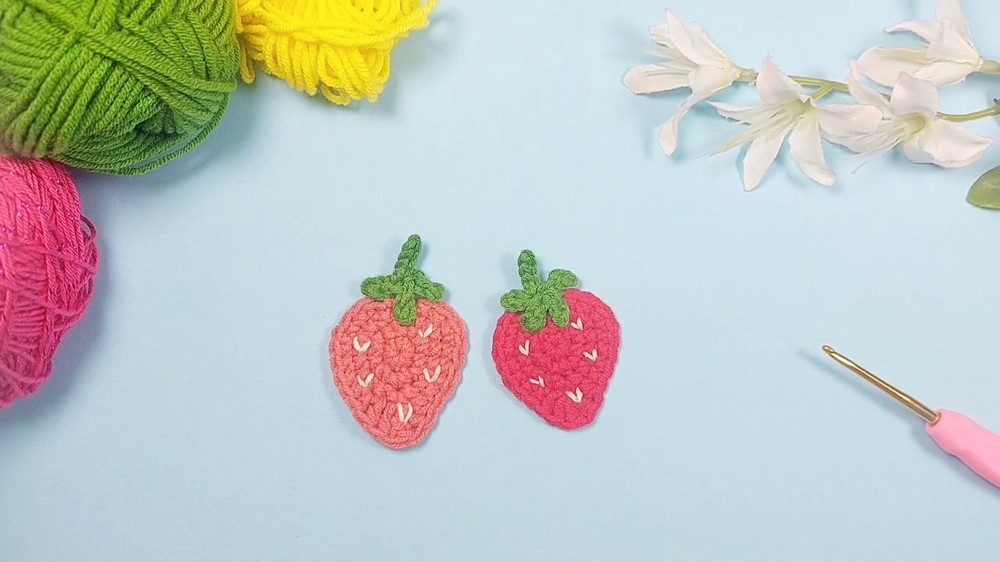
A sweet little berry comes alive with thread and a crochet hook, turning an ordinary day into a playful adventure. This small crochet design looks just like a real strawberry with its rounded red shape and shiny little seeds stitched on top. A soft green leaf cap rests gently, making it even more realistic and fun to look at. The bright red and green colors catch the eye and remind people of summer and fresh fruits. The Free Crochet Strawberry Pattern can be used in many ways, such as being made into a soft toy for a child, a cute keychain to decorate a backpack, or even as a small accent for home decor like a bowl of handmade fruits.
Beginner-Friendly Free Crochet Strawberry Pattern
This crochet strawberry is simple enough for new learners and gives a sense of happiness when finished, while its soft texture makes it comfortable to hold or play with. Its small size makes it easy to create quickly and to carry anywhere, turning it into a perfect little gift or decoration for parties, classrooms, and special occasions.
Strawberry Free Crochet Pattern
Materials
- Yarn: Alize Cotton Gold (or any available cotton blend, sport/baby weight, #2)
- Crochet Hooks:
- 2.5 mm hook for strawberry base
- 1.5 mm hook for leaves and stem (optional; use smaller hook or thinner yarn for smaller leaves)
- Scissors
- Yarn Needle: For sewing and weaving ends
- Optional: Embroidery needle and contrasting yarn/thread for seeds
Key Abbreviations
| Abbreviation | Stitch Name |
|---|---|
| ch | chain |
| sc | single crochet |
| sl st | slip stitch |
| hdc | half double crochet |
| dc | double crochet |
| MR | magic ring |
Special Notes
- US Terminology used.
- You may use any yarn and hook combination; adjust accordingly for size.
- Fasten off with a long tail for sewing stem/leaves on base if desired.
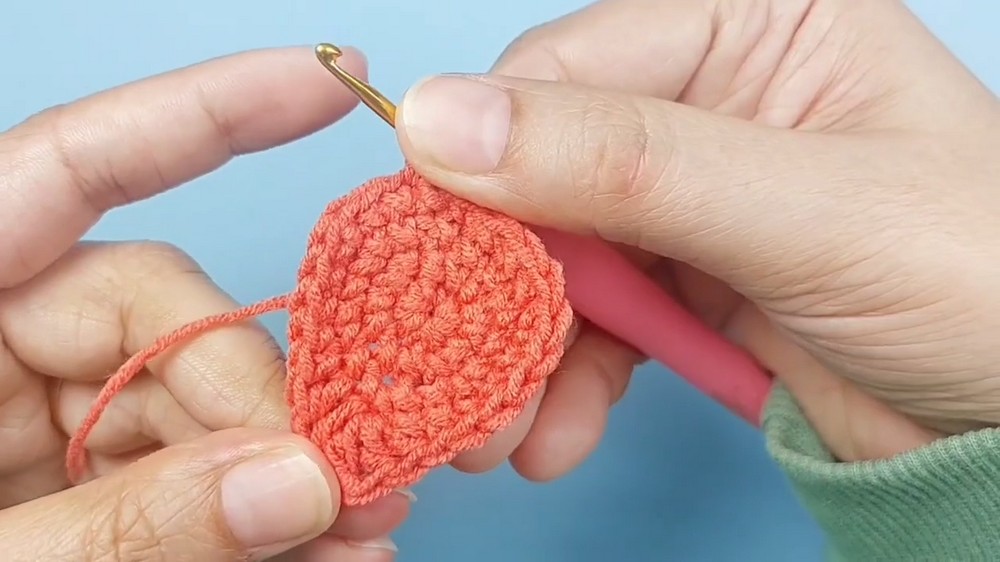
Strawberry Appliqué Pattern
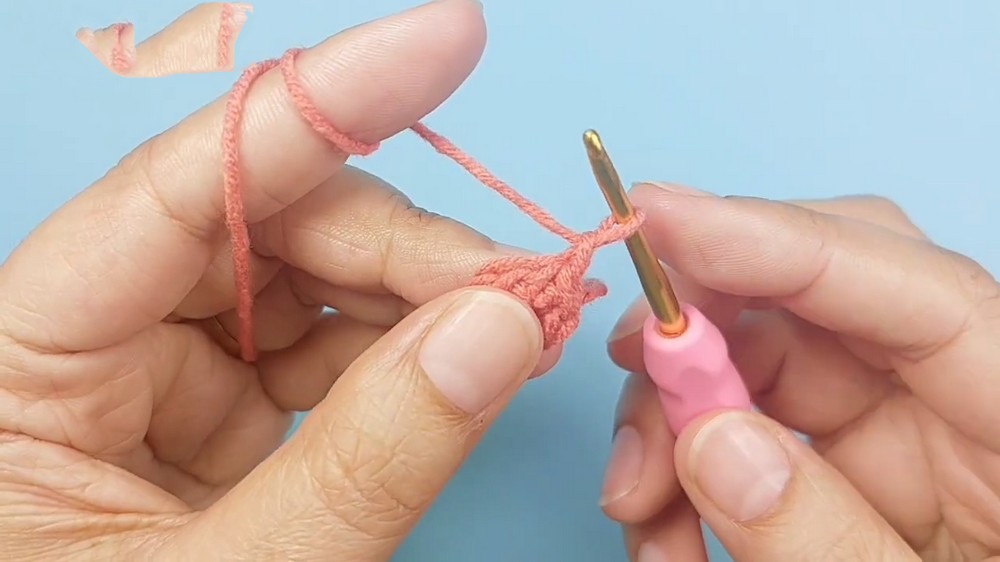
A. Strawberry Base
- Start: Using 2.5 mm crochet hook and red yarn, make a magic ring (MR).
- Round 1
- Ch 1 to secure.
- Work 6 sc into MR.
(Insert hook, pull up a loop, YO, pull through both loops) - Pull ring closed.
- Sl st to top of first sc to join.
- Round 2
- Ch 1.
- 2 sc in each stitch around. (12 sc total)
- Sl st to top of first sc to join.
- Round 3
- Ch 1.
- Work as follows:
- 1 sc in first stitch,
- 2 sc in next stitch (increase),
- Repeat from * for next 2 pairs.
- 3 sc in next stitch,
- 1 sc in next,
- 2 sc in following,
- 1 sc in next,
- 2 sc in following,
- 1 sc in each of last 3 stitches.
Final stitch count: 19 sc (as per description, although numbers may vary from video; adjust for shaping).
- Sl st to top of first sc to join.
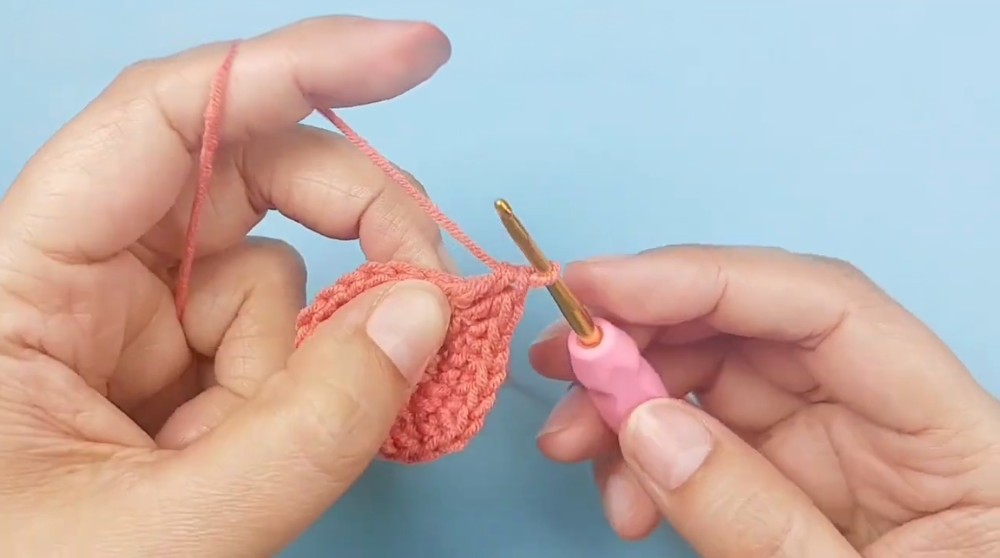
- Round 4
- Ch 1.
- Work as follows:
- 1 sc in each of first 2 stitches
- 2 sc in next stitch
- 1 sc in next 4 stitches
- 1 hdc in next stitch
- In next stitch: hdc, dc, hdc all in same stitch
- 1 hdc in next stitch
- 1 sc in next 4 stitches
- 2 sc in next stitch
- 1 sc in each of next 4 stitches
Make sure the shaping forms a strawberry tip with the extra stitches in the center.
- Sl st to top of first sc to join.
- Fasten off and weave ends.

B. Stem & Leaves
- Using 1.5 mm hook and green yarn (or preferred hook/yarn):
- Stem:
- Create a slip knot and ch 5.
- Skip the first chain. Sl st in next chain.
- Sl st in each of the next 3 chains.
- You now have a short stem.
- Leaves:
- Ch 3.
- Skip first chain.
- Sl st in next 2 chains.
- Sl st to base of stem (central chain or join at the stem's starting point).
- Repeat leaf pattern for desired number of leaves:
Ch 3, sl st in next 2 chains, sl st to stem base. - Typically 3-4 leaves look proportional.
- Fasten off with longer tail if sewing.

C. Assembly & Embroidering Seeds
- Sew stem & leaves onto the top center of strawberry base using yarn needle and long tail.
- Embroider seeds (optional):
- Using contrasting yellow or white thread/yarn, stitch small seed shapes randomly across the strawberry base.
Conclusion
You have now completed a beautiful strawberry appliqué, perfect for attaching to garments, accessories, or craft projects. Enjoy personalizing with extra leaves or embroidered details!

Pattern Correction and Tips
- The stitch counts given in rounds 3 & 4 may slightly vary depending on your gauge and tension. The shaping should resemble a strawberry, with a wider base and a slightly pointed tip. If yours looks too round or sharp, adjust by adding or skipping increments or using smaller/bigger hooks.
- For extra realism, add more leaves and use a mix of lighter/darker green yarn.
- Use the magic ring to tightly close the base-this prevents a hole at the tip.
Tip:
If you are new to magic ring, use "ch 2, 6 sc in 2nd chain from hook" as an alternative starting technique.\