
Tulip and Lavender Flowers Free Simple Crochet Pattern
Learn to make beautiful tulip and lavender flowers with this free crochet design that is simple to follow and perfect for gifts or decorating your home.
Make delicate tulips and lavender flowers that stay fresh forever with an easy crochet design. These flowers are made to look natural, with soft petals and elegant shapes that resemble real blooms. They are perfect for decorating your living spaces, adding beauty to special events, or giving as thoughtful gifts to family and friends.
Free Crochet Tulip and Lavender Pattern Perfect for Gifts

The tulips bring a touch of grace with their smooth petals, while the lavender offers a textured and charming look that feels calming. With simple instructions and endless color choices, this design is enjoyable for both beginners and experienced crocheters.
These flowers are useful for decorating tables, making stunning bouquets, or even brightening up plain corners in your home. Handcrocheted with love, they hold a special value as they can be customized to match any theme or occasion, bringing joy and a lasting charm to your daily life.

Crochet Flower Bouquet Pattern
Skill Level
Intermediate
Materials
- Yarn: Fine weight (sport or DK) acrylic or cotton yarn
- 3 shades of pink (for lavender)
- Green (for stems)
- Any color for tulip petals
- White (for variety, optional)
- Hook: 3.5 mm crochet hook (E/4 US)
- Stems: BBQ sticks, green floral wire, or craft stems
- Glue: Hot glue gun or strong craft glue
- Pliers (for shaping floral wire)
- Cotton stuffing: Small amount (for tulip)
- Yarn needle
- Scissors
- Optional: Lighter (for sealing cut synthetic yarn ends-use caution!)
Key Abbreviations (US Terms)
| Abbreviation | Stitch Name |
|---|---|
| ch | chain |
| sc | single crochet |
| hdc | half double crochet |
| dc | double crochet |
| sl st | slip stitch |
| st(s) | stitch(es) |
| BLO | back loop only |
Special Notes
- Lavender flowers are made using simple clusters and chains.
- Tulip flowers are made using rows of sc, then seamed and shaped into a 3D bloom.
- Finishing involves wrapping yarn for the stem and gluing flowers securely.
- Read each section fully before beginning for best results.
Part 1: Lavender Flower
Lavender Flower Head
- With chosen yarn color, ch 30.
- In the 4th ch from the hook, work 3 dc (all into the same ch).
- This forms the top cluster for your lavender.
- Ch 2, sl st into the same ch as the 3 dc.
- (In next ch: sc, ch 7, sl st into the first ch of your 7-ch just made)
- This forms one "bud" or "petal."
- Repeat Step 4 (sc, ch 7, sl st in first of 7-ch) in each following ch down the remaining starting chain until you reach the end.
- At the end, ch 1, pull tightly, and cut yarn.
- Weave in ends.

Lavender Stem Assembly
- Take a BBQ stick or floral wire.
- With green yarn, hold the yarn at one end of the stick and begin wrapping tightly and evenly down its length, covering the stick completely.
- Glue each end of the wrapped yarn to the stick to secure. Allow to dry.
- Attach flower: Use glue to attach the bottom (foundation chain) of the flower head to the top of the stem. Allow to dry.
- Optionally, lightly melt excess synthetic fiber ends with a lighter (take care, and only do this for synthetic, not natural, yarn).

Part 2: Tulip Flower
Tulip Petal Panel
- With main tulip color, ch 16.
- Working into the 'bump' (back loop) of the chain, sc in each ch across. (15 sc)
- Turn, ch 1.
- Sc across the row in BLO (back loop only). (15 sc)
- Repeat Step 3 for a total of 25 rows.
- The panel should naturally curve-this is desired for the tulip shape.

Tulip Flower Assembly
- Fasten off, leaving a long tail.
- With right side inside, fold the panel.
- Sew the side edges together with the yarn needle, working through inner loops only. (This forms a tube.)
- Weave yarn through one edge of the tube; pull gently to gather and close the bottom of the tulip.
- Secure the yarn, weave in, and cut.
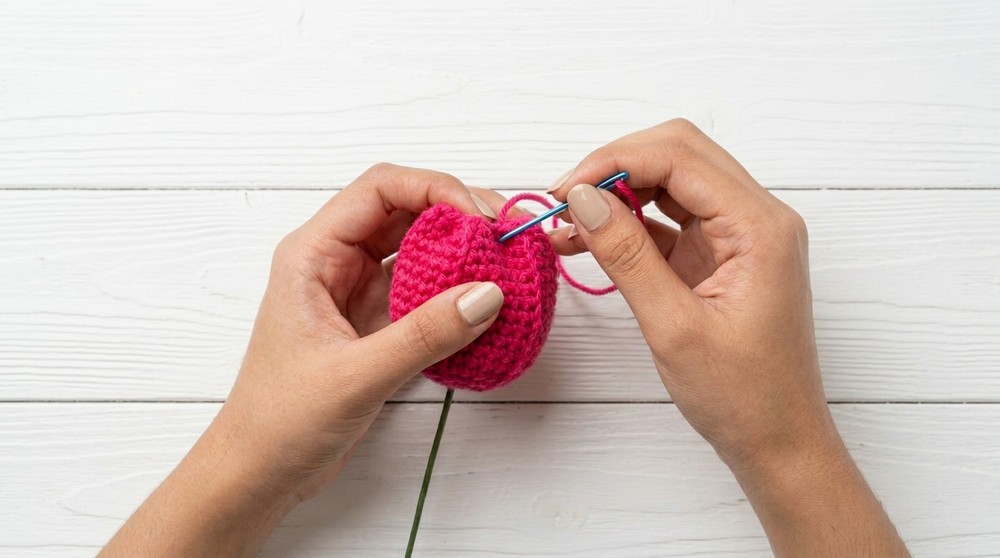
Attaching the Tulip Stem and Stuffing
- Bend the tip of a BBQ stick/floral wire with pliers to make a hook (this helps hold the stuffing).
- Insert the hook tip into the closed bottom of the tulip flower with glue.
- Stuff the flower lightly with cotton or polyfill.
- Use a yarn needle and remaining tail to sew a running stitch around the opening; cinch slightly to ensure the stuffing stays in, but do not completely close-it should look like a tulip bloom.
- Secure and weave in all yarn ends.
Finishing the Tulip Stem
- Wrap green yarn tightly around the stem (BBQ stick/floral wire), starting at the flower's base and gluing it at both top and bottom. Cut excess yarn.
- Optionally, use a lighter to tidy cut ends.

Bouquet Assembly
- Make multiple lavender and tulip flowers in your desired colors.
- Arrange the flowers, vary heights, and display in a vase or tie with ribbon for a bouquet.
Conclusion, Corrections, and Tips
Pattern Correction
- Check that each lavender flower has consistent "buds" (sc, ch 7, sl st in first ch).
- Tulip panel should be sewn in the inner loops only for a seamless finish.
Tips
- Use care with glue and lighters.
- Adjust lavender and tulip stem length by trimming BBQ sticks as desired.
- For a more realistic look, use several shades of the same color for both flower types.
- Use wire for stems for more flexibility and to allow flowers to stand or bend.
- Lightly steam flowers if needed to smooth shape before assembly.
Special Suggestions
- Add green felt or crocheted leaves for more realism.
- For gifts, tie bouquet with crochet ribbon or wrap in brown paper.
Final Words
You have now completed a beautiful, everlasting floral bouquet-perfect as a home accent or a heartfelt gift! This bouquet combines textured lavender and soft, plump tulip blooms for a dynamic display. With variety in colors and sizes, you can personalize your bouquet for any occasion.