How to Crochet Flower Tray for Organizing or Decorating – Free Pattern
Find out a refined crochet pattern to develop this Flower Tray accessory holder that's for organizing your essentials with a stylish touch.
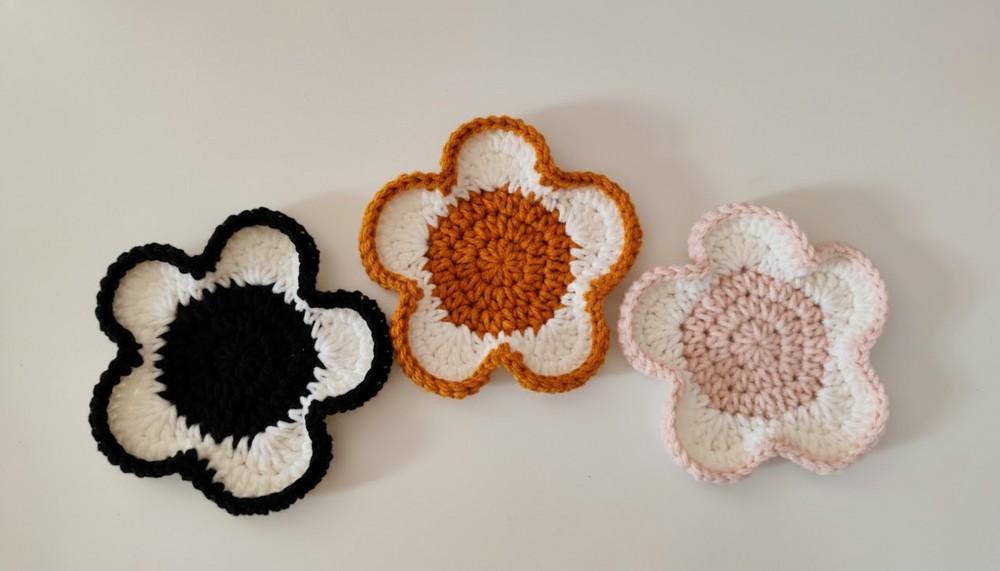
Bringing a touch of nature's charm into your home with something handmade and beautiful. A crochet flower tray pattern makes it possible to create a delightful piece that is both decorative and functional. Shaped like a blooming flower, it stands out with its soft texture, vibrant colors, and intricate details. This design is perfect for holding small items like jewelry, keys, or even candies, while also adding a cozy, cheerful vibe to any room.
Free Flower Tray Crochet Pattern That's Easy for Everyone

The petals give it a unique and artistic appearance, making it a lovely centerpiece or gift. Simple and fun to create, the pattern lets you explore different color combinations to match your style or decor. Whether it's used in the living room, bedroom, or study, this flower tray is more than just an accessory, it's a little piece of handmade art that brightens up your day and space.

Crochet Flower Tray: Step-by-Step Pattern
Necessary Materials
-
Yarn: 5-ply milk cotton or medium-weight cotton yarn (approximately 2.5 mm - 3.0 mm thickness).
-
Color A: Soft Yellow (for the base)
-
Color B: Cream or White (for the petal rim)
-
-
Crochet Hook: 4.0 mm (Size G)
-
Notions: Tapestry needle for weaving ends, scissors, and a stitch marker.
Gauge & Finished Size
-
Gauge: 4 stitches and 3 rows = 1 inch in Half Double Crochet (HDC).
-
Finished Size: Approximately 5.5 inches (14 cm) in diameter from petal tip to petal tip.

Special Techniques
-
Magic Ring (MR): Used to start the center of the tray without a hole.
-
Half Double Crochet (HDC): The primary stitch used for a dense, sturdy base.
-
HDC Increase (HDC Inc): Working two HDC stitches into a single stitch to expand the circle.
-
Back Loop Only (BLO): Working only into the back loop of the stitch to create a structural ridge for the tray walls.
Pattern Instructions
The Tray Base (Color A)
Round 1: Form a magic ring. Chain 2 (does not count as a stitch). Work 10 HDC into the ring. Join with a slip stitch (sl st) to the first HDC. [10 sts]
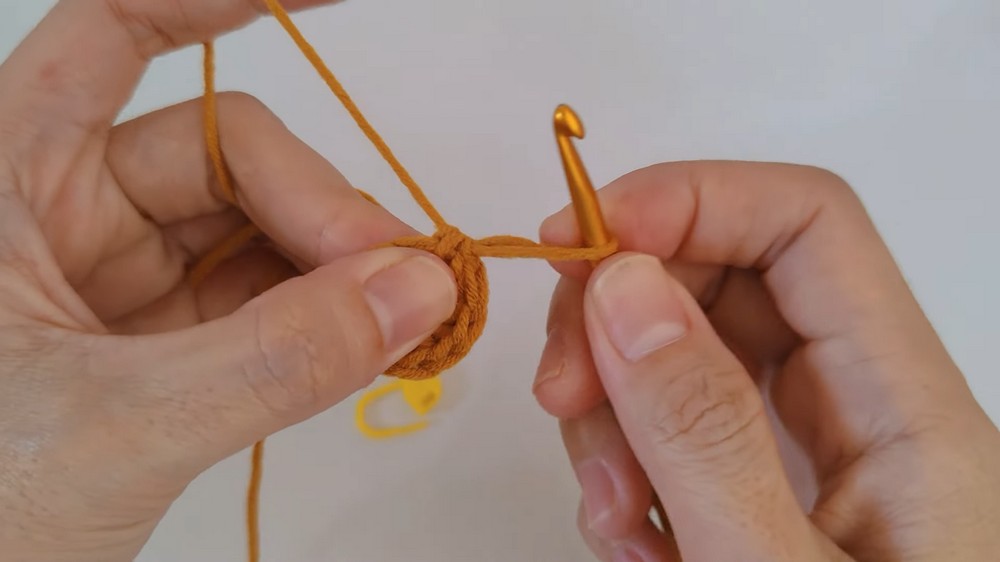
Round 2: Ch 2. Work 2 HDC in each stitch around (HDC Inc). Join with a sl st. [20 sts]
Round 3: Ch 2. HDC in next st, HDC Inc in next st. Repeat from * to * around. Join with a sl st. [30 sts]
Round 4: Ch 2. HDC in next 2 sts, HDC Inc in next st. Repeat from * to * around. Join with a sl st. [40 sts]
Round 5: Ch 2. HDC in next 3 sts, HDC Inc in next st. Repeat from * to * around. Join with a sl st. [50 sts]
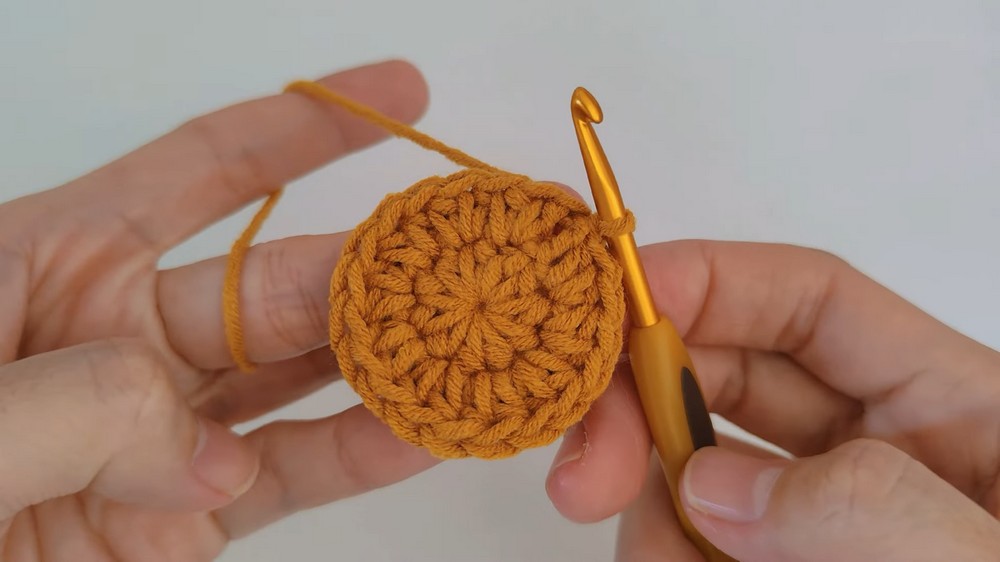
Round 6: Ch 2. HDC in next 4 sts, HDC Inc in next st. Repeat from * to * around. Join with a sl st. [60 sts]
The Structural Rim
Round 7 (BLO): Ch 2. Working in the Back Loops Only, HDC in each stitch around. Join with a sl st. This creates the vertical "wall" of the tray. [60 sts]
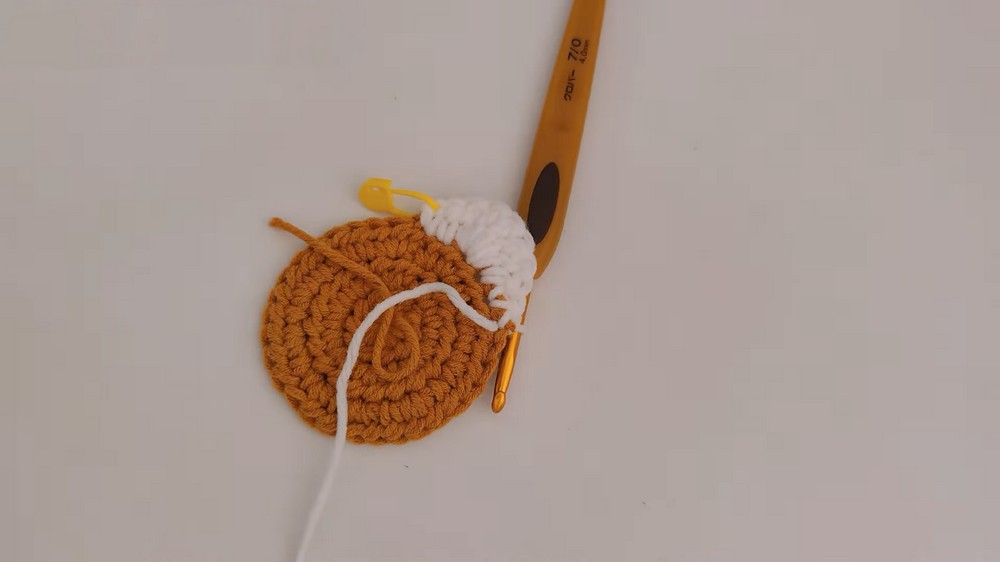
Round 8: Ch 2. Working in both loops, HDC in each stitch around. Join with a sl st. Fasten off Color A.

The Petal Border (Color B)
Join Color B to any stitch in the final round.
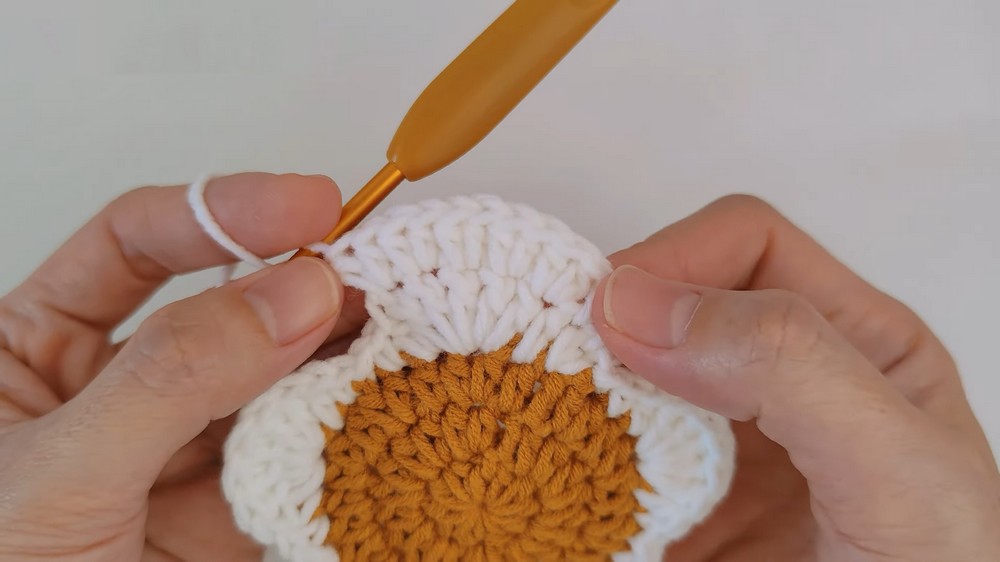
Round 9 (Petal Round):
-
*Sl st into the next stitch.
-
In the next stitch, work: (Ch 2, 2 Double Crochet, Ch 2, Sl st).
-
Skip 1 stitch.*
Repeat from * to * around the entire rim to form the delicate flower petals. Fasten off and weave in all remaining yarn tails using your tapestry needle.
Customization Ideas
-
Variegated Petals: Use a multi-colored yarn for the petal border to give the tray a wild-flower appearance.
-
Stiffness: For a more rigid tray, hold two strands of yarn together or use a smaller hook to create a tighter tension.
-
Size Scaling: Continue the base increase pattern (adding one more plain HDC between increases each round) to create a larger vanity tray or dinner mat.
Pro Tips
-
Seamless Joins: To avoid a visible seam where you join rounds, use the "invisible join" method when fastening off the final base round.
-
Blocking: Steam block the petals lightly once finished to ensure they lie flat and maintain a uniform shape.

Conclusion & Final Look
The completed tray presents a beautifully textured center with a raised structural wall, framed by a soft, scalloped petal edge. The contrast between the sturdy HDC base and the airy DC petals provides a professional finish that is both durable and elegant. This project is an ideal way to practice circular construction and tension control while producing a charming home organization piece.