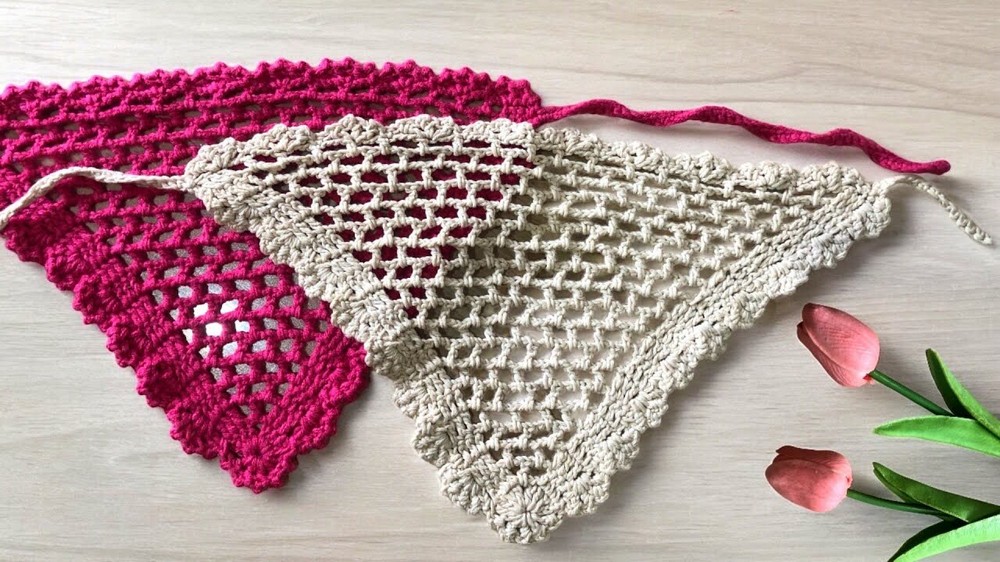
Fresh & Stylish Free Crochet Mesh Headscarf Pattern
Boost your everyday style with this free crochet mesh headscarf pattern that adds a soft, airy and pretty handmade touch to your outfit.
Summer is the perfect time to showcase your creativity and stay stylish with this Mesh Headscarf Pattern. This beautiful and airy crochet headscarf is the ultimate accessory to keep your hair in place while adding a touch of elegance to your look. Whether you're heading to a picnic, a beach day, or out for a casual walk, this headscarf is just what you need to stay cool, comfortable, and chic. The magical part of this pattern is the delicate mesh design, which is both lightweight and fashionable. It has a timeless charm that suits any outfit, whether it's a sundress, jeans, or even a cozy top. You can personalize it with your favorite colors to match your wardrobe or season. From pastel pinks and yellows for sunny days to deeper tones for evening outings, the possibilities are endless.
Crochet a Mesh Headscarf with This Free Pattern

It can be worn in multiple ways-use it to tie your hair back, as a cute accessory around your neck, or even as a gift for someone special. The cute scalloped border adds an extra touch of elegance that makes this headscarf stand out from the crowd.
This pattern is not just easy to follow but also perfect for beginners and experienced crocheters alike. With a simple yet gorgeous design, it's a relaxing project to try in your free time. Plus, it's a fantastic way to make a meaningful and handmade fashion piece to cherish forever. So, get summer ready by crocheting this modern headscarf today.

Free Crochet Mesh Headscarf Pattern
Materials Needed
To complete this project, ensure you have the following materials ready:
- Crochet Hook: Size 5/0
- Yarn Type: Cotton milk yarn (size 4 ply) in your color of choice. The pattern uses pink yarn, but you may substitute colors as per your preference.
- Alternatives: Cotton thread or summer yarn.
- Scissors for snipping excess yarn.
- Tapestry Needle for weaving in the yarn ends.
Abbreviations Used
- ch: Chain
- sl st: Slip stitch
- dc: Double crochet
Step by Step Instructions
1. Beginning the Project
- Start with a Slip Knot:
- Wrap the yarn around your fingers to form a loop. Insert the crochet hook into this loop and pull the working yarn through to create the slip knot. Make sure it's snug.
- Create the Foundation Chain:
- Crochet 5 chains (ch): Insert the hook into the yarn, yarn over, and pull through to form one chain. Repeat this process till you have 5 chains.
- Form a Ring:
- Join the last chain to the first chain using a slip stitch (sl st) to form a circle. This will serve as the base of your mesh design.

2. Row 1: Starting the Base Pattern
- Create the Foundation:
- Begin by chaining 3 (ch 3).
- Yarn over and create 3 double crochets (dc) into the center of the circle formed by the foundation chain. To create a dc, follow these steps:
- Yarn over.
- Insert the hook into the center of the ring.
- Yarn over and pull up a loop (you now have 3 loops on your hook).
- Yarn over, pull through the first two loops, yarn over again, and pull through the remaining two loops.
- Chain 3 for the Center:
- Create 3 more chains (ch 3).
- Continue on the Other Side of the Ring:
- Yarn over, and crochet 4 double crochets (dc) into the center of the ring on the opposite side.
- Once completed, the row should form a symmetrical design with two groups of double crochets (4 on each side) connected by a chain 3 space in the middle.
3. Row 2: Development of the Mesh Pattern
- Begin a New Row:
- Chain 3 (ch 3). Turn your work so that the next row can be worked on the reverse side. These 3 chains will count as your first double crochet.
- Form the Mesh Sections on Each Side:
- Yarn over, and create double crochets (dc) into the 2nd, 3rd, and 4th stitches of the previous row (3 double crochets in total).
- Create a chain of 3 (ch 3).
- Yarn over, and this time crochet 1 double crochet (dc) into the center space of the chain 3 from the previous row. This step adds a central support to the mesh pattern.
- Follow this with another chain of 3 (ch 3)
- Complete the Row:
- On the second set of double crochets from the previous row, add a double crochet into each of the 2nd, 3rd, and 4th stitches. Add a final double crochet into the top of the chain 3 from the previous row.
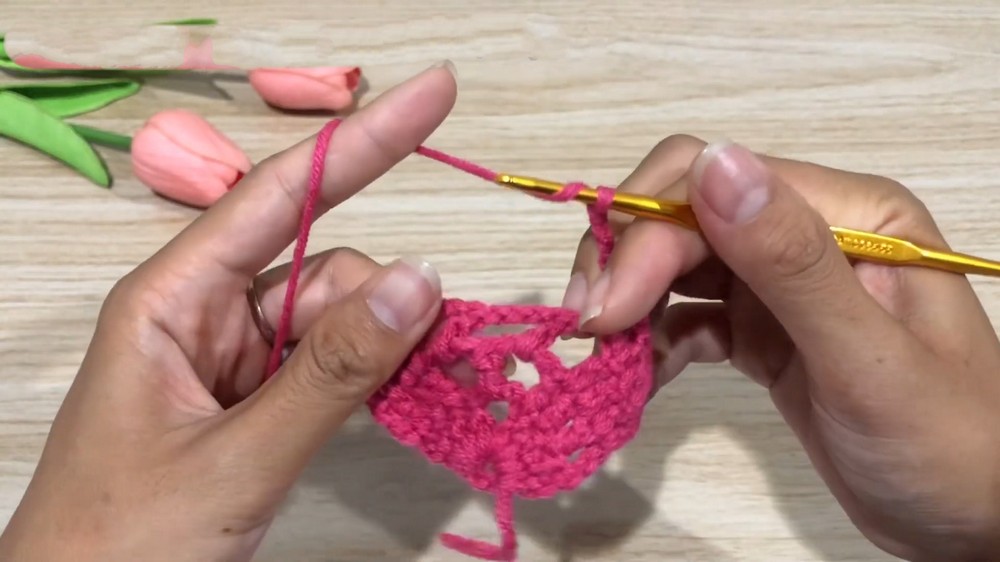

4. Rows 3 to 19 (or Desired Length):
Repeat the steps of Row 2. To expand the width of your hairband, you can crochet additional rows (recommended: up to 21 rows for a wider design).

5. Side Ties
To add the tying strings on either end:
- Create the Foundation Chain for the Tie:
- Chain 50 (ch 50).
- Return Using Single Crochets:
- Turn your work and create single crochets (sc) back along your chain. Begin by inserting your hook into the 49th chain, yarn over, and pull the yarn through to create a single crochet. Repeat this step for each chain until you reach the base pattern.
- Repeat the same process on the other side of the band to create a second tie. Both ties should have the same length.

6. Decorative Border
To add the border's scalloped design on the upper and lower edges:
- Start at one end of the hairband and work along the row edges, as follows:
- Work 1 sl st into the first stitch, followed by a dc into the same stitch. Chain 1 (ch 1).
- Slip stitch into the nearest stitch to secure and create the first 'bump' or scallop.
- Skip to the next section and repeat the following steps for each scallop along the edge:
- Yarn over and create 4 double crochets (dc) into the next single crochet of the row's edge.
- Follow with a single chain (ch 1). Secure your scallop shape with a slip stitch (sl st). Repeat these steps along the hairband's edge.
- At the corners of the hairband, add extra scallops for a fuller appearance. At each corner, crochet 5 double crochets instead of the usual 4, before continuing with the chain and slip stitching.
- Repeat this process along both the upper and lower edges of the hairband to maintain symmetry.

7. Finishing Steps
- Once the decorative border has been crocheted all around the edges, secure the last stitch with a slip stitch and pull the thread through.
- Use scissors to cut the yarn, leaving a small tail to weave in.
- Use the tapestry needle to weave in any extra yarn ends for a neat finish.

Final Words and Tips
Congratulations, You've completed your crocheted hairband with mesh design and an adorable scalloped border. Below are some additional tips to maintain and enhance your creation:
- Blocking Your Hairband:
- Once completed, you may block your hairband to ensure that it lays flat and smooth. To block cotton yarn, moisten the band slightly and pin it into the desired shape before allowing it to air dry.
- Customization Ideas:
- Experiment with different yarn types or colors to create seasonal or themed hairbands.
- Add beads, sequins, or small embellishments to the border for a more decorative appearance.
- Care Instructions:
- As this hairband is made with cotton yarn, hand wash it gently in cool water with mild detergent. Avoid wringing or twisting, as this may distort the shape. Lay the hairband flat to dry.
- Adjusting the Size:
- To make the hairband wider, add extra rows following the same mesh pattern.
- For longer ties, increase the number of foundation chains when creating the side strings.
- Tips for Consistent Tension:
- If you are a beginner, try to crochet with a consistent hand pressure. Minor variations in tension can cause the hairband to have uneven widths. Relax your hands as you work to ensure a smooth and even finish.