
How to Crochet a Waffle Skirt – Free Pattern Included
Boost your collection with a Free Crochet Waffle Skirt Pattern featuring beautiful texture and a comfortable fit perfect for casual outings.
A plain and simple skirt can often feel boring and lack character. The crochet waffle skirt pattern changes that by adding a charming texture made up of small raised squares, giving the fabric a unique and eye-catching look. This design creates a stretchy and comfortable fit that adapts well to different body shapes and seasons. It is breathable enough to keep you cool when it's warm yet provides gentle warmth during cooler days, making it practical as well as stylish.
Free Crochet Pattern: Stylish Waffle Skirt for Every Season

Using this pattern involves easy-to-learn stitches that even beginners can handle, allowing anyone to make a personalized skirt by choosing their favorite colors and length. The finished skirt is durable and retains its shape through many washes, so there's no need to worry about wear and tear. The cozy fabric feels gentle against the skin without being rough or itchy, adding extra comfort for daily wear.
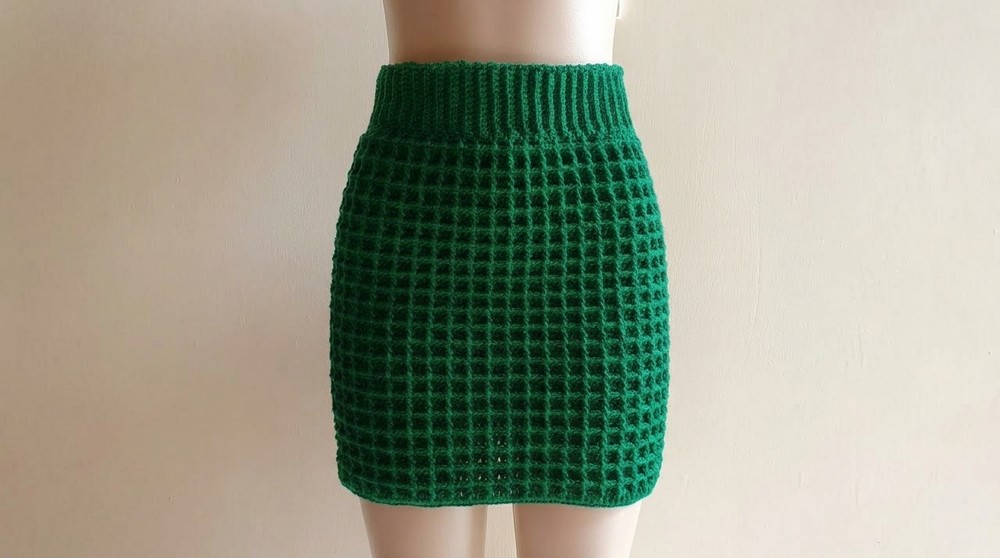
Besides looking beautiful and feeling good, making this textured skirt offers a rewarding experience that helps improve your skills. The raised pattern not only enhances the appearance but also strengthens the fabric, ensuring the skirt holds up well over time while staying flexible. Whether worn casually or for special occasions, this pattern provides a stylish, practical, and long-lasting option that many will enjoy adding to their wardrobe.
Waffle Stitch Crochet Skirt Pattern
Welcome to this detailed and beginner-friendly crochet pattern for a stylish waffle stitch skirt. This pattern is designed to be easy to follow and helps you create a beautiful and comfortable skirt using the textured waffle stitch. Follow along carefully and enjoy your crocheting journey!
Before You Start
- Choose a fingering weight yarn (thin yarn) for a light and comfortable skirt. Doubling the yarn strand is recommended for better stitch definition and durability.
- Use a 4.0 mm crochet hook (or appropriate size for your tension).
- Have scissors, a tape measure, and stitch markers ready.
- Take accurate hip measurements before starting as the waistband is based on this measurement.
- Chain length will correspond exactly to your hip size because the waffle stitch tends to shrink.
- This skirt is worked in continuous rounds (joined in the round).
- The pattern uses basic stitches such as slip stitch, chain, double crochet, front post double crochet, and single crochet.
- Familiarize yourself with working in rounds and front post stitches for best results.
Pattern Notes
- The skirt is worked from the bottom up starting with a foundation chain equal to your hip measurement (a multiple of three).
- The stitch pattern shrinks widthwise, so the initial chain equals your hip measurement to ensure a snug fit.
- Waistband is worked separately with single crochet stitches for a neat and stretchy finish.
- The skirt is closed by joining the beginning and end of the rows with slip stitches, working in rounds.
- Chains at the beginning of rounds do not count as stitches unless specified.
- Stitch count remains consistent throughout the stitch pattern section.
- Turning and slip stitches are used to create the waffle texture and form the body of the skirt.
How This Made
- Start with a foundation chain matching your hip circumference (multiple of 3).
- Join in the round to crochet the waffle stitch in continuous rounds until desired skirt length.
- Crochet a single crochet waistband with back loop stitches for elasticity and comfort.
- Join waistband edges with single crochet to form a waistband band.
- Add finishing touches such as a drawstring (optional) for a secure fit.

Skill Level
Beginner to intermediate: Basic knowledge of crocheting in rounds and front post double crochet required.
Finished Size
Customizable based on hip measurement and desired skirt length.
Materials
- Fingering weight yarn (thin yarn), recommended to be doubled for better texture. Example: Robin brand 50g skeins.
- 4.0 mm crochet hook.
- Scissors.
- Tape measure.
Measurements / Sizing
- Hip measurement: Your skirt's foundation chain length equals this measurement.
- Length: Crochet rounds until preferred length is achieved (approximate length can be adjusted).
Gauge
- Gauge is not fixed but the stitch pattern shrinks by approximately one third, so chain foundation accordingly.
Stitch Abbreviations
- ch: chain
- sl st: slip stitch
- dc: double crochet
- sc: single crochet
- fpdc: front post double crochet (explained below)
- st(s): stitch(es)
- rep: repeat
Special Stitches
Front Post Double Crochet (fpdc)
- Yarn over, insert hook from front to back around post of the indicated stitch, yarn over, pull through (three loops on hook).
- Yarn over, pull through two loops, yarn over, pull through remaining two loops.
Crochet Pattern Instructions
Part 1: Foundation Chain
- Take your hip measurement and convert it to chain length (multiple of 3). For example, if your hip is 42 inches, chain 165. (For smaller sample, chain 48.)
- Make a slip knot, then ch 48 (or your desired length, multiple of 3).
- Ensure chain is not twisted; join with a slip stitch (sl st) into the first chain to form a ring.
Explanation:
Make chains as long as your hips measure so the skirt fits snugly. Joining in a ring means the chain forms a circle, not a straight line.
Part 2: Round 1
- Ch 2 (does not count as dc).
- Dc into the same stitch where you joined.
- Dc into each chain around. (Total number depends on your chain count.)
- Join with sl st to top of ch 2.
Explanation:
This round creates your base row of double crochets all around your foundation chain.

Part 3: Round 2
- Ch 2 (does not count as dc).
- Dc in next dc; fpdc around next dc; repeat * to end of round.
- Join with sl st to top of ch 2.
Explanation:
This round starts the waffle texture by alternating normal double crochets and front post double crochets.
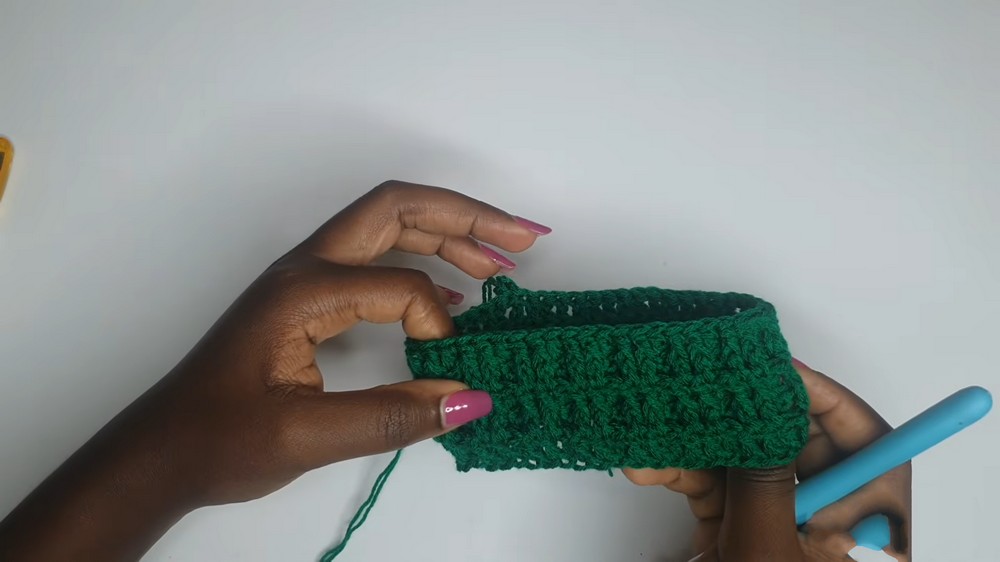
Part 4: Round 3
- Ch 2 (does not count as dc).
- Fpdc around next 2 dc; dc in next dc; repeat * to end of round.
- Join with sl st to top of ch 2.
Part 5: Rounds 4 and Beyond
- Repeat Round 2 and 3 alternately until skirt height reaches your desired length.
Explanation:
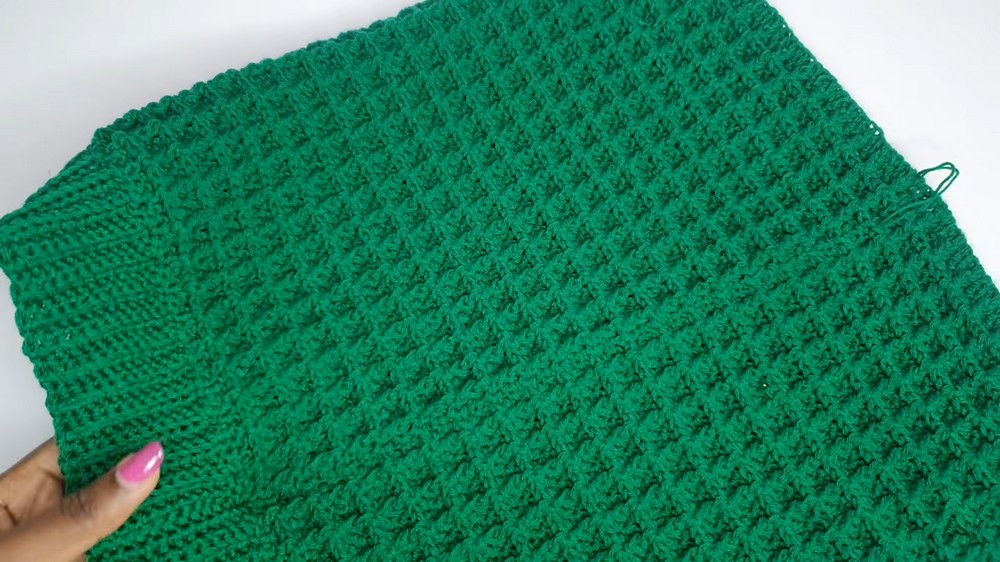
Alternating these two rounds builds the classic waffle stitch texture.
Part 6: Waistband Setup
- After reaching desired skirt height, chain 12 (or more if you want a thicker waistband) + 1 turning chain.
- Skip first chain; sc into each chain across (12 sc).
- Join the last sc to first sc with slip stitch to form waistband foundation.

Part 7: Waistband Stitching
- Turn work.
- Skip first 3 slip stitches on skirt base; in 4th stitch, sc in back loop only (BLO).
- Sc BLO across to end (total 12 sc).
- In last stitch, sc in both loops.
- Ch 1, turn.
- Work 1 sc in both loops in first stitch; then 1 sc BLO across to end.
- Continue this BLO pattern for several rows, alternating slip stitches at joining round (2 or 3 slip stitches on base alternating) as follows:
- Slip stitch 3 times on base, turn, skip 3 stitches, sc BLO across.
- Slip stitch 2 times on base next time, turn, skip 2 stitches, sc BLO across.
- Repeat this sequence until waistband fits comfortably.

Part 8: Joining Waistband
- Align waistband edges with the wrong sides facing each other.
- Join edges by working single crochet stitches through both loops of corresponding stitches from both edges.
- Continue until waistband is fully joined.
Part 9: Finishing Waistband Edge
- Chain 1, turn.
- Work single crochet evenly around top edge of waistband.
- Slip stitch to first sc, cut yarn and pull through to secure.

Assembly and Finishing
- Weave in all loose ends neatly.
- Optional: add a drawstring through the waistband for adjustable fit.
- Block your skirt gently if desired to smooth and shape your stitches.
Troubleshooting Guide
- Problem: Skirt feels too tight or small.
Solution: Increase foundation chain length to slightly larger than hip measurement to allow stretch. - Problem: Waffle stitch not forming correctly.
Solution: Ensure accurate front post double crochet technique; yarn over and insert hook fully around stitch post. - Problem: Waistband feels loose.
Solution: Add more rows of single crochet in BLO; consider adding a drawstring.
Creative Uses
- Use the waffle stitch technique to create scarves, cowls, or blankets.
- Make matching accessories like hats or bags using the same stitch pattern for coordinated autumn wear.
- Adapt the skirt pattern to create a top or vest using the waffle stitch rounds.
- Use the skirt as a base to add appliques or embellishments for customized fashion.