Mushroom Pouch Free Crochet Pattern with Easy-to-Follow Guide
Grab this adorable crochet mushroom pouch idea, it's fun, easy to make, and perfect for holding your favorite tiny treasures.
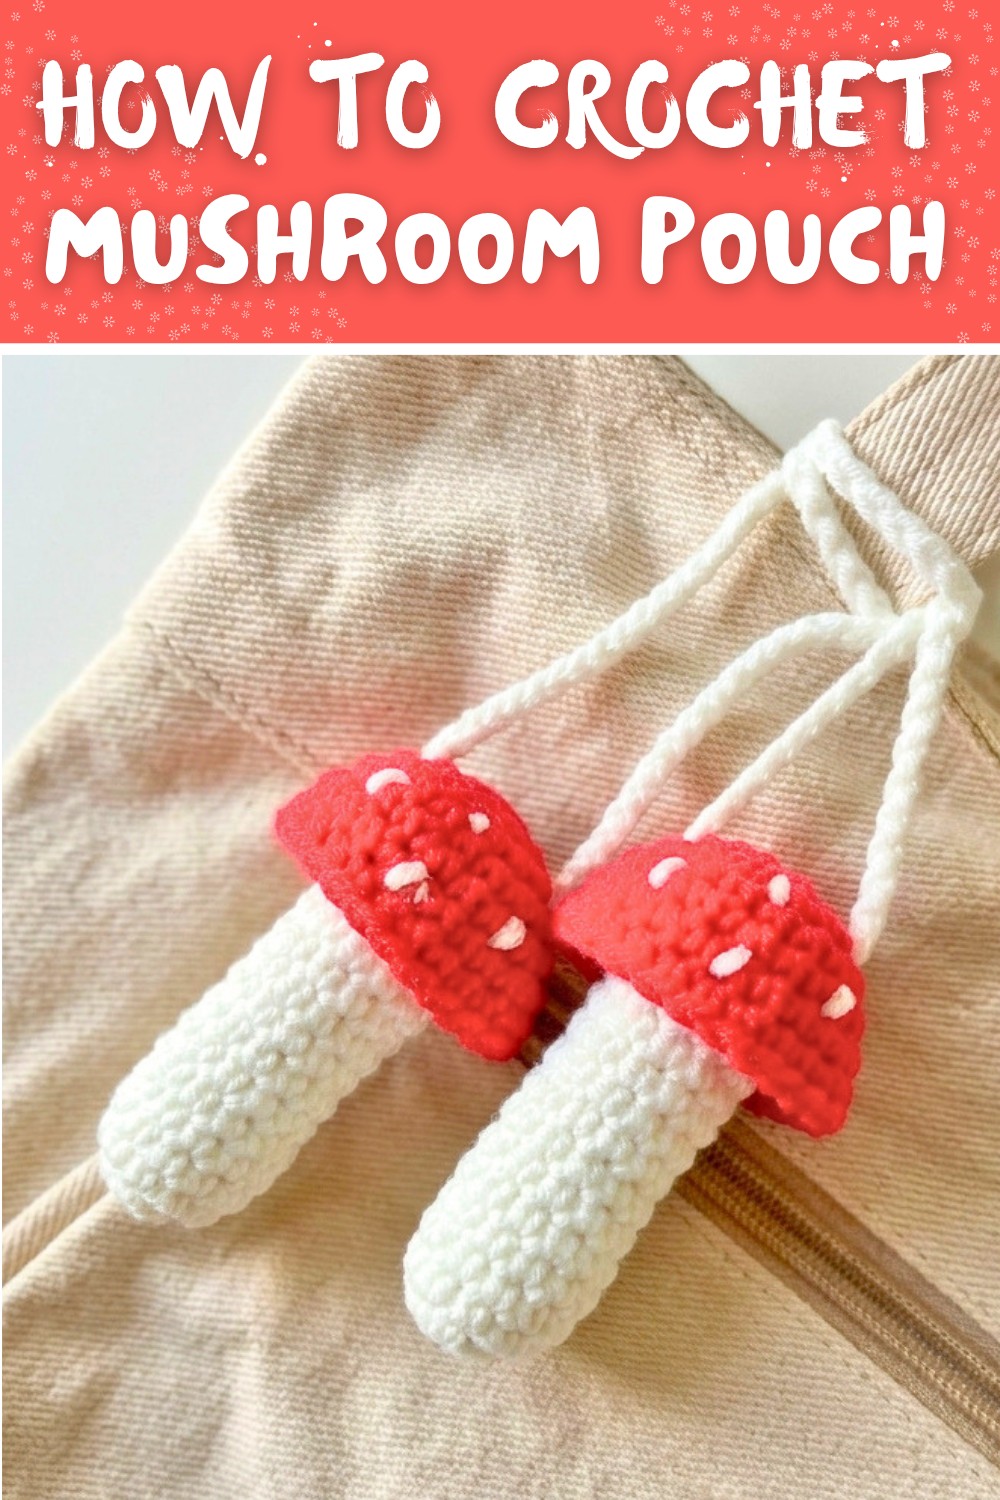
A small, charming pouch shaped like a mushroom makes for a playful and practical accessory. Its rounded top, resembling a mushroom cap, adds a touch of whimsy, while the soft yarn texture gives it a cozy and inviting look. This pouch is the perfect size for holding coins, jewelry, or other small keepsakes, making it both cute and functional.
Free Crochet Mushroom Pouch Pattern: Cute and Functional Design

The bright, cheerful appearance appeals to people of all ages, especially those who enjoy unique and handmade items. Its lightweight design ensures it's easy to carry or tuck into a bag. Whether it's the vibrant colors, the adorable details, or its everyday usefulness, this pouch brings a bit of joy to ordinary storage. A thoughtful project that combines charm and purpose, it's sure to become a delightful addition to anyone's collection.

Crochet Pouch Keychain Pattern
Materials
- Yarn: Acrylic yarn, DK or worsted weight, in brown, red, and white (or colors of your choice)
- Crochet Hook: Suitable for your yarn (recommended: 3.0-4.0 mm)
- Stitch Marker
- Scissors
- Tapestry Needle
Special Techniques
- Magic Ring (Adjustable Ring): Used to start rounds for amigurumi or circular shapes.
- Increase: Work two single crochets in the same stitch.
- Invisible Finish: To neatly close and weave in ends.
- Attaching: Using slip stitch and sewing to join components.
- Changing Colors: Fasten off or join new yarn as indicated for separate pieces.
Pattern Instructions
1. Make Pouch Body
- Start with a Magic Ring
- Create a magic ring.
- Round 1:
- 6 single crochet (sc) in magic ring.
- Pull tight to close. (6 stitches)
- Round 2:
- Increase in each stitch around: 2 sc in each stitch. (12 stitches)
- Round 3:
- Single crochet in each stitch around: 1 sc in each stitch. (12 stitches)
- Rounds 4-15:
- Continue as in round 3: 1 sc in each stitch. (12 stitches per round)
- Adjust the length to taste, making the Pouch longer or shorter as desired.

TIP: Use a stitch marker to keep track of your first stitch in each round.
2. Create the Chain
- Chain 50.
- Fasten off, leave a tail to attach to Pouch later.
3. Make the Hat
- Start with Magic Ring
- Create a magic ring.
- Round 1:
- 6 sc in magic ring. (6 stitches)
- Round 2:
- Increase: 2 sc in each stitch. (12 stitches)
- Round 3:
- Work as follows:
- [1 sc, increase (2 sc in next stitch)] repeat around. Use a marker to mark first stitch.
- This round: alternating a single sc in one stitch, then 2 sc in the next.
- Ends with 18 stitches.
- Work as follows:
- Round 4:
- 1 sc in each stitch. (18 stitches)
- Round 5:
- [2 sc, increase] repeat around.
- Continue increasing as needed for the size, ending with 24 stitches (or adjust for desired fit).
- Round 6:
- 1 sc in each stitch. (24 stitches; adjust as needed for shape and size.)


TIP: Fasten off, leave a tail for sewing.
4. Attach Components
- Stuff the body lightly if desired.
- Finish the ends neatly:
- Use tapestry needle to weave yarn ends inside the body after the last round.
- For a neat finish, use the invisible finish: insert needle front to back through last stitch and weave through several stitches.
- Attach chain to Pouch :
- Using leftover tail from chain, sew chain securely to top of Pouch body.
- Attach hat:
- Place hat on Pouch head portion, sew around the edge using tapestry needle and leftover tail from hat.
- Add embellishments:
- Use white yarn to add details like Pouch eyes or other facial features.
- You may embroider or use felt for eyes, mouth, etc.
- Secure all pieces:
- Trim excess yarn.
- Tuck in all loose ends for a neat finish.


Finishing
- Ensure all parts are securely attached.
- Weave in all ends using tapestry needle.
- Use invisible finish for closing ends and edges for a professional look.
- If making this as a keychain, attach a keyring to the end of the chain.

Tips & Suggestions
- Marker: Always use a stitch marker to track rounds, especially when working amigurumi style.
- Customization: Make Pouch taller by adding more rounds; alter hat color/design to customize.
- Safety: If gifting to a small child, ensure all parts are securely attached and avoid small detachable pieces.
- Washing: Hand wash gently and air dry for best results.
- Pattern Correction: If stitch counts do not match, check for missed or extra stitches in previous rounds.
Final Words
You have now completed your Pouch keychain! This beginner-friendly project is quick, fun, and great for gifts or personal use. Customizations are encouraged to make each Pouch unique. For questions or additional inspiration, consult the crochet community or leave comments.