
Rose Flower Hairclip Free Crochet Pattern for a Handmade Accessory
Make a beautiful rose hairclip with this free crochet pattern, perfect for adding a touch of elegance to your look with simple and easy-to-follow steps.
A hairclip that looks like a delicate rose can make anyone feel special. This crochet project gives you the chance to create a soft, handmade flower that looks real and lovely. The petals are layered carefully, giving the rose a full and natural appearance, while the choice of colors allows you to make it as bright or soft as you like.
Free Crochet Rose Flower Hairclip Idea for Special Occasions

The rose sits beautifully on a clip, making it perfect to wear in your hair for special events, casual outings, or just to add a little charm to your day. This design is lightweight and comfortable, so you can wear it for hours without worry. The crochet process is easy to follow, letting anyone create this attractive hair accessory with basic materials.
Whether you're looking to make a gift, a personal accessory, or a simple decoration, the finished piece stands out with its beauty and uniqueness. This is a great way to enjoy the fun of crochet while creating something special to use or share.

Crochet Rose Flower Hair Clip
Materials Required
- Yarn: Small amount of yarn in your preferred color (sample uses brown). Lightweight or DK works well.
- Crochet Hook: 2.5 mm hook (or size suitable for your yarn).
- Yarn Needle: For sewing and weaving in ends.
- Scissors: For cutting yarn.
- Glue: Fabric or craft glue suitable for attaching crochet to metal/hardware.
- Plain Hair Clip: Any standard base for hair accessories.
Special Techniques & Abbreviations
- sl st: Slip stitch
- ch: Chain
- sc: Single crochet
- dc: Double crochet
- tr: Treble (triple) crochet
- Rep: Repeat
- st(s): Stitch(es)
- FO: Fasten off
Step-by-Step Instructions
Step 1: Make the Foundation Chain
- Begin with a slip knot.
- Using your 2.5mm hook, ch 34.

Step 2: First Row - Creating the Petal Base
Going forward, you will form the base of each petal with clusters of double crochets separated by chains and skipped stitches.
- In the fourth chain from the hook, work 3 dc (all in the same stitch; creates the first cluster).
- Ch 1, skip 1 ch (do not work into it).
- Into the next chain, work 3 dc.
- Rep steps 2-3 until you have 16 clusters in total. Each cluster is separated by a ch-1, skip 1 ch.
- At the end of this row, double check that you have made 16 clusters of 3 dc each.
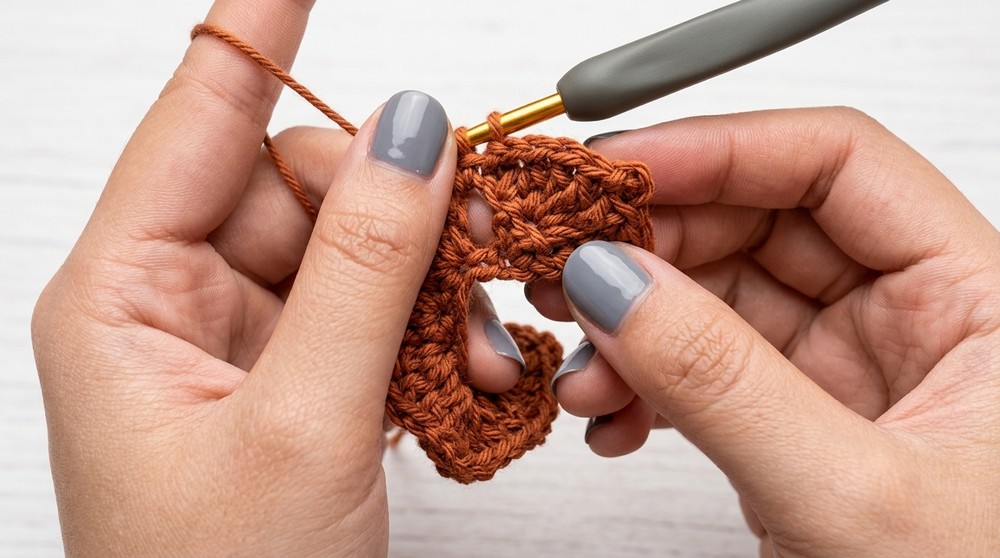
Step 3: Second Row - Forming the Larger Petals
You will now shape the rose petals, alternating sizes for dimension.
Creating Large Outer Petals (using treble crochets; 5 sets)
- Ch 2 and turn your work.
- In the first chain of the cluster's top, work 1 tr.
- In next chain, work 2 tr.
- Ch 2, sl st in side of petal to make a point.
- In the same chain as the previous 2 tr, work 2 more tr.
- In the next chain, work 1 tr.
- Ch 2, sl st in next chain to finish the petal.
- Rep this pattern for a total of 5 petals, one for each cluster.

Creating Smaller Inner Petals (using double crochets)
After completing 5 large petals, continue with the remainder.
- Into the next chain, work 1 dc.
- Into the next chain, work 2 dc.
- Ch 2, sl st in side of petal for the point.
- 2 dc in the same chain.
- 1 dc in next chain.
- Sl st into next chain to finish petal.
- Rep for the remaining clusters.
Continue until no stitches are left. FO, leaving a long tail for sewing.
Step 4: Rolling and Shaping the Rose
- Beginning at one short end of your crocheted strip (start with the end where the large petals are), gently roll the strip into a spiral. This will mimic the look of a rose.
- As you roll, apply small dots of glue along the base to keep the rose in shape.
- Make sure the petals are spread evenly and the flower looks natural and layered.
Step 5: Securing the Rose
- Use yarn needle and the long tail left at the end.
- Secure the coils of your rose by sewing carefully through the base, catching several layers as you go.
- Tie off with a knot at the bottom, weave in the end, and snip excess yarn.

Step 6: Attaching the Rose to the Hair Clip
- Take your hair clip and apply a small bead of glue to the upper flat surface.
- Press the base of the rose flower onto the glue area.
- Hold in place for a few moments and allow to set completely (refer to your glue's instructions for cure time).
Finishing Touches
- Ensure all ends are woven in securely.
- Double check for any loose petals and add extra glue/stitches if needed.
- Allow plenty of drying time before using or gifting your hair clip.

Tips
- Petal Adjustment: You can adjust the fullness and size by changing the number of clusters in your foundation chain (in multiples of 2).
- Fastening: For extra strength, combine glue and sewing when attaching the rose to the clip.
- Variations: Try multicolored yarn, add beads, or leaves for decoration.
- Maintenance: Spot clean gently if needed. Avoid immersing in water due to both glue and metal clip.
Final Words
Congratulations! You have created a beautifully layered crochet rose hair clip. This adorable accessory makes a charming handmade gift or a special treat for your own collection. Beginners should feel confident following these clear step-by-step instructions. As you become more comfortable, experiment with different colors and sizes to match any style.