
Simple Crochet Baby Booties Free Pattern to Keep Tiny Toes Warm
Style little feet with soft and charming crochet baby booties that are easy to make, keeping tiny toes warm and cozy in a delightful way.
There's something so special about making baby booties-they're tiny, adorable, and wonderfully personal. A crochet baby booties pattern lets you create soft, comfortable footwear for newborns that's both practical and sweet. These booties have a simple, rounded shape and a smooth sole, making them perfect for delicate little feet. You can keep the design simple or add fun details like bows, buttons, or vibrant colors to make them extra special.

The booties are usually sized for newborns, but you can easily adjust the pattern to fit babies or toddlers by adding extra stitches or rows. They're made by crocheting the sole and sock part separately and then sewing everything together. The process is simple and easy to follow, even if you've never made booties before.
The best part is picking out the yarn, Soft, lightweight yarns are ideal because they're gentle on sensitive skin and give stitches a neat, stretchy texture. I love using pastel colors for a classic look, but bold shades or stripes are always fun too.
These booties make great baby shower gifts, keepsakes, or just cozy shoes for every day. You can even get creative and personalize them with embellishments or unique color combinations. Making baby booties is such a sweet way to celebrate a new arrival-and they're filled with love in every stitch.
Crochet Pattern for Newborn Baby Booties
Key Features of This Project
- Skill Level: Beginner friendly.
- Finished Size: Sole length of approximately 9 cm (3.5") for newborns.
- Customization: Easily adjusted for larger sizes or personalized designs.
- Time Required: The booties can be completed in about an hour or less.
Let's get started on this cozy and functional crochet project.
Materials Needed
- Yarn:
- A lightweight and soft yarn suitable for babywear. Popular options include:
- Nako Pırlanta
- Alize Cotton Gold
- Choose pastel colors for a classic baby look or experiment with bold hues. For the pattern, we'll use a cheerful light yellow tone.
- A lightweight and soft yarn suitable for babywear. Popular options include:
- Crochet Hook:
- Size 2 mm (approximately 1.75 mm for tighter stitches). Match your hook to the yarn weight to maintain proper gauge.
- Additional Tools:
- Tapestry needle for sewing seams and weaving in ends.
- Scissors.
- Decorative elements like small pearls or buttons (optional).
- Gauge: 24 stitches × 28 rows = 4" × 4" square using double crochet (DC). Adjust your hook size if necessary.
Abbreviations and Stitches Used
- ch: chain
- DC: double crochet
- BLO: back loop only
- sl st: slip stitch
Chains at the start of rows count as the first stitch unless otherwise noted.
Finished Bootie Size
The pattern produces booties that fit newborns up to 3 months, with the following approximate measurements:
- Sole Length: 9 cm (3.5")
- Bootie Height: 4.5 cm (1.75")
To adjust the size, refer to the Customization Tips section below.
Step By Step Instructions
Step 1: The Sole
- Foundation (Base) Chain:
- Begin by chaining 26 stitches.
- Row 1:
- Work 1 DC into the 4th chain from the hook.
- Continue to make 1 DC in each chain across the row.
- You should have a total of 24 DC, including the first chain you skipped.
- Rows 2-7:
- Turn your work, ch 3 (counts as the first DC).
- Work 1 DC into the next stitch and each stitch across, using the BLO for extra texture.
- Ensure the stitch count is 24 DC per row.

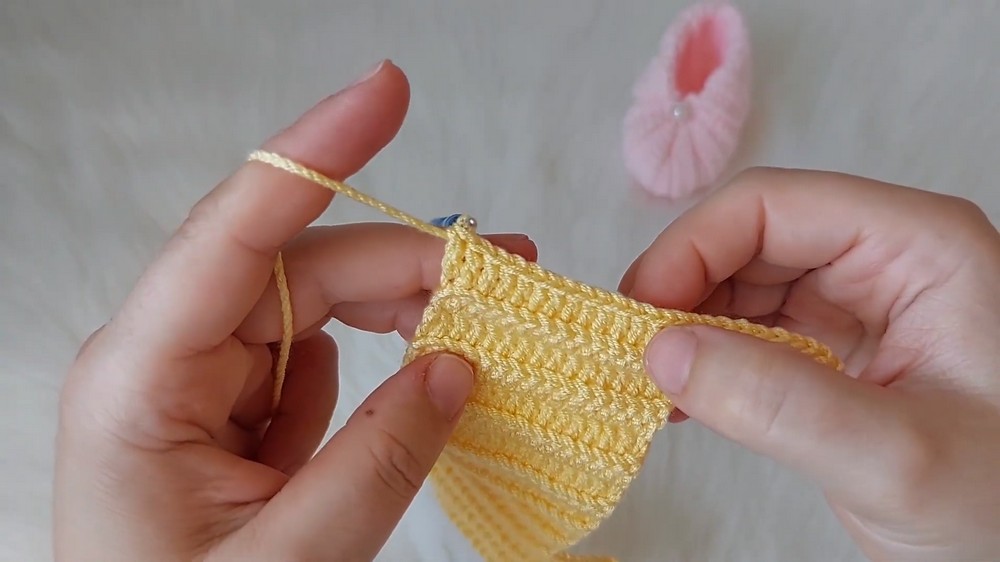
By the end of these 7 rows, you'll have a rectangular sole with ridged texture. This forms the foundation of the bootie.
Step 2: Forming the Top Section
- Row 8:
- Ch 3, turn your work.
- Work 16 DC into the next 16 stitches, working through the BLO.
- Leave the last 8 stitches unworked.
- This will create an opening for the top of the bootie where the baby's foot will go.
- Rows 9-21:
- Repeat Row 8 to create 16 DC rows while leaving the remaining 8 stitches unworked.
- Maintain the stitch count of 16 DC per row.


At the end of this step, you'll have a distinct rectangular flap extending from the sole. This section will be folded later to form the bootie's top.
Step 3: Reattaching Sole and Top Sections
Now, you'll widen the top section back to its original width of 24 stitches.
- Chain 10 to Form the Bridge:
- This creates a new foundation row to expand the top section.
- Work Across the Rows:
- Crochet 8 DC into the previously unworked stitches on the sole.
- Continue working 1 DC into each stitch of the top section until the row is complete.
- Ensure you have a total of 24 stitches.
- Repeat Rows for Height:
- Repeat the process of 24 DC per row for 7 rows.

At this point, your bootie will be assembled into a basic slipper shape, with a complete upper and sole.
Step 4: Closing the Bootie
Now it's time to assemble the bootie by sewing it together.
- Seam the Back (Heel) Section:
- Use a tapestry needle and matching yarn.
- Fold the bootie in half lengthwise and align the edges of the heel section.
- Sew through the back loops only to create a flat, professional seam.
- Seam the Front (Toe) Section:
- Continue sewing along the toe portion for a snug closure.
- Stop at the opening for the baby's foot.

The bootie should now resemble its final shape.
Step 5: Adding Decor and Finishing Touches
To make the booties extra special, consider the following finishing steps:
- Decorative Pearls (Optional)
- Sew on a pearl or decorative button at the top edge of the bootie.
- Secure it tightly, ensuring no loose threads that could pose a choking hazard.
- Slip Stitch Edging
- Add a neat border around the opening by working slip stitches around the edge.
- Ribbons or Straps
- Weave a thin satin ribbon through the edges, allowing for adjustable fastening.
- Weave in All Ends
- Use a tapestry needle to tuck in any leftover threads, ensuring clean edges.


Customizing for Different Sizes
If you want to make booties for older babies or toddlers, adjust the foundation chain and row count as follows:
- Length (Sole):
- Increase the base chain by multiples of 2 stitches until you reach the desired length (e.g., 32 chains for toddlers).
- Height (Top Section):
- Add more rows to the top section for a higher ankle coverage, or remove rows for a slipper style bootie.
- Width:
- For chunkier feet, add stitches when working across the sole or the top section.
Conduct a gauge swatch before starting if sizing adjustments are substantial.

Helpful Tips
- Tension Control:
- Maintain consistent tension throughout the project to avoid uneven edges or gaps.
- Use a slightly smaller hook for tighter stitches if needed.
- Stitch Markers:
- Mark the beginning of rows or key points like halfway through the sole for clarity.
- Experiment with Colors:
- Try stripes, gradient yarn, or multicolor designs for an added flair.
Final Look and Remarks
Congratulations! You've finished crocheting an adorable pair of newborn baby booties. These booties are soft, lightweight, and suitable for delicate baby feet. Ideal for gifts, baby showers, or simply dressing your new family member in style.
These booties are versatile and customizable, allowing you to explore creative patterns and colors. With such a quick and straightforward pattern, feel free to make multiple pairs for different occasions.