
Simple & Elegant Crochet Leaf Headband — Free Pattern
Follow an easy method to crochet an elegant leaf headband using simple materials, perfect for elevating your accessory collection with a fresh, handmade touch.
It's hard to find unique and affordable accessories that truly stand out, but this Free Crochet Leaf Headband pattern changes everything. Featuring a delicate and nature-inspired leaf design, this pattern is not only beautiful but easy to follow, making it perfect for beginners and experts alike. The lightweight yarn ensures comfort while showcasing intricate textures that mimic real leaves, giving the headband a timeless charm.
Free Crochet Leaf Headband Pattern for All Skill Levels

Its versatility is one of its greatest features, it can be worn to dress up a casual outfit, add a touch of elegance to special occasions, or even make thoughtful handmade gifts. The soft curves and detailed accents make this headband an eye-catching accessory, suitable for all ages. Working through this crochet pattern is a creative and relaxing way to express your artistic side, and the results are simply stunning.
Whether you're looking to enhance your wardrobe or craft something meaningful for loved ones, this Free Crochet Leaf Headband pattern is a delightful project to try. Transform simple materials into something extraordinary with this design that blends practicality with artistic beauty.

Forest-Themed Leaf Headband Crochet Pattern
Finished Project Dimensions:
- Adult size: Approximately 50-55 cm (20-22 inches) circumference with 10 leaves.
- Child size: Adjust the number of leaves (typically 6-8 leaves) based on head circumference.
Materials Needed:
- Yarn: 5-ply milk cotton yarn (soft and comfortable for headwear).
- Crochet Hook: 3.0 mm hook.
- Scissors: To trim the yarn.
- Tapestry Needle: For weaving in ends.
Special Notes:
- Difficulty Level: Easy to Intermediate.
- Gauge: Not required as this is an accessory project, but maintaining consistent tension is key.
- Techniques Used: Basic crochet stitches such as chain stitches, pulling loops, slip stitches, and single crochet.

Instructions:
Step 1: Crochet the Foundation Chain
- Start by creating a slip knot and place it on your hook.
- Crochet 60 chain stitches (this is the base strap/ground rope for one side of the headband).
- Ensure the chain is slightly loose for elasticity.
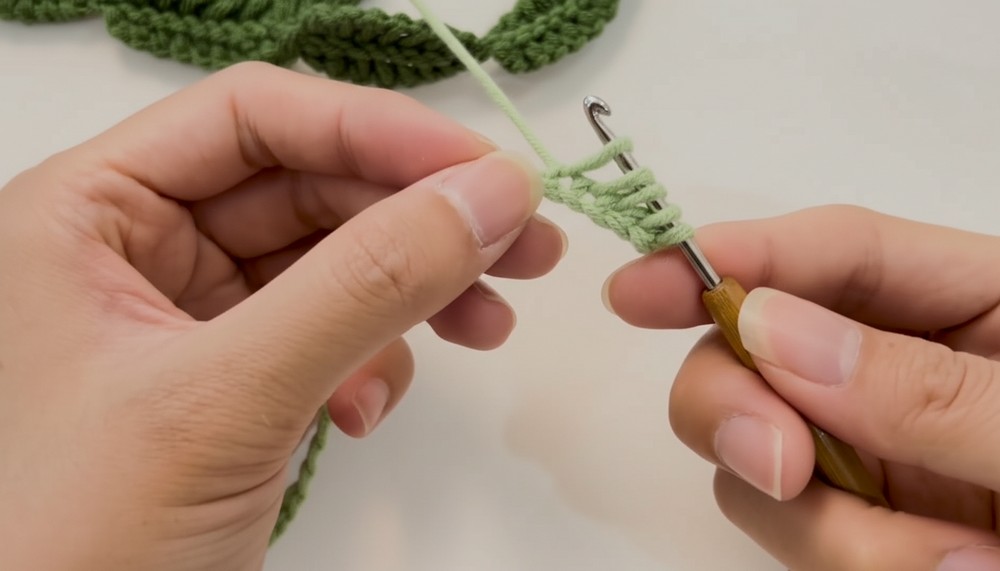
Step 2: Start the First Leaf
- After completing the 60 chains, chain 8 stitches for the first leaf.
- Insert your hook into the second to last stitch in the chain (grab only the outer half of the stitch) and start picking up loops:
- First 4 stitches: Gradually increase the length of the loops (short to long).
- Next 3 stitches: Gradually decrease the loop length (long to short).
- You'll now have 8 loops on your hook.
- Yarn over:
- Pull the yarn through 1 loop initially.
- Then yarn over and pull through 2 loops at a time until only 1 loop remains on the hook.
- Chain 1 upright stitch (also called a standing stitch), then flip the branch (your crocheted piece) to start crocheting chains on the other side.
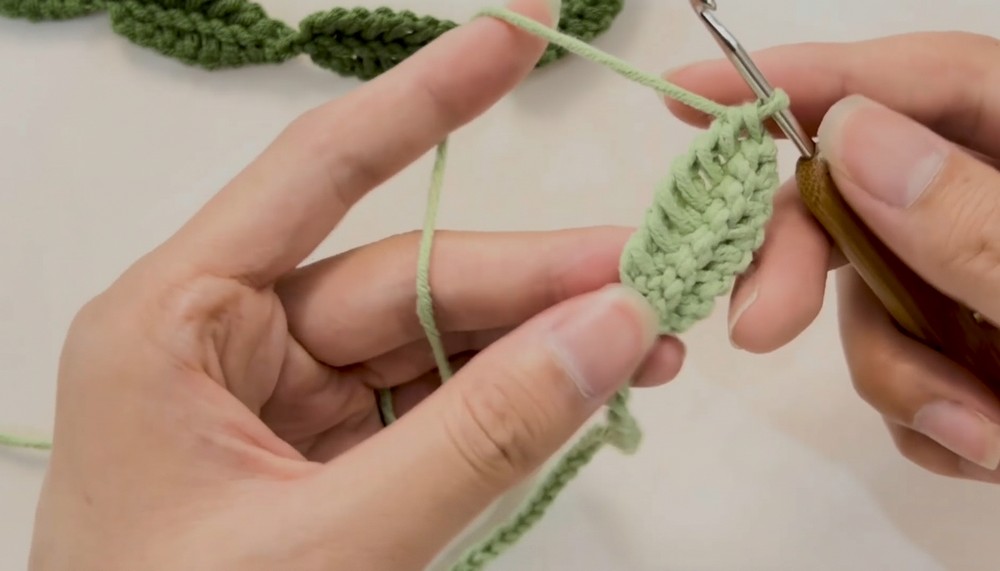
Step 3: Complete the Opposite Side of the Leaf
- On the flipped side, pick up 8 loops in the same way:
- Gradually increase loop lengths for the first 4 stitches (short to long).
- Gradually decrease loop lengths for the next 4 stitches (long to short).
- Yarn over and pull through the loops as done earlier:
- Pull through 1 loop first.
- Yarn over and pull through 2 loops at a time until there's 1 loop remaining.
- At the top of the leaf, crochet 1 short stitch to anchor the completed leaf to the foundation rope.

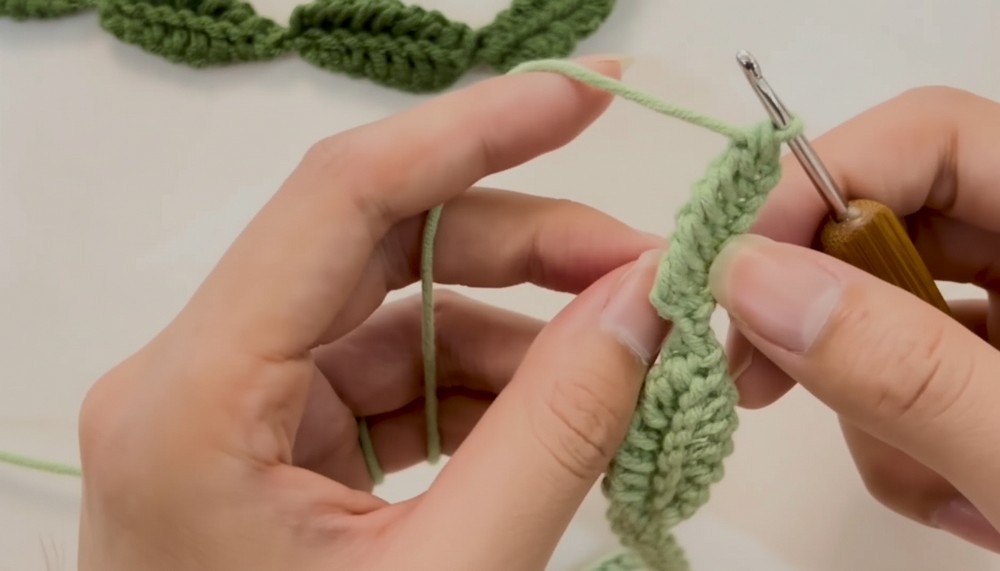
Step 4: Start the Next Leaf
- Chain 8 stitches again.
- Repeat Steps 3-9 to create the second leaf.
- Continue crocheting leaves using the same method, chaining 8 stitches between each leaf.

Step 5: Adjust the Number of Leaves for Size
- Adult Headband: Work a total of 10 leaves.
- Child Headband: Adjust to 6-8 leaves, depending on head circumference.
Step 6: Crochet the Second Side of the Ground Rope
- After completing the final leaf, crochet 60 chain stitches for the second side of the ground rope.
- Once finished, cut the yarn and pull the end through the last stitch to fasten off securely.

Tips for Success
- Consistency: Keep loop tensions even to ensure uniform leaf shapes.
- Fit Check: Measure the work against your head circumference before finalizing the number of leaves.
- Customization: Use colored or gradient yarns to create a unique design or alternate the colors of the leaves.
Optional Enhancements
- Add Beads: Incorporate small beads into the foundation chains between leaves for a decorative effect.
- Resize: Change the size of the leaves by increasing or decreasing the number of loops picked on either side of the leaf.
- Attach a Tie: Add a small chain strap at both ends for tying the headband securely.
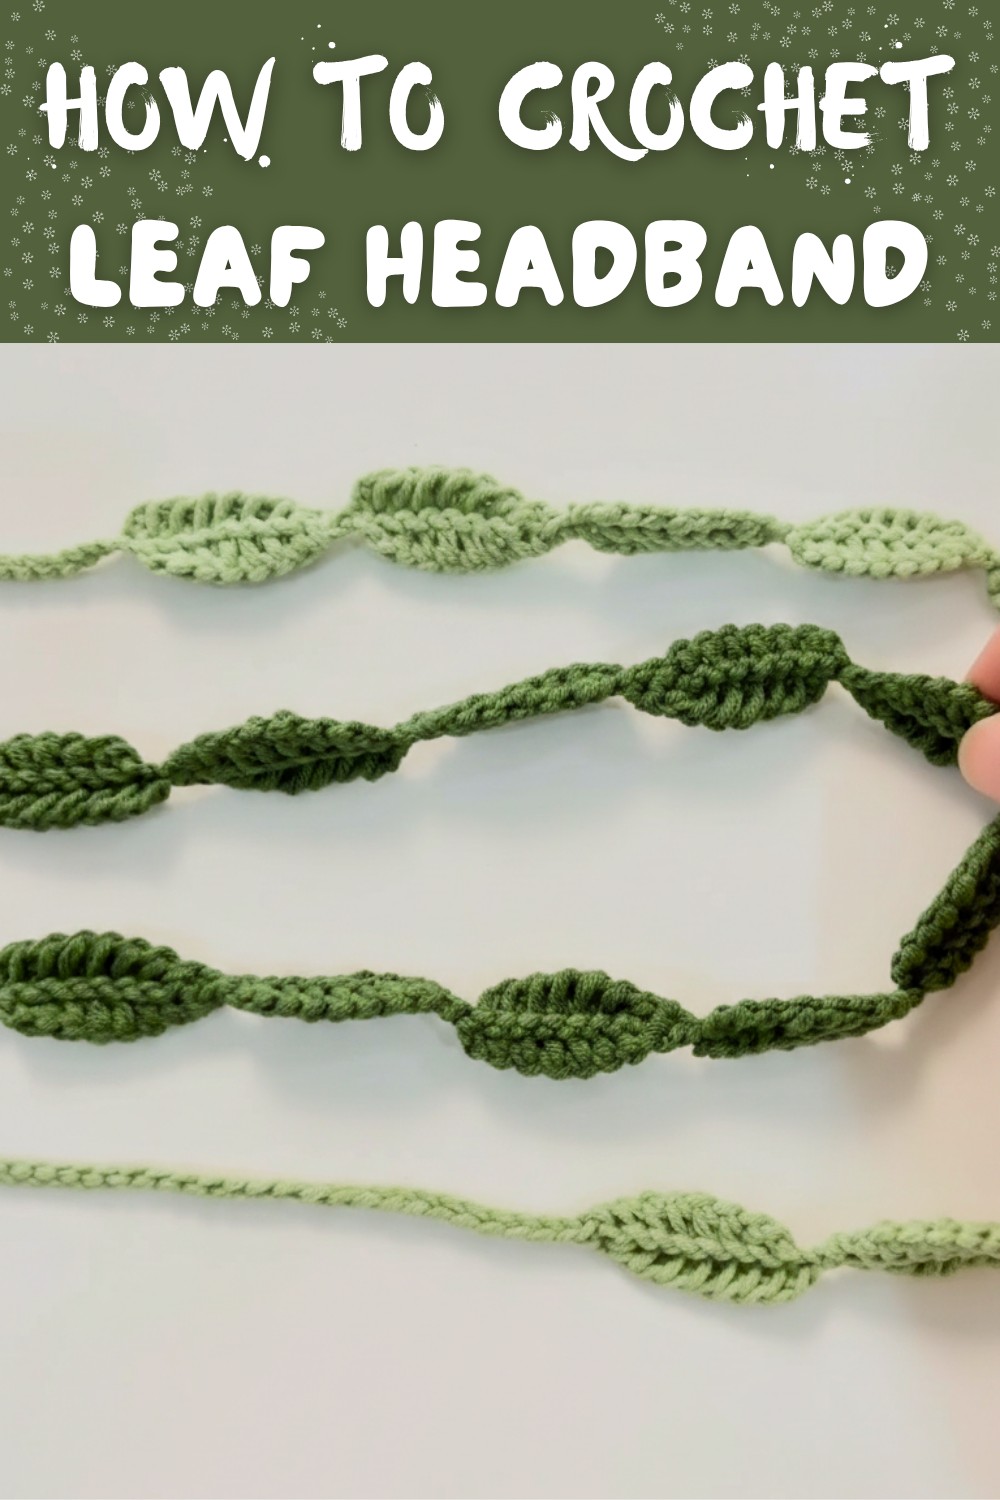
Conclusion
Once your last leaf is crocheted and the ground rope is finished, weave in all loose threads with a tapestry needle. Your forest-themed leaf headband is now complete and ready to be worn.
This whimsical accessory pairs well with casual outfits and makes for a charming handmade gift. Keep experimenting with colors, textures, and designs for unique looks.