
Simple Free Crochet Bag Pattern Will Level Up Your Style
Step out with confidence using this beautiful free crochet bag pattern that transforms your look with its unique design and practical features perfect for every outing.
This crochet bag is more than just a bag-it's a simple, stylish, and creative design that anyone can make. Starting with small squares, known as "patchwork," this project allows you to use your imagination and personalize your colors to make something unique. The beauty of this bag is its charming design and attention to detail. It uses soft yarn in earthy tones like tamara brown and off white that blend effortlessly.
Free Crochet Bag Pattern That's Perfect for All Seasons

The neat square patterns make it look modern and tidy. You can also use leftover yarn to make it colorful, making this an eco friendly and budget friendly project. Whether you need it for your wallet, phone, or makeup, this is an everyday bag you will love. Its zippered closure ensures your belongings stay safe, while the felt lining adds structure and keeps your items secure.
The bag is lightweight and comfortable to carry. With its handmade strap, you can wear it across your body for convenience or remove the strap if you prefer. This pattern offers a rare mix of style, function, and personal flair. So, if you're looking for a crochet project that will bring you joy and create something useful, this free crochet bag pattern is the perfect choice. It's easy to make, fun to personalize, and will reflect your creativity in every stitch.
Crochet Bag Pattern
Finished Size
- Height: 15 cm (approximately).
- Width: 20 cm.
- Depth: 5 cm.
Materials
- Yarn: Amigurumi yarn in two colors (Color 1: "Tamara" brown; Color 2: off white).
- Alternatively, use yarn scraps or leftover yarn for a patchwork style bag.
- Crochet Hook: 2.5 mm crochet hook.
- Zipper: Approximately 22 cm zipper.
- Felt: Matching yarn color (optional, for lining).
- Scissors.
- Glue: Universal glue or fabric glue.
- Stitch Markers.
- Optional Metal Accessories:
- 2 mosquetons (metal clasps).
- 2 "half moon" rings for removable strap assembly.
Gauge
Each square measures 5 cm x 5 cm. The squares are worked entirely in single crochet stitches (US terminology).
Pattern Instructions
Step 1: Making the Squares
- Foundation Chain: Start with 13 chains.
- Row 1: Work 1 single crochet (SC) into the second chain from the hook. Continue working 12 SC across. Turn.
- Row 2-13: Work 1 SC into each stitch (12 SC total per row). Turn at the end of each row.
- After completing 13 rows:
- Cut the yarn, leaving enough tail for finishing.
- Do not weave in ends; leave them for the final assembly process.

For the bag:
- Make 12 squares for the front panel and 12 squares for the back panel, alternating between the two chosen colors. (6 of each color for each panel).

Note: You can customize the colors for a unique look, such as multicolor patchwork or gradient squares.

Step 2: Assembling the Front and Back Panels
Horizontal Assembly:
- Position 3 squares horizontally (in rows).
- Match two side by side squares, ensuring their edges align perfectly.
- Insert the hook into the edge stitches of the two squares. Slip stitch along the edge to join them neatly. Continue until the two squares are joined.
- Repeat for all rows to create 4 rows of 3 squares.

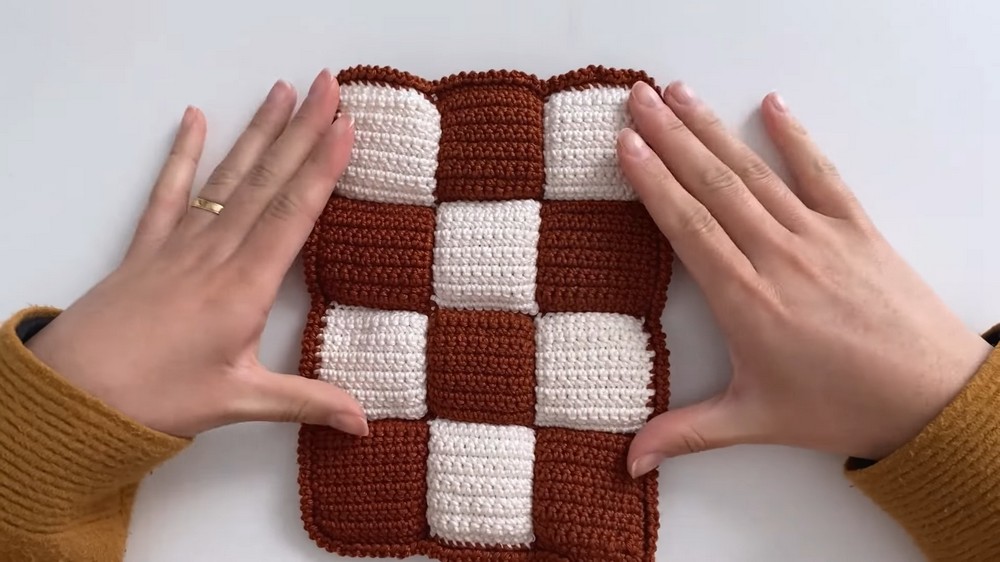
Vertical Assembly:
- Align two rows face-to-face (right sides touching).
- Slip-stitch along the vertical edges, joining them to form a complete panel.
- Repeat for the second panel (back panel).
- Once assembled, the front and back panels should each consist of 12 squares.

Tips:
- Ensure squares are positioned in the desired alternating arrangement before assembly.
- Use stitch markers to align edges and corners accurately.
Step 3: Creating the Border
- Attach yarn to any corner of the panel and work 1 round of single crochet along the edge.
- Ensure to crochet evenly; adjust stitch count along corners for smooth transitions.
Optional Detail:
Add a decorative "mesh stitch" (point rendinha) border:
- Work 1 chain stitch (CH) and 1 slip stitch (SL ST) alternately, working only in the front loop of the stitches.
- This creates a textured border.
Repeat the above for both panels. Ensure no tails or loose sections before proceeding to the next step.
Step 4: Adding the Felt Lining
- Measure and cut felt pieces to match the dimensions of the bag's interior (front, back, and bottom panels).
- Optional: Double-layer the felt for better structure.
- Glue the felt inside the panels' interior using universal glue.
- Press firmly and allow the glue to dry completely. Ensure the felt adheres securely.
Step 5: Joining Front and Back Panels
- Align the two panels (front and back) with right sides facing out.
- Use stitch markers to align corners.
- Slip-stitch around the edges, ensuring to catch every stitch on both panels.
- Check the alignment regularly to avoid distorting the shape.
- Cut yarn and securely weave in ends.

Step 6: Creating the Strap
- Foundation Chain: Chain 9.
- Row 1: Work 1 SC into the second chain from the hook. Continue working 8 SC across.
- Row 2-Desired Length: Turn and work 1 SC into each stitch (8 SC total per row). Repeat until the strap measures approximately 1.2 meters or desired wearable length.
- Optionally, add a border using SC stitches along the edges for a finished look. However, leaving it raw gives a clean style.
Attachment Options:
- Directly: Use a tapestry needle to sew the strap ends directly to the bag at the top corners (3 rows below the zipper). Sew securely to prevent tearing.
- Using Hardware: Attach a mosqueton and half-moon ring on each end of the strap. Sew half-moon rings to the bag corners. This method allows the strap to be removable.
Step 7: Attaching the Zipper
- Position the zipper across the top opening of the bag.
- Use stitch markers to align the zipper with the edge. Ensure it sits evenly across the opening.
- Glue the zipper securely to the bag with universal glue. Press firmly to ensure adhesion. Allow to dry completely.
- Reinforce the zipper with hand-sewn stitches at the ends and corners using needle and thread of matching color for added durability. This prevents the zipper from detaching during use.

Customization Ideas
- Yarn Choices: Use self-striping yarn, textured yarns, or metallic thread to enhance the aesthetic appeal.
- Square Variety: Experiment with different stitch patterns (e.g., granny squares or textured squares) for unique looks.
- Strap Variations: Create a thicker strap using double crochet stitches or a braided design for extra flair.
Special Techniques
- Slip Stitch Joining: Ensures neat edges and prevents gaps in the seams.
- Point Rendinha Detail: Adds a decorative border and gives the bag a finished look.
- FLO/BLO Techniques: Working only in front or back loops creates textured details and additional layers.
Conclusion and Important Remarks
This crochet patchwork bag project is versatile, allowing complete customization to suit your style. The neat slip stitch seams ensure durability, while the felt lining provides added structure and protection for items inside. The zippered closure enhances security, and the option to use hardware offers flexibility for strap designs.
When completed, you'll have a beautifully handcrocheted bag that combines form and function, perfect for everyday use or as a thoughtful gift. Remember to securely sew the zipper for reliable functionality.
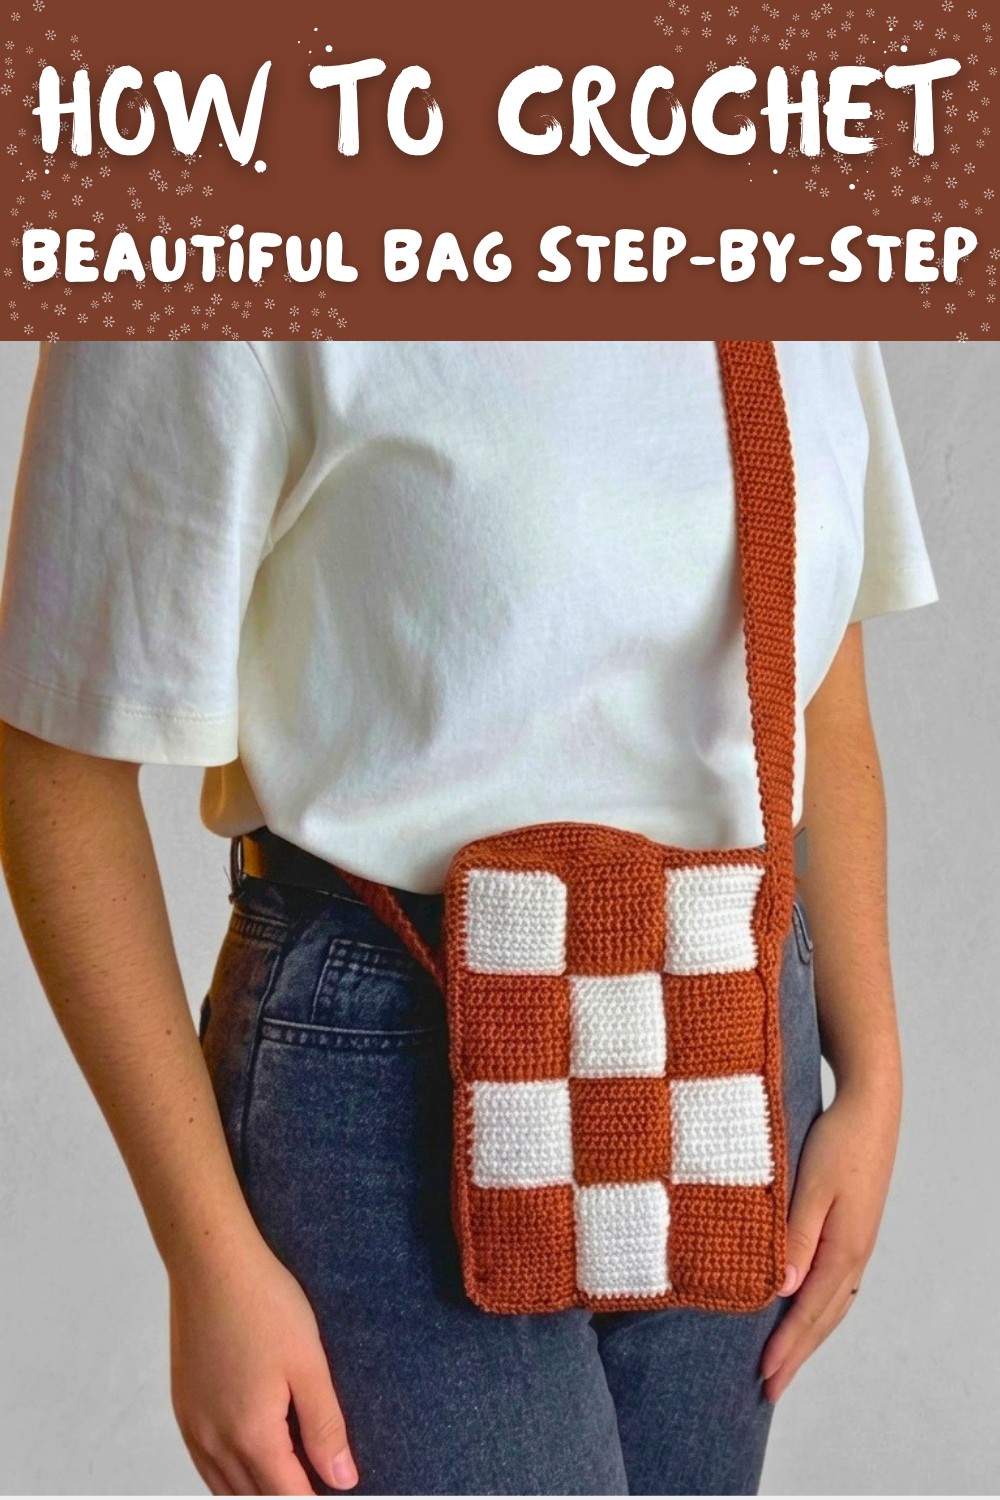
Final Look
The finished bag is spacious, sturdy, and stylish. It features a charming patchwork design with alternating colors, a robust handmade strap, and a practical zippered closure. With the right yarn and thoughtful construction, this project is sure to turn heads and be cherished for years to come.