
Unique Free Crochet Handbag Pattern for All Occasions
Turn your skills into a crochet handbag pattern that combines charm and practicality, offering endless ways to personalize a stylish and functional accessory.
It's easy to mistake a crochet granny square bag as just another project, but it's far from ordinary. This clever design takes the beloved granny square motif and turns it into a functional, wearable work of art. Perfect for anyone who loves combining creativity with practicality, it offers endless opportunities to mix colors, textures, and patterns that reflect your style.
Free Crochet Handbag Pattern for Everyday Style
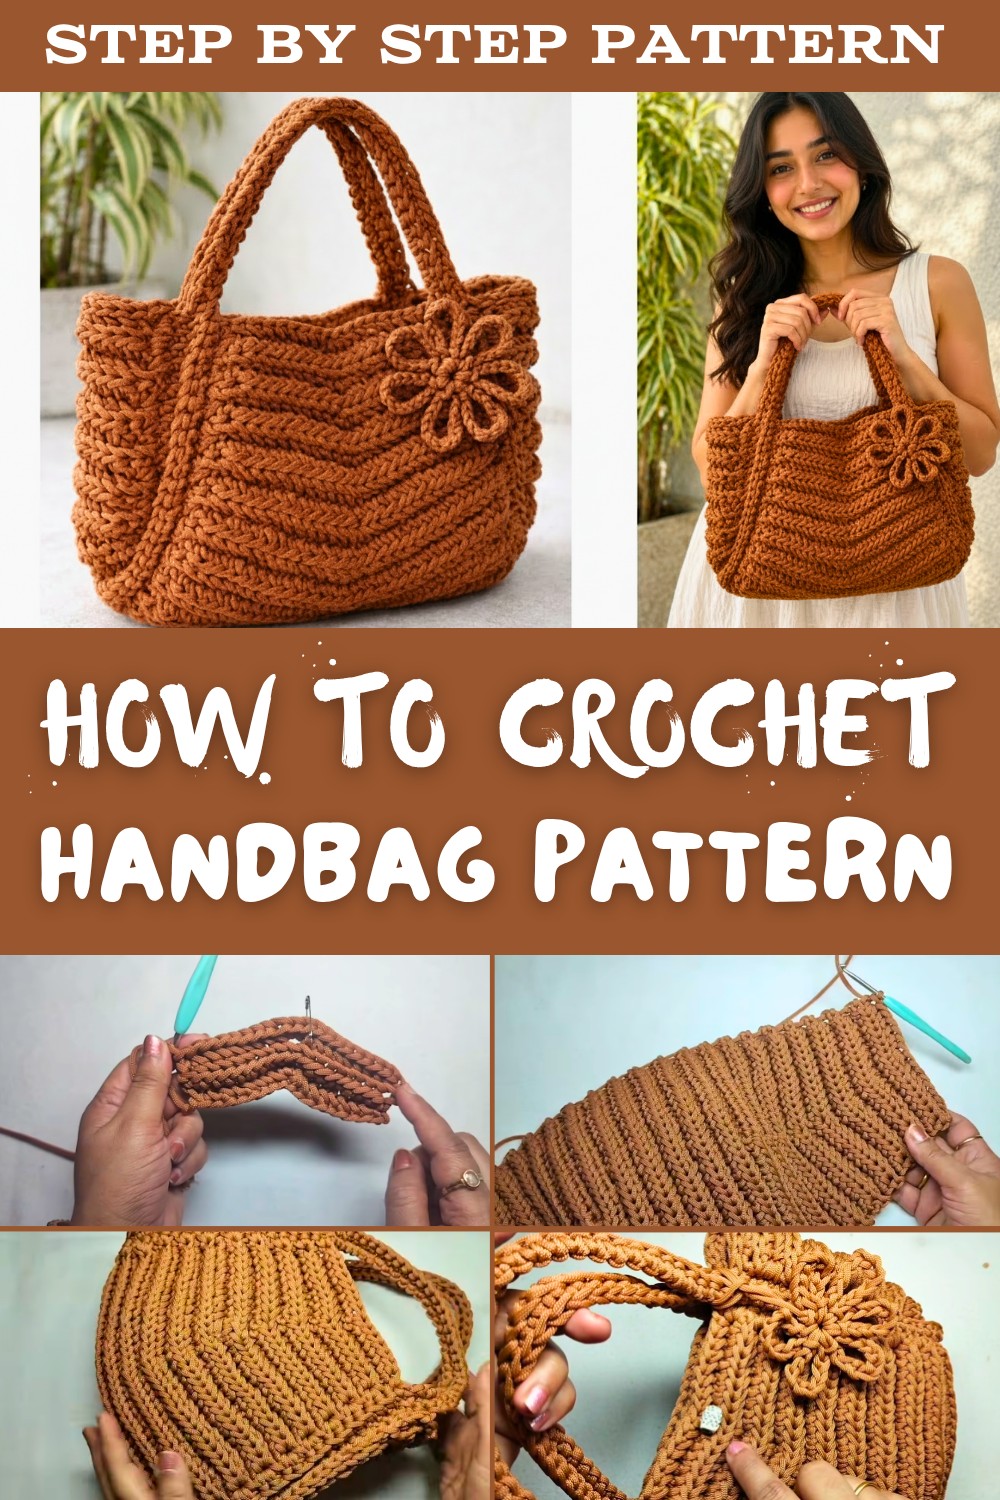
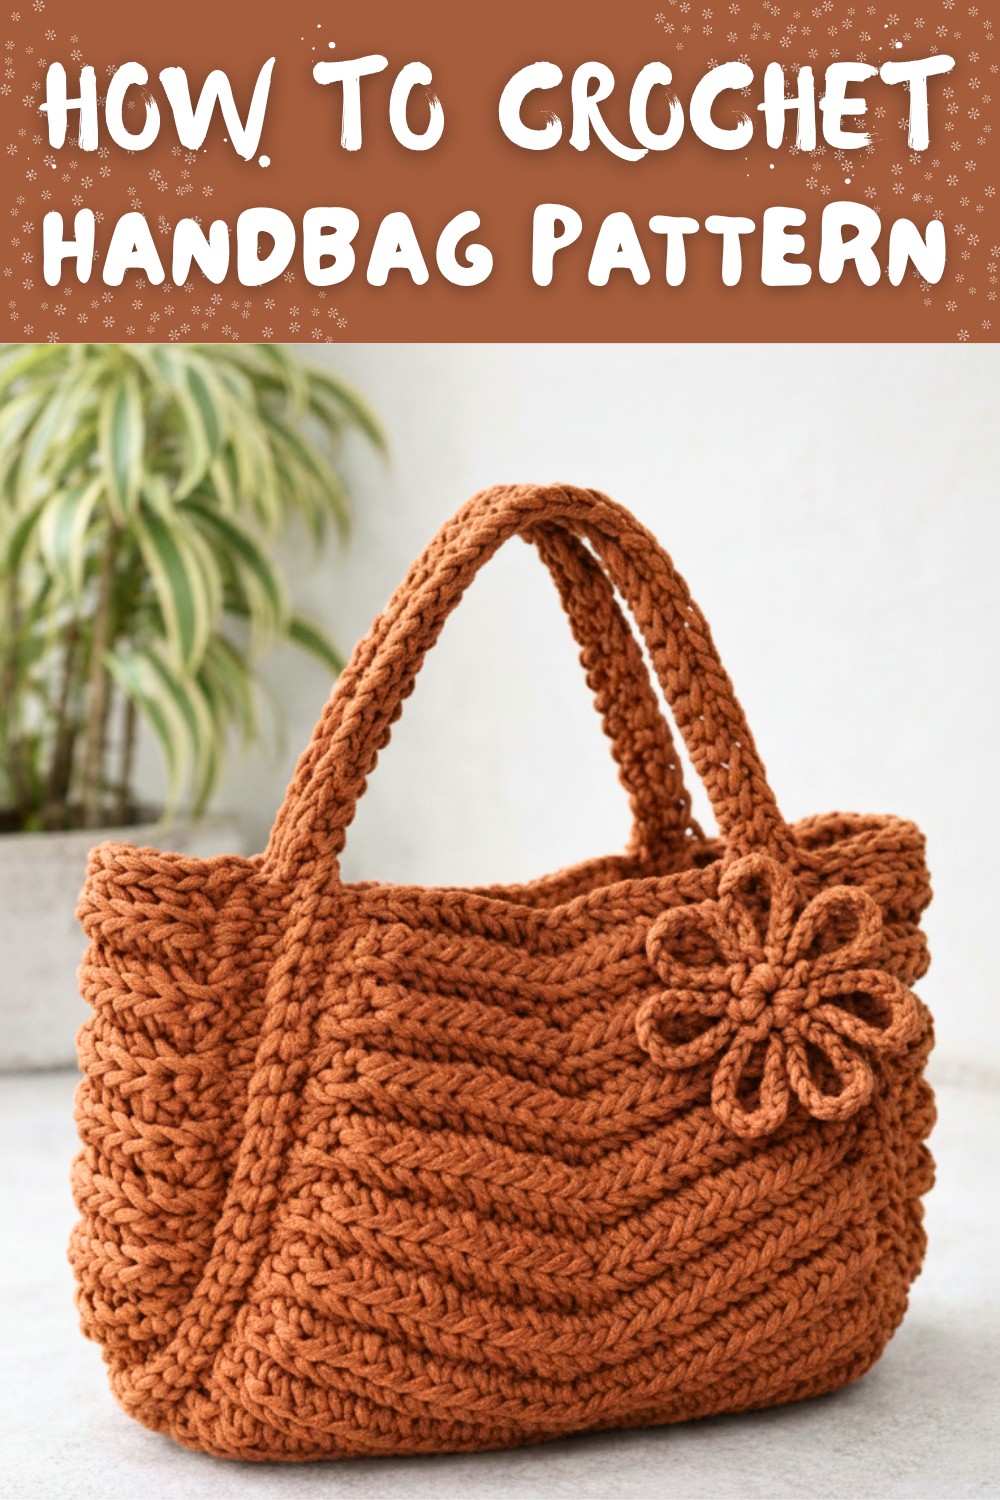
Use it as a fun market tote, a lightweight beach bag, or even as an eco-friendly replacement for everyday handbags. Some truly imaginative variations include adding decorative tassels, experimenting with oversized squares, or working with gradient yarn for a mesmerizing ombré effect.

Beyond its visual appeal, this project is beginner-friendly while still offering a satisfying level of challenge, perfect for those cozy evenings when your hands itch for a new crochet adventure. With its mix of charm and utility, it's hard to resist the unique magic of this delightful bag.
Crochet Handbag - Written Pattern
Finished Approximate Size
- Width: about 30 cm
- Height (without handles): about 24 cm
- Base length (center section): about 23 cm
- Side panel: approx. 18 cm (length) × 10 cm (width)
- Handle length:
- About 30 chains each for hand/arm carry
- Designer also mentions 70 chains if you want a shoulder strap version
These measurements may vary depending on your tension and yarn.
Materials
- Yarn: 4 mm nylon thread/cord (smooth and slightly stiff; any similar 4 mm cord will work)
- Hook: 4.0 mm crochet hook
- Stitch markers: At least 4-6 (used frequently for center stitches and handle positions)
- Yarn / tapestry needle: For weaving in ends and sewing on flower and magnetic button
- Scissors
- Magnetic clasp or button: For closure
- Optional embellishments: Fancy button or bead for flower center
Abbreviations (US Crochet Terms)
- ch = chain
- sc = single crochet
- sl st = slip stitch
- st(s) = stitch(es)
- BLO = back loop only
- RS = right side
- WS = wrong side
- rep = repeat
Special Techniques Used
1. Working in Back Loop Only (BLO)
Insert the hook into the back loop only of the stitch (the loop farthest from you), yarn over, pull up a loop, yarn over, pull through two loops to complete the sc. This creates a subtle rib texture and adds flexibility.
2. Center Increase (3 sc in One Stitch)
This is used to shape the base into a pointed/rounded end.
- When you reach the marked center stitch, work:
3 sc in same st
- The middle of those 3 sc becomes the new center stitch; place a marker in it.
This increases the stitch count by 2 each increase row.
3. Center Decrease over 3 Stitches
Used later to taper the opposite end.
- When you reach three stitches that need to be decreased together (center area):
- Insert hook into first st, yarn over, pull up a loop
- Insert hook into second st, yarn over, pull up a loop
- Insert hook into third st, yarn over, pull up a loop
- You now have 4 loops from the stitches + 1 original = 5 loops on hook
- Yarn over and pull through all 5 loops
Place a marker in the top of this decrease stitch (this becomes the new center).
4. Joining with Slip Stitch (Seaming)
To join two edges:
- Hold the two pieces together with WS facing each other.
- Insert hook through one stitch on each piece, yarn over, pull through both layers and through the loop on hook.
- Repeat across the seam.
Slip‑stitch seams lie fairly flat and are strong.
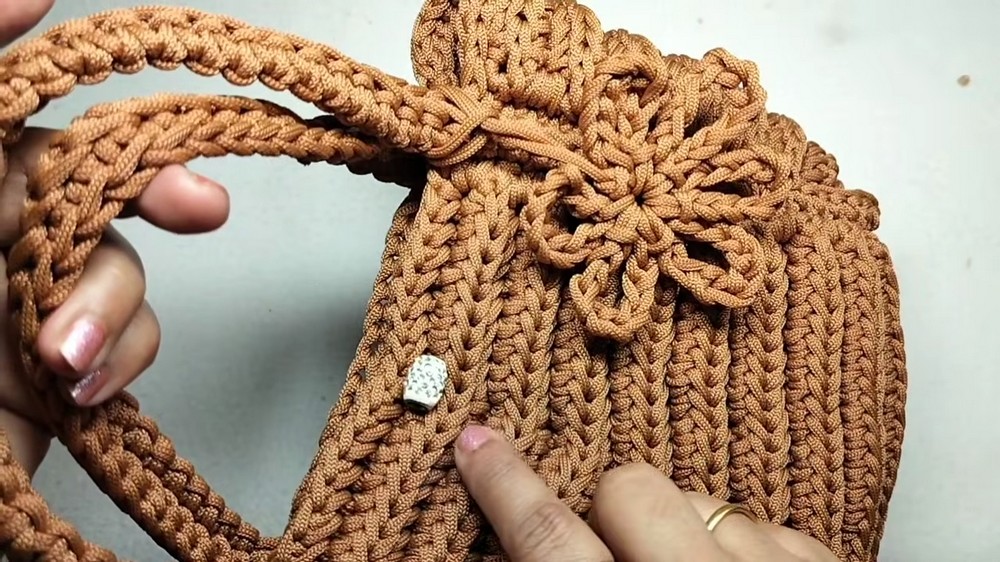
Main Construction Overview
The handbag consists of:
- Main body/base panel - one long shaped piece (increases, straight rows, then decreases).
- Top edging and built‑in handles - worked around the top edge of the body.
- Side gusset/strip - a rectangle that gives depth to the bag and is joined to the main piece.
- Flower embellishment and closure - decorative details added at the end.
PART A - Main Body/Base Panel
Step 1: Foundation and First Increase Rows
- Ch 18.
- Row 1 (Increase Row):
- Skip the first ch (turning chain).
- Working in the back loop of the chain, sc in the 2nd ch from hook.
- Continue: sc in BLO of each ch until you have worked 8 sc in total.
- The next ch (9th position) is treated as the center point.
- In this center ch: work 3 sc in same st.
- Count these 3 sc: 1, 2, 3; place a marker in the middle stitch (stitch 2 of the 3).
- Continue working along the other half of the foundation: sc in BLO of each remaining ch to the end.
- At the end, you should have 19 sc total.
- Row 2 (Plain Row):
- Ch 1, turn.
- Work 1 sc in BLO in each st across (including the center stitch) - no increases.
- Keep the marker in the center stitch.
- Stitch count remains 19 sc.
- Row 3 (Increase Row):
- Ch 1, turn.
- Sc in BLO in each st until you reach the marked center stitch.
- In the marked center stitch: work 3 sc in same st.
- Remove marker, place it in the middle of these 3 new sc (this is the new center).
- Continue sc in BLO in each remaining st to end.
- Stitch count increases by 2; Row 3 = 21 sc.


Step 2: Continue Alternating Increase and Plain Rows
- Work as follows:
- Odd‑numbered rows: Increase row (3 sc in the center stitch).
- Even‑numbered rows: Plain row (no increase, just sc in BLO across).
- Continue until you have worked a total of 17 rows (as the designer states).
- At the end of Row 17:
- Total stitch count across the row: about 35 sc.
- Measured width across: about 23 cm.

You now have a long base part that is widened at one end.
PART B - Straight Section (No Increases)
From this point, you work straight, keeping 35 stitches.
- Rows 18-29 (or 12 rows straight):
- For each row:
- Ch 1, turn, sc in BLO in each of the 35 sts across.
- Do not increase or decrease.
- The designer says she completed 12 rows of 35 sc.
- For each row:
At this point, the total row count from the foundation is about 29-30 rows.

PART C - Decrease Section (Upper Taper)
Now you will taper the opposite end by decreasing at the center.
Step 1: First Decrease Row
- Ch 1, turn.
- Sc in BLO in each stitch until you reach three stitches before the marked center stitch. In the transcript, the designer clearly points out three stitches that will be decreased together.
- Remove the marker from the center stitch.
- Perform a 3‑st decrease over the next 3 sts:
- Insert hook in first st, pull up a loop.
- Insert hook in second st, pull up a loop.
- Insert hook in third st, pull up a loop (5 loops on hook total).
- Yarn over, pull through all 5 loops.
- Place a marker into this decrease stitch (this is the new center).
- Continue sc in BLO in each remaining stitch to the end of the row.
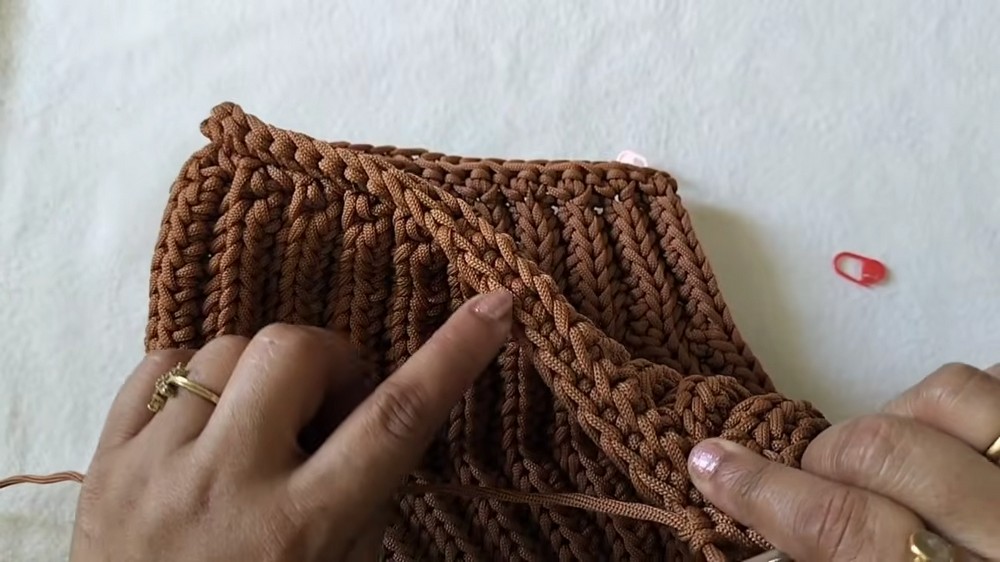
Your stitch count decreases by 2 on this row.
Step 2: Alternate Decrease Rows and Plain Rows
The designer's method is:
- One row with decrease at the center
- Next row without decrease (plain row)
Repeat this cycle:
- Decrease Row:
- Ch 1, turn.
- Sc in BLO to three stitches before center.
- Work 3‑st decrease over next 3 sts, mark this new center.
- Sc in BLO to end.
- Plain Row:
- Ch 1, turn.
- Sc in BLO in each st across; no decreases.
- Keep the marker in the center stitch.

Continue until the last row at the tapered end has approximately 17 sts. The designer notes:
- Last row stitch count: 17 sts (one more or less is acceptable).
- Total rows from beginning: about 46 rows.
This completes one long main body/base piece.
PART D - Top Edge and Handles
Once the base panel is finished, you will create a round of stitches around the top and attach handles with chains.
Step 1: Work Along the First Long Side
- With the main piece laid flat and WS facing, pick one long side/top edge to start.
- Attach yarn at one corner along the side/top edge (after the taper).
- Work 2 sc into each row‑end space along the side edge from one end to the other.
- The designer counts a total of 45 sc, then adds 1 more sc into the last corner to get 46 sc.
- Place a marker in the first sc of this side (this will be a reference for handle placement later).
Step 2: First Handle Chain
- At the end of this side (after 46 sc), ch 30 for a hand‑carry handle.
- The designer says: 30-35 chains for a hand handle, 70 chains for a shoulder handle.
- In the video, she uses 30 chains.
- Make sure the chain is straight and not twisted.
- Join the end of the chain with a sl st into the first st on the opposite edge where you want to anchor the handle.
- Place a marker at this joining point.
Step 3: Work Along the Second Long Side
- From the joined point, work 2 sc into each row‑end space along this second side edge, mirroring the first side.
- Again, achieve 46 sc along this long side.
- Place a marker in the last stitch of this side.
Step 4: Second Handle Chain
- From that last sc, ch 30 again (or same number as first handle).
- Make sure the chain is straight.
- Join with a sl st into the very first sc on the starting side (where you placed the first marker).
At this point, you have:
- 46 sc along one long side
- A 30‑ch handle
- 46 sc along the other long side
- Another 30‑ch handle
All forming a continuous loop.
Step 5: Round 1 Around Top and Handles
- Turn your work so that you are working along the handles and top edge from the other side (video shows turning before working the round).
- Starting at a marked stitch:
- On the handle chain:
- Work 1 sc into the back loop of each chain across the handle.
- On the top edge stitches:
- Work 1 sc into the outer/back loop of each sc all along the top edge.
- On the handle chain:
- Continue all the way around:
- Handle 1 → top edge → handle 2 → other top edge → back to start.
- Join with a sl st into the first sc of the round.
Step 6: Round 2 Around Top and Handles
- Ch 1, turn.
- Work 1 sc in BLO (inner loop as she shows) in every stitch around, including:
- All top edge stitches
- All handle chain stitches (again in a consistent loop to keep handles neat)
- After completing the second full round, join with sl st, fasten off, and weave in ends.
The top opening and handles are now reinforced and have a neat ribbed texture.

PART E - Side Gusset / Depth Panel
This rectangular strip forms the depth/side of the bag and is later joined to the main body.
Step 1: Rectangular Strip
- Ch 13.
- This gives approx. 10 cm width when worked in sc BLO.
- Row 1:
- Skip first ch, sc in 2nd ch from hook and in each ch across (12 sc).
- Rows 2-17:
- Ch 1, turn.
- Sc in BLO across each of the 12 sts.
After 17 rows:
- Length: approx. 18 cm
- Width: approx. 10 cm
Fasten off (or keep working yarn if you continue immediately with edging).
Step 2: Edging the Strip to Reach 46 Stitches
Now you will work around three edges to get a total of 46 sc, matching the main body's top edges.
- With RS facing, join yarn at one corner of a long side.
- Long side 1:
- Work 2 sc in each row‑end of the 17 rows.
- Aim for 17 sc on this side.
- Place a marker in the first sc on this edge.
- Short side (bottom or top edge):
- Work 12 sc evenly across.
- Long side 2:
- Again work 2 sc per row‑end, adjusting so that total sc from start to this second corner ends up as 17 sc along this long side as well.
You now have:
- 17 sc (long side 1)
- 12 sc (short side)
- 17 sc (long side 2)
Total: 46 sc, matching the 46 sc around the main body base/top edges.
PART F - Joining the Side Gusset to the Main Body
Both the main body and the side strip have 46 stitches to be matched when joining.
Step 1: First Side/Bottom Join
- Turn both the main handbag and side strip to WS (wrong side) facing outward.
- Align the 46‑st edge of the gusset with the corresponding 46‑st edge of the main bag (the base/side area).
- Insert hook through the first st of both pieces, join yarn with ch 1.
- Work sl st through both layers, stitch for stitch:
- Insert hook into next st on bag + next st on gusset, yarn over, pull through both and through loop on hook.
- Continue this way across the first part of the seam, usually 17 sts at first as she mentions.
Step 2: Folding the Corner and Completing the Join
- After the first 17 sl sts (joining one side/bottom), the designer folds the corner so the strip naturally wraps around the bag's base and starts up the other side.
- Continue working sl sts through both layers along the remaining stitches, ensuring:
- 12 slip stitches across the short side
- 17 slip stitches up the next long side
This joins one continuous side of the gusset to one side/bottom edge of the bag.
Step 3: Repeat for the Other Side (If Applicable)
From the transcription, the gusset appears to be used to join both sides symmetrically; you will effectively have:
- Both sides of the bag joined to the gusset edges
- All seams executed with slip stitches on the WS for a neat look on the RS
When seaming is complete, turn the bag RS out. The handbag now has a structured base and sides, with good internal space.
PART G - Flower Embellishment
Step 1: Simple Petal Flower
- Make the center ring:
- Ch 10.
- Join with a sl st into the first ch to form a ring.
- Petals (6 total):
- For each petal:
- Ch 10.
- Sl st into the ring.
- Repeat this petal sequence 6 times to form 6 loop petals around the ring.
- For each petal:
- Pull the center ring tighter if necessary and fasten off, leaving a tail for sewing.
Step 2: Attach Flower
- Decide the placement, typically the front center of the bag near the top.
- Thread the yarn tail onto a needle.
- Sew the flower securely to the bag, catching multiple stitches for strength.
- Optionally, sew a fancy button or bead in the center.
PART H - Closure (Magnetic Button)
- Place the bag flat and decide where you want the closure:
- One side on the inner front panel, the corresponding piece on the inner back panel.
- Using matching thread and a sewing needle, stitch the magnet parts securely onto the bag interior.
- Ensure both halves align so the bag closes properly when the magnet snaps together.
Finishing the Pattern
- Examine all seams to ensure there are no gaps.
- Weave in all yarn ends on the WS using a yarn needle.
- Gently shape the bag by hand, especially the corners and base.
- Check handle strength by lightly pulling; handles should feel secure and firm.
Suggestions and Practical Notes About the Pattern
- Tension:
- The designer specifically mentions not to crochet too tightly. With nylon cord, overly tight stitches are hard to work and can make the bag stiff and warped. Aim for even, moderately firm tension.
- Stitch Counts:
- The transcript itself says that if the final stitch count is off by one or two stitches, it is not a problem. The shaping is more important than an exact number, as long as both sides match visually.
- Yarn Choice:
- 4 mm nylon thread gives a strong, structured bag that does not collapse easily.
- If cotton or acrylic yarn is used, consider adding a fabric lining or interfacing for more stability.
- Customization:
- Change color for the gusset or the flower for contrast.
- Add more rounds around the top and handles for extra thickness.
- Adjust handle chains depending on whether you prefer hand carry or shoulder carry.
Tips to Maintain the Handbag
- Cleaning:
- Nylon bags can often be wiped with a damp cloth. Avoid very hot water, which might deform the cord.
- If washing is necessary, hand wash very gently and lay flat to dry, reshaping the bag while damp.
- Storage:
- Store the bag stuffed lightly with tissue or fabric to help maintain its shape.
- Avoid hanging heavy items from the handles for long periods to prevent stretching.
- Wear and Tear:
- Periodically check the slip‑stitch seams and handle joins. If any stitch loosens, reinforce with a few extra stitches using matching thread.
- Keep the magnetic clasp free from rust or strong impacts.
Final Words
This handbag pattern, reconstructed from the video transcription, combines simple stitches-chains, single crochet, increases, and decreases-to build a structured, elegant bag with generous capacity. The alternating increase and decrease rows shape the body, while the attached gusset provides depth and a professional, boxed look. The two‑round reinforced handles and the small flower embellishment complete a practical yet charming accessory.