Perfect Free Crochet Halter Top Pattern for a Handmade Touch
Learn how to make a stunning and easy crochet halter top with this free pattern, featuring fun colors and an adjustable lace up back design.
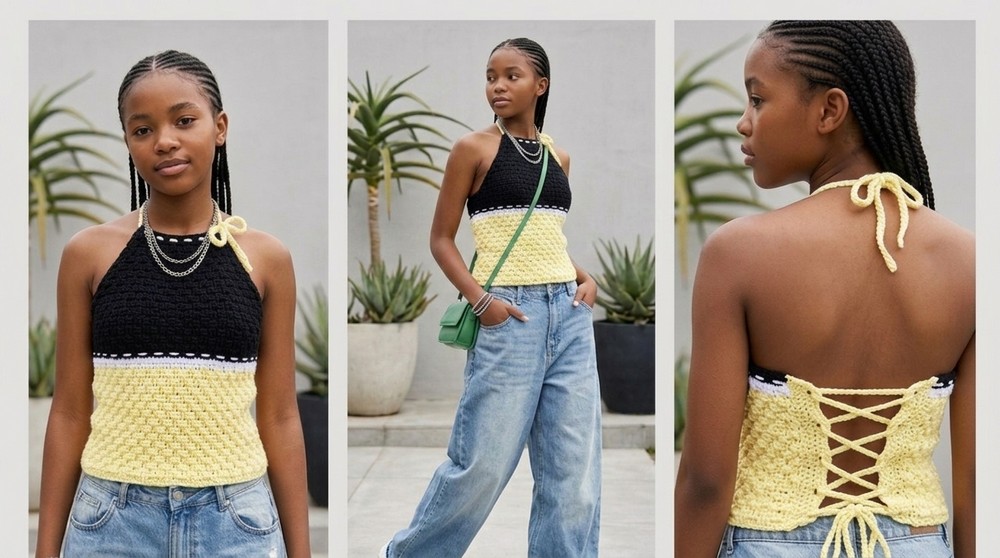
If you love handmade fashion and want to try something fun and easy, this Free Pattern is perfect for you. Making your own halter top is not just exciting but also a wonderful way to create a stylish outfit that fits you perfectly. This crochet project teaches you how to make an open back halter top with straps, giving it a trendy and modern vibe.
Your Go To Free Crochet Halter Top Pattern for Stunning Styles
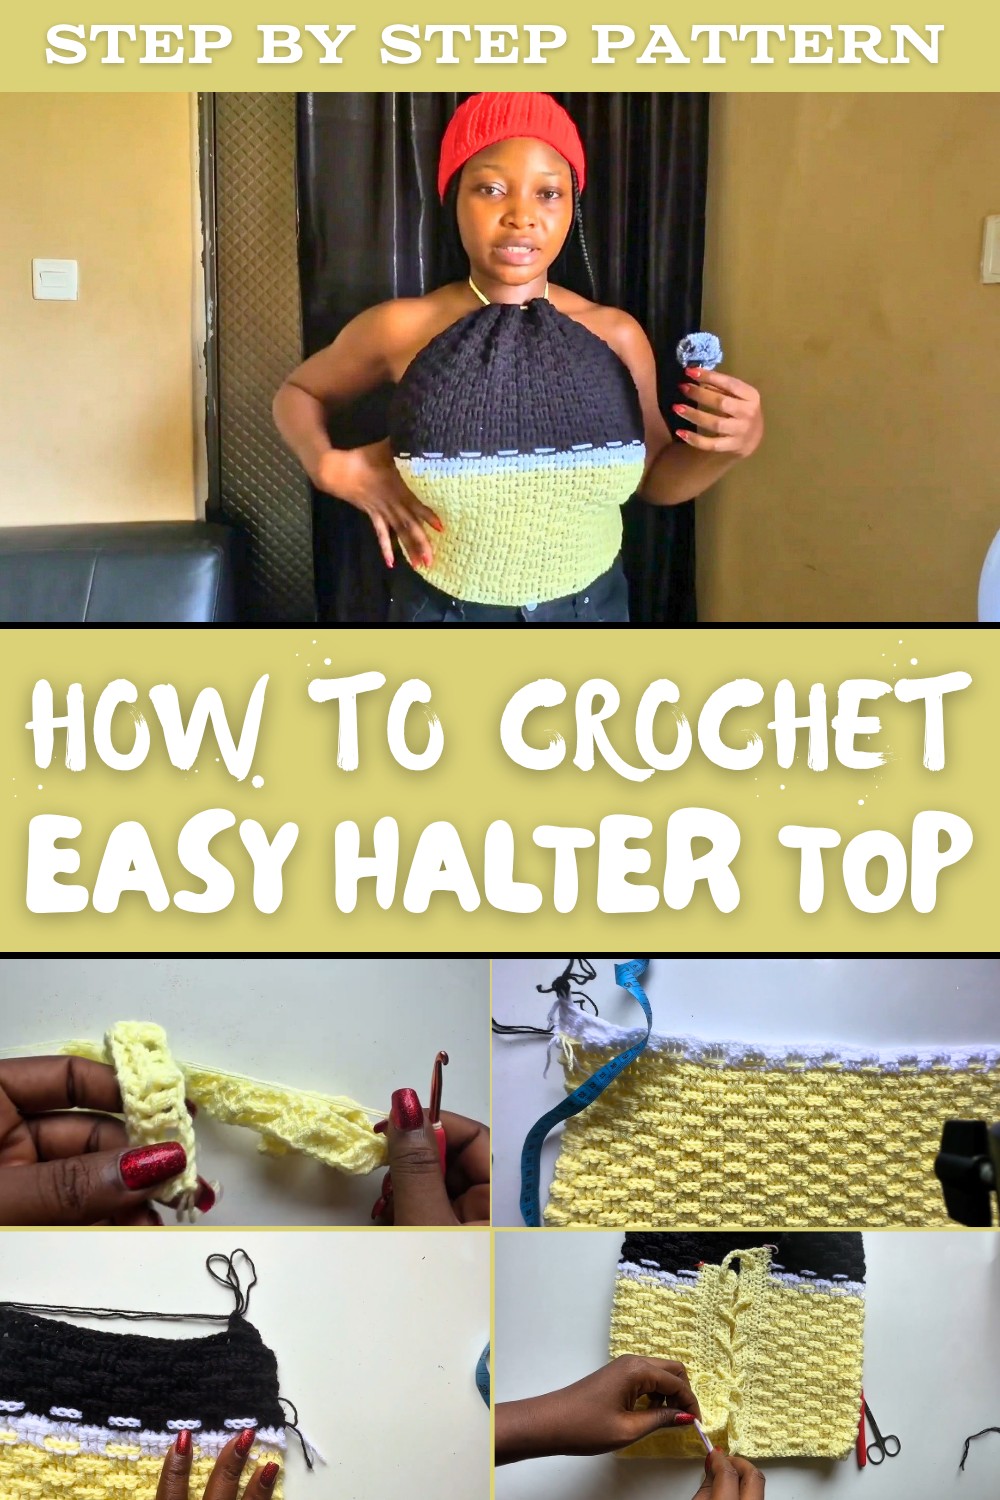
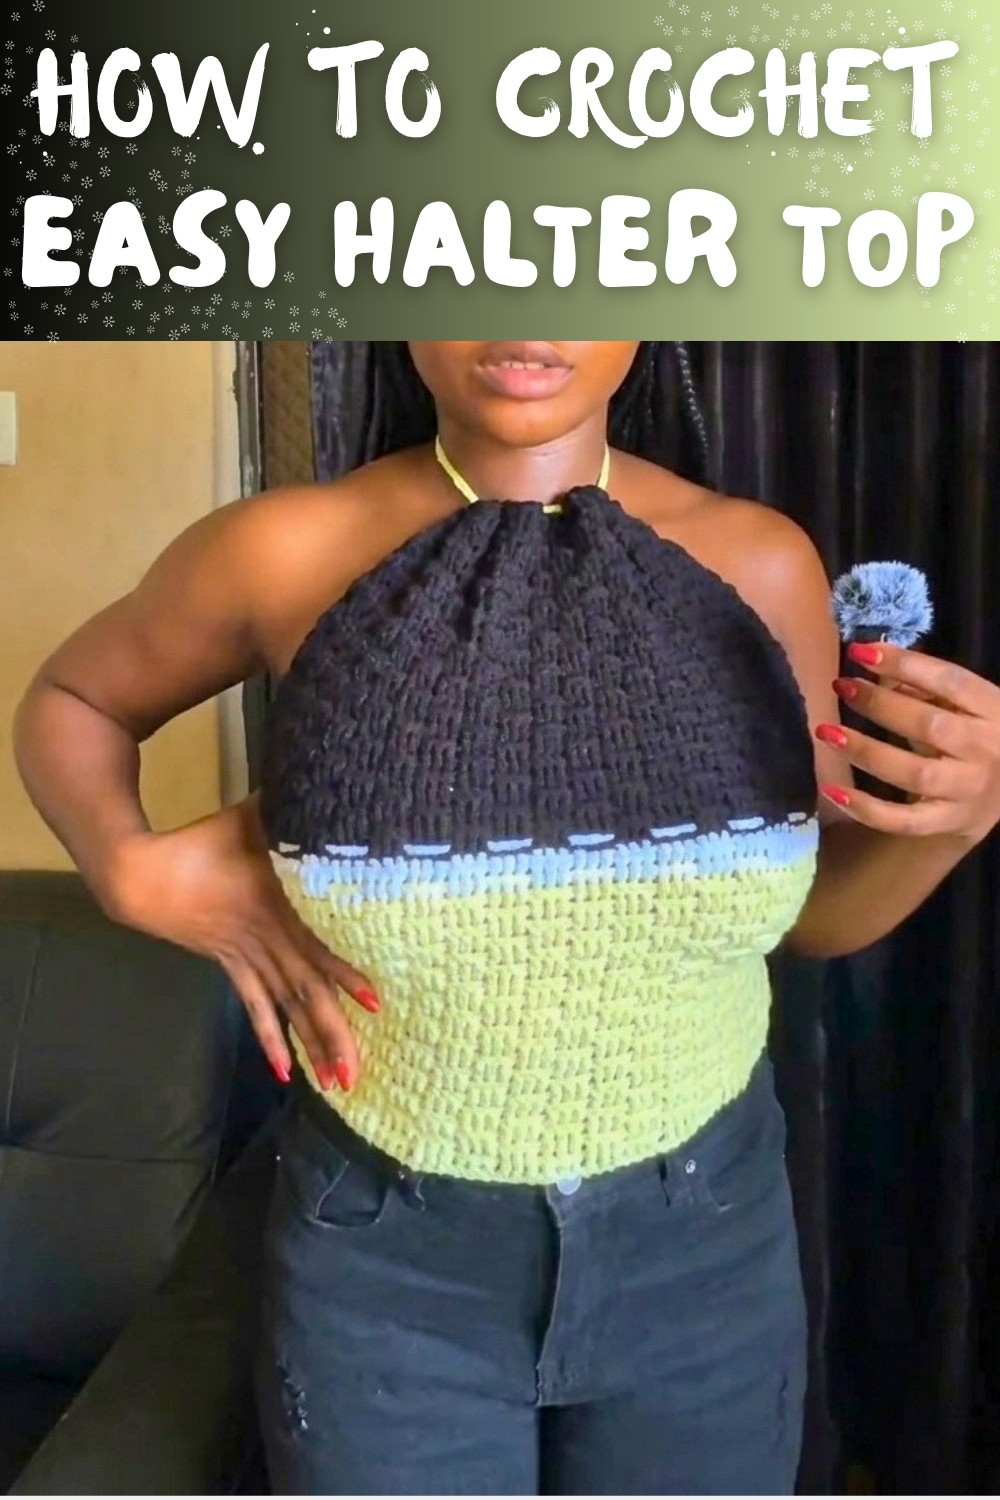
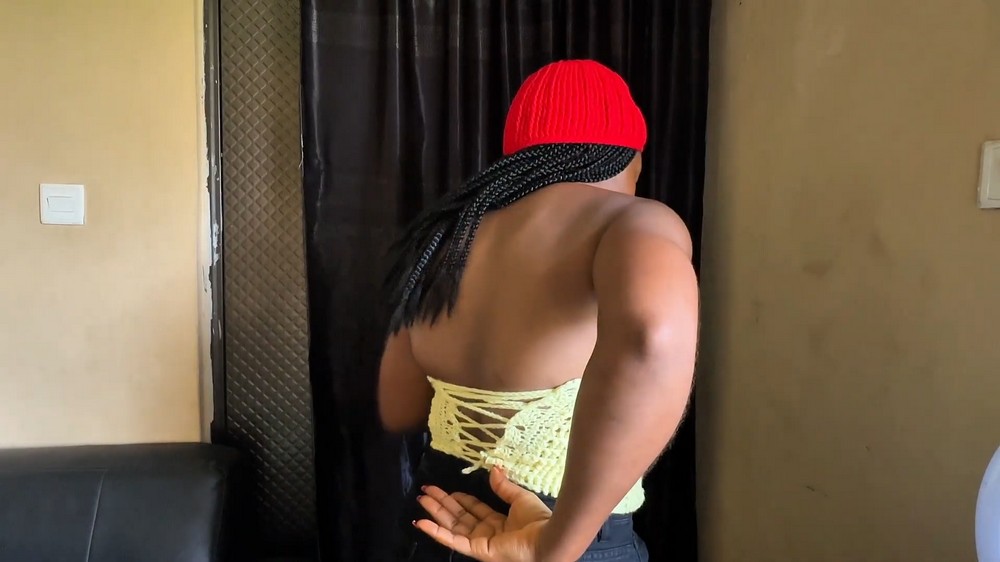
This halter top is made using a soft three ply acrylic yarn in three eye catching colors: black, yellow, and white. These bright and bold shades create a beautiful block style design that stands out. The structure of the top is unique because it combines front post and back post double crochet stitches, giving it a textured and flexible fabric. The top is adjustable, thanks to its lace up back, which makes it fit various sizes and adds a chic look.
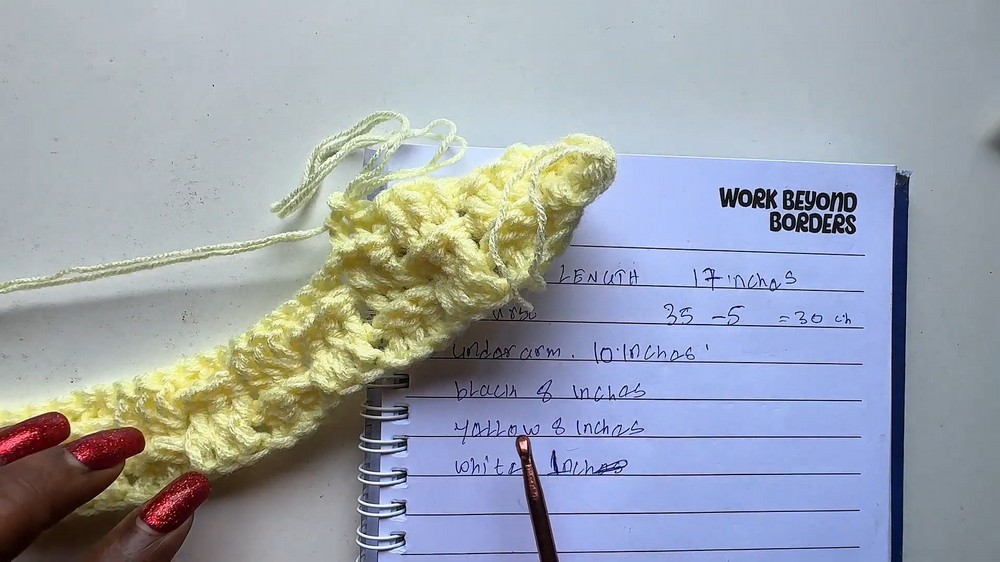
The finished halter top measures 17 inches in length, and you'll adjust it to fit your bust size by subtracting 5 inches of openness at the back. This makes it easy to create a custom, fashionable fit based on your body size. The halter ties at the neckline and the laced back add a playful and feminine touch to this wearable piece.
This crochet halter top is special with its stretchy and comfortable design, so you can wear it on sunny days, to picnics, or casually pair it with jeans or skirts. It's super beginner friendly and doesn't require much yarn.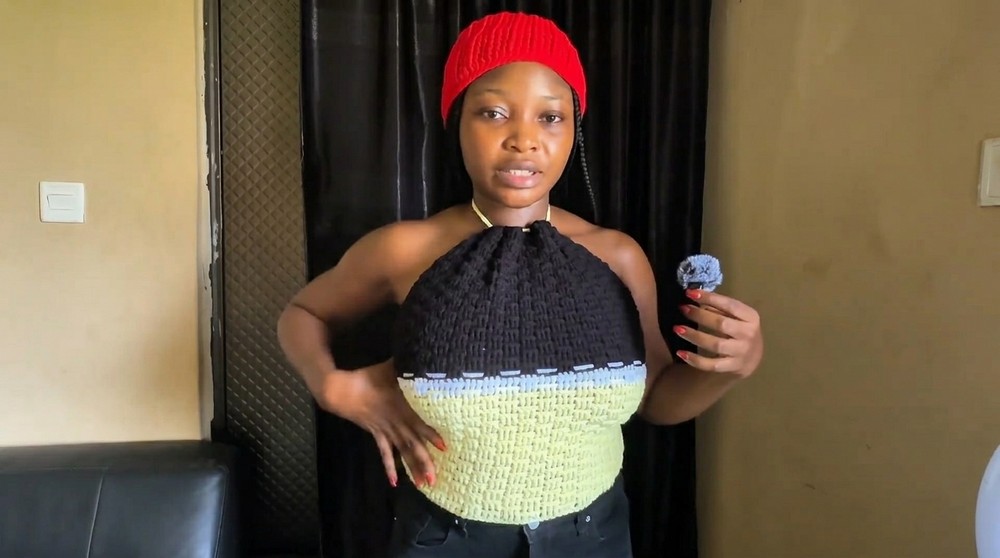
Creating this top lets you explore your creativity while making something trendy. Anyone can enjoy crocheting this, even teens or beginners. With just basic tools-a 4.5 mm hook, yarn, scissors, and patience-you'll crochet a stunning halter top that shows off your personality. Give it a try and enjoy wearing something made by you.
Crochet Halter Top Pattern (Step by Step Detailed Instructions)
Materials Needed
- Yarn: 50g acrylic three ply yarn (preferably in three colors, e.g., black, white, and yellow).
- Hook: 4.5 mm crochet hook.
- Other tools:
- Measuring tape
- Stitch markers
- Scissors
- Optional: Yarn needle (for weaving in ends).
Gauge
- 8 rows = approximately 4 inches in double crochet (DC).
- 12 stitches = approximately 4 inches in double crochet (DC).
Finished Size
- Length of finished top: 17 inches from top to bottom.
- Bust size: Flexible; instructions below allow customization (based on your own bust measurement).
- Halter lace and back opening are adjustable for different sizes.
Tips for Success
- Swatching is key: If your gauge differs significantly, adjust your hook size.
- Customization made easy: Use your bust measurement and desired coverage to modify the chain length and vertical rows.
- Color alternation: This design involves alternating between three colors (e.g., black, yellow, and white). However, feel free to experiment with color patterns of your choice.
- Stay organized: Use stitch markers to track key points like underarm starting points and back panels.
Pattern Instructions
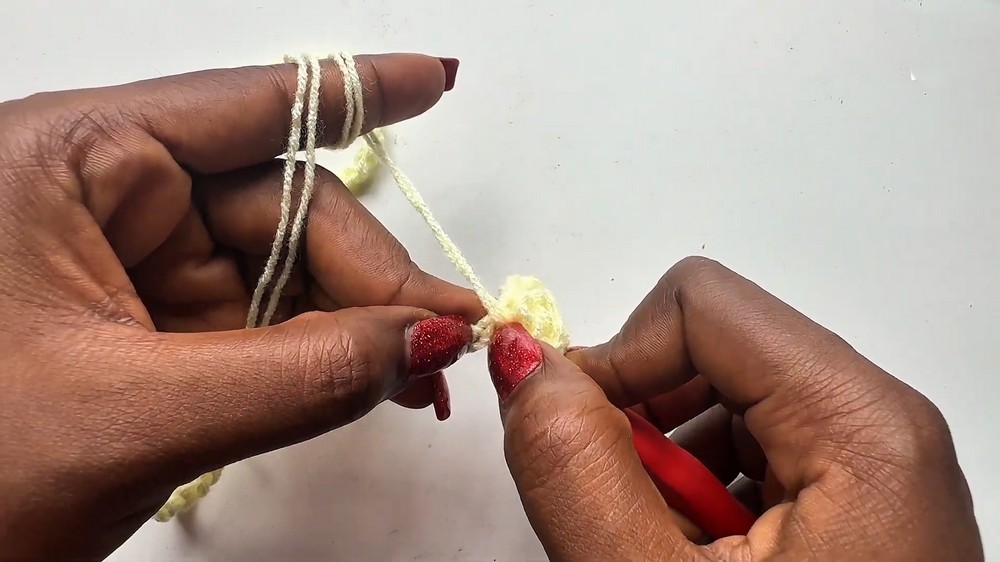
1. Foundation Chain
- Measure your bust size (e.g., 35 inches). Subtract 5 inches for an open back (e.g., 35 - 5 = 30 inches).
- Crochet a foundation chain to match the reduced bust measurement. Wrap the chain around your body to ensure it gives the desired fit with some openness at the back.
2. Row 1 (Double Crochet Row):
- Chain 1 more (for height).
- Skip the first two foundation chains.
- Crochet double crochet (DC) into the third chain from the hook.
- Continue making double crochet stitches into each foundation chain across the row.

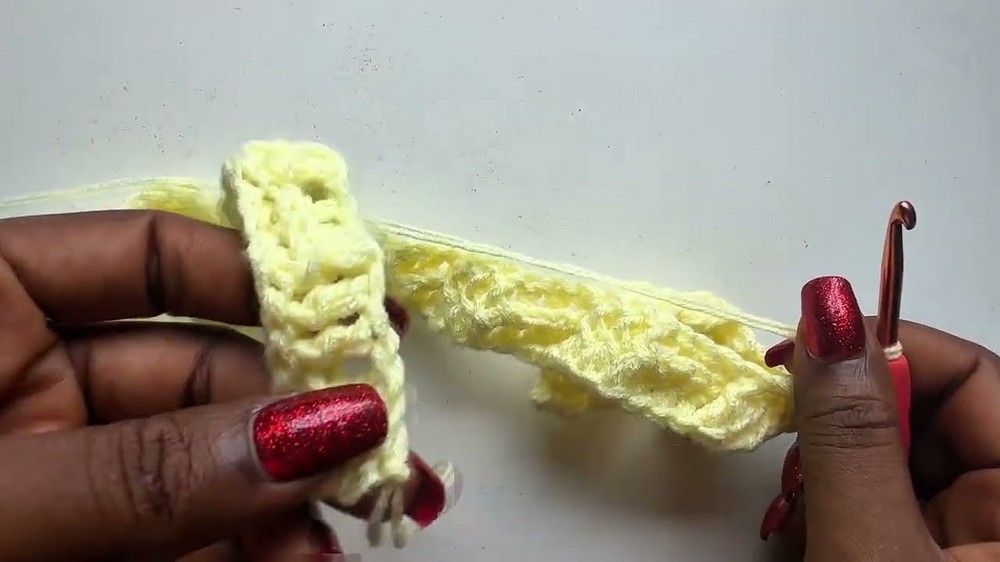
3. Row 2 (Front Post and Back Post Double Crochet):
This row introduces texture with alternating front post (FPDC) and back post (BPDC) double crochets.
- Chain 2 and turn your work.
- For the first three stitches, perform front post double crochets:
- Yarn over, insert your hook around the post from front to back to front, yarn over, and complete your double crochet as usual.
- For the next three stitches, do back post double crochets:
- Yarn over, insert your hook around the post from back to front to back, yarn over, and complete your double crochet as usual.
- Repeat the pattern of 3 FPDC, 3 BPDC across the row.
4. Row 3+ (Switching Post Stitches):
- Begin with a Chain 2 and turn your work.
- Switch the previous row's pattern:
- Where you see FPDC, crochet BPDC.
- Where you see BPDC, crochet FPDC.
- Continue until the row is complete.
5. Crochet the Main Body (Color Blocks):
We will now define color blocks for the halter neck top.
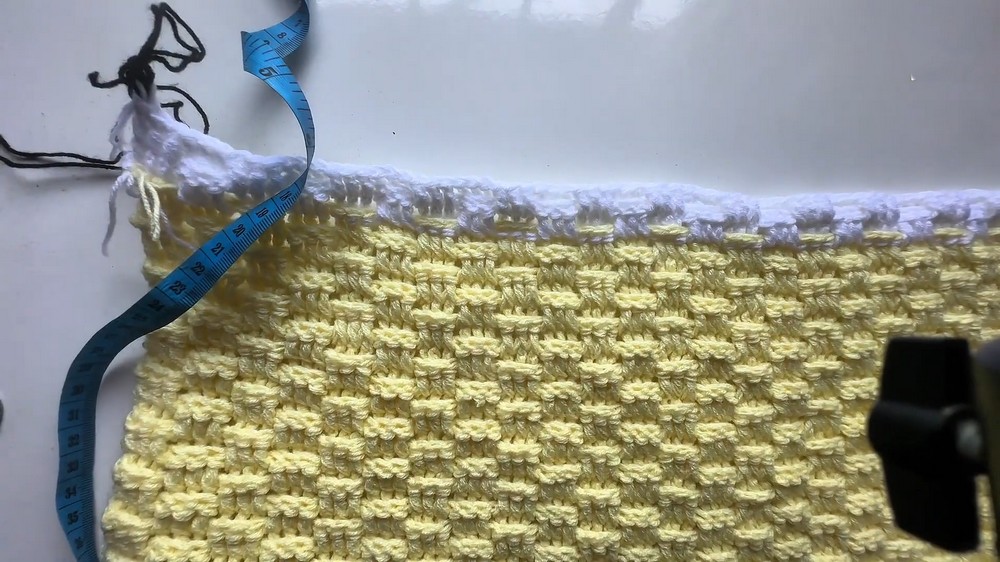
- Yellow Section:
- Continue the alternating post stitch texture until the work is 8 inches tall in yellow.
- Measure as you go to ensure the length is correct.
- White Section:
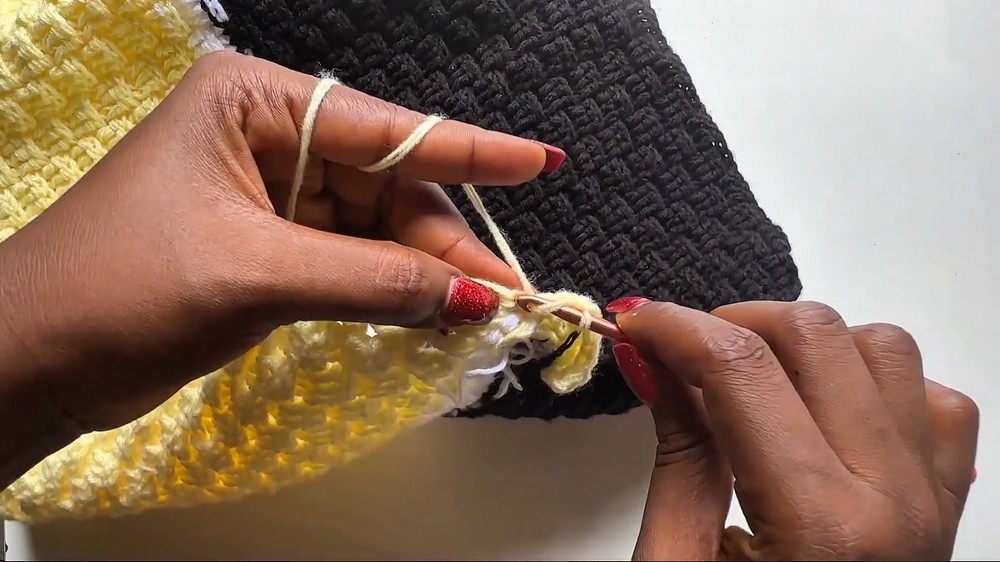
- After completing the yellow section, finish two rows in white yarn, maintaining the same post stitch pattern.
- Use a slip stitch to attach the white yarn to the last stitch of the yellow block.
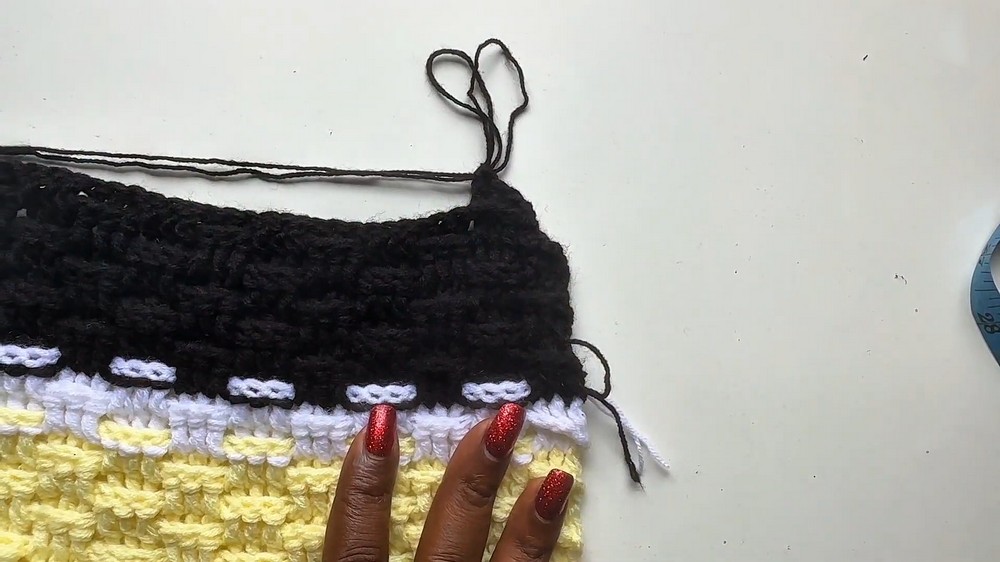
- Black Section:
- Once the white section is complete, switch to black yarn. Work until the total length from the bottom of the top to the uppermost edge is 10 inches, ensuring it matches the underarm measurement.
6. Reductions (Creating a Tapered Shape):
To ensure the top fits snugly near the underarm and neckline, reductions will begin at 10 inches.
- At the start of the row: Yarn over, insert your hook into the next stitch, pull up a loop; repeat into the next stitch. Yarn over and pull through all loops (2 stitches decreased into 1).
- Work the rest of the row as usual.
- Reduce stitches at the end of the row in the same way.
Continue reducing at the beginning and end of each row until the work reaches the neckline.
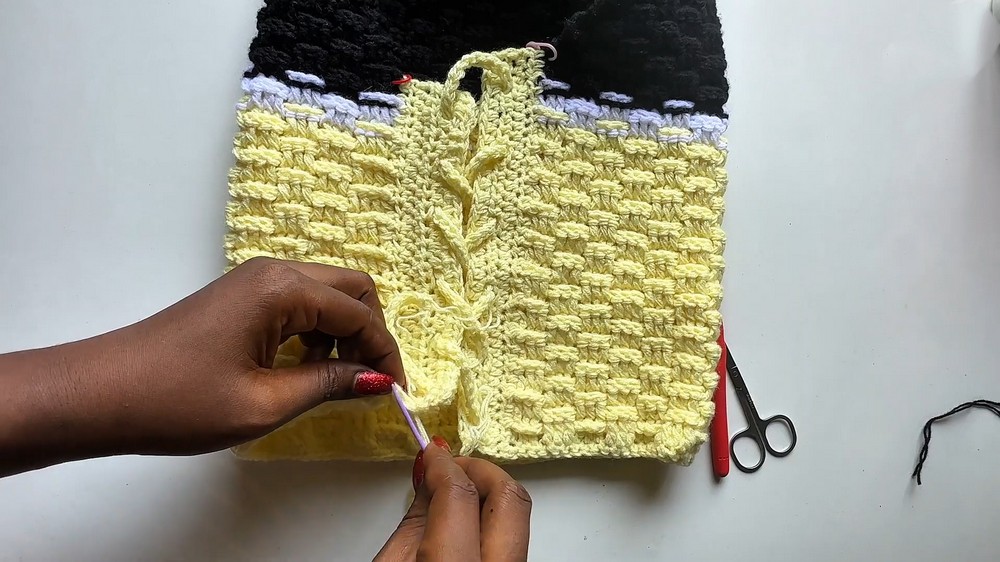
7. Back Lace Panels
The back lace panels add a corset style detail to the open back design.
- Work half double crochets (HDC) along both sides of the back.
- For each row, make:
- 2 HDC stitches per row along the side edge.
- Use this panel to include holes for lacing:
- On the third row, Chain 1, skip two stitches, and HDC into the third stitch to create evenly spaced holes.
- Work evenly to ensure both sides match in the number of rows and spacing of holes.
8. Creating the Neckline:
- Chain approximately 120 chains (or more for desired halter length).
- Thread the chain through the upper edge of the top, ensuring it aligns evenly.
- Tie at the back of the neck.
9. Lace for the Back:
- Make a chain 180-200 stitches long for the lace.
- Slip stitch along the chain for added thickness.
- Thread the lace through the back holes in a criss-cross pattern. Adjust for tightness to fit your body perfectly.
Customization Ideas
- Playing with colors: Add additional color blocks, or use gradients.
- Adjusting the opening: Modify the bust chain or reduce fewer rows for a wider back opening.
- Neckline design: Experiment with a decorative border or beads on the halter tie.
- Lace style: Use ribbons or braided yarn for tying at the back.
Conclusion and Final Remarks
This crochet halter neck top is stylish, customizable, and perfect for various occasions. With its open back and fitted structure, it's flattering for multiple body types. The three-yarn block pattern allows room for creativity, letting you choose your favorite colors and textures.
Don't forget to weave in all ends securely and trim excess yarn to give your top a clean finish. Whether worn casually with jeans or paired with skirts, this handmade creation is sure to stand out.