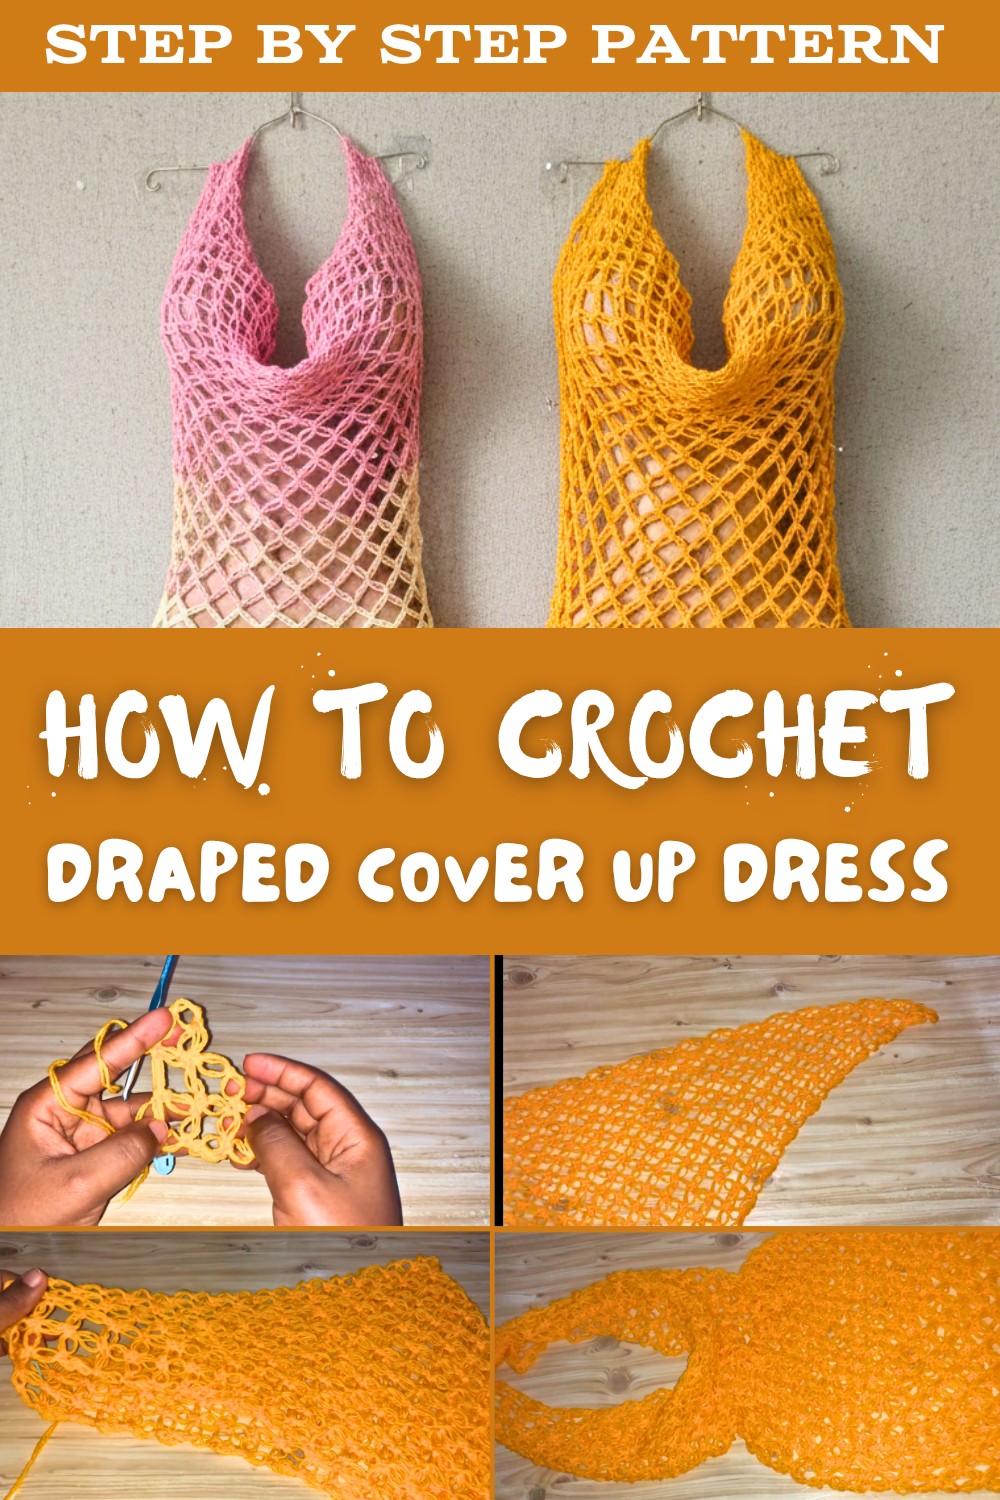
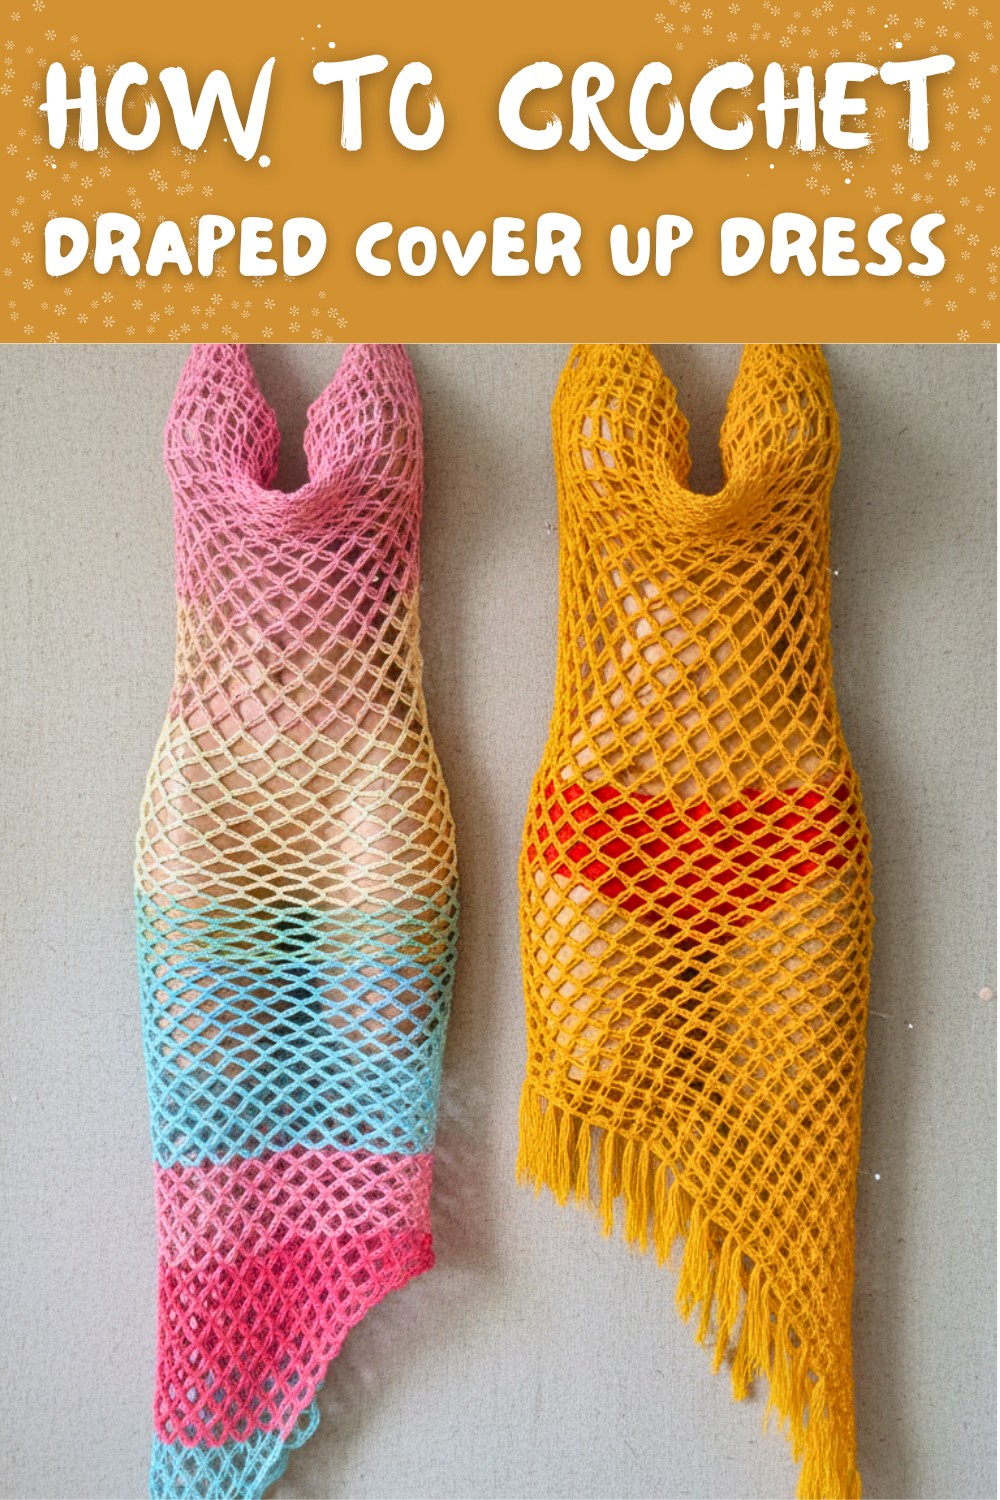
Crochet Draped Cover Up Dress Free Pattern Using Solomon Stitch
Whip up a cozy and flowy crochet dress that’s perfect for twirling at the beach or relaxing in the sun with this super easy and fun-to-make pattern.
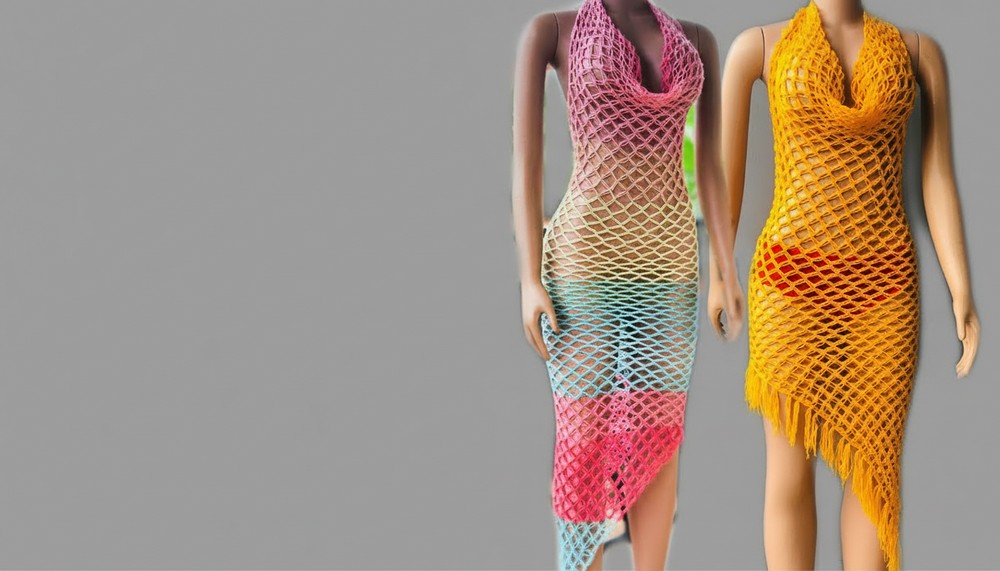
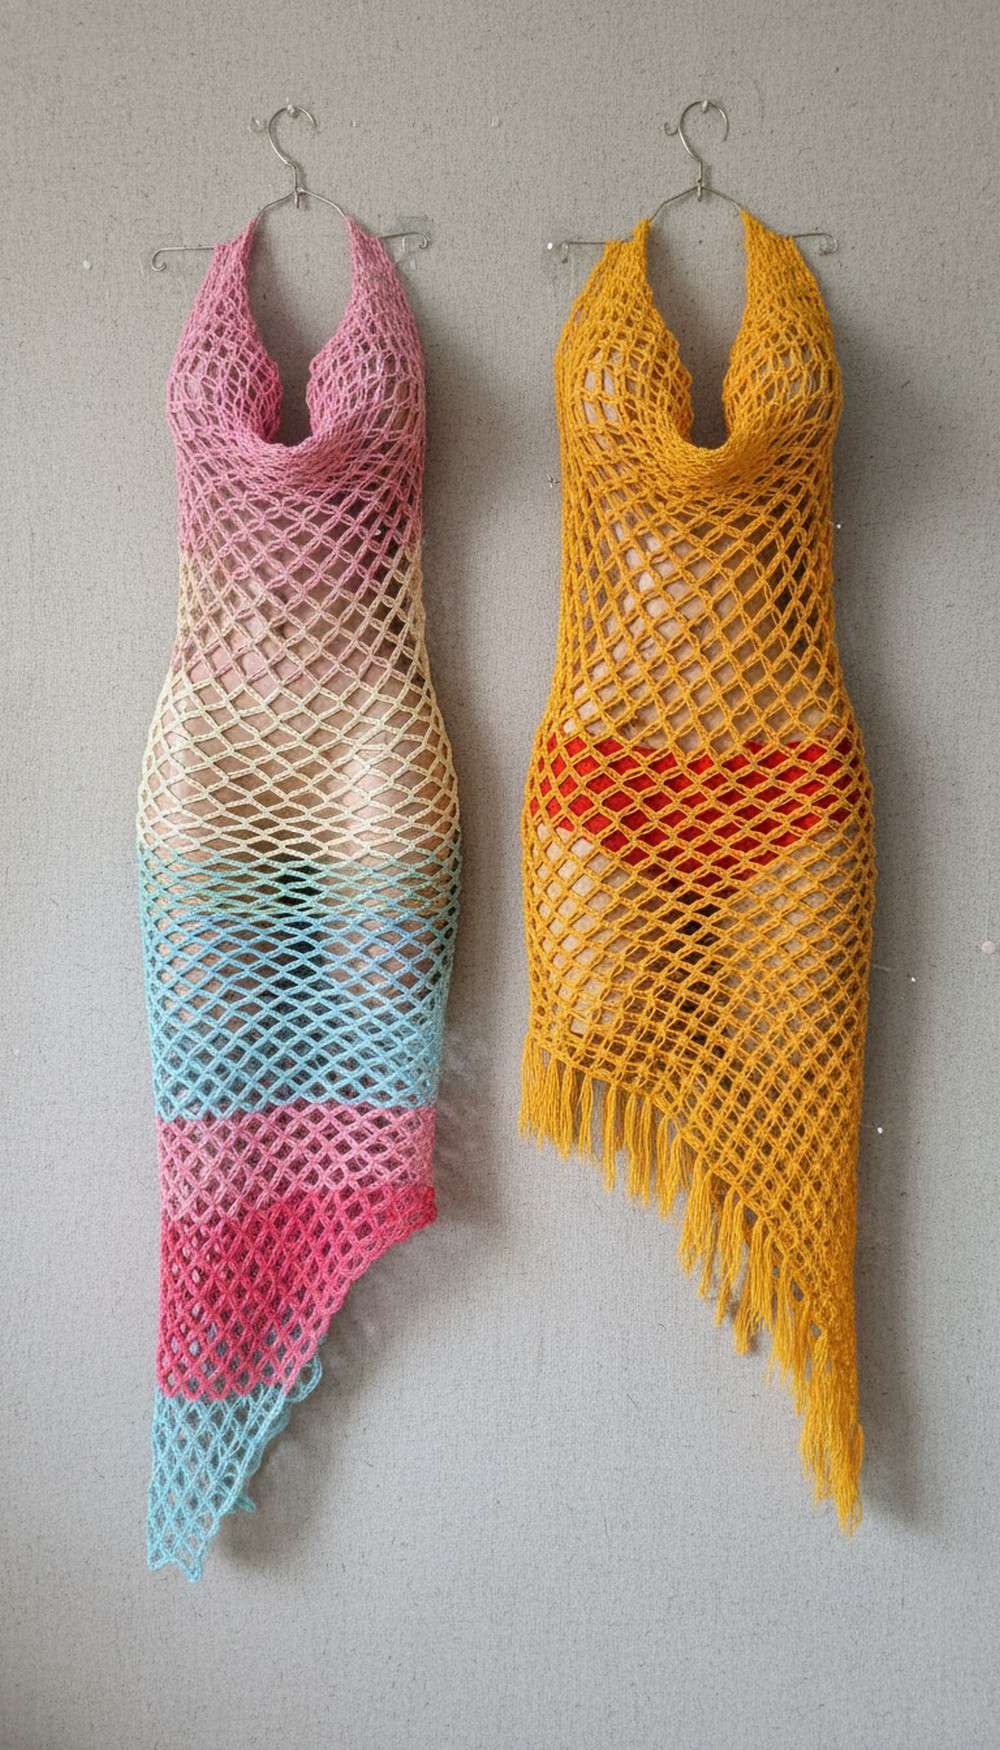
Wrapping yourself in a soft and flowing dress that feels as light as a cloud. This beautiful draped cover-up dress is perfect for adding a touch of elegance to your look, whether you’re heading to the beach, relaxing by the pool, or enjoying a sunny day outdoors. Its loose and airy design makes it super comfortable to wear, and the unique crochet pattern adds a delicate and stylish texture that catches everyone’s attention.
Free Crochet Draped Cover Up Dress Pattern with Optional Fringes
The dress gently hugs your curves while staying breathable, making it a great choice for warm weather. You can wear it over swimsuits or even pair it with your favorite top and jeans for a casual and chic style. The fringed edges and flowing shape give it an extra special touch, making it a must-have for anyone who loves lightweight, timeless fashion. It’s simple, stylish, and absolutely stunning.
Crochet Draped Stitch Cover-Up Dress Pattern
Skill Level
Intermediate
Materials
- Yarn:
- Mandala Baby Ombré Yarn (or similar lightweight acrylic yarn). You’ll need approximately 3.5 balls of 50 grams each for a medium-sized dress.
- Alternative: Use Robin acrylic yarn (doubled strands suggested for medium weight).
- Hook: 4mm (G-6) crochet hook.
- Stitch Marker: To mark key points.
- Tape Measure: For measurements and ensuring proper size.
- Scissors: For trimming yarn ends.
- Optional: Darning needle for weaving in ends and adding chains/fringes.
Special Techniques & Abbreviations (US Terminology)
- ch: Chain
- sc: Single Crochet
- sl st: Slip Stitch
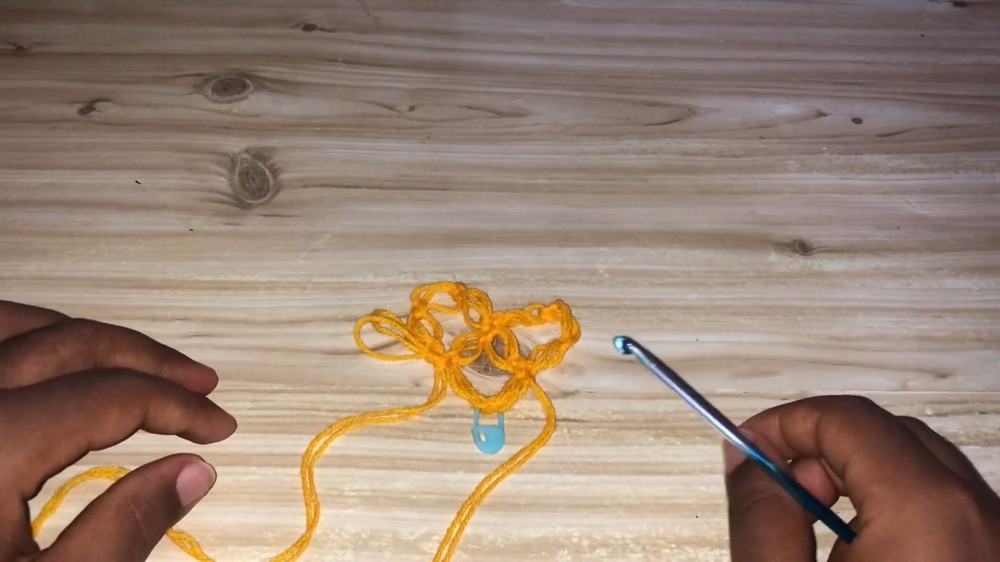
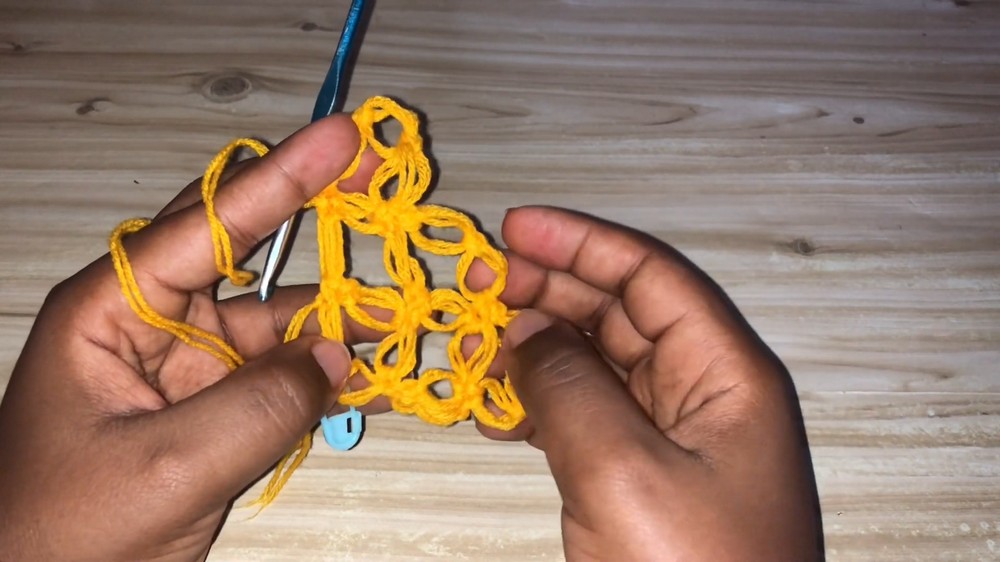
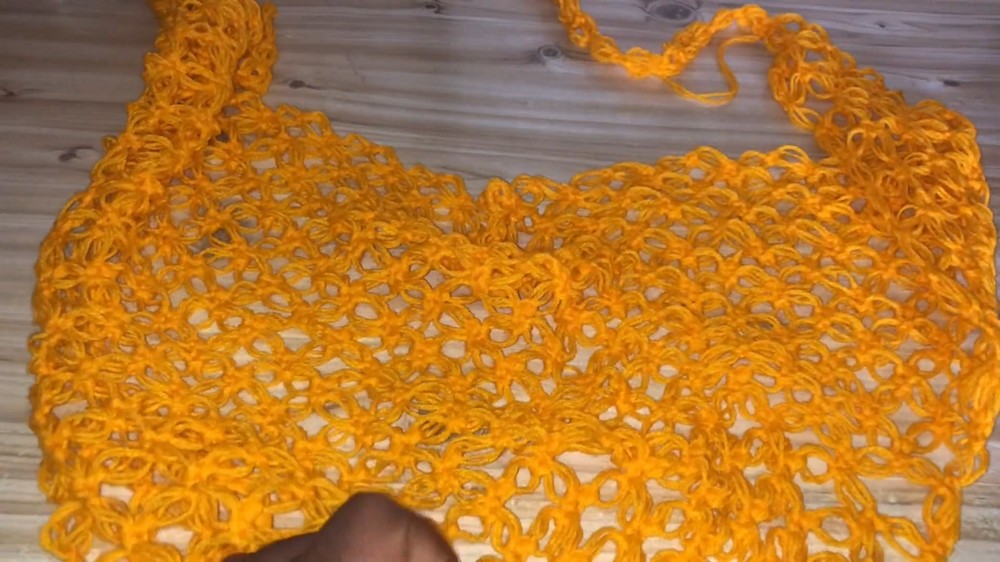
- Solomon Stitch (Lover’s Knot):
- Pull up a loop to about 1 inch, yarn over, pull through the loop to create a chain-like knot, then make 1 single crochet into the knot.
- Repeat as needed for the stitch pattern.
- Skip Stitches: Skip a designated number of stitches to create lace-like texture.
Pattern Suggestions
- Adjustments for Sizing: This dress can be made for any size by adjusting the width (initial rows) and length (number of rows or rounds). Refer to the main instructions for scaling guidance.
- Fringes: Optional for decorative edging.
- Chains: Optional for creating ties at the neck or back.
Pattern Instructions
Step 1: Body Base
- Foundation Chain:
- Begin with a slip knot.
- Pull up a loop approximately 1 inch long for the first Solomon Stitch.
- Yarn over and pull the yarn through the loop to create a knot, then make a sc into the knot to secure the stitch.
- Place a stitch marker on the base of the stitch for reference.
- First Row:
- Pull up a loop, yarn over, create another knot, sc into the knot.
- Repeat the Solomon Stitch to make a total of 4 stitches.
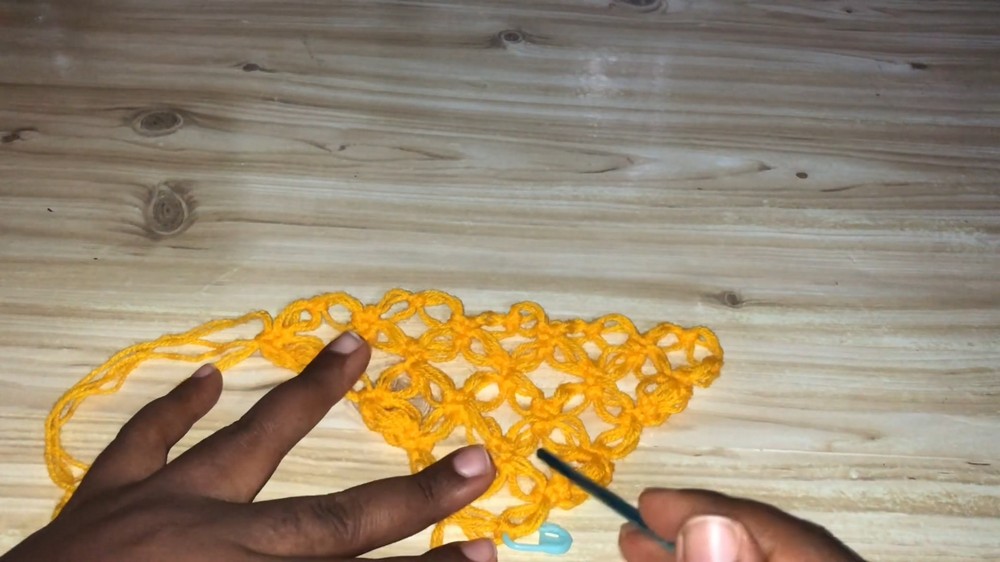
- Continue Row Pattern:
- At the end of the row, turn your work.
- Make 3 Solomon Stitches to start each row and place 1 sc into the next st (skipping the previous stitch marker point).
- For row ends, always end with 3 Solomon Stitches followed by 1 sc.
- Repeat Rows:
- Continue building rows using the Solomon Stitch, ensuring the texture is even and consistent.
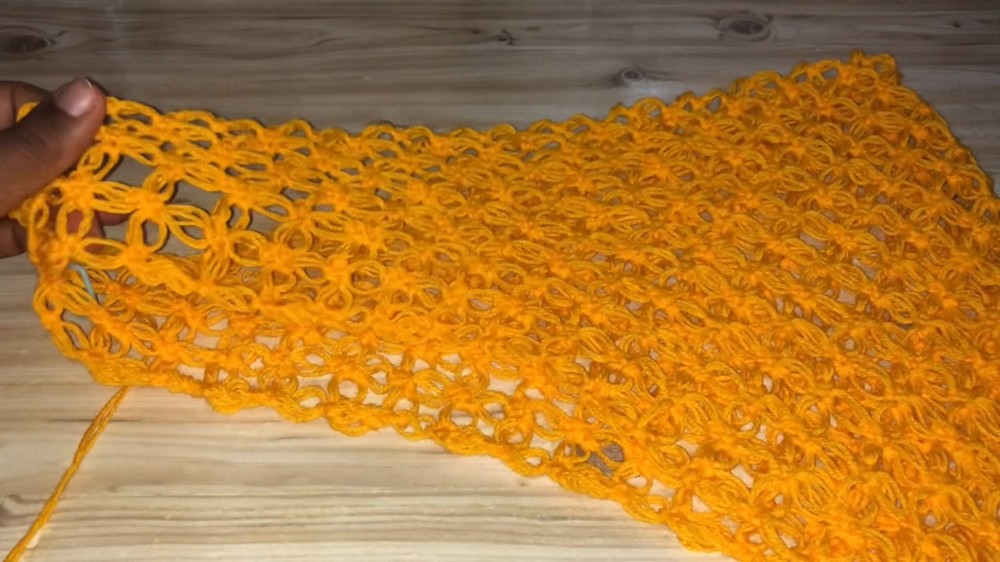
- Work until the dress measures the full hip circumference unstretched. Example for a medium size: 34 inches unstretched, 43 inches stretched.
Step 2: Transition to Rounds
- Fold the rectangle base lengthwise.
- Slip Stitch to Join Edges:
- Skip the first sc at the edge and slip stitch into the next sc.
- Begin working in Solomon Stitch rounds from this point.
- First Round of Body:
- Start with 2 Solomon Stitches, then place 1 sc into the next sc of the previous round.
- Continue working 2 Solomon Stitches + 1 sc into the next sc around.
- End of Round:
- Do NOT slip stitch to end the round. Instead, place a stitch marker at the start of the round to track progress.
- Continue rounds working the same 2 Solomon Stitches + 1 sc pattern.
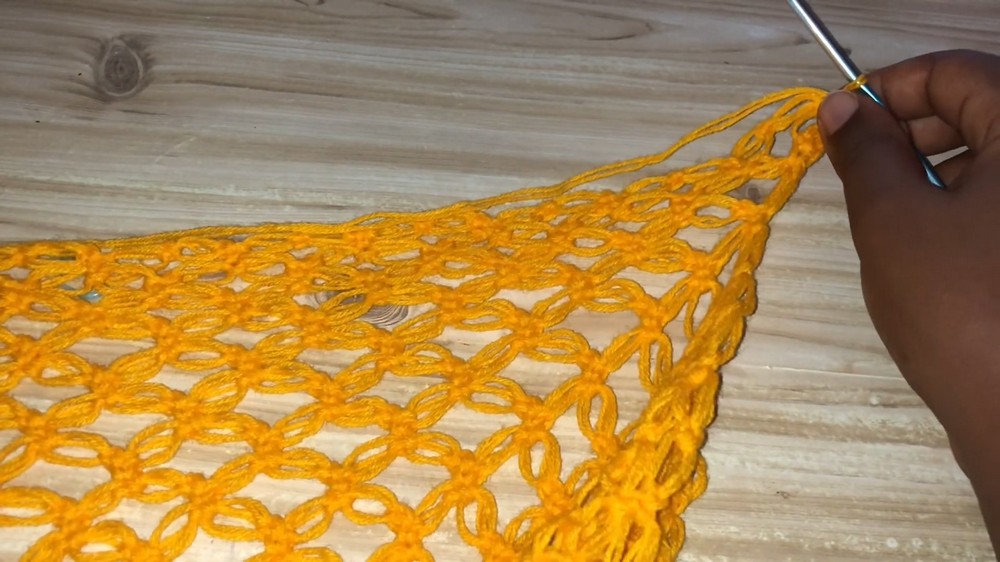
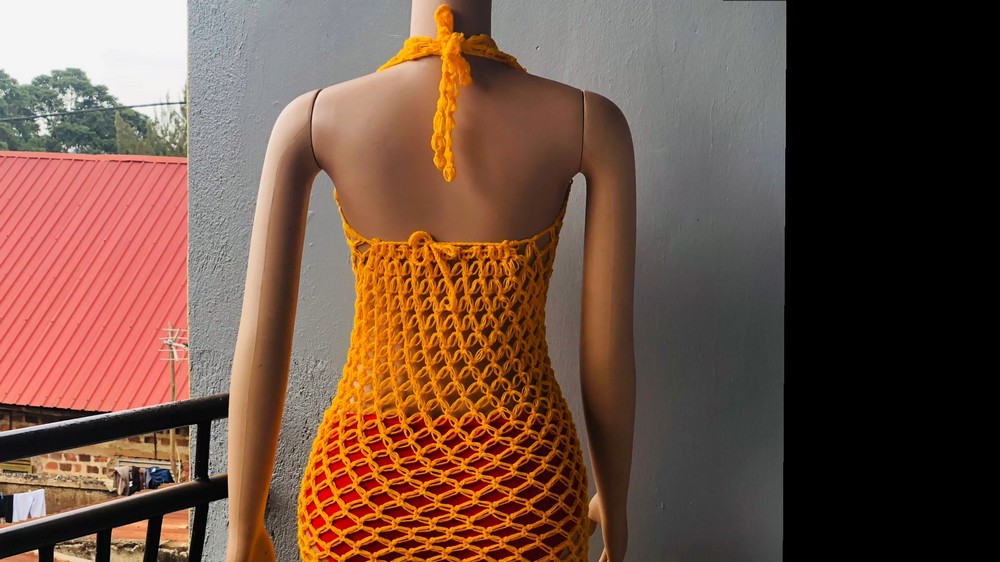
Step 3: Create Upper Portion
- Work Solomon Stitch rounds until the dress reaches the underbust measurement or desired length.
- Example: Add 25 more rounds to reach underbust for a medium size.
- Increase Rows for Neckline:
- Once underbust height is achieved, start working in rows again.
- Begin with 3 Solomon Stitches at the start and end each row with 3 Solomon Stitches to increase width for the neckline.
- Add 12 rows of increases.
Step 4: Create Neckline Chains
- First Chain:
- Make a long chain using Solomon Stitches (e.g., 15 loops) for one side of the neckline.
- After finishing the chain length, turn and work Solomon Stitches over the chain to finish it securely.
- Second Chain:
- Repeat the same process for the second side of the neckline.
Step 5: Back Tie Chain
- To secure the back:
- Make a simple long chain using Solomon Stitches.
- Thread the chain through the loops on the back portion of the dress, crisscrossing for a decorative tie look.
Step 6: Add Fringes (Optional)
- Cut yarn into 7-inch long strands, folding them in half for each fringe.
- Attach fringes:
- Insert the folded fringe into each knot or sc space at the bottom edge of the dress.
- Pull through to create and secure the fringe knot.
- Repeat for all sc spaces to create an even fringe around the bottom.
Finishing
- Secure Loose Ends: Use a darning needle to weave in all loose ends neatly.
- Stretch and Block:
- Stretch the dress gently and block it to maintain the Solomon Stitch texture.
Final Words
Congratulations on completing your Solomon Stitch cover-up dress! This lightweight and elegant design is versatile and perfect for the beach or casual summer wear. Share your creation with friends, or experiment with different yarn colors to personalize your piece even further.
Tips to Maintain the Pattern
- Tension Consistency: Solomon Stitch relies heavily on consistent loop sizes; ensure all loops are uniform to maintain texture.
- Sizing Adjustments: Measure at key points (hip, underbust) for custom fit adjustments.
- Stretch-Friendly Yarn: Choose yarn with stretch potential for comfort and better fit.
- Decorative Elements: Experiment by skipping fringes, adding beads, or replacing chains with ribbons.