
Cheerful Crochet Rug Free Pattern For Cozy Living Areas
Refresh your living space using this free crochet rug pattern, a soft handmade rug that brings comfort, warmth and style to any room.
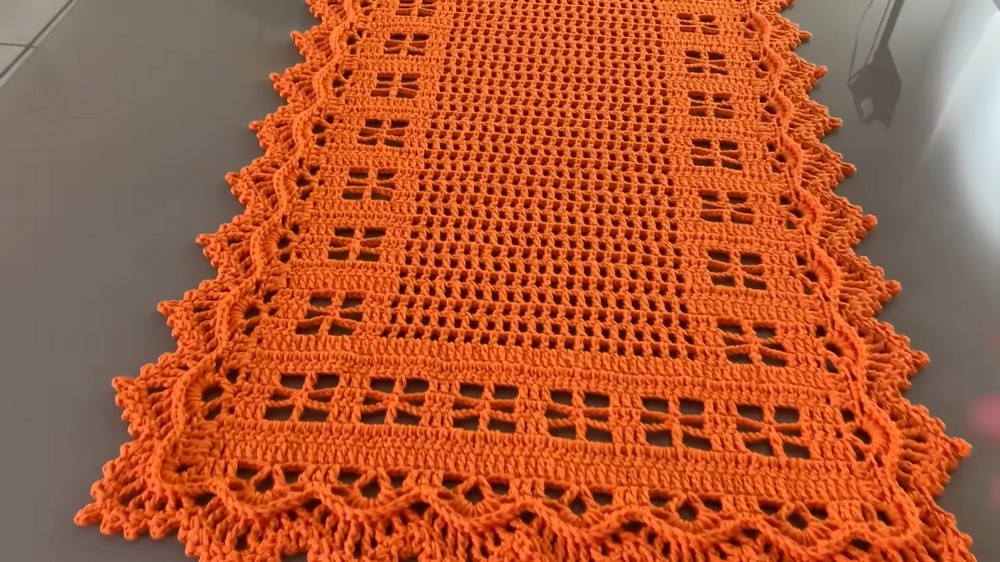
Want to add a personal touch of elegance to your home? this Rug is the perfect project for you. Versatile and beautiful, this piece features stunning motifs that create a combination of texture and style. Whether you want it as a centerpiece for your table or a cozy addition to your living room, this design is sure to enhance any space. The rug can be customized to suit your preferences, from a hollow and lightweight design to a solid and durable one.
The Cozy Free Crochet Rug Pattern That Home Decor Lovers Will Save

You can adjust the size, length, or width with ease, making it suitable for different table styles and uses. Need a more solid, structured piece? Simply work with double crochet stitches, and you'll have a sturdy table runner or a rug. The choice of yarn also allows you to make it soft and cozy with 100% cotton or more structured with a cotton blend. Either way, your creation will be both durable and easy to maintain.
This crochet rug also provides a relaxing and enjoyable crocheting experience. Its repetitive patterns make it beginner friendly, while also giving experienced crocheters the chance to showcase their skills. The final touch is the delicate picot edging, which creates a polished and elegant border for the design. Whether you're working on this project for your own home or as a gift, the beauty and craftsmanship of the rug will leave a lasting impression. Dive into this fun and satisfying project and make something truly special.
Crochet Rug Pattern
Materials Needed
- Yarn: 100% cotton or a blend (85% cotton or more recommended). The video uses 8/6 cotton thread. You can select colors of your choice.
- Hook: 2.5mm or 3mm crochet hook. Adjust according to your yarn's thickness for proper tension.
- Tapestry needle: For weaving in ends.
- Scissors: For cutting the yarn.
- Optional: Clear fabric glue (non instant works too) for securing finishing knots.
Special Techniques
- Elongated Double Crochet: Yarn over, insert the hook, pull the loop, yarn over, and pull through one loop, then yarn over and pull through two loops twice.
- Picot Stitch: Chain 3 (or 6 for larger picots), insert the hook at the base of chain stitches, pull through all loops and close with a slip stitch.
Pattern Instructions
Base Foundation - Starting the Cord
- Begin with a foundation of 68 chains. Keep the chains loose to avoid tightness.
- After chaining 68, work a double crochet (DC) into the 5th chain from the hook. Continue working one DC in each chain across. In total, you'll have 65 DCs, counting the turning chain as your first double crochet.
Setting Up the First Motif
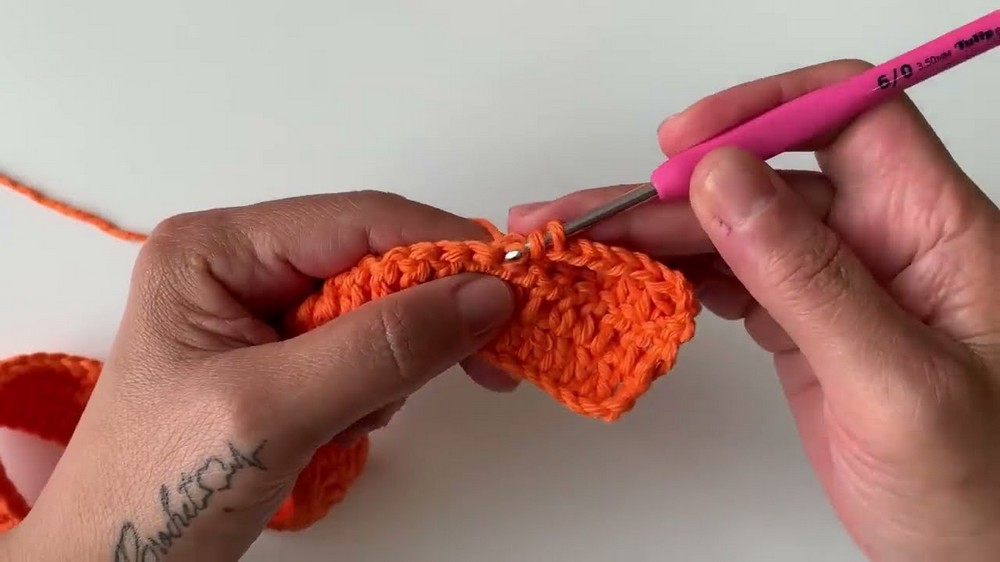
- Row 1: Chain 3 (acts as the first DC) and turn. Work a DC in each stitch across for a total of two rows of DC stitches for the base foundation.
- Row 2: Chain 3, turn, and work the first 4 DCs. Chain 3, skip 3 stitches, and make an elongated double crochet in the 4th stitch. Chain 3 again, skip 3 stitches, then make a sequence of 3 DCs. This forms the first motif.
- Continue alternating the 3 chains + elongated DC and 3 DC sequences across the row. You should have 6 motifs in total. Finish with 4 DCs at the end.
Building Subsequent Rows
- Row 3: For the next row, repeat the first motif pattern. Start with the initial 4 DCs of the row.
- Chain 4, single crochet (SC) into the top of the elongated DC from the previous row, chain 4 again, and work a DC in each of the next 3 DCs of the motif.
- Repeat this pattern (4 ch + SC + 4 ch + 3 DC) over each motif. Work 4 DCs at the end of the row.
- Row 4: Work 4 DCs first. Repeat the initial motif pattern: chain 3 + elongated DC + chain 3, and then 3 DC stitches.


You've now created your first full motif. Repeat rows 3 and 4 across the length of the table runner to create your desired number of motifs.

Customizing the Size
To adjust the length: Simply add more motifs by repeating rows 3 and 4.
To adjust the width: Increase or decrease the initial chain by increments of 10. Correspondingly, add or subtract a motif using the given instructions.

Adding Central Spaces
- As you progress, after completing the required motifs on both sides, continue the center of the table runner by forming 19 spaces:
- Work 1 DC, 1 chain, skip 1, and 1 DC repeat across the row until 19 open spaces are formed.
- Ensure the start and end of each row have 4 DCs aligned with the motifs' DCs for symmetry.

Final Border
After completing your desired length, finish the base of the table runner with two rows of DC stitches for uniformity before adding the edging.

Edging - Creating the Decorative Picots
Step 1: Start the Edging
- Begin on one side of the table runner. Chain 7 and make a V stitch (1 DC, 4 ch, 1 DC) into the same space.
- Move to the next part of the row and create groups:
- For rows with 2 rows of DC: Make 4 DC stitches (2 in each DC row), followed by 1 chain to separate.
- For rows with motifs: Create a V stitch (1 DC, 4 ch, 1 DC), skipping the first DC of the motif, and continue alternating.
Step 2: Corner Work
For creating corners, use a V stitch (1 DC, 4 ch, 1 DC) and continue evenly across edges. The key is to keep corners sharp and symmetrical.
Step 3: Finishing the Second Layer
- Crochet a second layer of edging in relief DC stitches for an elevated design. Work this entire layer taking the DC stitches from behind the previous rounds to create a dimensional look.
- Pay attention to the corners and handle them uniformly, as explained above.
Final Steps
- Add the picot stitch to the outermost row: On every chain of the relief row, do a SC followed by a picot stitch. In spaces with 2 chains, crochet 2 SC stitches, one long picot (chain 6), another SC, and finish the space with a smaller picot (chain 3). This detail adds a sophisticated finish.
- To finish, fasten off and weave in ends securely.
Finishing Your Work
- Use a tapestry needle or a crochet hook to weave in any loose ends neatly behind the stitches.
- To further secure the ends, split the strands of the thread using a fine needle, tie two small knots, and trim the excess. Add a drop of clear fabric glue to make it even more secure if desired.

Final Words and Tips
- Customization: This pattern is versatile. You can make it wider, longer, or narrower simply by increasing/decreasing chains and repeating motifs. It's perfect for various uses as a centerpiece, table runner, or even as a rug if using thicker yarn.
- Yarn Choice: Cotton yarn works best as it provides structure and durability. Choose colors that match your décor or the season (e.g., orange for autumn, red for holidays).
- Use Quality Tools: Use a comfortable hook size for your chosen yarn. If needed, experiment before starting the project to ensure the best tension and stitch definition.
- Blocking: Once finished, block your piece to ensure clean edges and to highlight the intricate details of the motifs. Simply pin the piece flat on a foam board, spray lightly with water, and let it dry completely.
- Gifting Idea: This table runner makes a thoughtful handmade gift for loved ones, especially if made in their favorite colors.
Conclusion
Congratulations, Your stunning table runner is now complete. Whether you're making it for yourself or as a gift, its elegant design and personalization will surely bring charm to any table or space. Remember to keep practicing and share your creations.
