
Free Crochet Pumpkin Keychain Pattern for Holiday Favors
Bloom into creativity with this Crochet Beautiful Pumpkin Keychain Pattern, a fun and easy project to make a tiny pumpkin that looks adorable on any bag.
The pumpkin keychain is a simple yet adorable design that will add a fun and creative touch to your daily life. It is small, lightweight, and the perfect size for a keychain, making it both practical and cute. Whether you want to keep it for yourself or gift it to friends and loved ones, this pumpkin keychain is a thoughtful handmade accessory that is sure to impress. This easy to make design uses Alize Cotton Gold yarn, which makes the pumpkin soft yet durable. The warm colors of the yarn make the pumpkin look cozy and cheerful, and you can choose different shades based on your preference. Crocheted with a 2 millimeter hook, the keychain features neat stitches and smooth rows that give it a polished and tidy look.
Free Crochet Pumpkin Keychain Pattern for Seasonal Displays

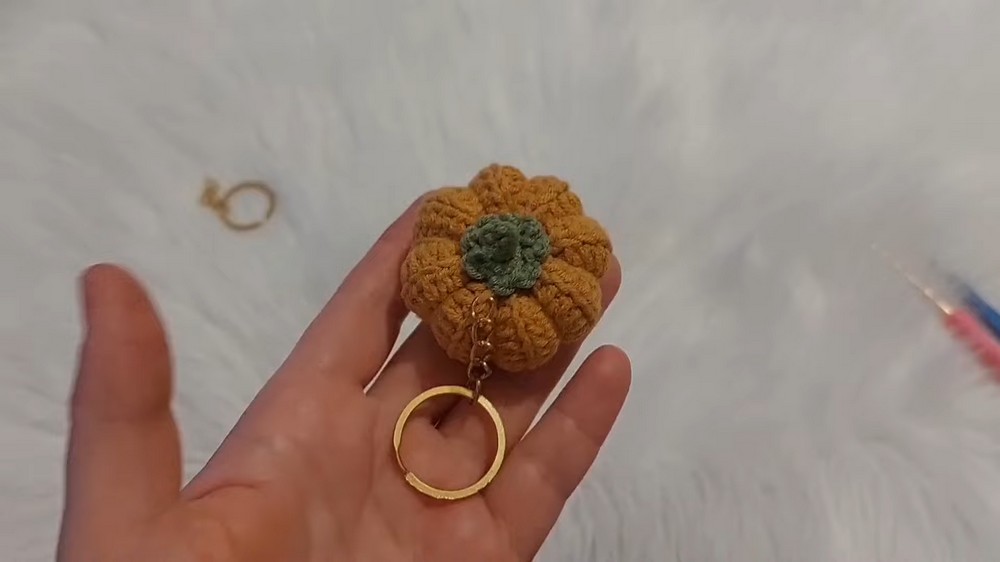
Uniquely crocheted, this pumpkin can also serve as a pincushion or a decorative item to place in front of your mirror or desk. Its realistic stem and small green leaf add charm and detail, making the pumpkin look just like its real life counterpart. The thoughtful assembly ensures the accessory is sturdy and long lasting-a perfect companion to keep your keys organized or as a seasonal decoration.
What sets this pumpkin keychain apart is its versatility and handmade charm. By following simple techniques like chaining, half treble stitches, and sewing, you can adjust the size and colors of your pumpkin design to make it truly unique. The silicone filling gives it just the right shape and makes it soft to hold.
This charming pumpkin keychain is quick to crochet and ideal for beginners. It is more than just a keychain; it is a delightful way to showcase your love for thoughtful, handmade creations.
Crochet Pumpkin Keychain - No‑Sew Body
Materials
- Yarn
- Main colour (pumpkin): Alize Cotton Gold or similar DK / light worsted cotton blend.
- Green yarn for leaf and stem: same weight as main yarn.
- Hooks
- 2.0 mm hook (for the pumpkin body).
- 1.75 mm hook (optional, for the leaf and stem - gives a neater, smaller finish).
- Filling
- Polyester fiberfill (sometimes called silicone fiber in the pattern).
- Notions
- Tapestry (yarn) needle.
- Scissors.
- Stitch marker (optional).
- Keyring / keychain hardware.
- Fabric glue or hot glue (silicone glue) if you prefer gluing the leaf top instead of sewing.
- Optional lighter to slightly seal knotted thread ends (only if safe and familiar with this technique).

Abbreviations (US Terms)
- ch: chain
- sl st: slip stitch
- sc: single crochet
- hdc: half double crochet
- BLO: back loop only
- MR: magic ring

Special Techniques
1. Half Double Crochet (hdc)
2. Working in Back Loop Only (BLO)
3. Magic Ring (MR)
Finished Size
- Diameter: about 5-6 cm (2-2.5 in)
- Height: about 3-4 cm (1.25-1.5 in)
Pumpkin Body (Front / Main Piece)
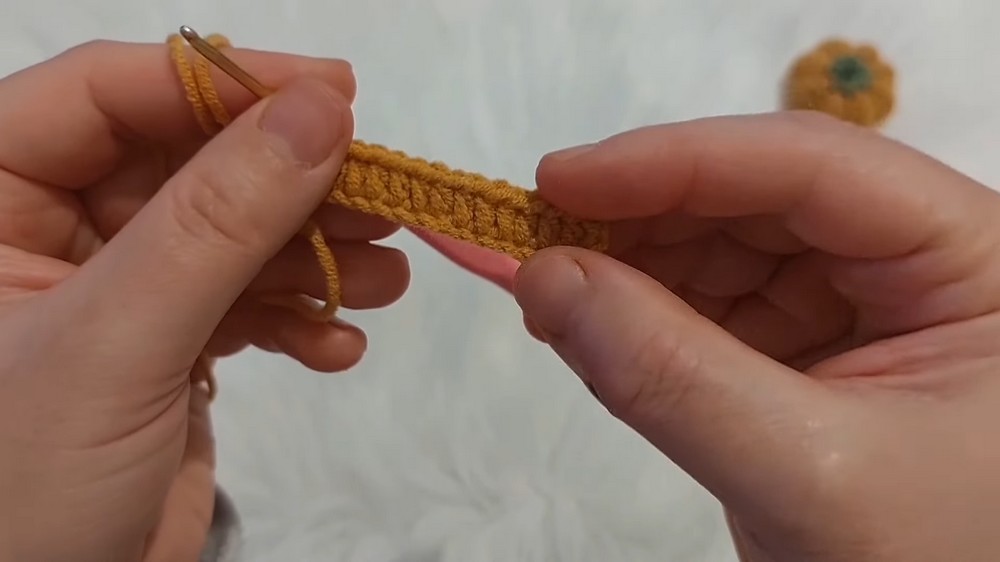
The body is worked flat in rows, then joined into a tube and cinched at both ends.
Step 1 - Foundation Chain
- With main (pumpkin) colour and 2.0 mm hook:
- ch 17
Step 2 - Row 1
- Yarn over.
- Work first hdc into the 4th chain from the hook.
- The 2 skipped chains count as the first "stitch"; the hdc in the 4th chain is your second.
- Continue working hdc in each remaining chain across.
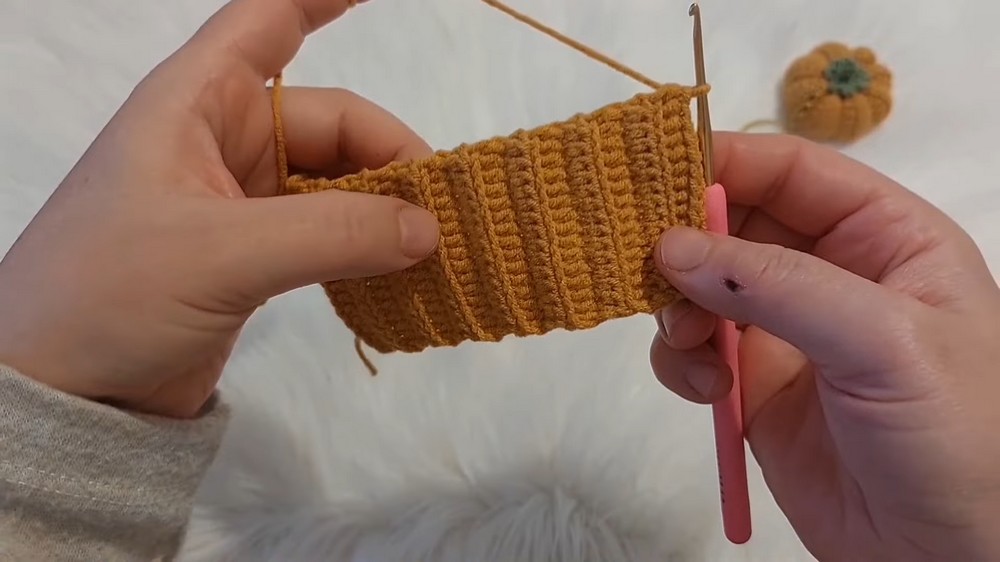
Step 3 - Rows 2-16
- Turn your work.
- ch 2 (counts as first hdc).
- Work hdc in BLO of each stitch across until the last stitch:
- Insert your hook into the back loop only of each stitch.
- Work hdc in each, so you keep 15 hdc per row.
- For the last stitch of each row:
- Insert the hook into the full chain edge stitch rather than BLO (both loops or chain edge) to keep edges straighter.
- Repeat this for a total of 16 rows.
Joining the Body into a Tube
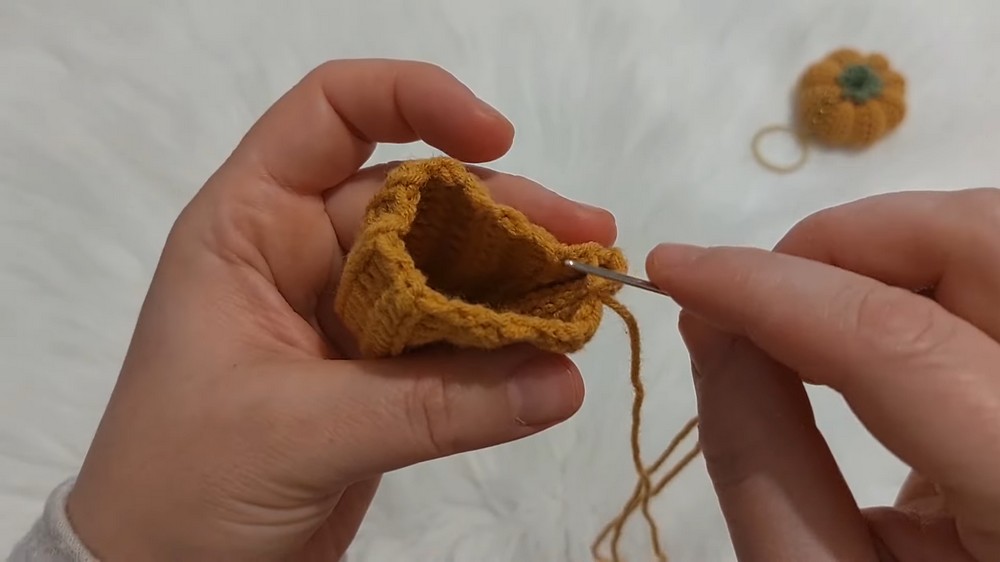
Step 4 - Side Seam (Slip Stitch Join)
- Do not cut the yarn yet.
- Fold your rectangle so that the foundation chain edge meets the last row edge, aligning stitches.
- With the working loop on the hook:
- Insert your hook through the top loop of the chain edge on one side and the inner loop (one loop closest to the inside) of the corresponding stitch on the opposite side.
- Pull yarn through both and through the loop on the hook: this is a slip stitch.
- Continue working slip stitches along the edge:
- Always insert the hook through one stitch on the front edge and the corresponding inner loop on the opposite edge.
- Work to the end; this will form a neat tube.
- When you reach the end:
- ch 1.
- Cut the yarn, leaving a long tail (used for sewing and shaping).
- Pull the tail all the way through.
Closing the Bottom
Step 5 - Close One End
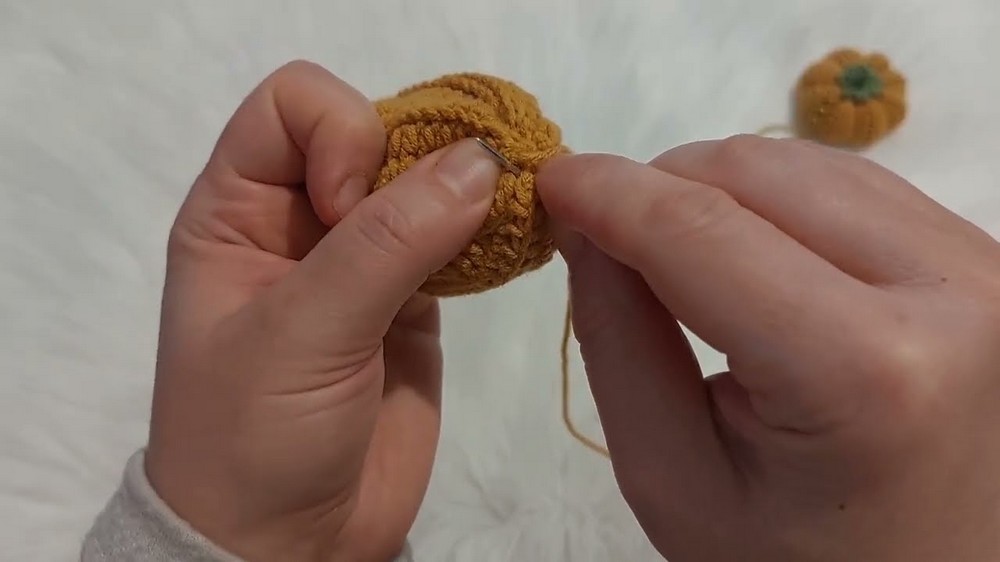
- Thread the long tail onto a tapestry needle.
- Without turning the tube yet, close the bottom end first:
- Insert the needle through the spaces between the hdc rows around the bottom edge.
- Pick up a small bit of yarn from each ridge/row edge all the way around (like a running stitch).
- When you have gone all the way around:
- Pull the yarn tail to gather and close the bottom.
- Sew back and forth across the opening a few times to secure.
- Tie a small knot if desired.
Turning and Stuffing
Step 6 - Turn Right Side Out
- Turn the tube inside out so the seam and gathered bottom are on the inside.
- The right side (the ribbing) is now on the outside.
Step 7 - Fill and Close Top
- Begin to close the top:
- Using the same tail, weave through the top edge (as you did on the bottom), but only partially gather at first.
- Before fully tightening:
- Stuff the pumpkin with fiberfill firmly but not excessively; shape it into a plump ball.
- Pull the yarn tail to gather completely and close the top opening.
- Secure with a few stitches crossing the opening.
- The top may still have a slightly open centre; this will be covered later by the leaf and stem.

Creating the Pumpkin Segments (Ridges)
Step 8 - Forming Ridges with the Same Tail
- The goal is to create deep lines from the bottom centre to the top, resembling pumpkin segments.
- With the yarn tail still threaded:
- Insert needle from the bottom centre of the pumpkin and bring it out at the top centre.
- Pull snugly to create a slight indentation.
- Insert the needle back down through the same top point and bring it out at the bottom centre again.
- Pull to tighten; this creates one ridge.
- Repeat this process multiple times:
- Each time, adjust the needle exit at the bottom so that the ridges are evenly spaced around the pumpkin (for example, 6-8 ridges).
- Always go up and down through nearly the same top point so that the top centre is cinched nicely.
- After forming the last ridge:
- Pull yarn snugly, ensuring the shape is even.
- Secure by tying a knot close to the entry/exit point.
- Cut the yarn tail close; the end will be hidden inside.

Leaf and Top Detail
Step 9 - Leaf Base (Small Circle)
- With green yarn and 1.75 mm hook:
- Make a magic ring.
- ch 1.
- Work 8 sc into the ring.
- Pull tight to close.
- Join with sl st into the first sc.
Step 10 - Tiny Bud Leaves Around
You will create 8 small "bud" leaves (one in each sc).
- Start:
- ch 3.
- Go back and sl st (or sc, depending on desired firmness) into the base of the chain to form a small loop/petal.
- For each remaining sc around:
- sl st into the next sc.
- ch 2.
- Insert hook into the back loop at the base of this chain (the same sc).
- sc (or sl st, as per preference) to close that small petal.
- Continue around until you have 8 small bud like leaves.
- Join to the starting point with a sl st.
- ch 1, cut yarn, and pull through.
- Bring the yarn ends to the back of the piece with the needle.
- Tie them together in two secure knots, then trim.
Step 11 - Stem / Chain for Hanging
- With the same green yarn:
- ch 6 (or slightly longer if you want a longer loop).
- Starting in the 2nd ch from hook:
- sc in the next 4 chains.
- sl st in the last 2 chains.
- Fasten off, leaving short tails for tying or weaving.
Assembly and Finishing
Step 12 - Attaching Leaf and Stem
- Position the green leaf disc centrally on top of the pumpkin, covering the sewn centre.
- You may:
- Glue it with silicone/hot glue for a quick finish, or
- Sew it securely with matching green yarn.
- Attach the short green chain:
- Pass its ends through the centre of the leaf piece and into the pumpkin.
- Tie knots or sew in place so the chain stands upright or slightly arcs.
- Attach the keyring through the chain loop.
Tips to Maintain the Pattern and Piece
- Choose Durable Yarn: Cotton blends such as Alize Cotton Gold are ideal for keychains because they are less prone to fuzzing.
- Firm Stitching: Keep tension tight for a dense fabric that holds stuffing securely.
- Even Ridges: When pulling the shaping yarn, adjust gradually; do not over tighten a single ridge or the pumpkin may distort.
- Secure Knots: Always double knot and, if desired, lightly seal ends with a small touch of heat (only if safe) or by weaving well.

Final Words
This pumpkin keychain pattern yields a charming, practical accessory that is easy to customize by changing yarn colours, size (more chains/rows for a larger pumpkin), or adding embellishments like embroidery or beads. The ribbed body, cinched ridges, and small green crown create an elegant and realistic pumpkin shape.
